How to build a Project Management Portal in SharePoint Online
Time flies! One of my most popular posts over the years was the article on how to build a PMO portal in SharePoint I wrote in 2017. This is not surprising since many organizations use SharePoint for project management. But, as with life, things change, and that post is outdated by modern standards and best practices. So by popular demand from my loyal blog followers, I would like to document the high-level steps necessary for creating the PMO/Project Management Portal in Modern SharePoint Online.
What prompted the change
Pretty much everything.
- When I wrote that post back in 2017, I based it on SharePoint classic version, which was the version of SharePoint we had back then. Now we have Modern SharePoint, which looks completely different
- SharePoint classic relied on the subsite architecture, which we no longer use. With modern SharePoint, it is all about Hub Sites
- I mainly relied on SharePoint capabilities for task management and other Project management artifacts. With modern SharePoint, this functionality was shifted to Teams, Planner, and other applications.
So long story short, this blog post urgently required a refresh, which is what you are reading right now.
Other possible use cases
Though the whole concept of project management and Project Management Office (PMO) is so dear to my heart due to my previous experience as a project manager, other use cases apply to the model/architecture I am about to describe. Here are a few other cases/scenarios:
- Real Estate Portal with Properties/Property SharePoint sites
- Legal Portal with Case/Matter SharePoint sites
- Training/Teacher/College/University portal with Course/Class SharePoint sites
How to build a Project Management Portal in modern SharePoint Online
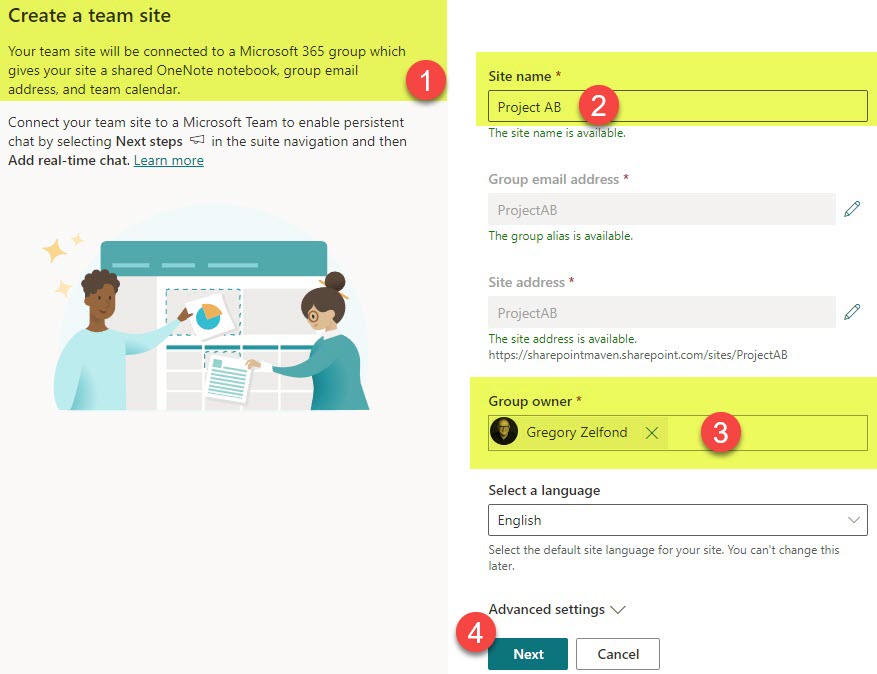
Step 1: Create a Project Site/Team
The first step would be to create a project site. I described the different types of sites in this post, but the absolute winner here is a Team Site. This is because it is connected to Microsoft 365 Group and other Microsoft 365 assets like Teams, Planner, Project for the Web, and Calendar.
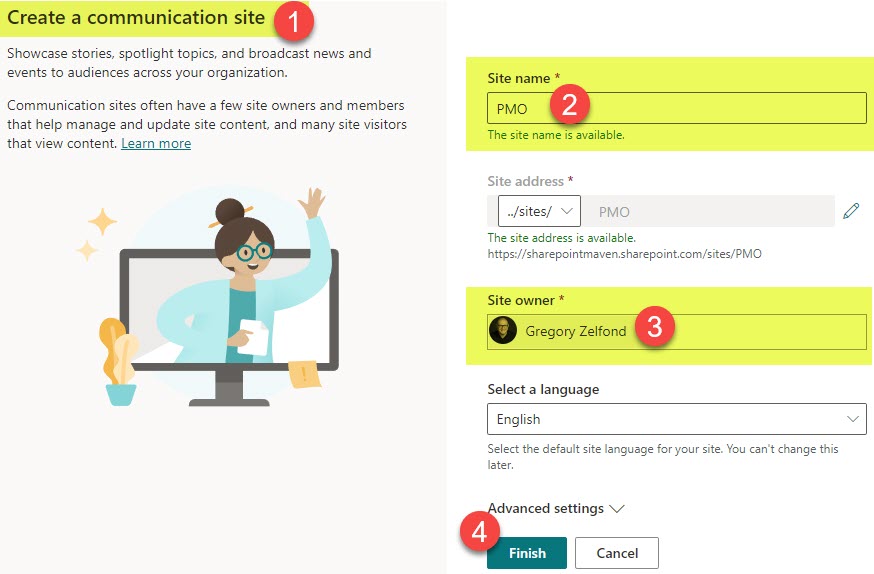
Step 2: Create a Project Management Office (PMO) Site
As with many PMOs, you probably want to have one central site that will serve as the destination for all project managers and stakeholders. In such a case, you have to create a Communication Site. This will allow you to create a visually appealing site that will be the go-to place for all project-related activities.
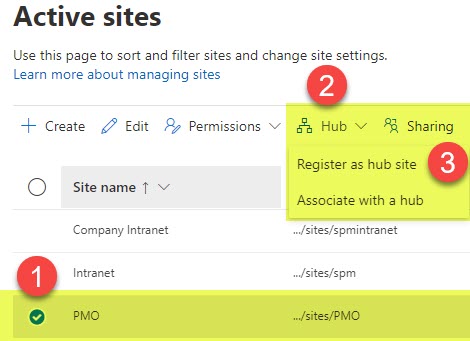
Step 3: Register a PMO Communication Site as a Hub
This is necessary if you want a common place for users to search all the projects from. As you create all these project sites, they are independent entities, and if you want to search them all at once, you can’t do it without the mighty hub feature. So the idea is that the Communication site will be the parent hub, and project sites will be sites associated with the Hub. I explain how to register a Hub and manage it here.
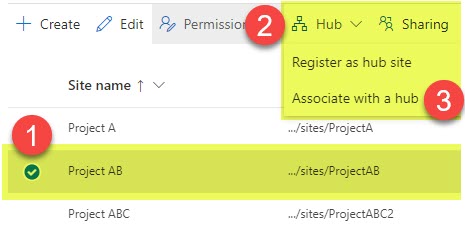
Step 4: Associate project sites to the Hub above
So this is an obvious next step given what I mentioned above.
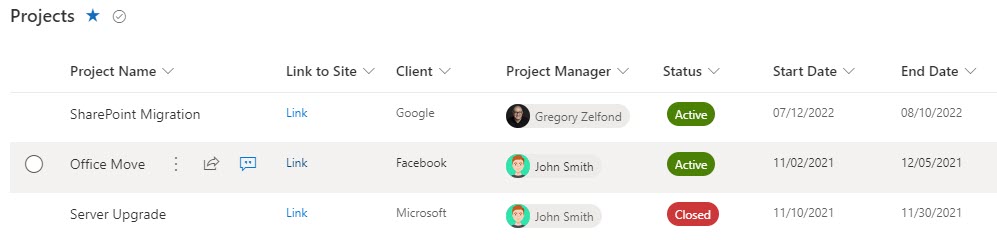
Step 5: Create a Projects List
Another thing that I find handy and always do for my clients is creating a custom list to link up all those project sites. Most likely, your users will access these sites from Teams or will just sync the doc library locally on their PC via Windows Explorer, but many times it is helpful to get the overall picture of all the projects. Think of it as almost like a dashboard of projects. A custom List will mention project names, have a hyperlink column to project sites, and have other metadata you can track about the projects (Project Manager, Start Date, End Date, Project Status, Budget, etc.)
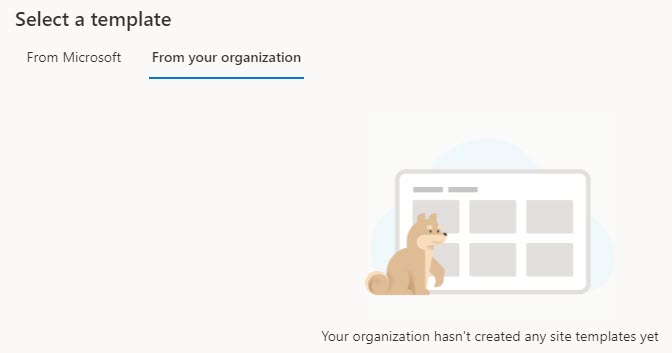
Step 6: Create a project site template
OK, the ability to create a project site template is something that was possible in classic SharePoint, but not possible anymore in modern SharePoint, at least out-of-the-box. To be able to create a project site template, you have to revert to Site Scripts. If your Project Site is simple enough, and you do not have lots of page customizations and custom lists and libraries with metadata in it, and you also do not have lots of projects that need to be created every day – then you are probably OK just creating and adjusting the site manually for every project. However, if it is the opposite – you will then need to work with a developer to help you automate the scripting process.
Step 7: Decide on the Task Management tool
This is yet another area that got transformed greatly, thanks to the modernization of SharePoint. In the past, with the classic SharePoint, we used to rely on the Tasks Web Part for task management, which also allowed for sync with MS Project. In modern SharePoint architecture, we now have modern replacements for those web parts. Tasks Web Part is being replaced with Planner or Project for the Web. I have even seen some organizations use Microsoft Lists for task management too. By the way, I provide an overview of various task management options in this article.
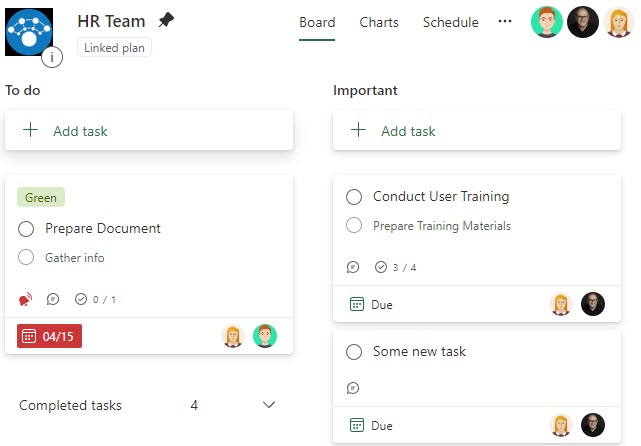
Plan in Planner (part of Microsoft 365 Group)

Project for the Web (part of Microsoft 365 Group)
Both Planner and Project for the Web utilize Microsoft 365 Group for membership/access to those applications by the project team members. Also, while Planner does not yet allow for the creation of the Plan template, you can easily copy plans from one Microsoft 365 Group (project) to another.
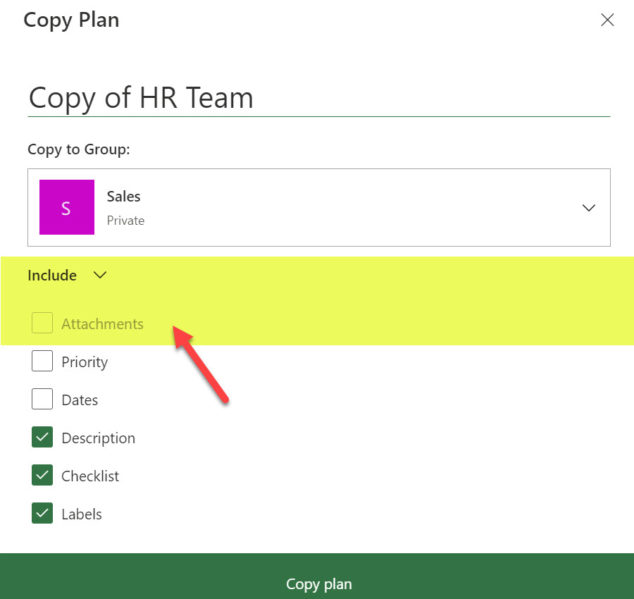
Ability to copy plans in Planner from one group to another
Step 8: Customize Teams Template
In the old days, for communication, we used either Newsfeed or Discussion web parts available in SharePoint. Discussion Board has now been replaced with MS Teams App and Yammer. Teams app is obviously a popular choice due to its seamless integration with SharePoint and many other applications. Since these applications are not part of SharePoint, you would need to configure them separately for each and every project. With the recent addition of Shared Channels, Teams also allow for a great way to bring in outside vendors and consultants, often required on many projects. By the way, when you do create a custom template in Teams (with custom channels and tabs), you can create a template out of it as well.

Step 9: Consider using metadata
One thing that totally makes sense on Project sites and PMP Portal is the use of metadata. You can use metadata to organize project templates and artifacts on a PMO Portal site. You can go further with standardizing the content types and metadata on each and every project as well (assuming metadata will be part of the project site template). There are numerous ways to configure metadata in SharePoint, so there is really no right or wrong method here – you just need to make a decision about it. One way to standardize on metadata across multiple project sites would be via the Content Type gallery available in SharePoint Admin Center.

Example of custom Content Types you can publish via Content Type Gallery
Step 10: Set up security/permissions for the Project Management Portal in SharePoint Online
Permissions, of course, will be set up based on your specific need. Some organizations I work with are wide-open and allow all employees to have same equal access to all the project sites. Most organizations, though, have pretty strict rules in terms of who can do what.
Typically, you would have a PMO Communication site managed by just a few members while Everyone will be read-only. Project sites will also be accessible on a role/permissions basis. So for project sites, you would typically set them up as private sites and only invite members who have access to that site.
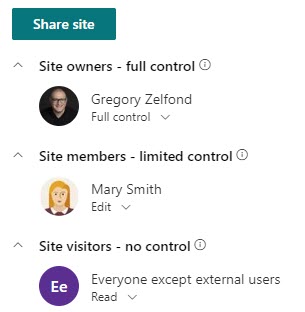
Example of SharePoint site security on a PMO Site
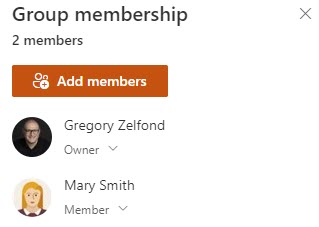
Example of a Project Team Membership on a Project Site

Share Article