How to create an Intranet in SharePoint
In many of my previous articles on my blog, I documented steps on how to create various sites you would typically have within your company’s Intranet—a Human Resources Site, a Marketing Site, and an Onboarding Site, just to give you a few examples. That being said, I never documented how to create the most important site of them all—the Intranet Site in SharePoint that would serve as the main page for the company portal. So below, please find the detailed steps on how to achieve this.
Step 1: Evaluate the Design Possibilities
The first step is to evaluate what is possible in terms of SharePoint Intranet Designs. I can recommend several places you should check out.
- SharePoint Intranet Examples Blog. Some time ago, I wrote a detailed article and even recorded a video with a few demo examples – so definitely check it out.
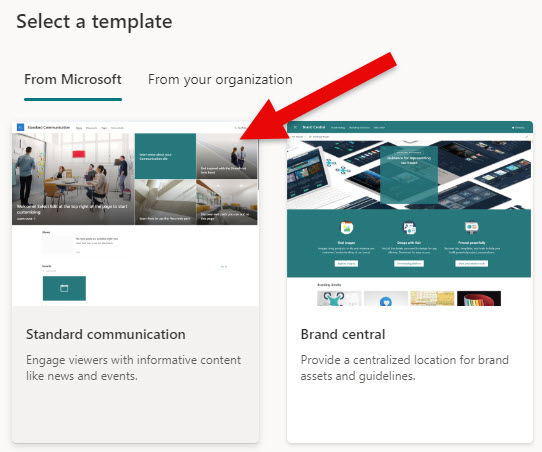
- SharePoint Look Book. I have an article about it, but here is a direct link to it as well. This is an amazing catalog of various SharePoint Site templates organized by various categories/use cases. If you decide to proceed with one of those templates, you will need assistance from IT to install it in your environment.
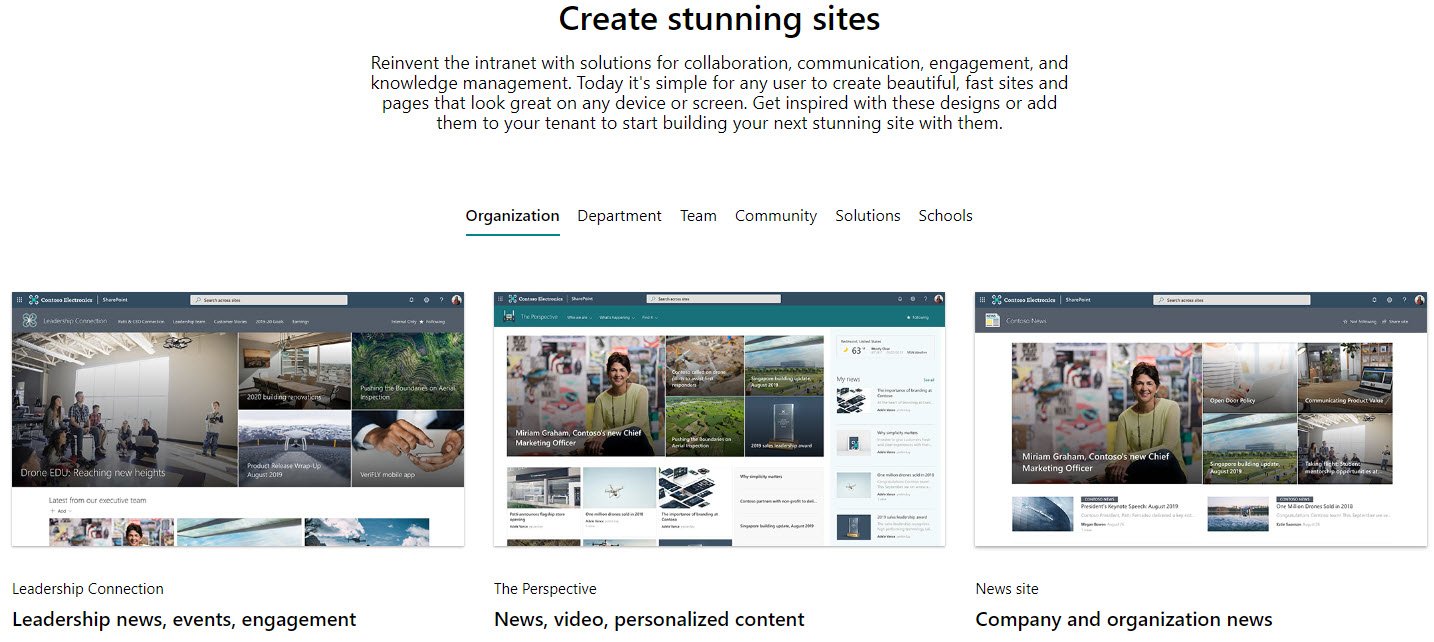
Example of available SharePoint Site Templates in SharePoint Look Book
You can also search the Internet for possible designs. However, be careful, as many of those nice-looking examples will require you to purchase third-party themes, which means additional maintenance and licensing. As you know from my blog, I am strictly an out-of-the-box SharePoint consultant, so I will proceed with instructions on how to create an Intranet in SharePoint OOTB.
Step 2: Decide on the Design Approach
The next step is to determine whether you will create a site from scratch or start with one of those Lookbook templates. In this article, I explain the pros and cons of each method. My preference is always to start from scratch since we can design the page with the modules and look and feel we need, not the web parts forced on us by the template.
Step 3: Create a Communication Site
Now that we made some decisions, let’s go ahead and create the Communication Site.
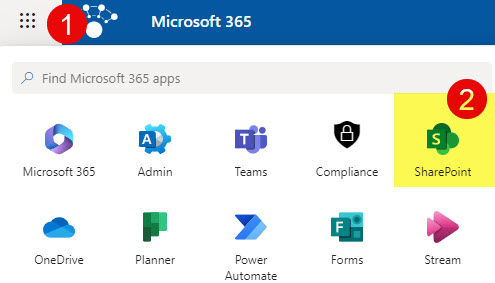
- Click Microsoft 365 App Launcher > SharePoint
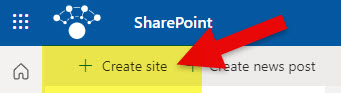
- Click Create Site in upper-left hand corner
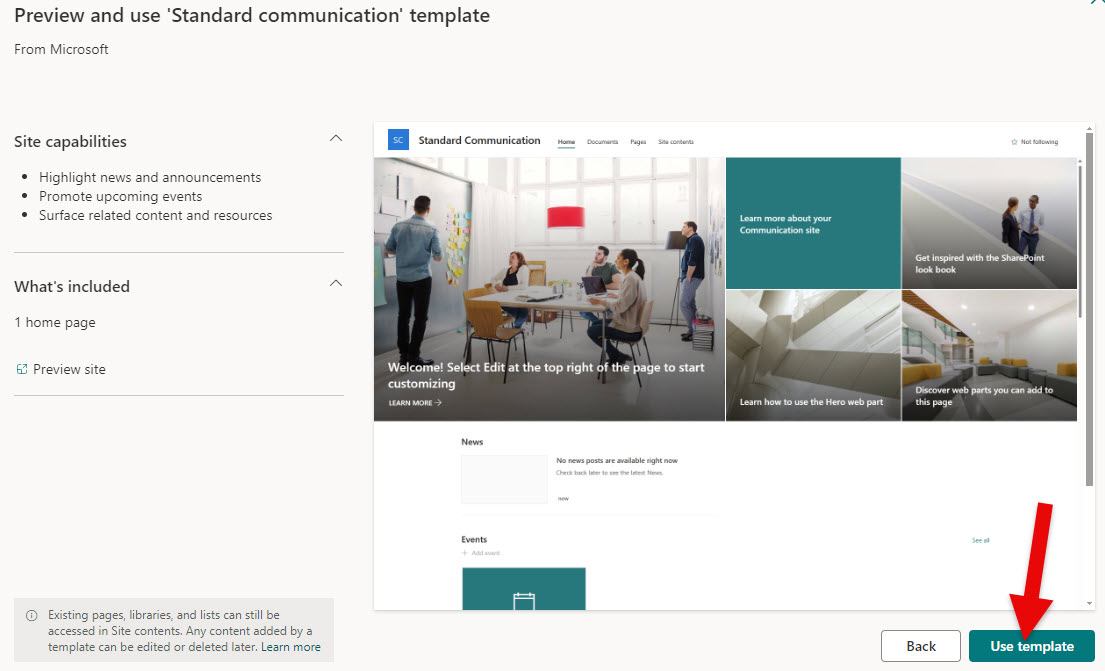
- Select Communication Site Type

- You can choose any existing Microsoft Template you want to start with.
- Click Use Template
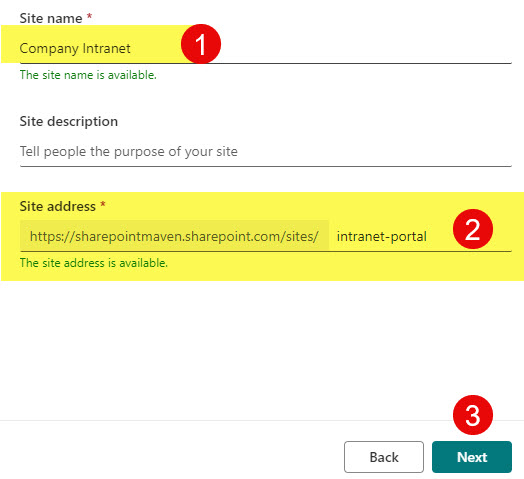
- Give your Site a Title (Name). You can adjust the URL as necessary. Click Next.
- Click Create site button.
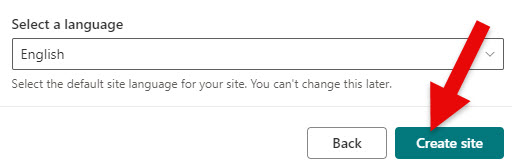
- This will create an Intranet Communication site.
Step 4: Determine Content for the Main Site
The next step when creating an intranet in SharePoint is to determine the types of content for the homepage. This is a two-step process. First, we need to determine the types of content and then map the content to a respective web part in SharePoint.
Having worked on many intranet portals for my clients throughout the years, I accumulated the top 10 list of the most popular web parts my clients put on their Intranet Site. Here is a list.
- News & Announcements (News Web Part)
- Company Calendar (Events Web Part)
- Links (Hero and Quick Links Web Parts)
- Weather (Weather Web Part)
- Current Time (World Clock)
- Maps (Bing Maps)
- Deadline (Countdown Time Web Part)
- Call to Action (Call to Action Web Part)
- Photos (Image Gallery Web Part)
- Videos (Stream Web Part)
To explain each piece of content and respective web part further, I added some additional information about them below.
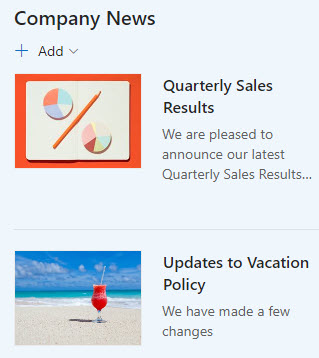
News
Every Intranet has news and announcements. The natural choice for this is the News Web Part. I actually devoted quite a number of articles to it, so feel free to check them out.
Company Calendar
Just like news, every Intranet includes a Company Calendar. I have seen many use cases, from Company Holidays to Vacation Calendars to Company Events. While a few choices are available for the calendar, the Events Web Part is the fit here. The only downside of this web part is that you can’t have recurring events, and you can’t really have a calendar (month) view – just a list of upcoming events.

Links
Every organization has links to share, whether to internal resources or external applications. There are many choices for displaying links in SharePoint, but two of the most popular ones are the Hero Web Part and Quick Links. Both allow for some nice customization options and add an attractive element to the Intranet page.

Example of a Hero Web Part
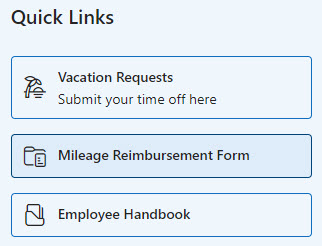
Example of Quick Links Web Part
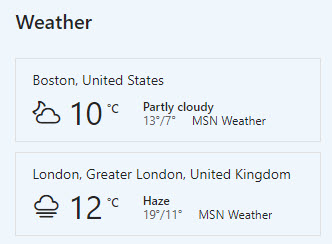
Weather
Another way to make SharePoint Intranet more relevant is to add Weather for a certain location. You can actually add a few locations and choose between Celsius and Fahrenheit.
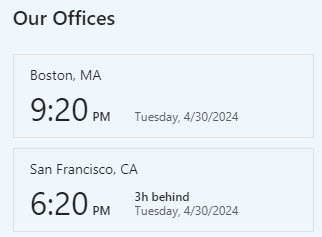
Current Time
Another popular web part I always add to Intranet Portals is the World Clock Web Part. It always makes sense to add, especially if you have offices in different regions/counties/time zones.
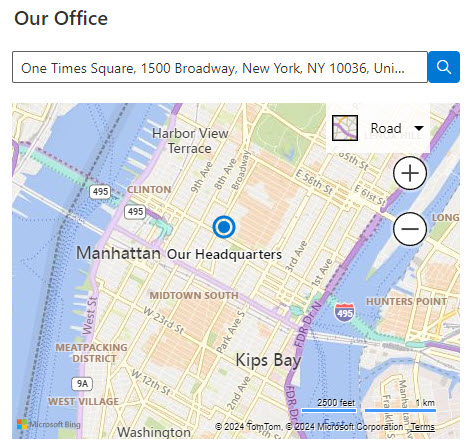
Address/Location
You can also add a map/address of your headquarters. This might be a great use case if you have multiple locations (facilities), and you can display the addresses with the map image as well.
Deadline
If you need to catch employees’ attention on some important date or deadline, the Countdown Timer Web Part is the way to go. I explained how this works here.

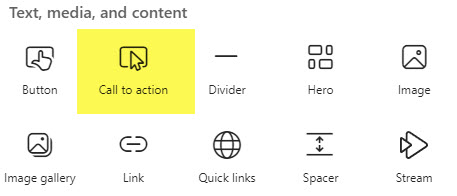
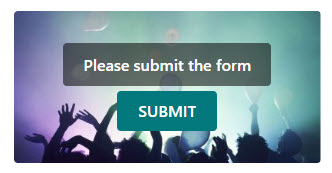
Call to Action
Call to Action is another great way to engage your audience. The Call to Action Web Part is a perfect fit for this. It also allows for some customization (background and text display).
Photos
While there are a few ways to display images in SharePoint, Image Gallery provides an excellent user experience, especially when added to SharePoint Intranet. I explained how it works in this article.

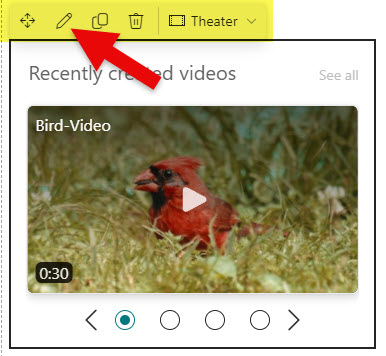
Videos
Videos are another popular type of content. With the recent transition from Stream Classic to Stream on SharePoint, the new Stream Web Part will allow you to display either a single or multiple videos on your page.
Step 5: Customize the Main Landing Page
The next step in the process is to customize the Main Page. This is where we change the page layout, adjust section backgrounds, etc. I also suggest that you check out this article to learn more about best practices related to Page Design.
Step 6: Set the Site Theme
The next step is to Apply a site theme. You can either add an OOTB theme or create your own based on your company’s branding guidelines. I explained how to do this here.

Step 7: Upload the Logo
Kind of related to the above, you will need to add a logo to the site. I outlined the steps in this article.
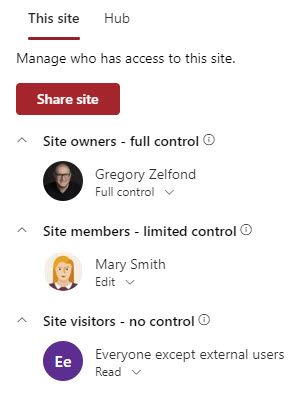
Step 8: Set up Permissions
One of the most important steps is to properly set up permissions for your Intranet Site. Since this is a communication site, we will rely on the 3 SharePoint Security Groups: Owners, Members, and Visitors. Check out this article on how to properly set up permissions for your site.
If you want to quickly add the whole org as Visitors, you can use the Everyone group. I explained what it is here.
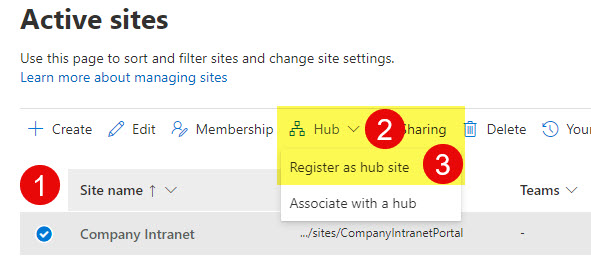
Step 9: Convert into the Hub
Next, you will need to convert your site into a Hub (or, to be precise, register your site as a Hub). This is important if you envision having additional sites that will connect to your Intranet (e.g., a Human Resources site or a Marketing Site). To do this, you will need access to the SharePoint Admin Center. I explained what hubs are and how to set them up here.
Step 10: Set up Viva Connections
The last step is optional but might be handy if your organization is a heavy user of Teams. This will allow you to embed the Intranet Homepage inside the Teams application. It’s definitely a nice way to improve User Adoption. I explained how to set this up here. Just like with the step above, you will need Admin access to the SharePoint and Teams Admin Centers.
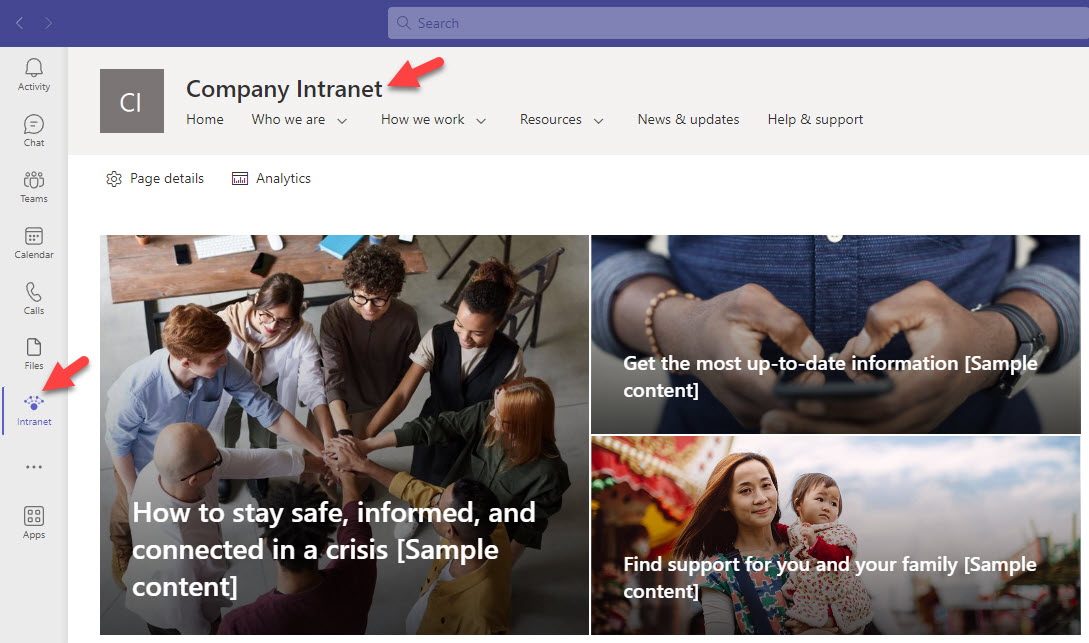
Example of Viva Connections setup
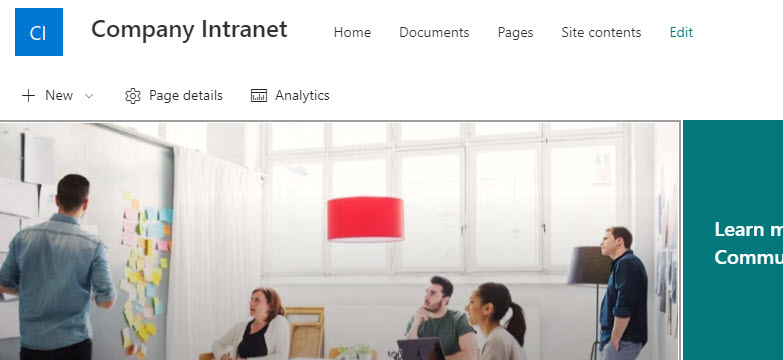
And if you are wondering what the end result would be once you follow all of the above steps and create an Intranet in SharePoint – here it is.
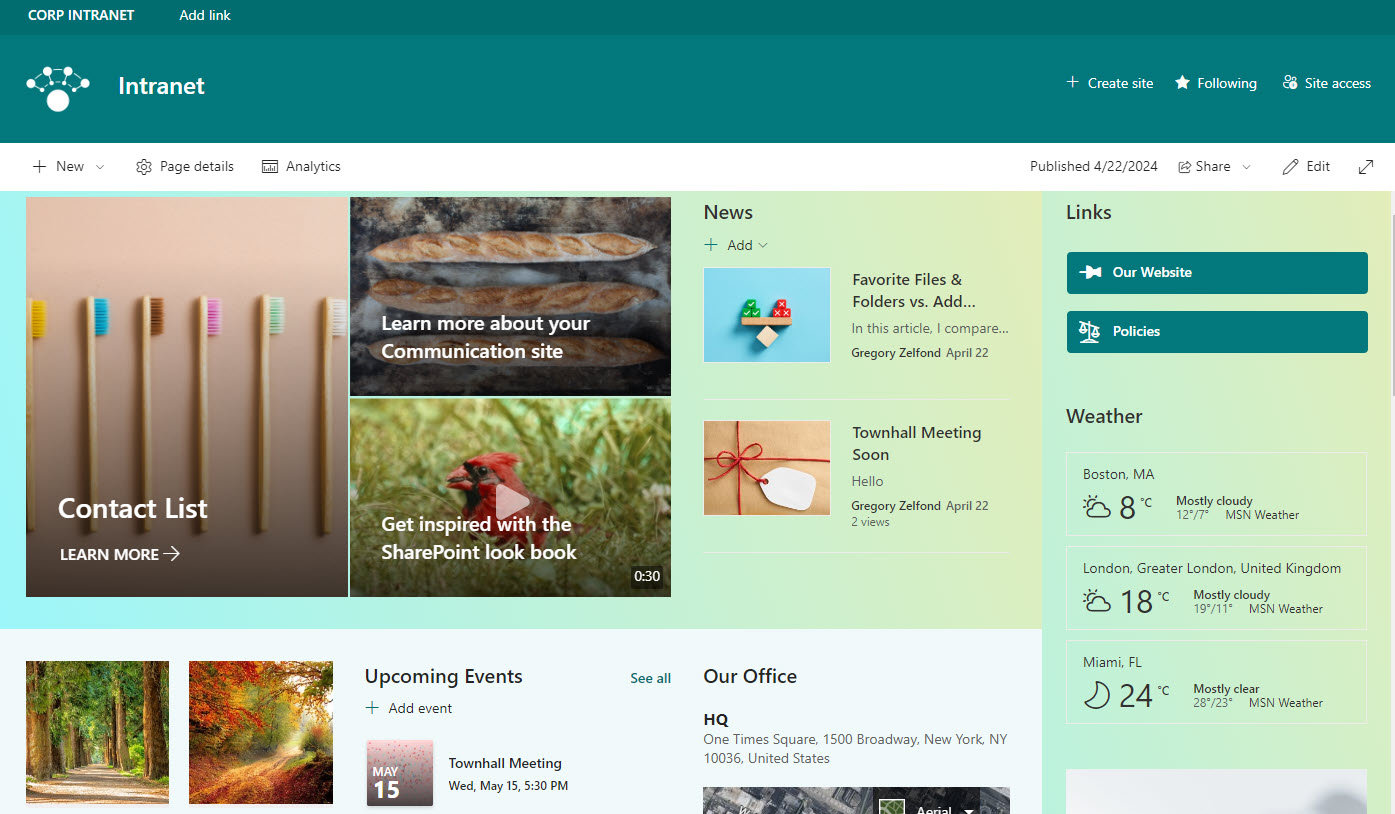
Example of a SharePoint Company Intranet

Share Article