15 settings to configure in the SharePoint Admin Center
The first thing I do when working on client SharePoint sites is configure certain settings in the SharePoint Admin Center. I documented some of them in this article. However, a lot has changed since I wrote that post. We now have a brand new modern SharePoint Admin Center, a totally different way to create sites and new features and functionality. So I thought it would be a good idea to document those several settings and refresh a previous post.
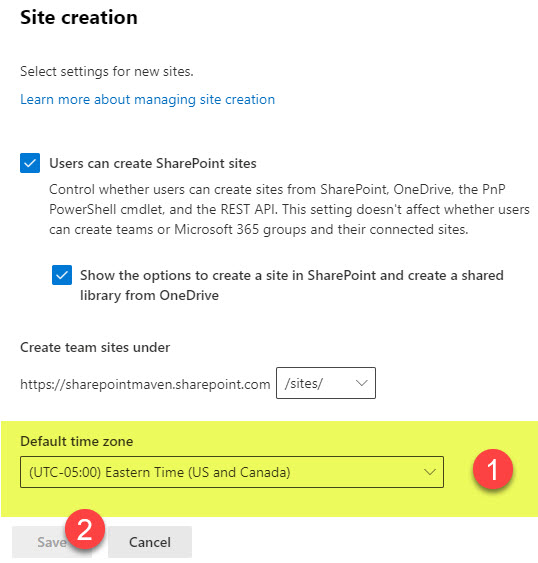
1. Set the Proper Time Zone
The very first thing I usually do in the tenant is configure the Time Zone. By default, all sites get the Pacific Time Zone (I suspect because Microsoft headquarters are in Redmond, WA, USA). However, that is not true for most organizations. So you can change it to any other time zone. Now, it always defaults to the time zone of a user logged in; however, if the user does not have a license or is an external user, there is no way for them to set the personal time zone. So if you want the modified/created dates to be correct, it is necessary to set a default time zone. Here are step-by-step instructions on how to do this.
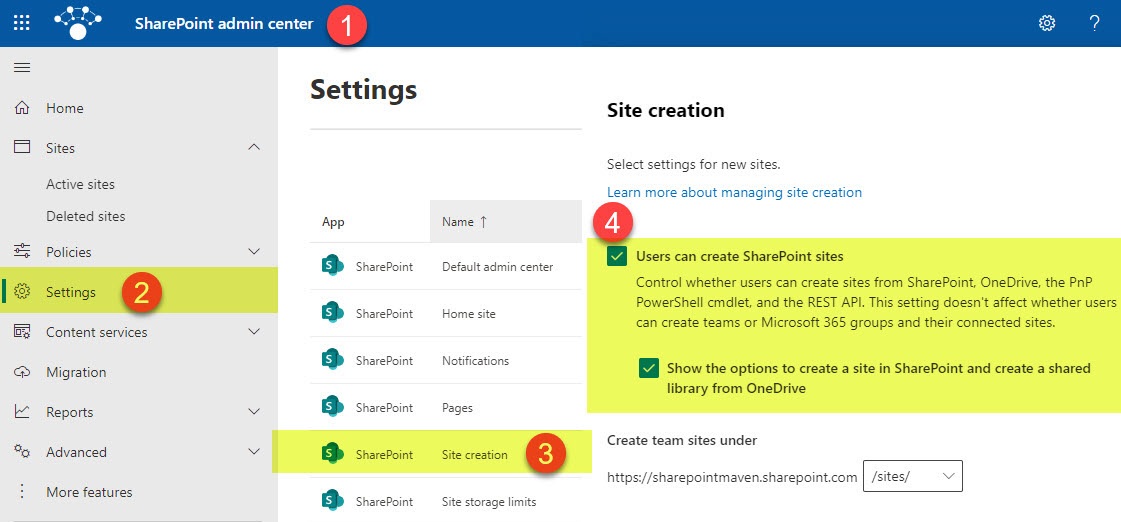
2. Disable Site creation
The next thing you might want to configure is the ability for users to create sites (from the SharePoint Start Page or OneDrive). This really depends on your governance model and tolerance towards users creating sites. I usually prefer to allow users to create sites themselves (assuming you trained them and they understand the consequences), but if you are a large organization, it probably makes sense to disable such an ability and institute some sort of approval/governance process for site creation.
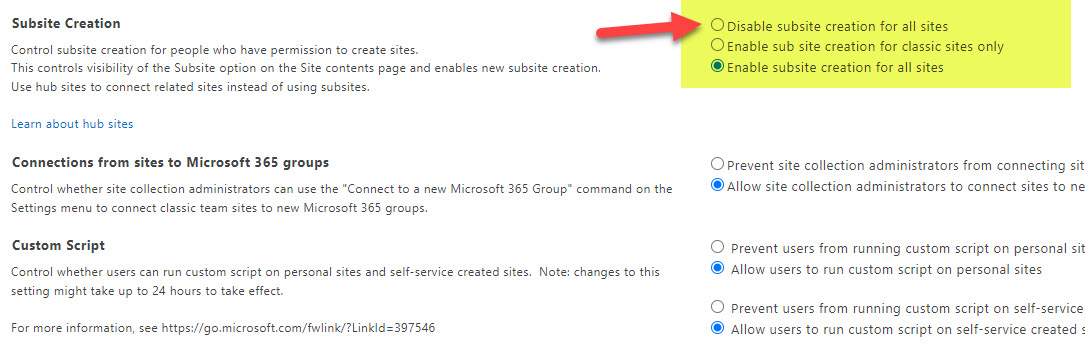
3. Disable Subsite creation
I don’t care what you decide to do for the site creation I mentioned above, but one thing I definitely want you to do is to disable subsite creation. We live in an era of flat architecture in SharePoint, and users should not be creating any more subsites. Please reference this post for instructions.
4. Make yourself an Admin of a Term Store
The next thing you might want to do is make yourself an Admin of the Term Store. If you are planning to use metadata, Term Store is an invaluable tool. Just because you are a SharePoint Admin, does not automatically make you a Term Store Administrator. This is something you have to grant yourself separately. I provided step-by-step instructions on how to achieve it in this article.

5. Check external sharing settings
Next, you might want to visit the External Sharing Settings screen. Many clients I work with tend to disable external sharing to make it more “secure.” This is wrong. I would leave the external sharing on and monitor and control instead. I explain the optimal sharing settings in this post.

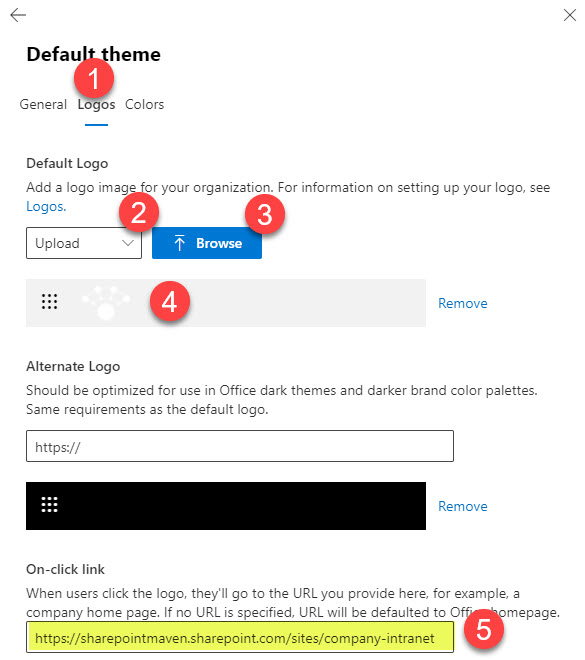
6. Configure Global Theme/Logo
Next, you might want to configure the global Microsoft 365 theme and a logo that appears in that ribbon. This will keep your Marketing department happy + will help the users navigate to the Intranet Homepage with a click of a button (once you configure the logo and URL). I explain how to do this here.
7. Prevent Comments on Modern Pages
Next, I like to disable SharePoint page comments globally on the whole tenant. With Conversations in Teams and Yammer, you will find the Page comments very limited and pretty useless. I explained how to turn off the comments (locally on the page and globally at the tenant level) in this post.

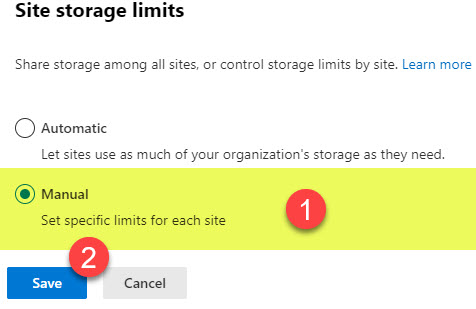
8. Site Storage Limits
This next setting I usually never worry about; however, if you are concerned about users syncing too much stuff to their sites, this might be worthwhile. If you switch from Automatic Storage allocation to Manual, you will then be able to limit storage per site. Here are detailed instructions on this topic.
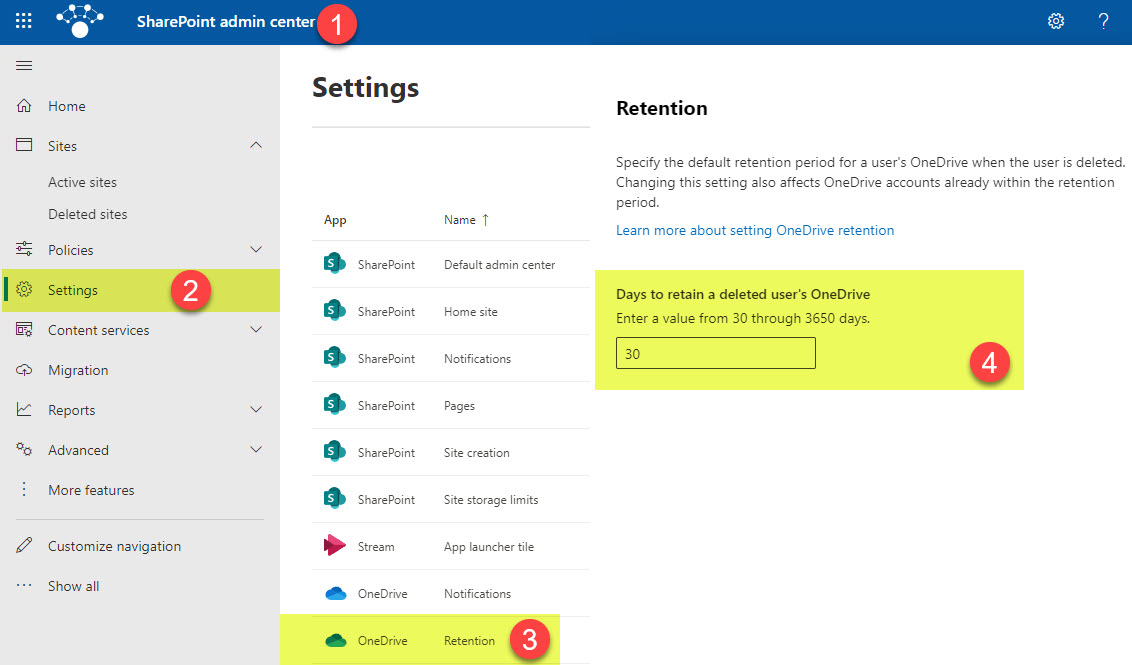
9. OneDrive Retention
This is a big one! By default, when users leave your organization, and you disable their account, their OneDrive gets deleted 30 days after that. However, if there is a risk of some important documents located there, you might want additional time beyond those 30 days. That is what this setting is controlling.
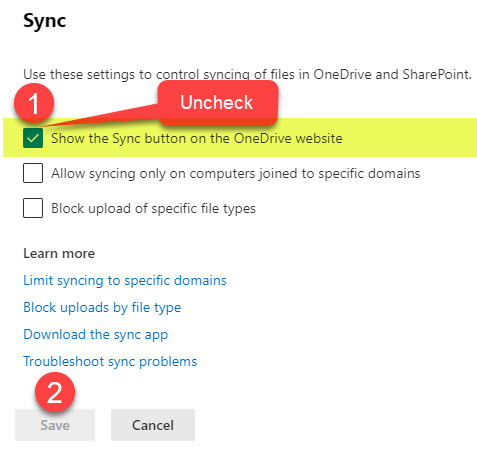
10. Disable the OneDrive Sync button
This is also optional, and frankly, I am not a huge fan of messing with it, but if you do not want users to download the OneDrive sync app and sync stuff locally, you might want to disable the OneDrive Sync Button on OneDrive. I provided instructions in this article.
11. Set Guest Expiration Limit
Back on the External Sharing settings screen, it is not a bad idea to set a limit on the access duration for external users. By default, users get unlimited access to a given site once they accept the invitation. However, for Governance reasons, it is a good idea to add a limit. I explain how to set that up and what the user experience will be in this article.

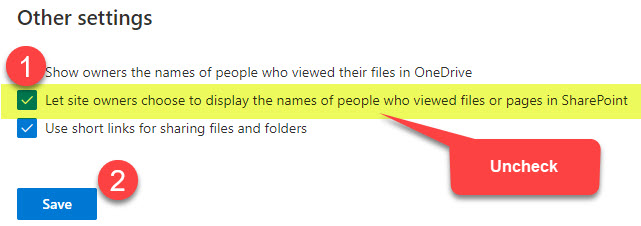
12. Disable who viewed globally
One other setting that always intrigued me was the ability for site owners to see who viewed their files/content. By default, this information does not appear on the SharePoint sites. However, Site Owners can enable a feature in Site Settings that will allow them to view such information. If you are concerned about privacy, you might want to prevent Site Owners from enabling this feature. I explained how to do this in a post here.
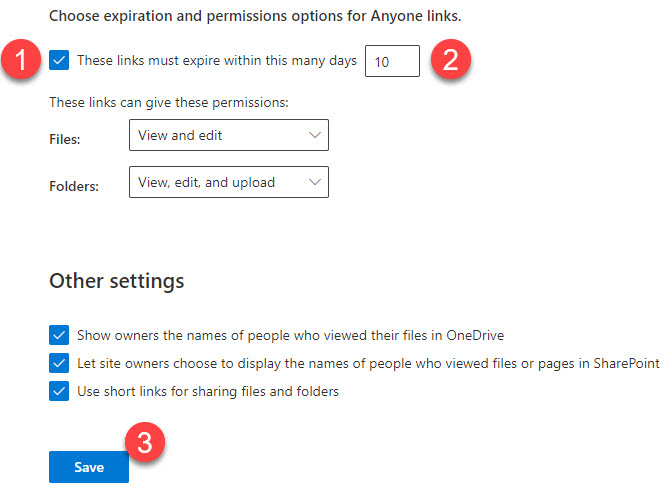
13. Choose expiration and permissions options for Anyone links
Another best practice is to add a default Expiration limit on Anyone links. Personally, I am not a huge fan of Anyone links as you never know who viewed or edited the documents. However, in some cases, this might be necessary. Still, adding some limits to those links is a good practice. You can do so by following the instructions in this post.
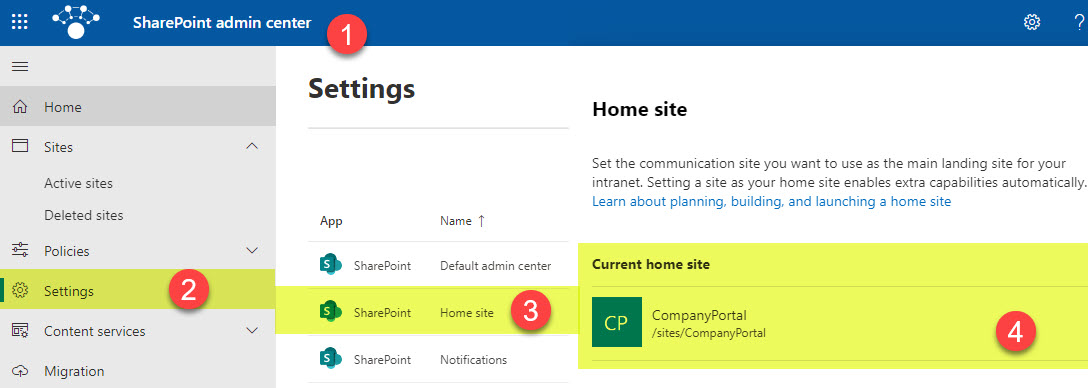
14. Set Home Site
This setting is not something you can take care of right away, since you probably need to build a Communication Site/Hub first and only after that Register a site as a Home Site. If you are unfamiliar with Home Sites, you might want to read about them here. When I wrote the post above, registering a Home Site required PowerShell; however, now it is possible to do it via the User Interface.
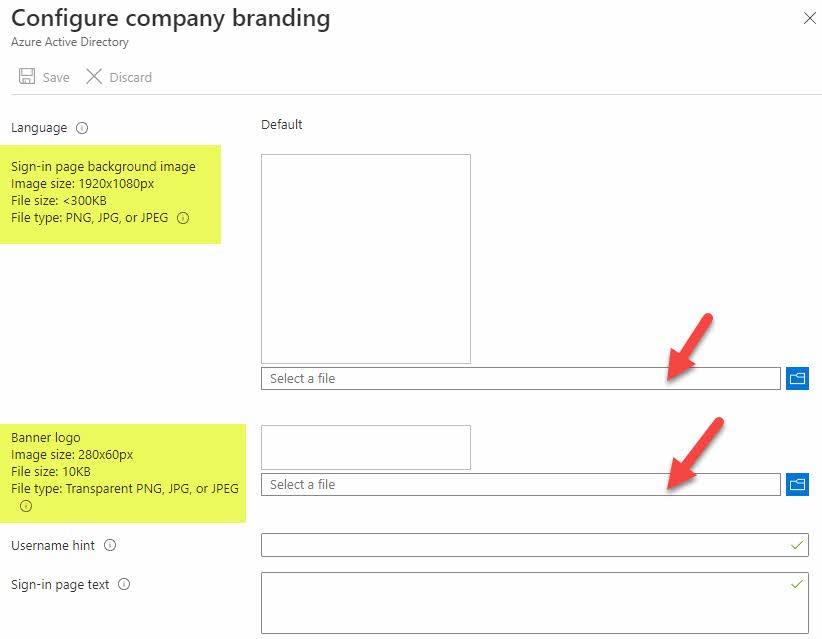
15. Brand the Microsoft 365 Login Page
The last tip, again, not mandatory, but it helps from a user adoption standpoint, is to brand the Microsoft 365 Login page. It helps personalize the Microsoft 365 experience somewhat. I explained how to do this in this post.

Share Article