How to implement Document Management System in SharePoint using Content Types
I have written a number of posts already on how SharePoint is a perfect tool to store and manage documents. With today’s post, I would like to explain to you, my loyal blog reader, how to build a simple, but versatile Document Management System in SharePoint (also known as SharePoint DMS).
What is a Document Management System in SharePoint?
Let me first explain what I mean by SharePoint Document Management System. I don’t mean that you would recreate your file share/network drives folder structure and migrate 50 GB of documents into 1 document library. First, you can do this without this post. Second, dumping all files and folders into a single document library and essentially recreating the mess you currently have is not considered a wise SharePoint strategy.
What I mean by Document Management System in SharePoint is metadata based document library where users can upload and tag documents, search based on keywords and tags and not worry whether they are accessing a duplicate or latest version of the file.
Below is a quick preview of what we are going to build
What do we need to build a Document Management System in SharePoint?
Below is SharePoint functionality and SharePoint features we will be using in this blog post to build SharePoint DMS:
- SharePoint Metadata (to tag our documents)
- SharePoint Content Types (to categorize different types of documents)
- Metadata Navigation (to help users find the documents)
Step 1: Determine the types of documents you want to store in your SharePoint DMS
As I indicated in previous posts, it is not a good idea to dump all your company files into one SharePoint Document Library. The major objective of SharePoint DMS is to organize documents that are somewhat related and share same security/permissions. An example of such SharePoint DMS would be you storing various financial documents like:
- Invoices
- Purchase Orders
- Quotes
- Estimates
- Receipts
If you are thinking of storing documents that belong to different departments, have different audiences, permissions/security, you do not want to store them in the same document library/DMS. Instead, you want to split them up into multiple sites/libraries. Check out this post for more info.
Step 2: Define different types (categories) of documents you want to store
So for the purposes of this post and example, let’s create a SharePoint Document Management System to store financial documents mentioned above.So let’s assume we are going to build a SharePoint DMS to store the following categories of documents:
- Purchase Orders
- Invoices
- Receipts
Step 3: Define metadata for each of the categories above
It is very likely that each of the categories above will have its own, unique metadata. For example, you might want to tag all Purchase Orders against PO#, Vendor Name, PO Date. Invoices might be tagged against Invoice #, Client Name, Date Received, Date Paid. Lastly, Receipts might be tagged against Vendor Name, Receipt Date, Description, Employee Name. So it might look like something like this:
Purchase Order
- PO #
- Vendor
- PO Date
Invoice
- Invoice #
- Client
- Date Received
- Date Paid
Receipt
- Vendor
- Receipt Date
- Description
- Employee
Step 4: For each metadata property, define the type of that property/column
For example, free text field, choice/drop-down, date. We will need that when we create our columns in next step
Step 5: Create your metadata columns
In case you are not familiar with how to create metadata in SharePoint, you might want to check out some detailed instructions here. I will do one example below and you can repeat the procedure for all the other metadata/columns you have.
How to create Metadata Column in SharePoint:
- You can create your column at library level, but it is always considered best practice to create columns at the Site Level. This way, you can reuse your columns in other sites and libraries. In our case, having our metadata columns built at a Site level, will also allow us to create global content types down the road.
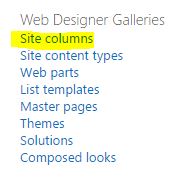
- To create a Site Level column, go to Site Gear Icon > Site Settings > Site Columns (under Web Designer Galleries) > Create
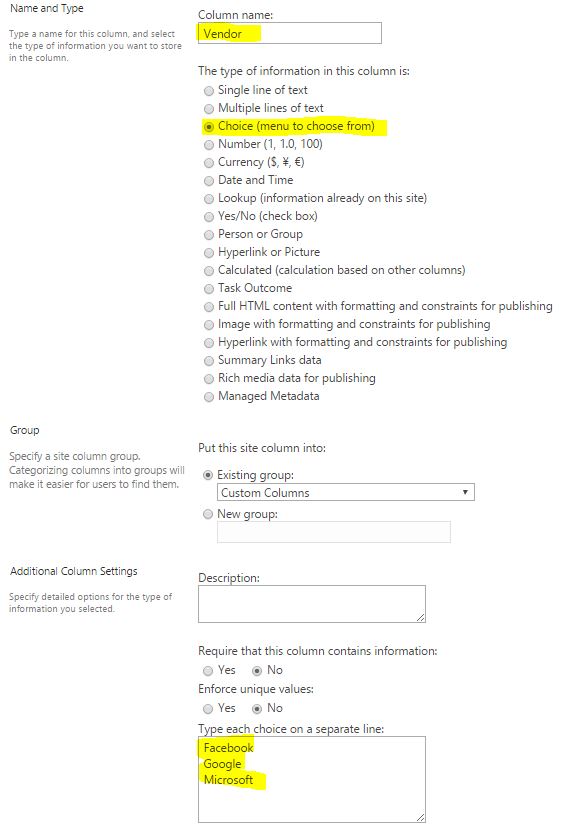
- Create your metadata column according to the information we gathered in Step 3. For example, I will create Vendor Column, which will be a drop-down choice of all vendor names
- Repeat above steps for all columns you have identified.


Step 6: Create Content Types
If you are not sure what the content type is, I suggest you reference this blog post. With this step, we will create content types defined in Step 2 and associate corresponding metadata defined in Step 3.
How to create SharePoint Content Types:
- Go to the root of the Site Collection (or same site where you created all your site columns in Step 5).
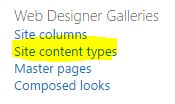
- Site Settings > Site Content types
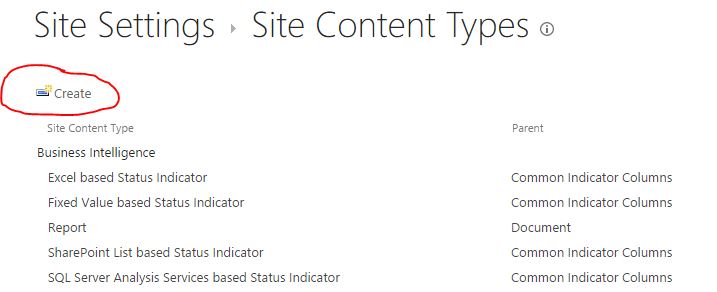
- Click on Create link
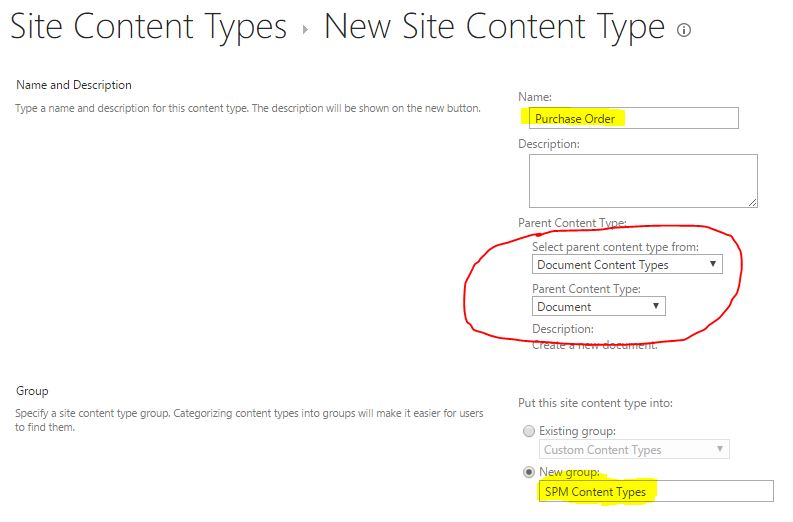
- On the next screen – this is where we define the name and characteristics of our future Content Type. Fill in the name of the first Content Type from Step 3 (i.e. Purchase Order). In the middle of the page, in the 2 drop-downs, choose Document Content Types and Document respectively. Essentially by this we are telling SharePoint that we will be using our Content Types in a Document Library to manage Documents. At the bottom of the screen, in the Group section, choose the grouping for your Content Types (just like with Site Columns, you can use Custom group or create your own). Click OK button
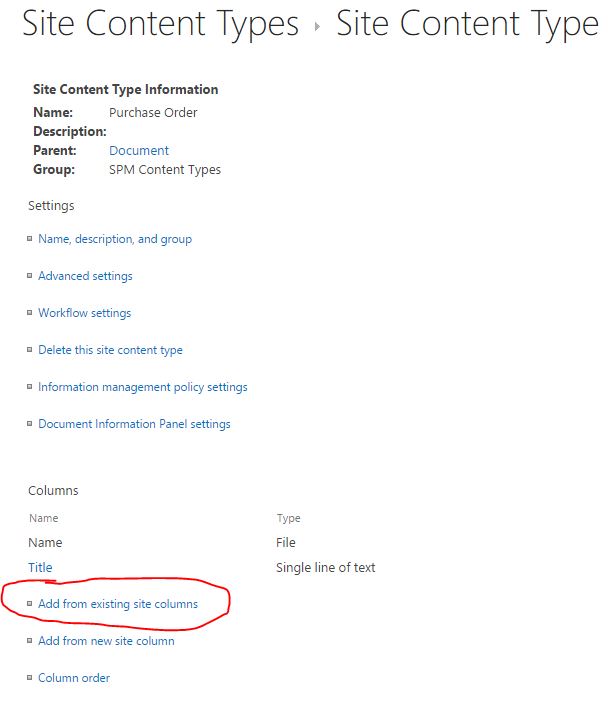
- You will now be presented with the next screen that looks like the one below. This is where we associate our newly created Content Type (category) with corresponding custom metadata (columns). There are many other things we can do with customization of the content types, but for the purposes of this post, we will just focus on associating site columns. To do that, click on Add from existing Site Columns. If you notice, by default we have Title Column. We will now add the ones we created.
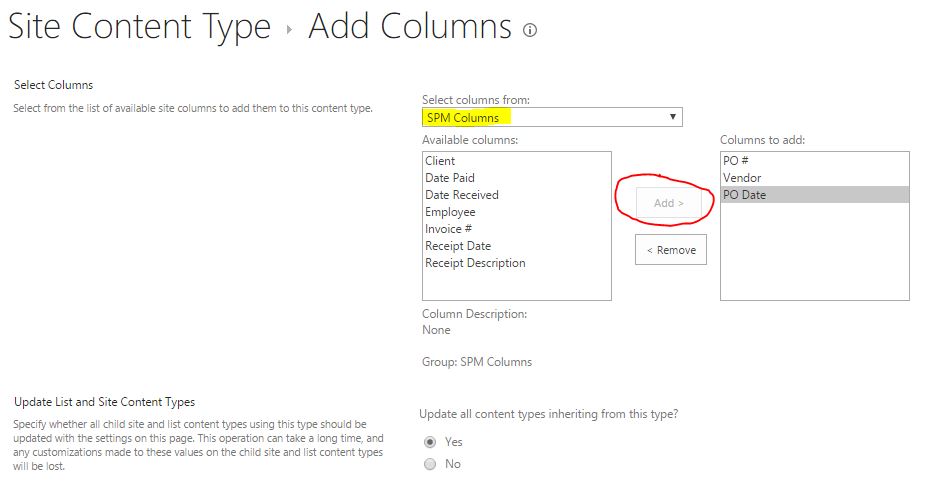
- You will now be presented with a screen you see below. Under Select columns from drop-down, choose the group you used to organize all your site columns (i.e. Custom Columns). This will filter and only show you corresponding site columns from that group. Choose the site columns associated with the particular Content Type from Available Columns and using Add> Button, add them to the right side of the selection screen. In our case, these columns are PO #, Vendor and PO Date. Click OK at the bottom of the screen.
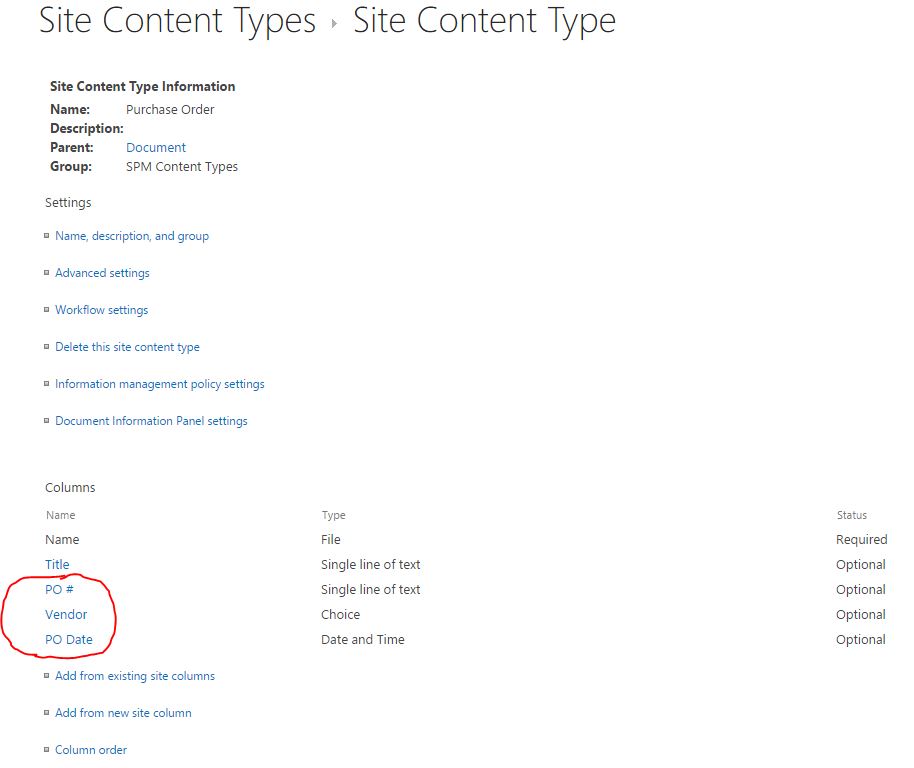
- Your result should look like the page below, where the Content Type now includes the corresponding custom columns
- So we are done with first content type. Repeat the above 7 steps for all the remaining content types


Step 7: Create a document Library on the site where your SharePoint DMS will reside
I trust that you know how to create a new site and add a Document Library to it. Do not use default document library (there are reasons for it which I will document in later posts).
Step 8: Prepare your document library for custom content types and custom metadata
Before we do the magic and add our site content types to it, we need to prepare our Document Library for “metadata”. Essentially we will need to tweak few advanced settings before we do the rest.
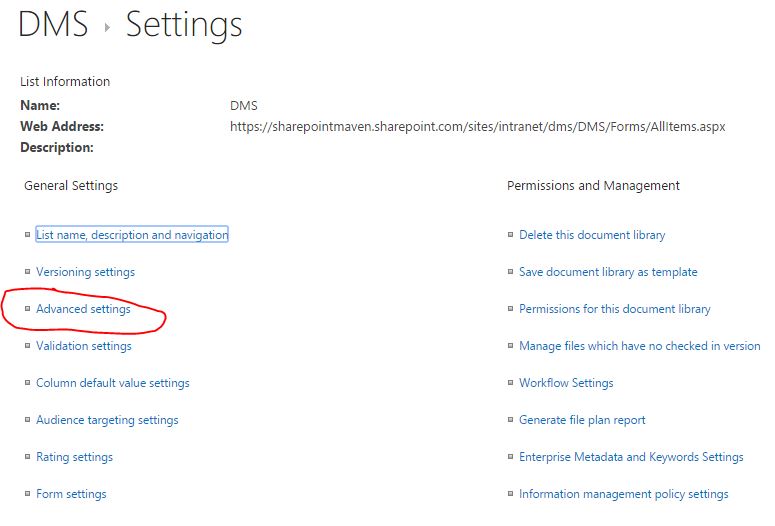
- Go to Library Tab > Library Settings to access all “administrative” functions of a document library

- Choose Advanced Settings
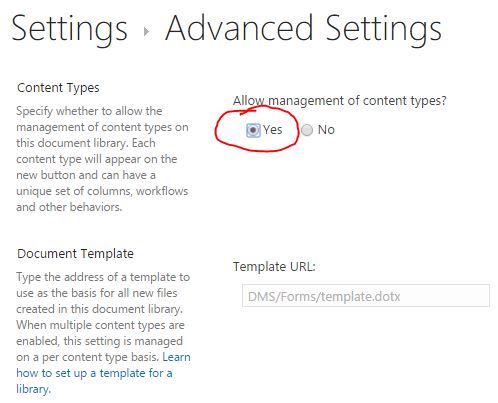
- Under Allow management of content types? choose “Yes” radio button. This will allow us to add our custom site content types to our document library
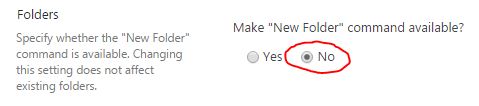
- Scroll to the middle of the screen. Under Make “New Folder” command available?, choose No Radio button. I like to disable folder creation for users anytime library uses metadata. You really do not want to mix the 2 together.
- Scroll to the bottom of the page and click OK button
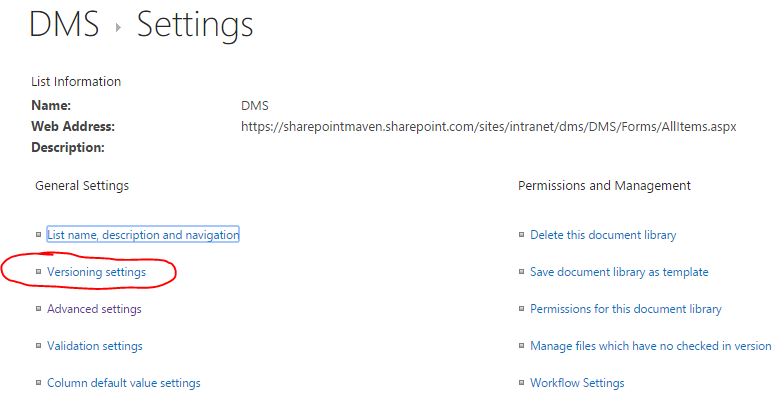
- From the Library Settings page again, click on Versioning Settings
- Make sure Create major versions option is chosen (it usually is, but just to make sure)


Step 9: Add custom content types to the document library
OK, now we are into some exciting stuff. We are now ready to add out custom content types from Step 6 to our document library. To do this:
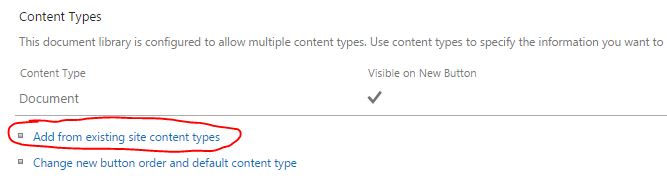
- Scroll down to the middle of the Library Settings Page. In there you will see a section called Content Type. This is a section that appears in a document library once we enabled content types in previous step. By default it shows a single, default Content Type called Document. We eventually will remove it. Bit for now let’s add our custom content types. Click on Add from existing site content types
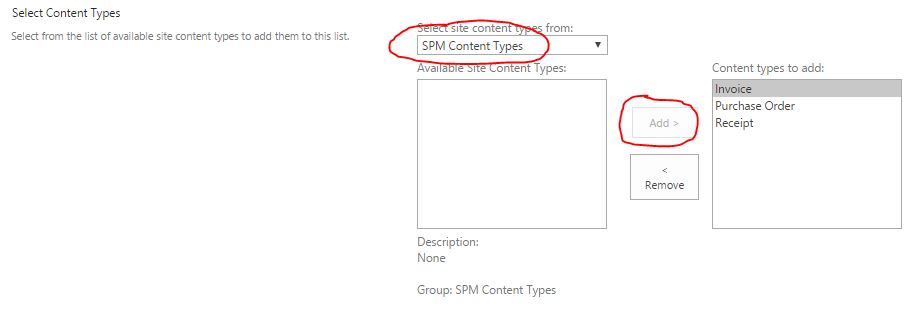
- On the next screen, choose custom content types you created. Just like with site columns, select the grouping you used to organize your Content Types from the drop-down. Then choose the custom content types and click Add> button to push them to the right side of the selection screen. Click OK
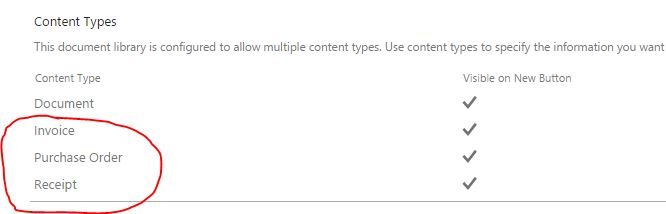
- Your middle section of the page will look like this, with custom content types added next to the default document type (Document)
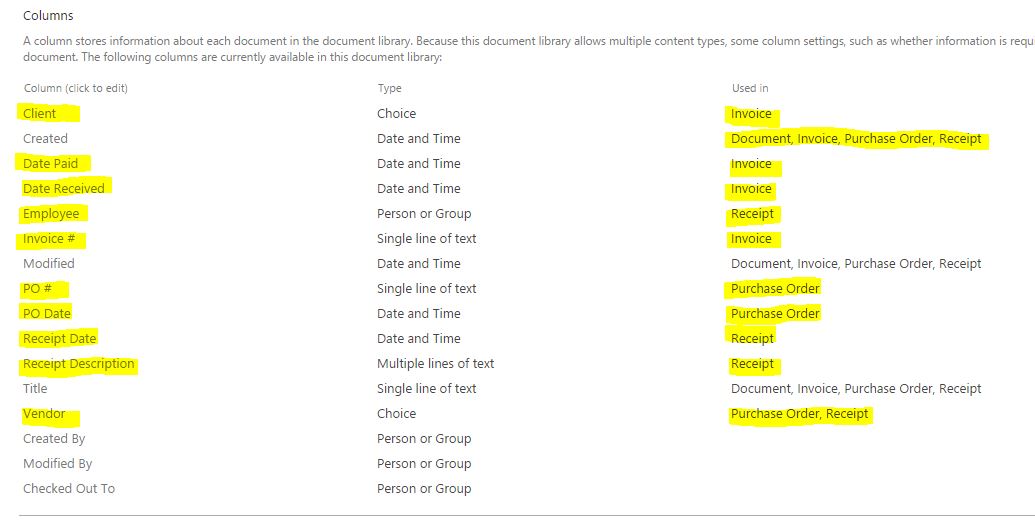
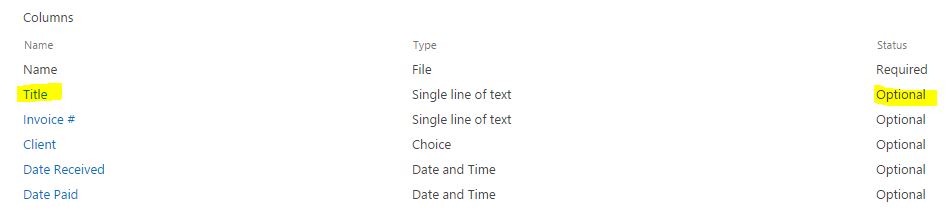
- Notice how not only the document types were added, but also all corresponding site columns were brought over as well. You can see them in the Columns section at the bottom of the screen. That section also shows you all the columns used and where they are used (which content types). Pretty powerful!
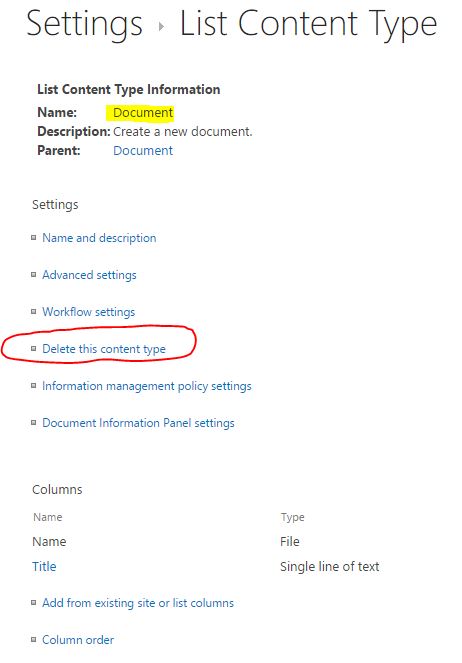
- Before we forget, let’s go ahead and remove that default content type as we won’t need it in our SharePoint DMS. To do that, click on the Document Content Type from Content Types section (middle of the screen) and click Delete this content type. You will get a warning message. Click OK.
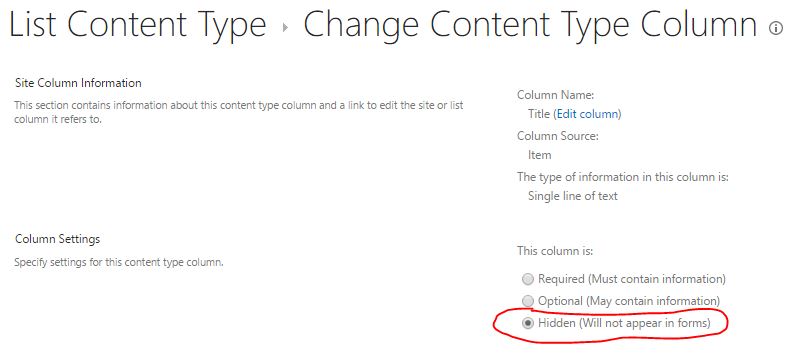
- Another thing that is optional, but I personally like to do is Hide the Title Field. Title Field is added by default to every content type. Sometimes it means an extra entry for the user. I like to hide it. If you want to hide it, go to the content type, click on the Title Column


Step 10: Add metadata navigation
We are getting very close to completion of our SharePoint DMS. Just few more steps. One thing I love to see on any SharePoint document library or SharePoint list is Metadata Navigation. This really only makes sense when you use metadata. This allows you to search for files/documents/items in your list or library using the cool-looking filters. I always compare that experience to Amazon.com shopping, where you punch in filters on the left hand-side and results adjust accordingly on the main page. I have actually written a pretty detailed blog post on the topic and already provided detailed instructions on how to set it up. So I am not going to repeat them here. Instead, I recommend that you check out this blog post here and follow instructions as per that post. Once all is set and done, you will end up with something like this below

Step 11: Optimize SharePoint DMS for 5,000 Item limit
I assume you would want to store lots of documents in your SharePoint DMS. In order to be able to do that in SharePoint, you need to optimize your document library accordingly. Once again, I have written a detailed blog post + published a slide deck with instructions on what you need to do. Please follow all of the instructions and take care of indexed columns, views, etc. Otherwise you will run into issues when you go above 5,000 files in your SharePoint DMS.
Step 12: Upload some documents
We are pretty much there. Now, go ahead and upload a document. You will notice that in addition to “regular” metadata properties, you also have a Content Type drop-down. As you toggle through the drop-down, your metadata choices will adjust accordingly. Below images show the difference


Step 13: Enjoy your Document Management System in SharePoint!
That’s it! Once all is set and done, you will end up with a really nice SharePoint DMS and a wonderful user experience.

Share Article


