How to add custom metadata columns to the Filters Pane in SharePoint Online
One of the coolest features of a modern document library in SharePoint Online is the ability to filter the contents using metadata. Just click on a filters pane on the right-hand side, choose the columns, and the library is filtered. I call this Amazon.com® filtering, where you can filter for products using a very similar experience. In this post, I would like to explain how to add custom metadata columns to the filters pane. In SharePoint terms, this is called “pin columns.” Let’s do this together!
Step 1: Create Metadata
There are a few ways to create custom metadata in SharePoint; for this exercise, we will create a few columns at the library level.
- Click + Add Column, then Choice (for drop-down column)
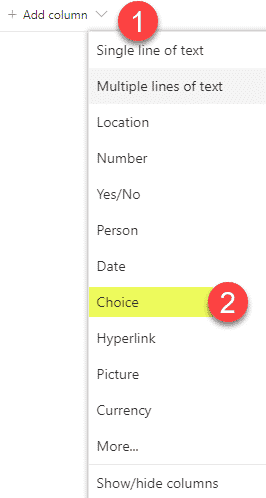
- Give your column a name (Document Type in my case), provide the list of drop-down choices (1 choice per row), click Save
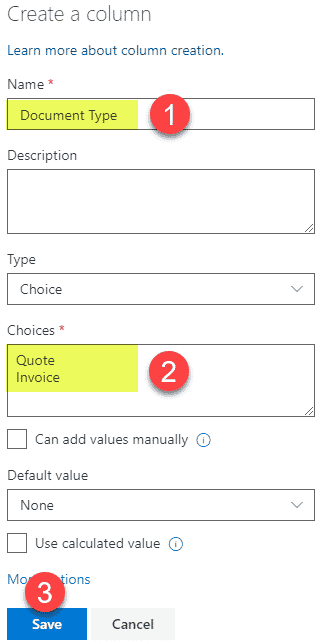
- You will now notice the column appearing in a library. Click + Add Column again to add another one

- This time, let’s add Expiration Date column (Date type)
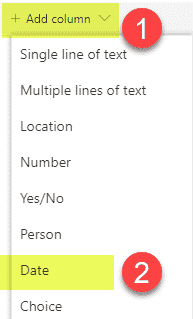
- Give it a name, click Save
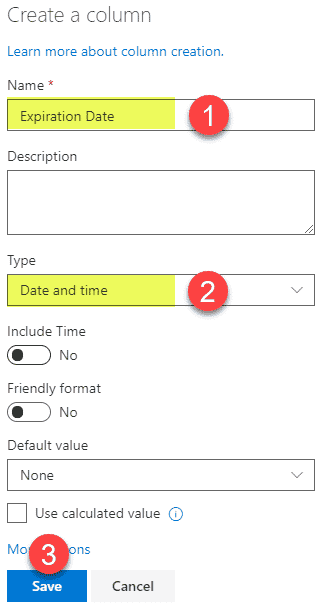
- If your library looks like this now, pad yourself on the back

Step 2: Upload and tag documents
I have previously documented how to tag docs in bulk, so instead of repeating myself here, please kindly reference this post.
Step 3: Pin Columns to the Filters Pane
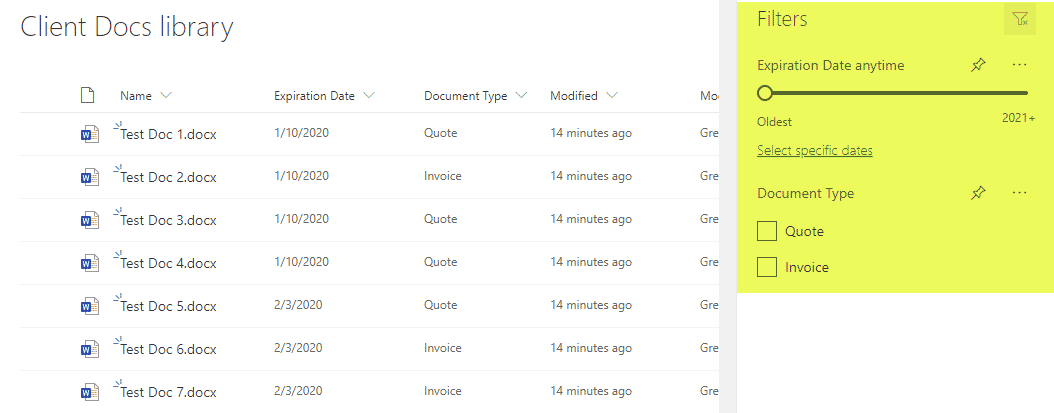
This is where the magic happens. You will notice that if you click on the Filters Pane, some columns will already be added automatically.
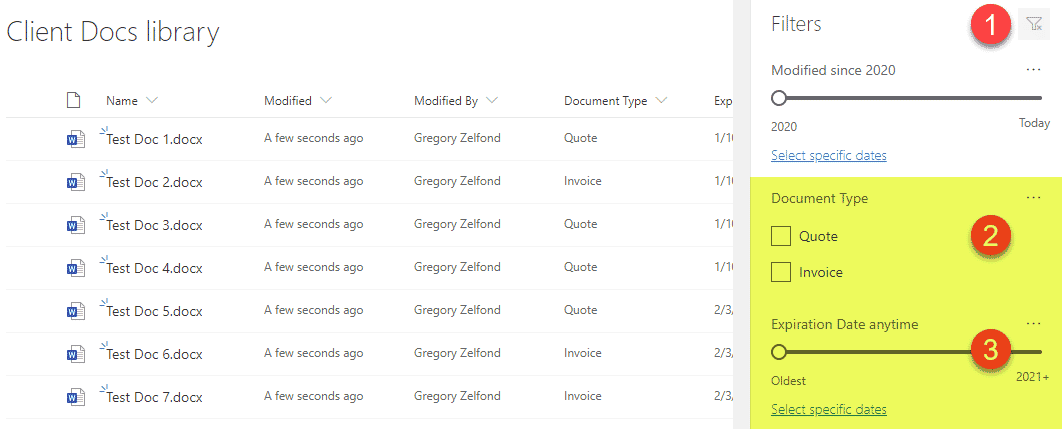
However, if you have many custom columns and to assure they permanently stay there, you must pin them to the Filters pane (read: add custom metadata columns to the Filters Pane). To do so:
- Click on the drop-down next to the Column Header > Columns Settings > Pin to filters pane
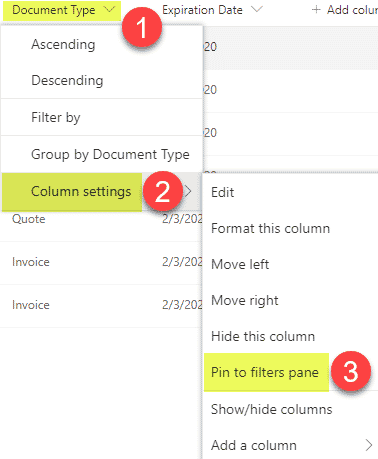
- Repeat for all the custom columns you wanted to see in the Filters Pane
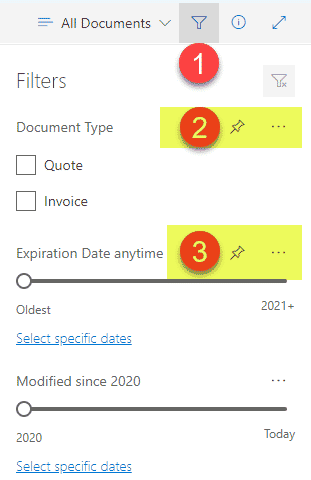
- You will now notice the pin appearing next to filter in the Filters pane for all the columns you have pinned
Step 4: Remove unwanted filters
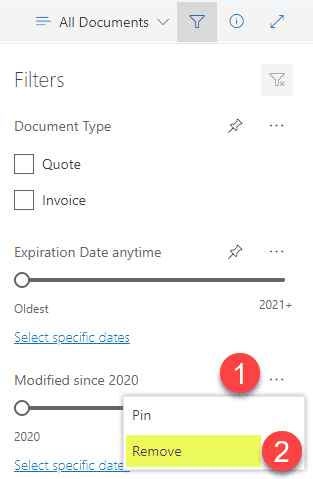
While we are here, you might not necessarily need all the filters added for you automatically (i.e., File Type or Modified Date). So you can remove those.
Step 5: Change the order of columns
The columns in the Filters Pane will appear in the same order (top to bottom) as they appear in the library (left to right). So to adjust the order of filters in the filters pane, you need to change the order of the columns in a library. Re-arrange (drag) the columns to the left/right as necessary and do not forget to re-save the view.
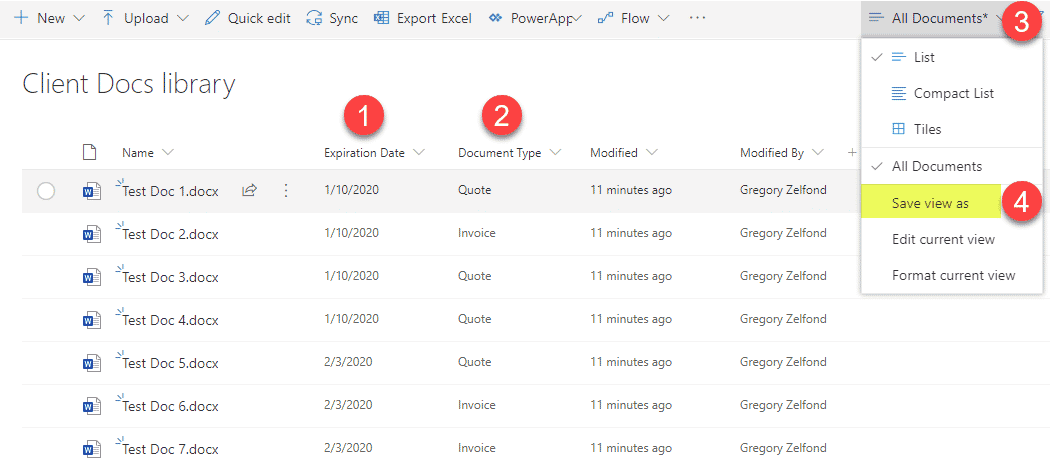
This is how it should all look like when all is set and done.
NOTES
- In addition to the document library, the same filters pane functionality is available in the SharePoint list as well. Confused about the difference between a list and a library? Read here.
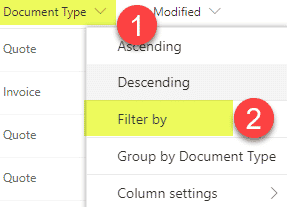
- If you do have a long list of drop-down choices in your column, you might only get a limited number displayed in the filters pane. According to this post, it will cap the number of terms to 140 in the Filters pane. The workaround to display the full list of choices would be to filter by using the column header instead of the filters pane
- The Filters Pane is unique per view. In other words, if you create another view on a list or a library, you will be able to create another (unique) filters pane for that view.
- Anyone with the Edit permission level (Members of your site) can create custom metadata, adjust the view, and the Filters Pane – so worthwhile to train your staff on do’s and don’ts here.


