How not to go insane with all the SharePoint changes
I have gotten lots of emails and calls in recent months from anxious clients asking me about all the SharePoint changes they happen to encounter in Office 365, like the new look for a document library, for example. While all the improvements are great in the long run, they do bring short-term inconvenience and anxiety to end users when things don’t exactly look like what they did yesterday.

SharePoint Online and OneDrive have been undergoing minor changes throughout all these years, however this year (2016) has been the most revolutionary in terms of a number of changes as well as their extent and magnitude. Here are a few that occurred already or will soon take place in SharePoint Online/Office 365:
- New look and feel for a Document Library
- New SharePoint Home Experience
- New look and feel for Site Contents page
- New Mobile App for SharePoint
Each of these SharePoint changes above is pretty drastic by itself and will alter the user behavior for good. In many cases, it is not straightforward even for seasoned SharePoint Consultants. So what you, a business owner or an IT Admin, can do to make it easy for yourself and your end users? I have put together a list of tips and techniques below you can use to alleviate the stress and improve the user adoption of the new functionalities.
“Change is the only constant in life”
–Heraclitus, a Greek philosopher
Tip # 1: Enroll yourself in the First Release program
You can enroll yourself or selected users in the First Release program in Office 365. Essentially what that means is that before the changes to SharePoint and Office 365 are rolled out to general public, they will first be rolled out to those who have enrolled in the First Release program. This way Microsoft can work out all the bugs and kinks before making changes across the board. The major benefit of this is that you can be the first to learn about the upcoming changes and prepare yourself and the organization for what’s coming.
To enroll yourself in the First Release Program:
- Go to Office 365 Admin Center
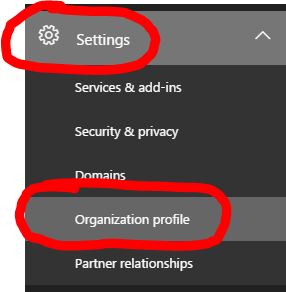
- Click Settings > Organization Profile
- Under Release Preferences section, go to Actions > Edit

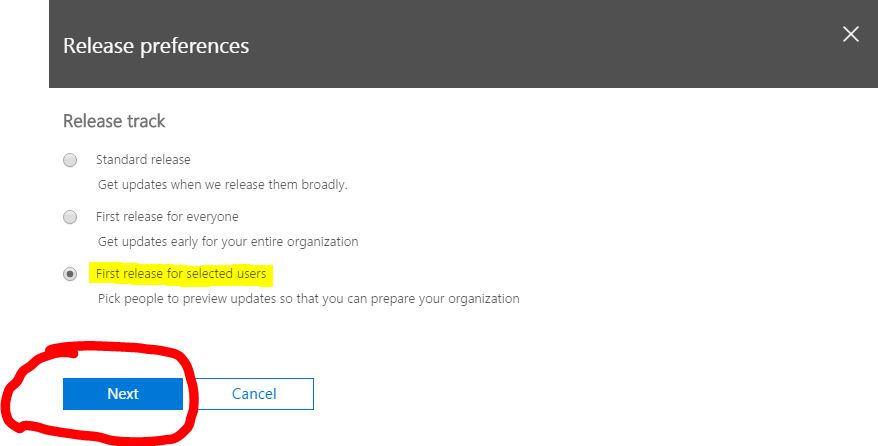
- Under Release Track, choose First Release for selected users, then click Next (the default is Standard Release)
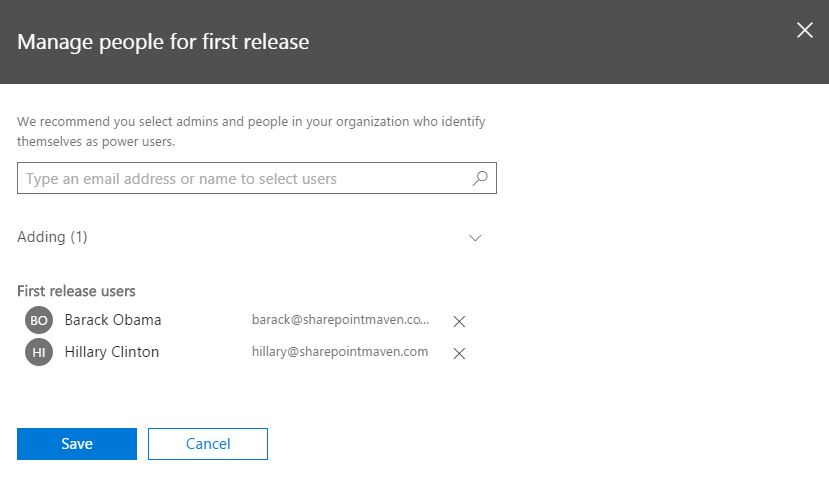
- On the next screen, type the names of the users you want to be in First Release. Click Save
Tip # 2: Do not enroll the whole organization in the First Release
In previous tip, in Step 4, you could also enroll the whole organization in the First Release. Unless you are a small company of tech-savvy early adopters, this is not a good idea.
Tip # 3: Familiarize yourself with all SharePoint changes
It might be challenging at first to know how to navigate around the new document library or take advantage of the new SharePoint Mobile app. Become a SharePoint junkie – subscribe to Microsoft Office 365 blogs, find relevant blog posts, attend webinars, view videos on YouTube.
Tip # 4: Test with various types of sites in your environment
Once you get access to the First Release program and figure out how things work in the new world, make sure to test things out in your environment. For example, for the new document library experience – check out few different sites in your Intranet, make sure all still work (links, navigation, metadata, views, etc.). The look and feel as well as whether or not things will work depends on features enabled on the site or at the library level (i.e. Publishing features, metadata navigation), so make sure to test all the different variations. This is especially true if you have done some custom-coding or used 3rd party tools and branding in your environment.
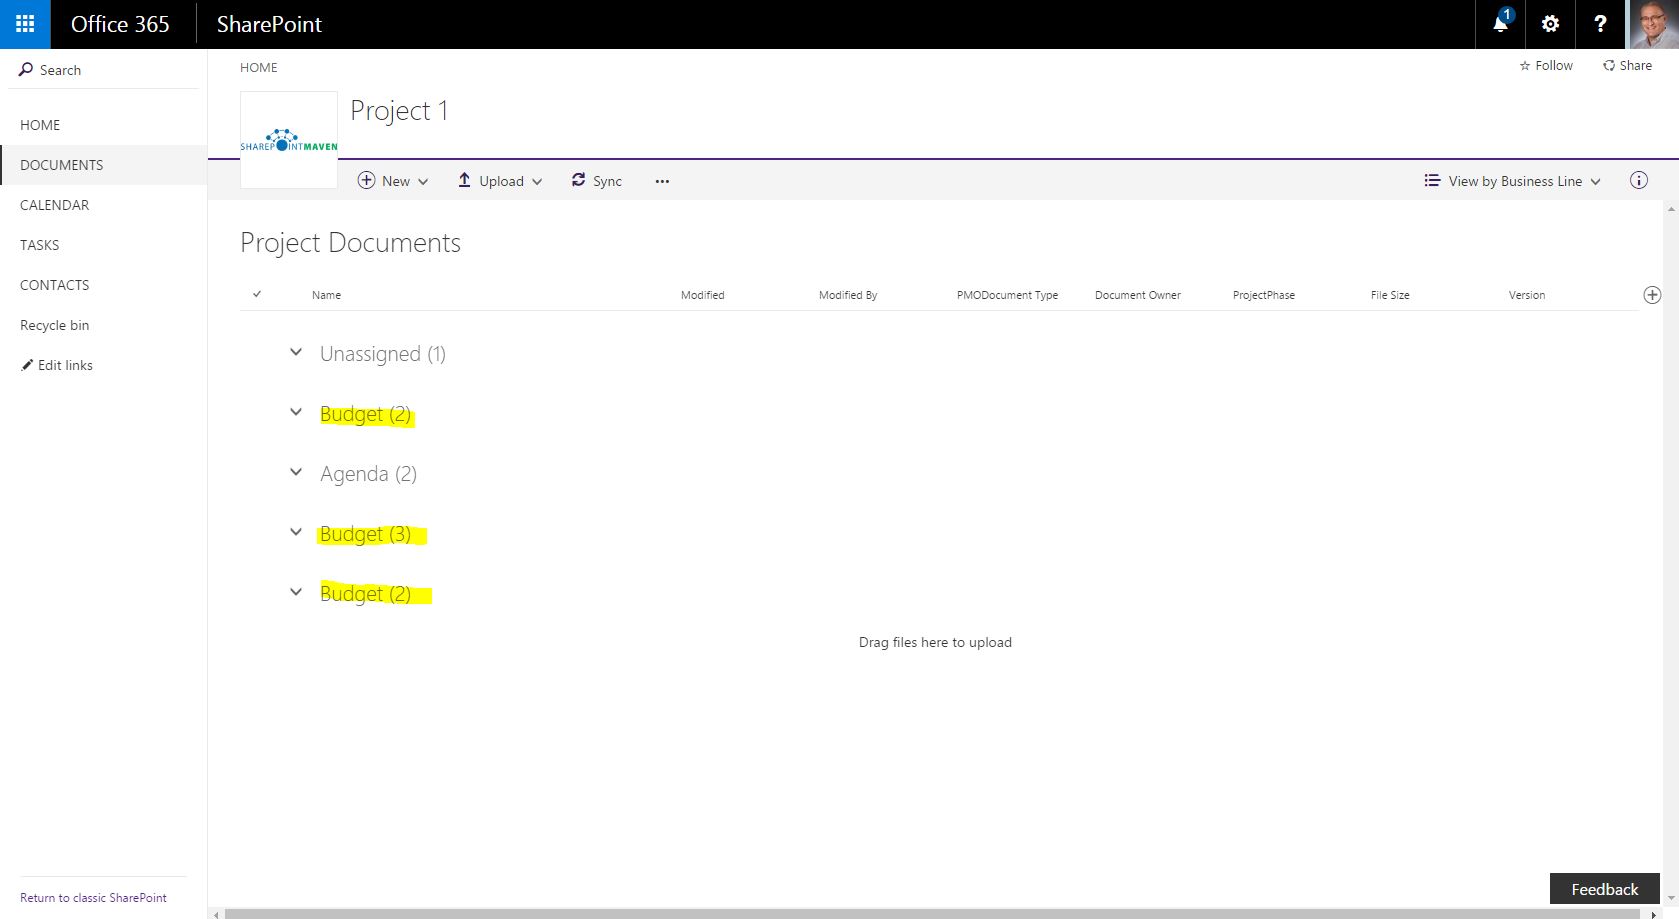
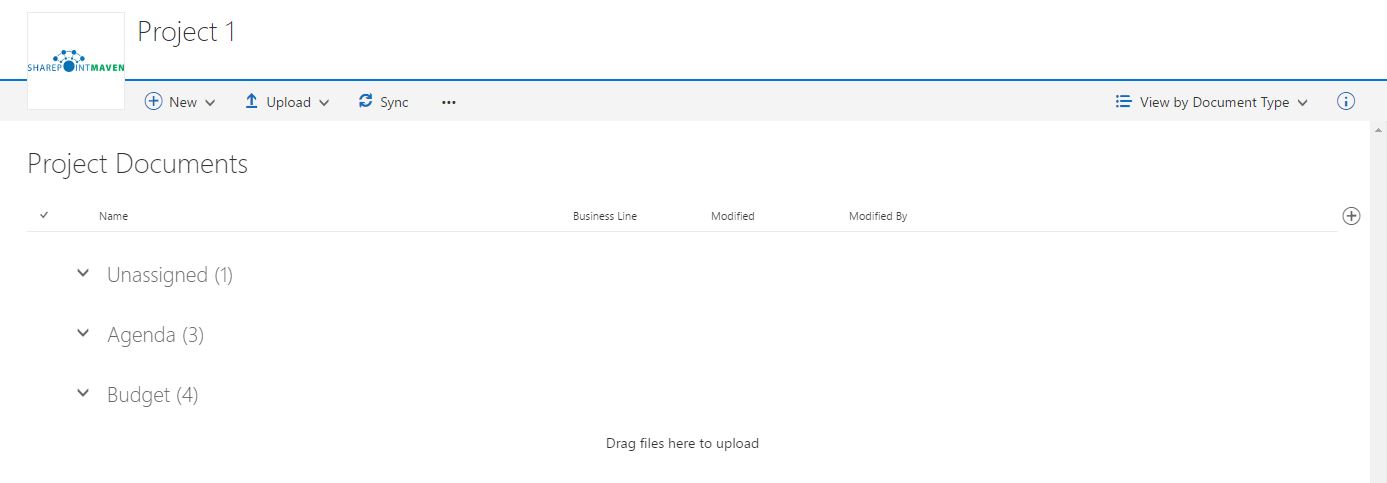
For example, recently I have encountered the following problem with the new document library experience. I noticed that on one of my document libraries that uses metadata, grouped view went wild with double and triple-counting the files (the end result should have been just 1 group, not 3 as in image below). This is definitely a big no-no for live SharePoint environments, so this proves why you need to test thoroughly and revert back to classic look if need be (follow instructions at the end of this post on how to do this).
Tip # 5: Communicate changes to your end users
Make sure to properly communicate upcoming changes to the end users well ahead of the time they will see them on their screens. They don’t need to know all the little details, but it is important for them to be aware of the changes that are coming. People hate change, so make sure to also justify the updates and explain why things are changing by putting a positive spin on them (i.e. easier collaboration, additional functionalities, etc.)
Tip # 6: Train users on new functionalities
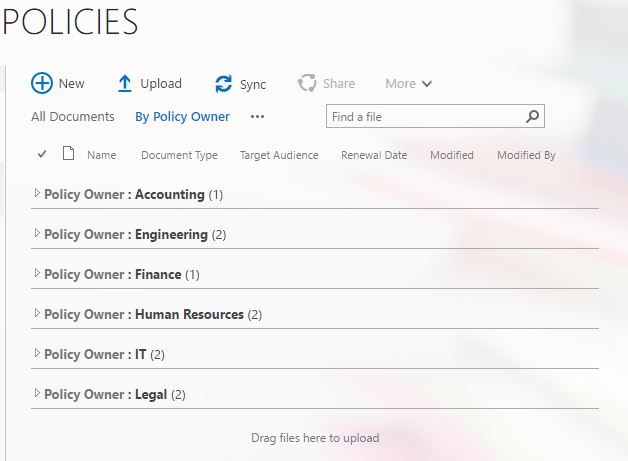
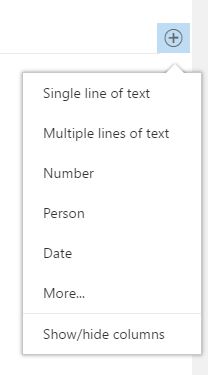
Yes, you need to do this. There is no way around this. Below are 2 images of a document library. How it used to look and how it looks now. While it might be easy for some, understanding where some of the commands or buttons went will frustrate the hell out of your users. You don’t need to spend considerable time either – informal lunch and learns will do. But you do need to educate them about the changes.
Tip # 7: Revert to classic view if necessary
Some changes within Office 365 can be reverted back to the old (classic) look and feel. Microsoft is completely aware that not all of us are computer geeks, so they do give us the option to revert back if need be. For example, the new SharePoint Document library is probably the biggest source of anxiety, so if you miss the old look and feel, you can easily switch back. Here are 3 ways to do this:
Option 1: Revert to classic view temporarily
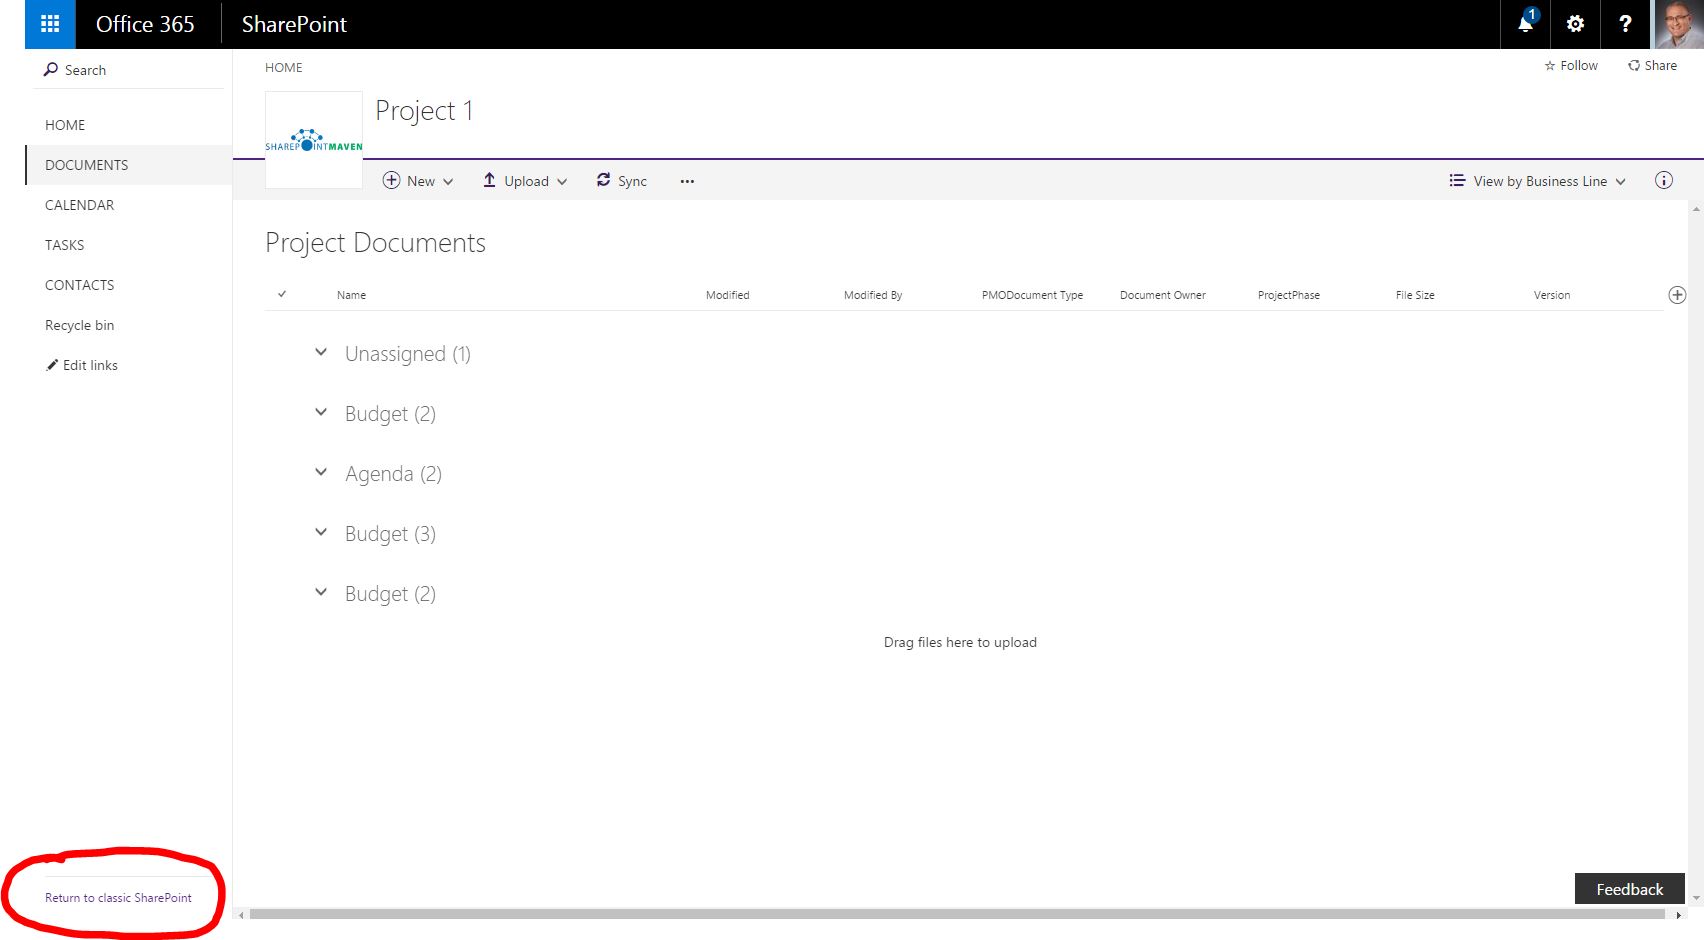
If you access the document library or list or Site Contents Page that has gotten a new experience (look and feel), you can switch temporarily to the old (classic) view just by clicking Return to classic SharePoint in the lower left-hand corner of the screen. This option is available in SharePoint Document Libraries. SharePoint lists and Site Contents Page. One important thing to note is that this change is temporary (while you have the browser open). Once you exit the site, close the browser and come back – it will default to the new experience again.
Option 2: Revert to classic view for a single Document Library
- Once in a document library, go to Gear Icon > Library Settings
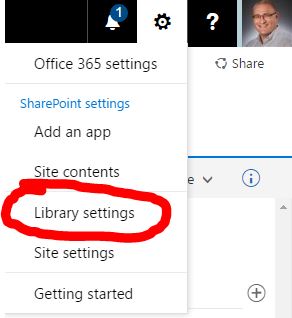
- Click on Advanced Settings
- Scroll all the way to the bottom, and choose Classic experience under List Experience. Click OK

Option 3: Revert to classic view for the whole environment
As a site collection Administrator, you can also alter the setting globally, for the whole environment. To do this:
- Go to Office 365 Admin Center
- Click on SharePoint Admin Center
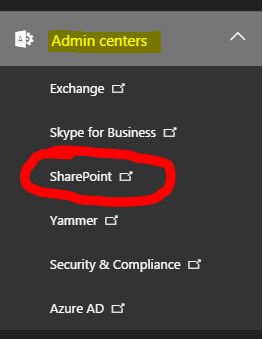
- Click on Settings
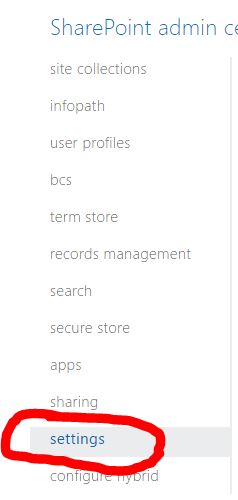
- Scroll a bit down, in the middle of the screen, under SharePoint Lists and Libraries experience, choose Classic experience. Click OK

