How to create a custom list in SharePoint
It is hard to believe, but we could create custom lists in SharePoint since the ancient times of SharePoint 2007. Yet, many users don’t realize that SharePoint has this extraordinary capability. Most users think of SharePoint as strictly a place to store documents. Yet, we can also create lists. In this article, I will guide you through the steps to create a Custom List in SharePoint.
What are Lists?
Lists are for structured information you would typically store in Excel in a table. Think of it as rows of data, such as a list of contacts, issues, clients, projects, locations, and so on.
Lists vs. Excel
Reading the above, you might be thinking, why bother with Lists in the first place when we already have Excel? Great question. I offered a few advantages of Lists in the following article and summarized them below.
- Cleaner web-based interface
- Better and easier integration with other Microsoft 365 apps like SharePoint, Forms, Power Automate, etc
- Ability to create and save custom views to visualize the data
- Version History capability
- Permissions settings
Lists App
Lists in Microsoft 365 do not exist out there in space by themselves. They are physically residing in, surprise, surprise, SharePoint! Yep, just like you would use SharePoint to store files and folders, you would use Lists to store non-document information (rows and columns of data). While you can create lists directly from the SharePoint site itself, we also offer a Lists app that enables you to aggregate and access all lists from multiple sites in one place. Think of Lists as OneDrive but for Lists…

While we could create lists from the SharePoint 2007 version, we only got the Lists app in 2020.
How to create lists on a SharePoint site
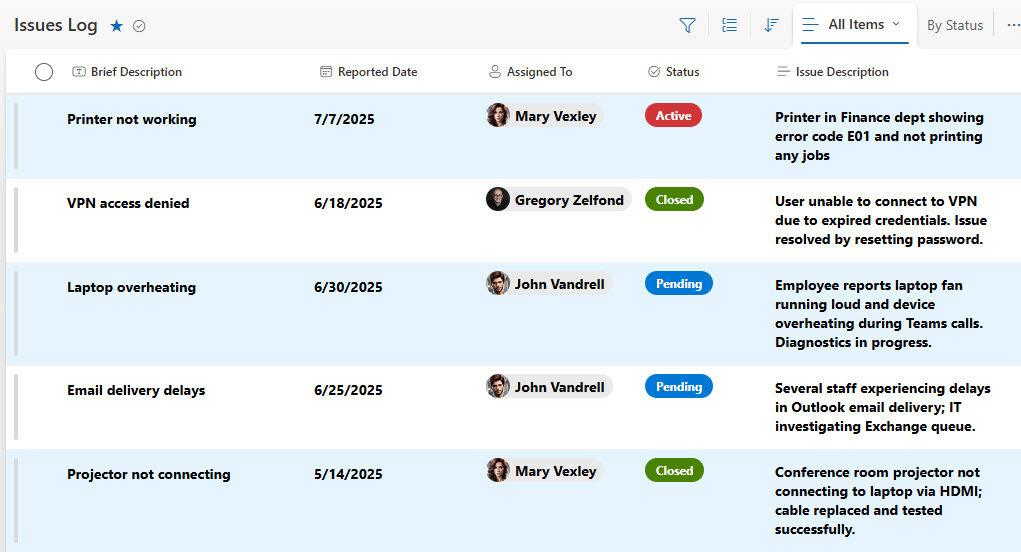
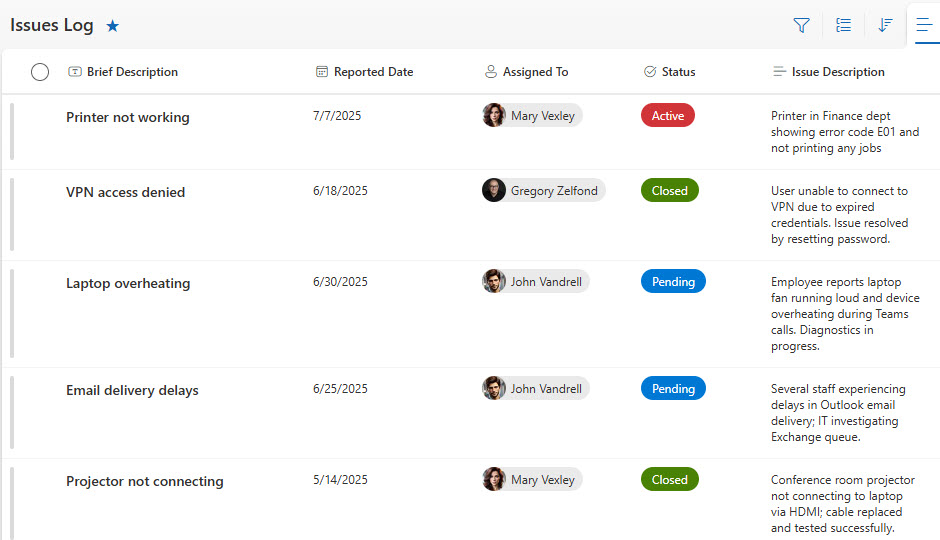
Below is an example of the list we will build together. Let me walk you through step-by-step.
Step 1: Define Metadata
The first step in the process is to define metadata columns. For this article, let’s create a simple action log. So, in my case, I would like to capture the following information.
- Brief Description
- Reported Date
- Assigned To
- Status
- Issue Description
Step 2: Define Column Types
The next step would be to match each desired column with an available column type. I documented all the possibilities in this article. So below, you will see the same column I defined above with an available column type (in the parenthesis)
- Brief Description (Single Line of Text)
- Reported Date (Date and Time)
- Assigned To (People)
- Status (Choice)
- Issue Description (Multiple Lines of Text)
Step 3: Create a New List
Now, it is time to roll up the sleeves! 😊
- From the SharePoint site homepage, click New > List
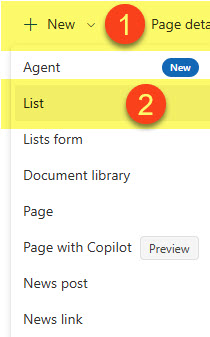
- From all the available options, choose List

- Give it a name and click Create

Step 4: Create Columns
The next step is to create all the columns we defined above.
- Click +Add column, then choose the appropriate type of column you would like to create. I mapped out all the choices below. Note that the Brief Description is missing from the list; we do not need to create it – I will explain why in the next step.

- Below is what the column creation looks like for the Status Column (Choice)
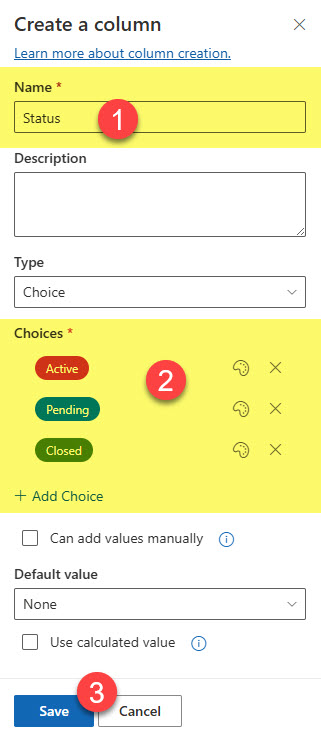
- Repeat the above step for all the other columns.
Step 5: Rename the Title Column
One column we did not create above was the Brief Description column. And there is a reason for this. Every List has the default Title Column, which is a mandatory column you must have on your list. It is a column that has the List item feature selection next to it. It is a Single Line of Text column Type. While there are ways to hide it, why not reuse it? Since Our Brief Description is also a Single Line of Text, we can simply rename it and make good use of it. By the way, I explained various possibilities with the Title Column a while back.
- Click on the drop-down next to Title, then Column settings > Rename
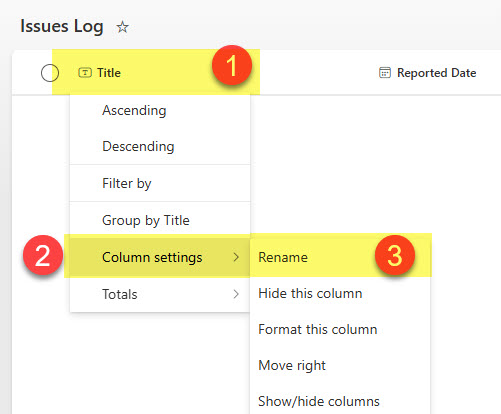
- Enter the new name and click Save

- This is how our list will look now

Step 6: Populate with data
Once the columns are created, you will need to populate them with some sample data. You can either add them one by one or copy and paste them from Excel using Edit in Grid view.

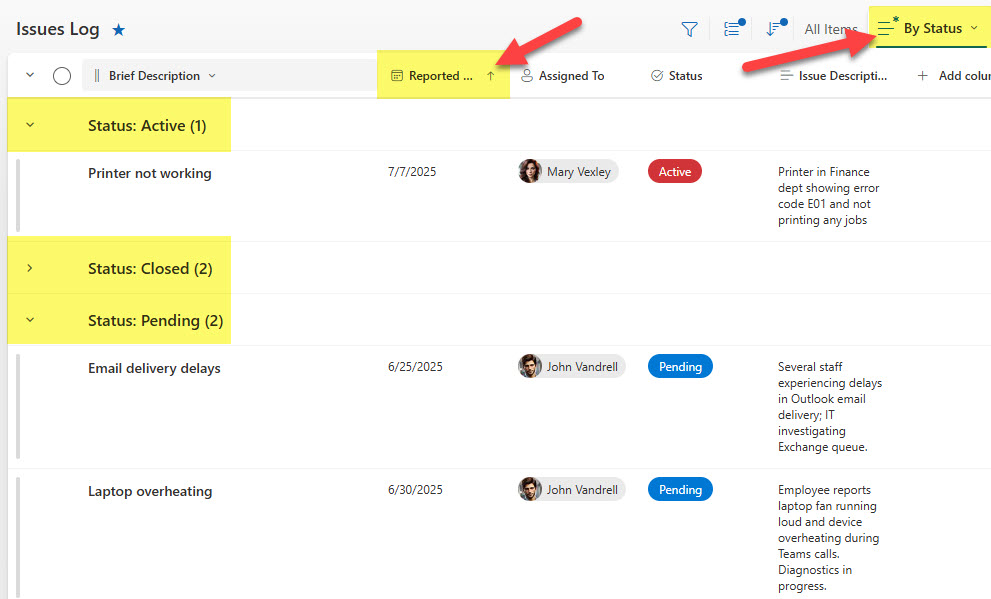
Step 7: Create Views
The next step would be to create various views on a list. Since the data is represented via metadata columns, you can create all sorts of views by grouping, sorting, or filtering the list. For example, you can create a view that groups by Status and sorts by the Reported date, as shown below.
In addition, you can create other styles of views, such as Calendar or Gallery, that allow for alternative and cool ways to view the information. Check out this article for possibilities.
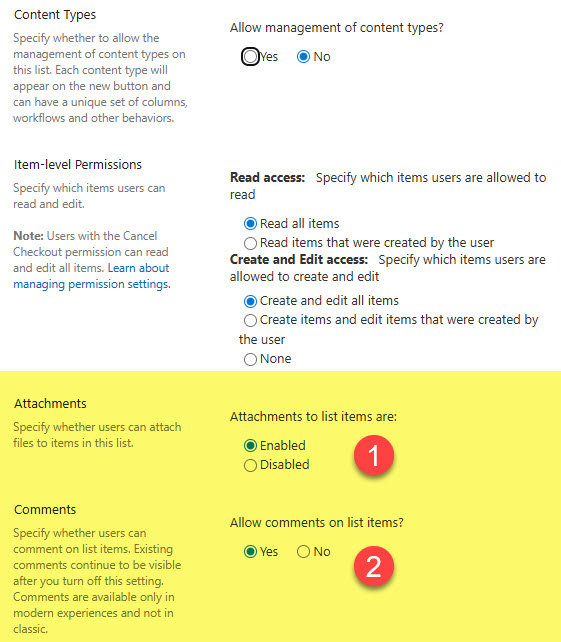
Step 8: Configure Attachments Setting
The next important step is to configure the attachment setting. I usually discourage users from attaching files to the list, as those files lack the typical document management capabilities you would expect in a document library. I have explained the reasons here. However, ironically, in our case, we do want to allow file attachments (i.e., in case users want to attach a screenshot image of the issue).
To prevent users from attaching files, refer to the instructions in this post. You can also turn off comments on a list while in there.
Step 9: Format views and columns
Next, you may want to make your list visually appealing by adding some color to it. For example, you might want to highlight the issues that are in Active Status or ones that have been overdue for a while. I explained how to configure custom formatting on a list or a view here.
Step 10: Configure List Permissions and share it
The next step in the process is to ensure the list has proper permissions. Since the list resides on a SharePoint site, the preferred way to manage its permissions would be via the site settings. However, if you want to create unique permissions on the list (hide it from certain site members or prevent editing), you will need to break the permissions inheritance. Here is how to do this.

Likewise, you might want to share the list with some users outside of the Team/SharePoint Site. In such a case, you would need to do the opposite of the above step and share the list. I explained how to do so in an earlier article.


Share Article