Set up Document Retention via Retention Labels in SharePoint Online
I recently published an article on creating and publishing retention policies on SharePoint sites. However, in that scenario, the assumption was that all content on a site would follow the same retention policies. However, what if you have various types of documents that need to be retained for different periods of time? In this case, we need to rely on Retention Labels. By tagging content with different retention labels, we can apply different and unique retention schedules to different files and folders. And that is what I would like to explain in this article.
3 Steps to Set up Document Retention via Retention Labels
There are three steps involved when it comes to setting up document retention via retention labels in SharePoint.
- Step 1: Create Retention Labels (specify the retention period)
- Step 2: Publish Retention Policies (specify which sites the retention labels will be published to)
- Step 3: Tag the content with Retention Labels
Step 1: Create Retention Labels
The first step in the process is to create a Retention Label. The label will define the retention period + retention behavior.
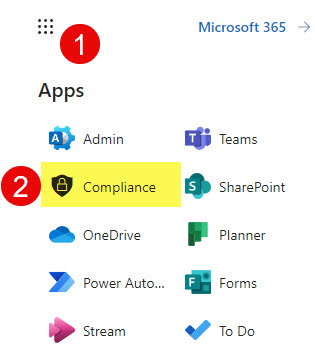
- From Microsoft 365 App Launcher, click Compliance
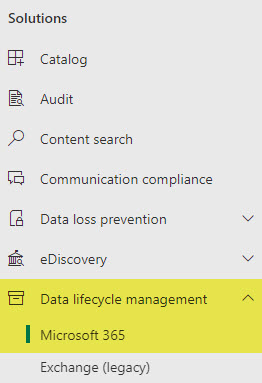
- Under Data lifecycle management, click Microsoft 365
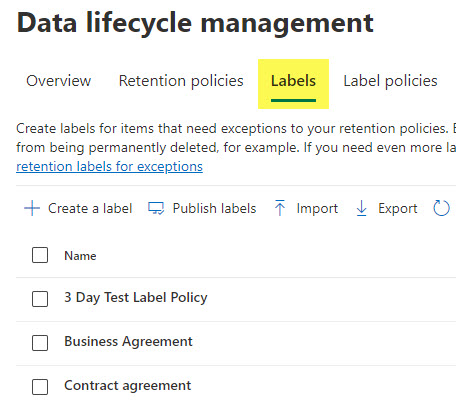
- Click on the Labels Tab. This is where you can create/define retention labels.
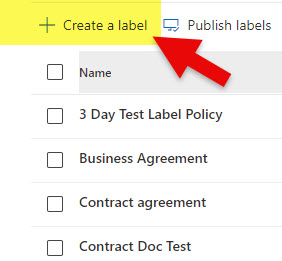
- Click Create a label
- Give the Label the name. The label name will be visible to users when they tag the documents. You can also provide an optional description for the users and admins. Those fields allow for more text, and the text will be visible as a tooltip when the users apply the label to the file or folder. Click Next.
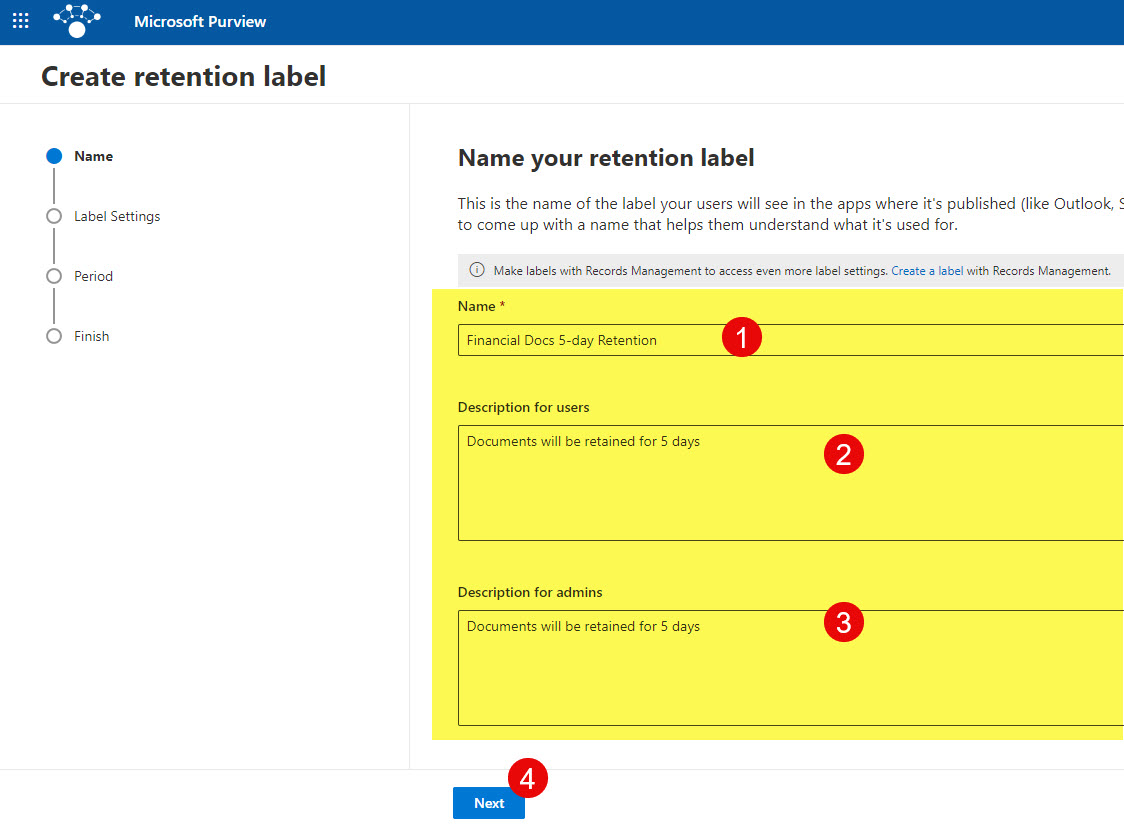
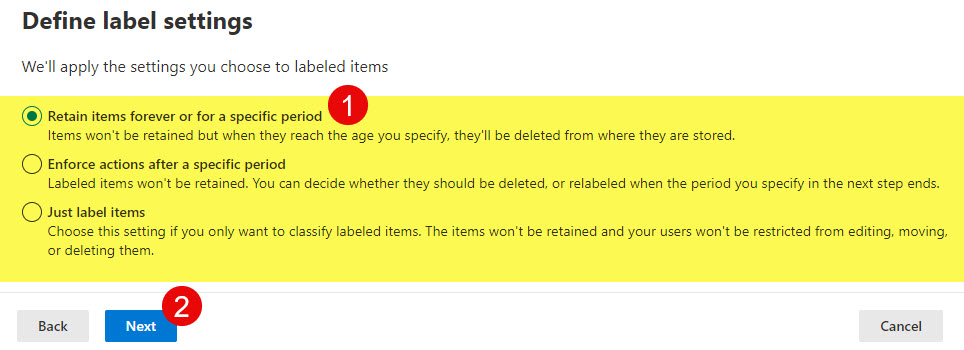
- On the next screen, you can define label settings. In our case, we are going to proceed with Retain items forever or for a specific period. Click Next.
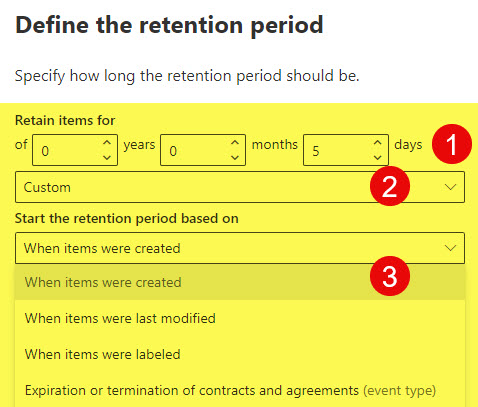
- On the next screen, we will define the Retention Period. In addition, you have to specify from which date the clock starts to count the retention. I chose When items were created. Other options are also available, and I plan to blog about those later. Click Next.
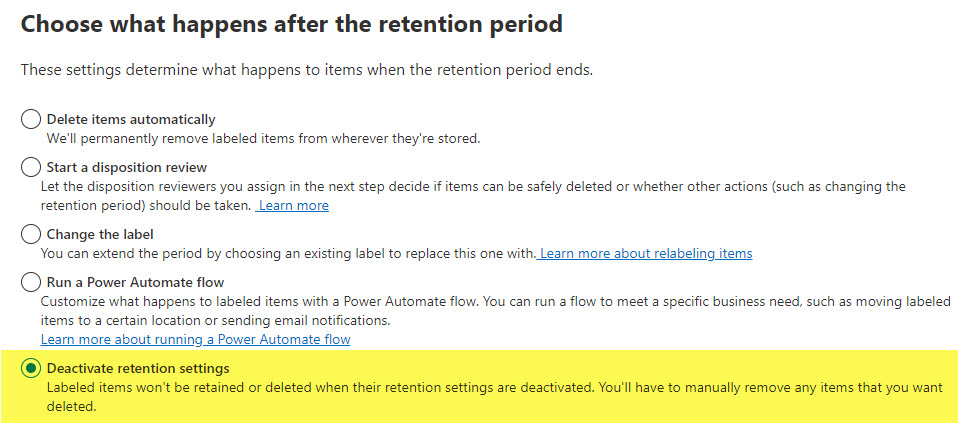
- Next, we need to choose what happens after the retention period expires. I plan to publish a separate article on all available options, but for the time being, we will select the last one: Deactivate retention settings. Essentially, nothing will happen at the end of the retention period – the documents will remain in the same location and will not be removed or deleted.
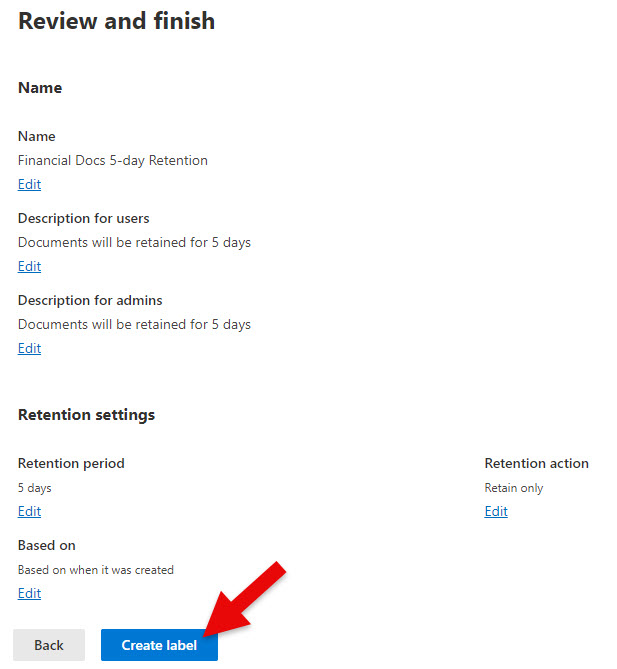
- On the final screen, you can review the settings, and if everything looks good, click Create label.
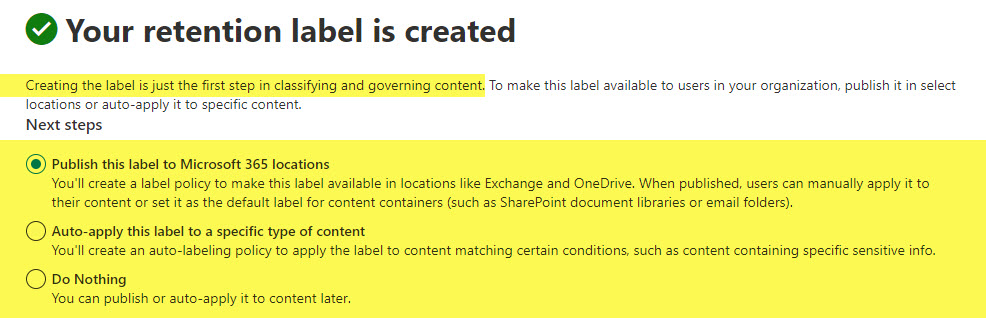
- You will then receive a confirmation message. It will offer you to continue the process and publish the labels right away, but in my case, I will choose to Do Nothing, and we will publish the labels in the next step.
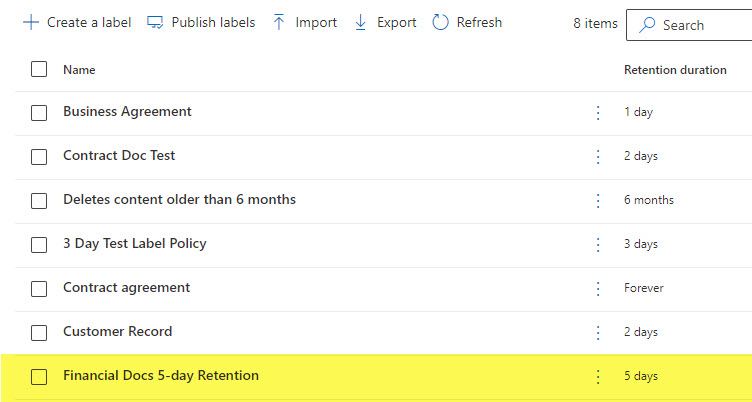
- The label will appear in the dashboard/list of labels
Step 2: Publish Retention Policies
Now that the label has been created, we can now publish it. When we publish the label, we make it available to certain SharePoint sites, so that users can apply those labels to content on those sites.
-
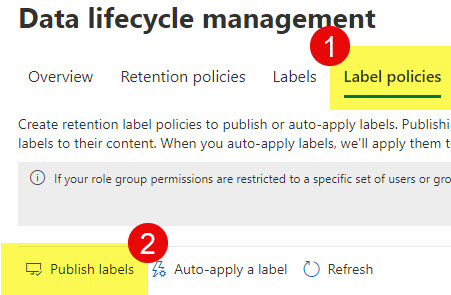
- While in the Data lifecycle management screen, click on Label policies.

- Click on Publish labels.
- On the next screen, you need to choose a label you would like to publish. Once chosen, click Next.
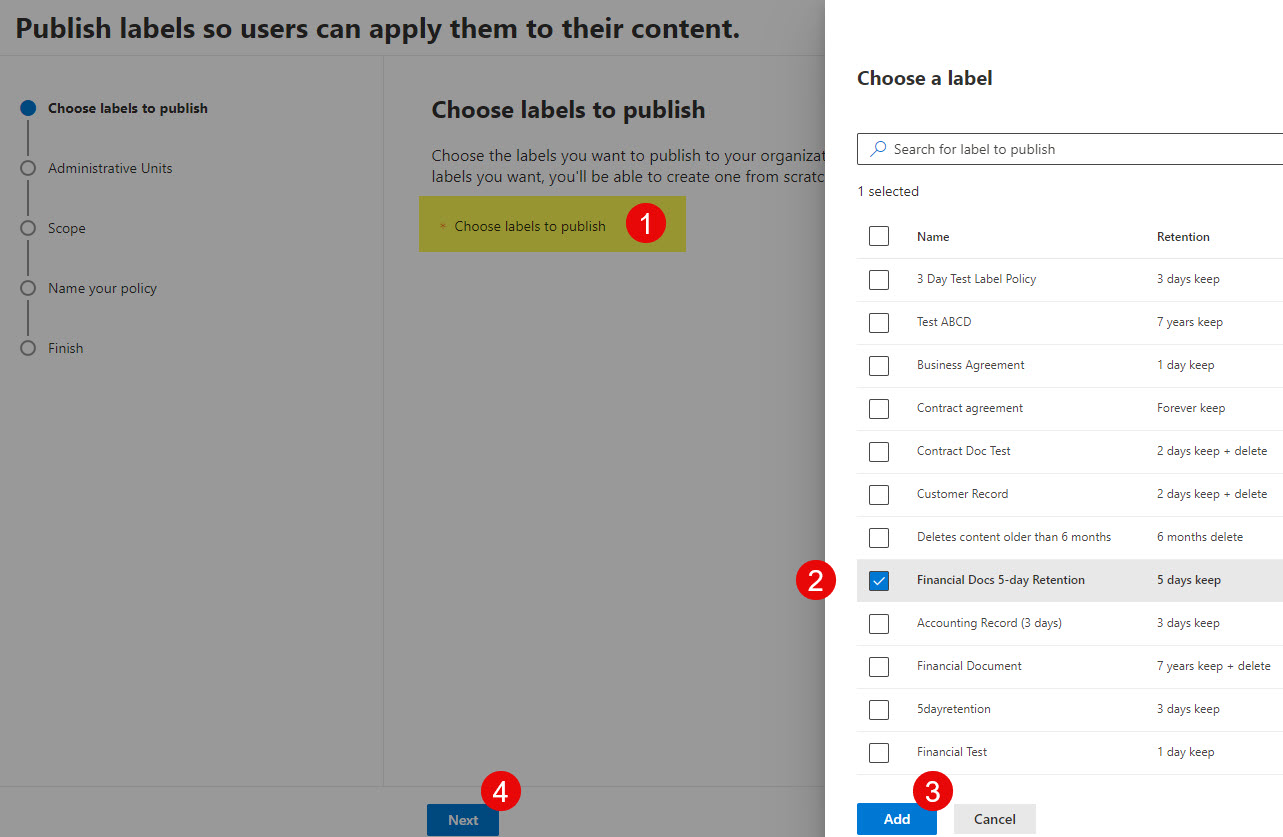
- The next screen is optional and really only applies to large organizations. This is where you can select Admin Units. Admin Units make sense if you have large organizations and have different compliance officers responsible for different regions/SharePoint sites. To learn more about Admin Units, check out this article from Microsoft.
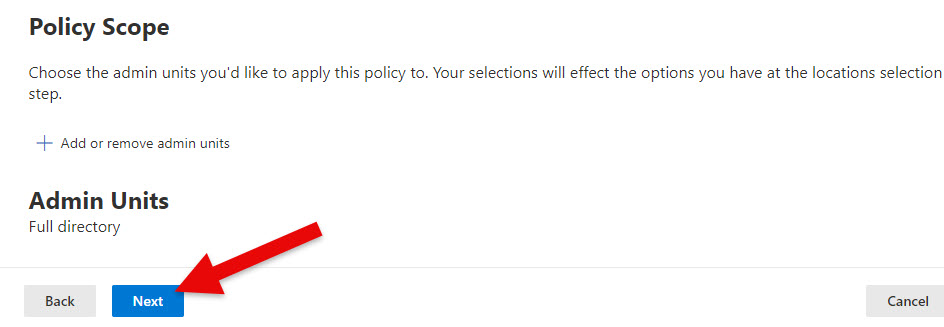
- On the next screen, you must choose the Retention Policy type to create. You can choose between Adaptive and Static Scope. With Static Scope, you will have to choose specific Sites/URLs to publish the labels to. With Adaptive Policy Scope, you will be able to specify sites based on site attributes like Site Title, Site URL, etc. I have written a separate article on the Adaptive Scope, which you can read here.
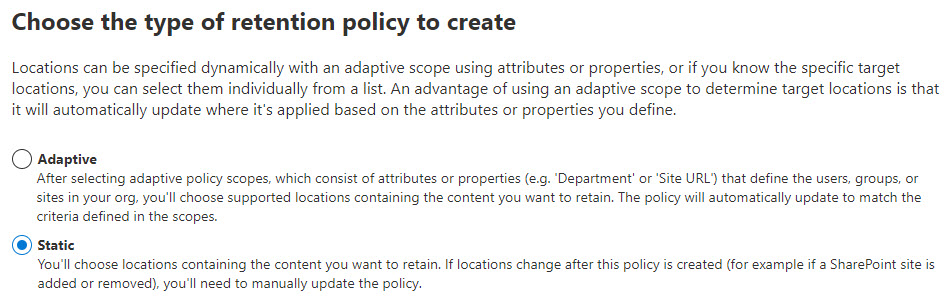
- For this exercise, I chose Static Policy Scope. On the next screen, you can choose locations to publish. You can publish labels to not just SharePoint Sites, but also to OneDrive Accounts and Exchange Mailboxes. In our case, I am publishing the label to a Team Site. Click Edit to choose a specific site(s) to publish the label to.
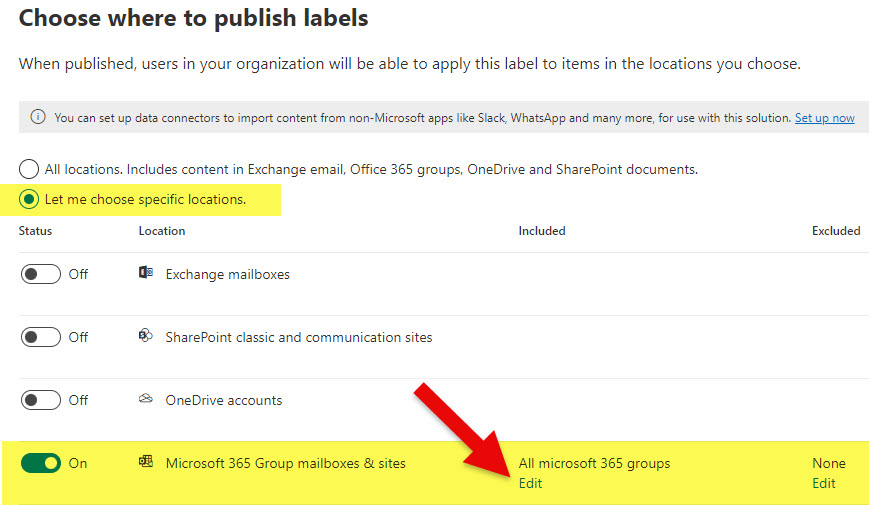
- Once the Site is chosen, click Done.
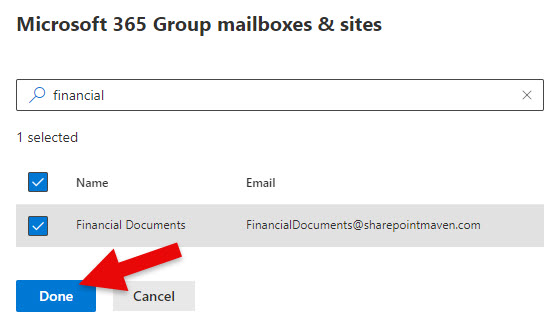
- Click Next to proceed to the next screen.

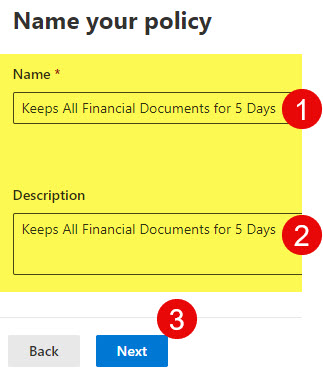
- Finally, we just need to give the Policy a name. Click Next.
- On the final screen, you just review the settings you have set up. If all looks good, click Submit.
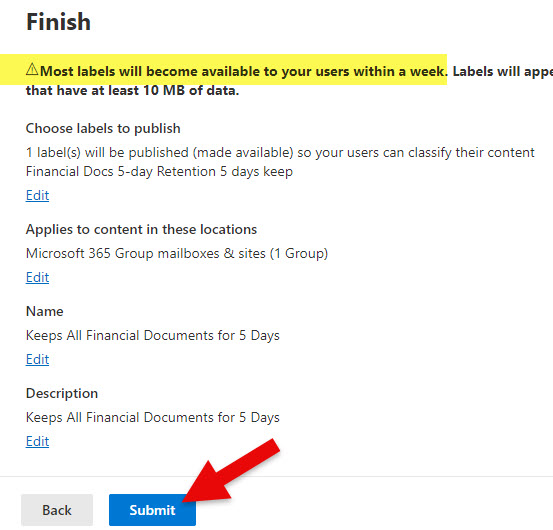
- You will then get a confirmation message telling you it might take a week to have the labels published. In reality, it might be just a day or two.

- While in the Data lifecycle management screen, click on Label policies.
Step 3: Tag the content with retention Labels
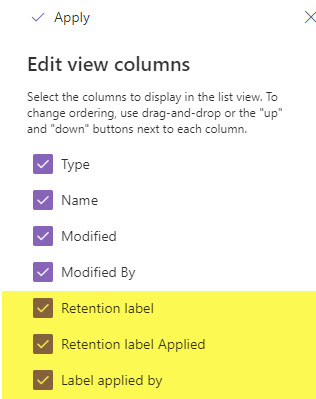
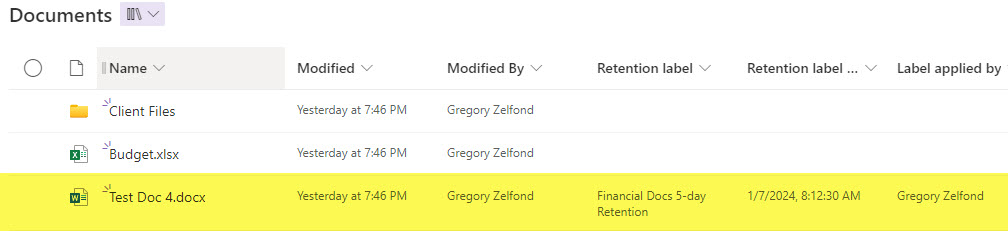
- Prior to tagging the documents with retention labels, I highly recommend that you add the below 3 labels to the library view: Retention label, Retention label Applied, and Label applied by. Those three columns will provide additional information on whether the labels are applied or not to a given document.
- To tag a document, click on the checkbox next to a document, then “i” in a circle, then choose the proper retention label under the Apply label section.
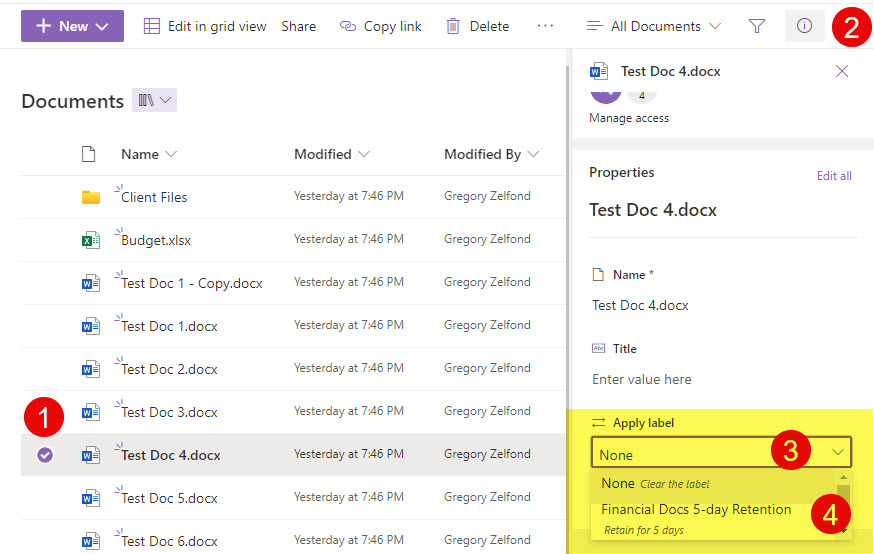
- The document will now be tagged with a label.
How do retention labels work?
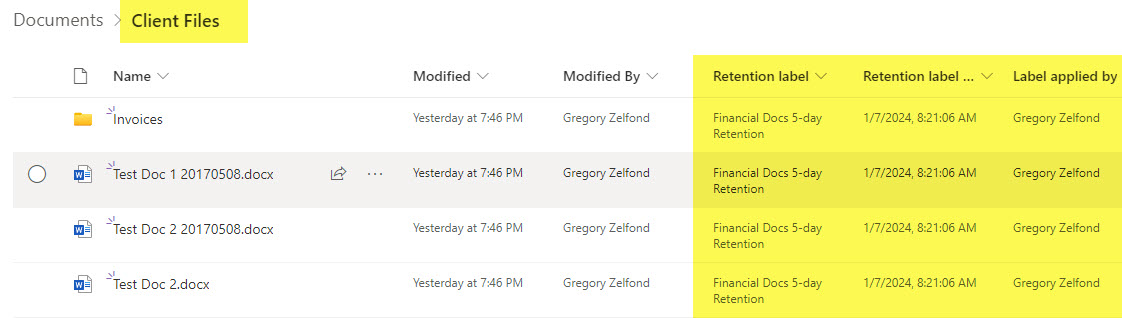
- You can apply the retention label to both a single document or an entire folder.

- If you apply a retention label to a folder, it will also apply/propagate to the contents of the folder (other files and folders inside the labeled folder).
- Users can continue editing files and folders as they normally do. That said, if they delete a document, it will go to the Recycle Bin as well as a Preservation Hold Library, which is a hidden Document Library only available to Site Owners/Admins (more on this below).
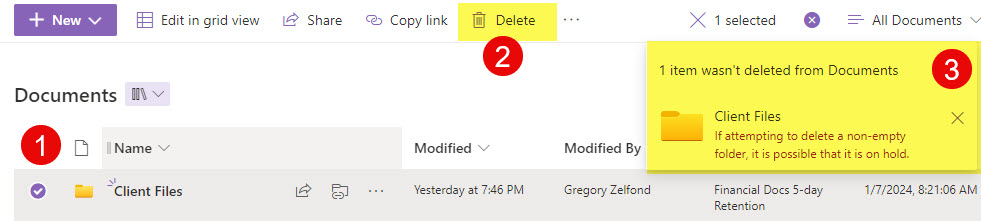
- If users try to delete a labeled folder that is not empty, you would first need to delete the contents of the folder first. Otherwise, you will receive the following message: If attempting to delete a non-empty folder, it is possible that it is on hold.
How to access Preservation Hold Library
As mentioned above, once at least one labeled document is deleted, a Preservation Hold Library is created on a SharePoint site. It is hidden and not accessible to regular team members. It is only accessible by Site Owners/Site Admins. To access the Preservation Hold Library, you need to type in /PreservationHoldLibrary at the end of the Site URL.
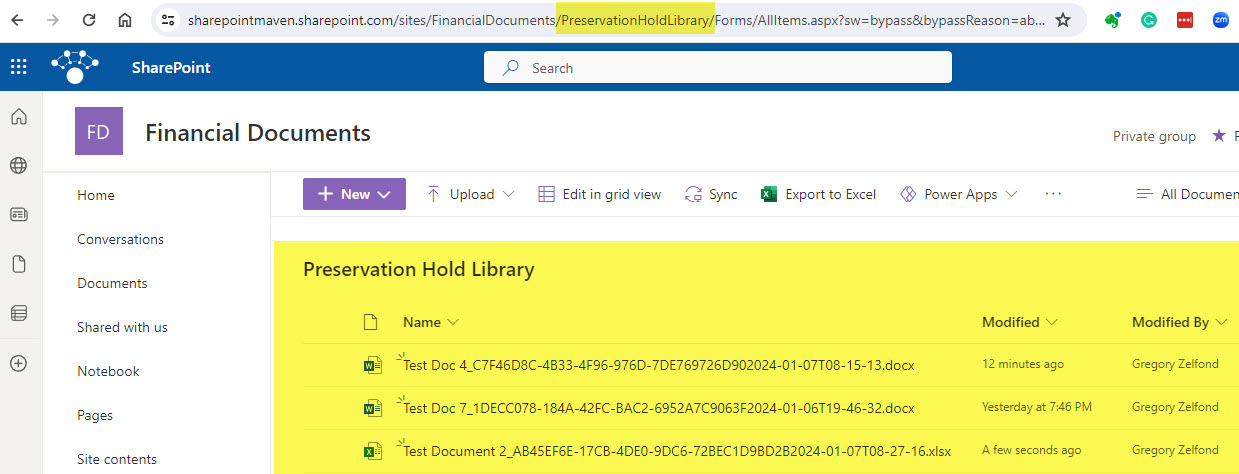
The Preservation Hold Library holds the documents that have been deleted for a period of retention in case they need to be recovered. There are many other nuances about this library, which I will try to summarize in a future article.

Share Article