15 ways to make your SharePoint Site more secure
Security is probably on every Site Owner’s mind – and this totally makes sense. As a Site or Content Owner, I want to make sure my site is not just visually appealing and has the right content, but is also secure in terms of inadvertent deletions and data loss. In this post, I compiled a list of 15 settings/features that will help make your SharePoint site more secure and will help you sleep better at night.
1. Adjust External Sharing in the SharePoint Admin Center
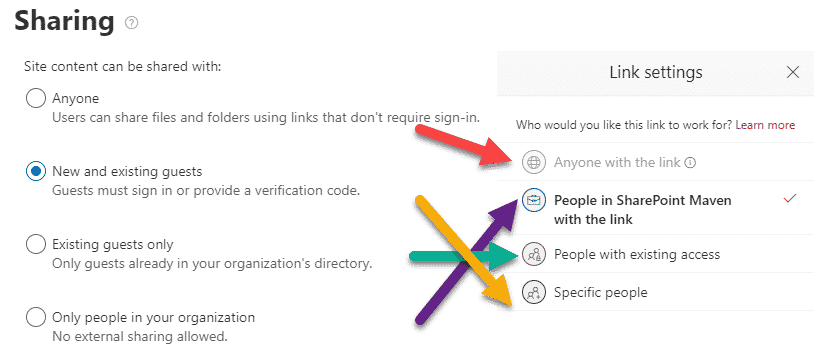
By default, all Team Sites (sites connected to Microsoft 365 Groups) are enabled for external sharing. In case the content of your site is strictly for internal consumption, why not turn off external sharing altogether on a given site? I documented how to achieve it in this post. This will prevent the users from sharing the site and its files and folders outside of the organization, preventing an inadvertent data loss.
2. Limit sharing by domain
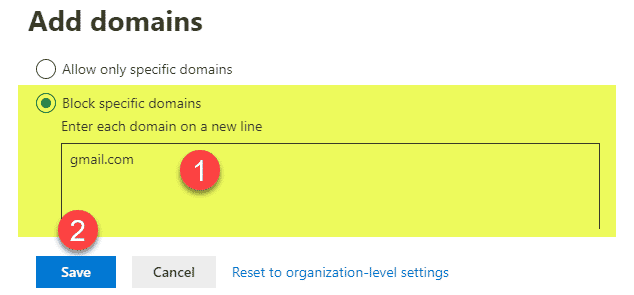
In case external sharing is necessary, you can allow such sharing to designated/trusted domains (i.e., from your clients or vendors), while preventing others. For example, you can prevent sharing to gmail.com or yahoo.com domains for a given site. Such a setup might help prevent unnecessary sharing of data. I documented how to set it up here.
3. Configure Admin Sharing Settings and default link permission
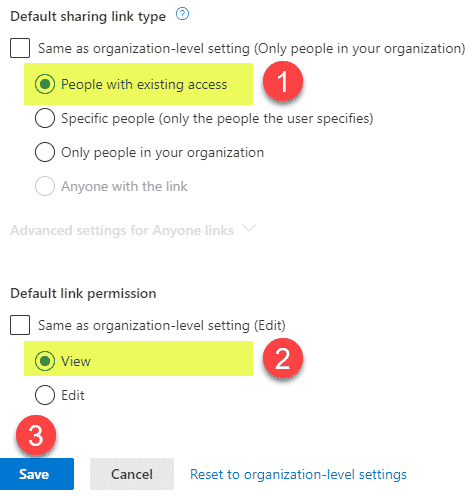
While you are in the SharePoint Admin Center, you can also control the default sharing links. Just like with external sharing, you can control this at the site level as well. For example, if you change the link type from the default “People in your organization” to “People with existing access,” you will disallow generating links to files and folders that might give access to those who do not have access to the site already. In addition, you can also make the generated link “view only” by default, preventing unnecessary edits by mistake.
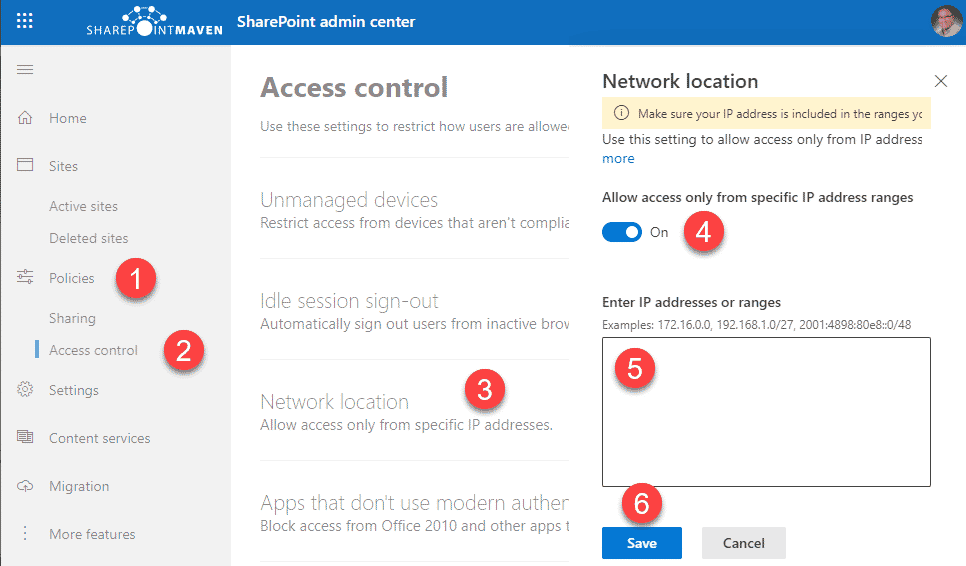
4. Specify Network Location/IP Address in Admin Center
Another thing that might help make your SharePoint Site more secure is to designate approved IPs where the SharePoint site could be accessed from. This one might not be practical anymore given the current work-from-home trend, but in case you have designated locations/offices where the site should be accessible from, this might be worth considering.
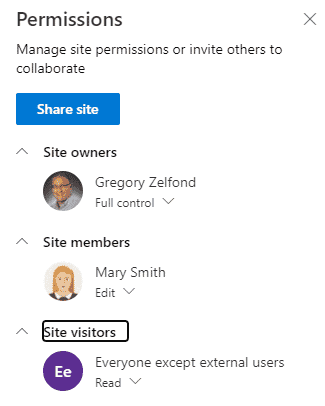
5. Set up proper security for a site
A very important aspect of making your SharePoint Site more secure is to set up proper security. Too often, I see users having privileges much higher than what they need. If your users just need to edit content, they do not need Full Control. If the users just need to read and download – Visitors Group is all they need. Make sure to understand how security and permission levels work first.
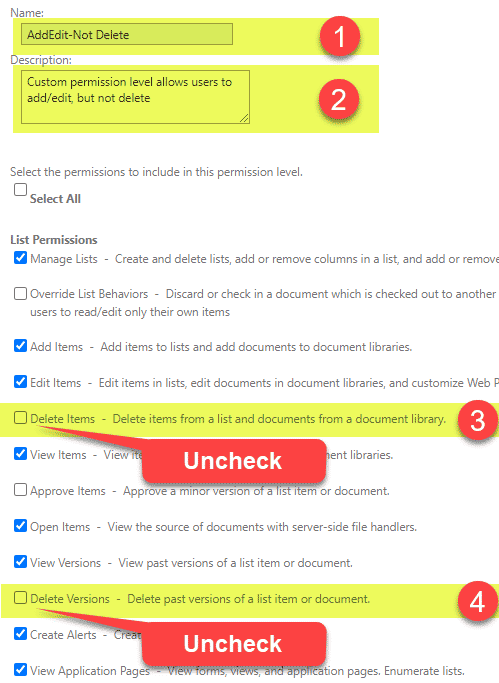
6. Create a Custom Permission Level if necessary
Sometimes, creating a custom permission level might be necessary. For example, if you want your users to add/edit documents, but not delete, you will need to create a custom permission level. Though I personally do not support straying from OOTB setup – sometimes this might be necessary. In case you are looking for instructions on how to set up custom permission levels – check out this post.
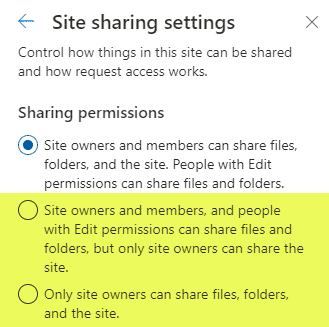
7. Adjust Site Sharing Settings
Once you set up security for the site, you absolutely have to adjust the Site’s sharing settings. By default, any site member (those with Edit privileges) can share the whole site with anyone they wish. Which kind of means that whatever security you set up for the site almost doesn’t matter unless you also adjust site sharing settings and prevent users from sharing the site or its files and folders. I explain this in greater detail here.
8. Prevent page editing
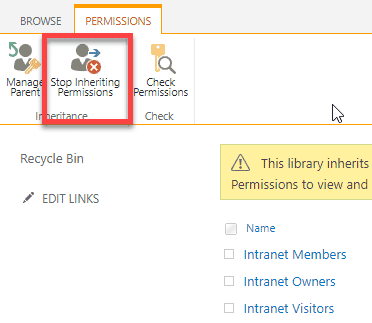
Sometimes you want your users to edit documents, but not mess with the other aspects of the site (i.e., be able to edit pages). In such a situation, you would need to break inheritance between the Site Pages library and the site. You can find the instructions on how to achieve this here.
9. Prevent Doc Library sync
A lot of accidental deletions and data loss occurs when users decide to sync the document libraries to their computers locally and then decide to “clean” their C: Drive. I explained this phenomenon here. So might not be a bad idea to disable sync on certain libraries as well – detailed instructions on how to do this are here.

10. Enable Audience Targeting
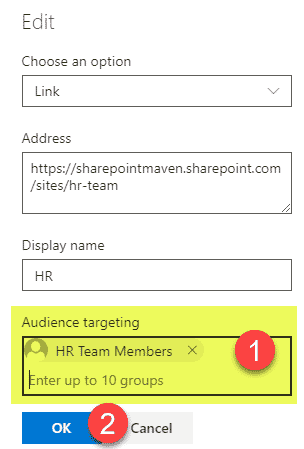
Audience Targeting is not really a security feature, but allows to display the content to the user based on their role/security group. So in a way, it “hides” the stuff the users do not need to see. You can set an audience targeting on navigation, documents, and pages. Please reference this article to learn how to set all of them up.
11. Enable Retention policies on a site
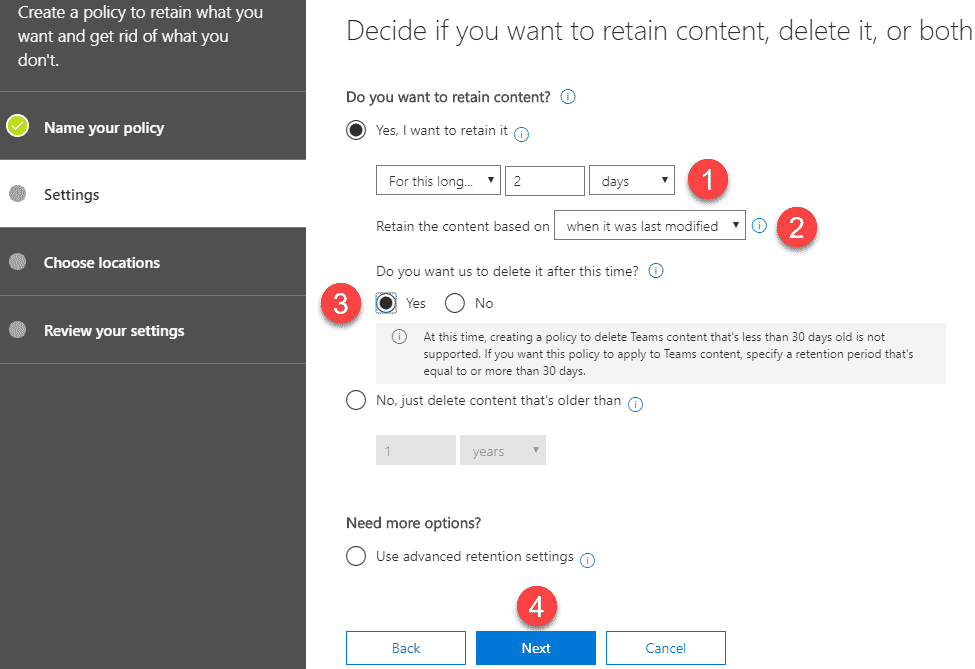
A very solid option to prevent data loss and inadvertent deletions is to enable Retention Policies. You can apply retention policies at a site level or via labels at a library/folder/file level. I provided step by step instructions here for site level policies and here for label-based policies.
12. Data Loss Prevention Policies
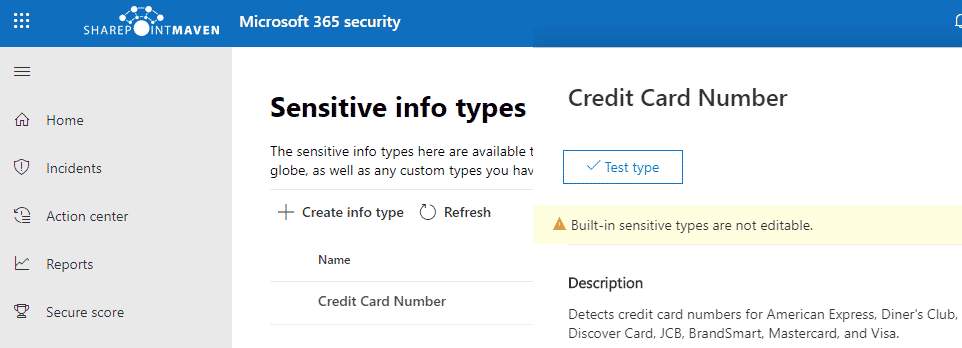
You can go one step further and apply data loss prevention policies to prevent certain actions like printing, sharing, or downloading of content based on certain criteria (i.e., financial or personally identifiable information). In such cases, you would need to set up Data Loss Prevention policies. Please reference this article from Microsoft for additional info.
13. Configure settings in Teams
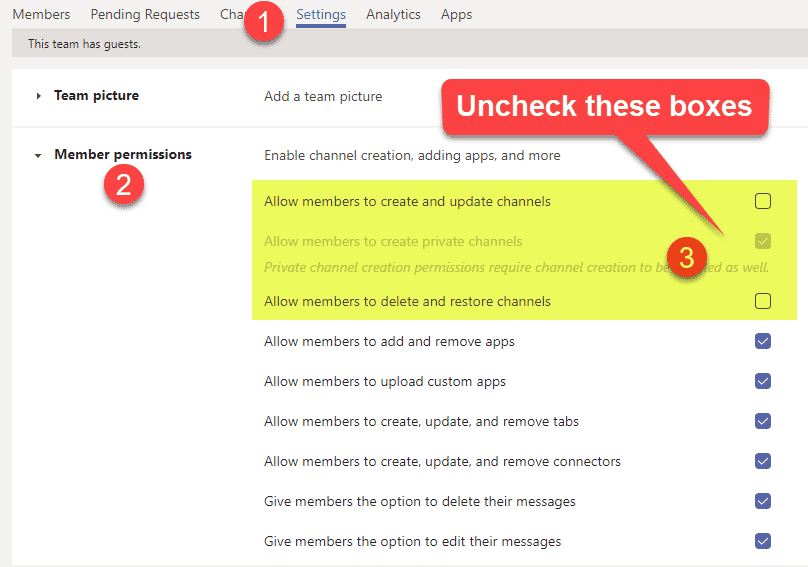
Many SharePoint sites these days are created and being used as part of MS Teams. By default, Teams are pretty liberal in terms of what team members can do (i.e., Team members can create and delete channels, for example). Since these actions, in turn, create a folder in a site (for a standard channel) and a separate site altogether (for a private channel), you might want to restrict the ability for members to do this freely (since deleting a private channel, for example, deletes the site as well).
14. Do not make everyone an admin
The reason I have this point here is that this happens way too often. No, your site or Teams does not need 5 Owners with Full Control. Full Control means you can delete a site, shall I say even more? Here is a nice article to read on the subject.

15. Training
All of the above points provide different technical means on how to make your SharePoint Site more secure. But nothing will do a better job and provide the best Return on Investment than Training. Your users need to understand the consequences of external sharing or syncing. Or know how long they have to recover deleted items from the Recycle Bin. If I was given a choice to choose just one item from the list of the 15 I documented for you here – Training would be the one I would choose over the others. Please, please, please do not ignore it and make sure your staff understands how SharePoint works! Trust me, this will make your SharePoint most secure right away!
Staff Training is the most effective way to make your SharePoint Site more secure

