4 places where you can enable Audience Targeting feature in SharePoint
If you are building an Intranet or some sort of communication hub within your organization, I am sure you would want to personalize the experience for your visitors and feed certain content depending on the role of the users logged in. Luckily, we can now do that, thanks to the recent improvements in SharePoint Online. In this article, I would like to explain what the Audience targeting feature in SharePoint is all about, and all the places where you can set it up.
What is Audience Targeting?
Audience Targeting is the ability to personalize content to the users depending on their role/security group they are in. The idea is that you would specify Audience Targeting, say for a document, or a news post, and then only those documents or news posts would be shown to the users on a given SharePoint page.
As of the writing of this post, you can set up an Audience Targeting in the following areas in SharePoint:
- HCWP Web Part Audience Targeting – click here for instructions
- Navigation Audience Targeting – click here for instructions.
- News Web Part Audience Targeting – click here for instructions.
- Quick Links Web Part – instructions at the bottom of this post
Audience Targeting vs. Permissions in SharePoint
Permissions determine whether or not you have access to the content. For example, if you have a SharePoint Site – the presence of a user in a site security group determines whether or not the user will have access to the site and all its contents like news posts and documents. In contrast, Audience Targeting allows displaying the above information to the user on a given page, assuming the user has access (permissions) to this content.
Permissions is about making sure IF users have access to certain content. In contrast, Audience Targeting is about WHO will see that content.
Where to enable the Audience Targeting feature in SharePoint
1. HCWP Web Part
The first location to take advantage of the Audience Targeting would be an HCWP web part combined with a document library. A given user might have access to all the documents in a document library somewhere on a SharePoint site, but when you use HCWP Web Part to display/roll up documents from that library and have Audience Targeting enabled, just the documents where you were included in Audience Targeting will show up on a given SharePoint page. Please reference this article for additional information and step-by-step instructions on how to set this up.

2. Site/Hub Navigation
Another place to take advantage of Audience Targeting is Navigation. The user can have access to all the sites in your hub. However, if you enable Navigation Audience Targeting, say, on your Hub Navigation, then the user won’t see the links in the navigation if the user is not in the group that the links were targeted to. You can also set Audience Targeting on local site navigation as well, though I expect it to be a less common occurrence than the Hub one. Check out this article for more info.

3. News Web Part
Same idea with the News Web Part. If a given user navigates to the Site Pages library on some SharePoint site, he/she will see all the news posts that exist and were ever published. However, if Audience Targeting has been set on the Site Pages Library and the News Web Part, then the user will only get to see the news posts that were targeted to him/her on a given SharePoint page/News Web Part. Here is a post that explains this further as well.

4. Quick Links Web Part
We can now set Audience Targeting on Quick Links Web Part as well. Just like with the News posts, you might want specific links to be visible by a select group of users only and not everyone else. Here is how to make it happen:
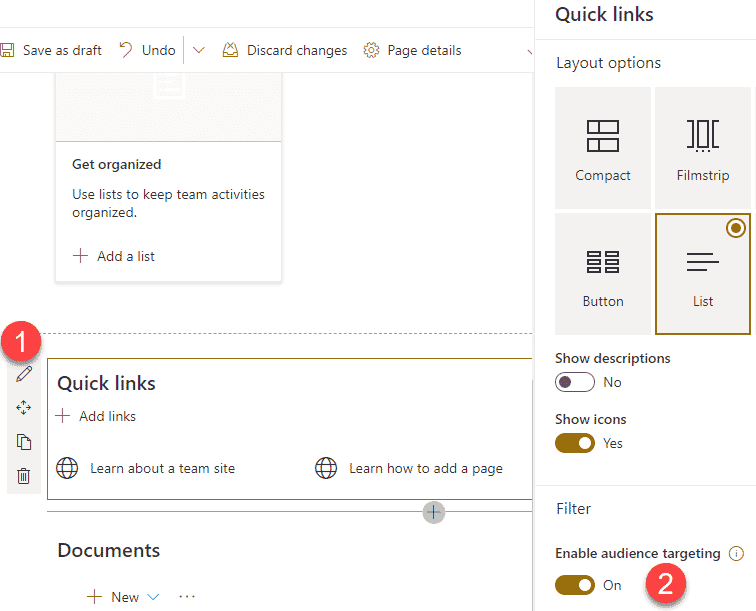
- Click the pencil icon next to the Quick Links Web Part, then toggle Enable audience targeting switch on
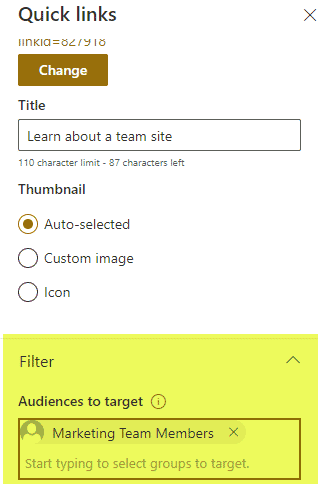
- Next, when editing a given link, scroll to the bottom of the side panel and specify the security group(s) that will see the link. If you leave it blank, the link will be visible to everyone. If you specify security groups, only those groups will see the link – it will be hidden from others. You can select up to 50 security groups, and you can use any security groups other than a distribution list (click here to learn more).


Think of Audience Targeting as permissions on a VIEW of the content in addition to the permissions of the content ITSELF.
I would equate Audience targeting to advertisements online. When you visit your favorite store online and search for, let’s say, shoes, you can find the shoes you need by searching the online store – that would be the equivalent of permissions. However, right on the homepage of the store, you might see ads for certain shoes that the store wants to sell you – that would be Audience Targeting.
It is also worth noting that you need to have permissions to the content for Audience Targeting (display of info) to work. If you do not have permission to access the content, you obviously do not have access to view it once Audience Targeted. I hope that makes sense.

Share Article