How to set security on links in the Hub Navigation using Audience Targeting
In this article, I would like to explain how you can use the newly released Audience Targeting feature to personalize your Hub Navigation. Up until recently, this was not possible. Historically, we could set security on sites, folders, documents, pages, and hide them accordingly. We never had to worry about links, though, since they were always permission-driven. However, with the release of Hub Sites, that behavior has changed, and we “lost” the ability to hide links according to user access. Well, now we do have that capability again, so let me explain how to set security on links in the Hub Navigation using Audience Targeting.
Background
Just as stated above, Hub site navigation is not permission-driven. What that means is that if you added a link to a Private Human Resources Site in your Hub navigation, everyone, by default, would see the link, whether they have access to the site or not. Yes, they would get access denied in case they were not part of a site, but they would still see the link. Recently, however, Microsoft added Audience Targeting functionality, which is, in pure English terms, a security setting on a navigation link!
How to enable Audience Targeting in Navigation
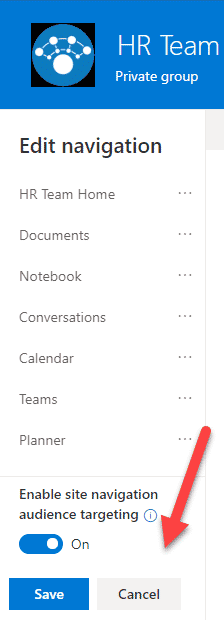
- In the Hub Navigation, click Edit link

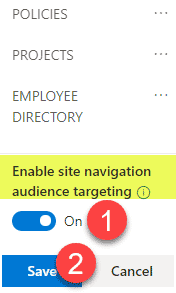
- At the bottom of the navigation panels that open up on the left-hand side, under Enable site navigation audience targeting, switch the toggle to On (it is off by default), then click Save


How to set security on links in the Navigation
- Once the above step is completed, you can now set security on links in the Hub Navigation using Audience Targeting. To do that, edit the Hub Navigation again.
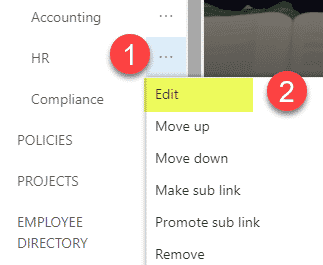
- Click three dots (ellipsis) next to the links where you want to set security, then Edit
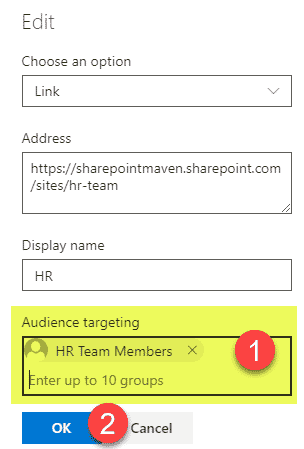
- On the next screen, choose the name of the security group that will see the link in the navigation. It could be any of the security groups you have in your tenant (Active Directory Groups, Mail-enabled Security groups, Microsoft/Office 365 Groups). Click OK
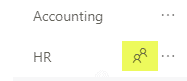
- You will now see the “users” icon appear next to the menu label – meaning that Audience Targeting has been set on the link/label.
- It might take a while for changes to propagate. The link will now be visible only to a select group of users.


Notes
- You are only allowed to enter up to 10 security groups for each label/link
- In case you are using a Microsoft/Office 365 Members Group for audience targeting, that includes Group Owners too! So, say, HR Team Site (which is a Microsoft/Office 365 Group) has Mary as a Team Member and John as the Team/Group Owner. Though you can only add Team Site Members group in Audience Targeting, it will include John as well.
- In case you are using sublink (hierarchical) functionality in your navigation where you organize links one under another and setting up Audience Targeting on the parent link, make sure you give all necessary parties “Audience Targeting access” to the parent link. If users do not see the parent link, they will not see any sublinks underneath – hopefully, this makes sense
- Though I used Hub Navigation (which is where Audience Targeting will be mostly used) as an example, Audience Targeting is also available in the local site navigation (left-hand-side navigation on a Team Site and top navigation on the Communication Site)


Share Article