How to Create Site Retention Policies in SharePoint Online
I wrote several posts on retention policies and labels in the past. However, this was in the early days of the Compliance Center. Over the years, many significant changes were made to the user interface and steps involved. Not to mention that the Compliance Center was rebranded to Microsoft Purview. So, what I would like to do in this article is document the steps involved when it comes to setting up retention policies on SharePoint Sites and its content.
Why do you need to set up retention policies on SharePoint Sites?
There are many reasons why you might want to consider setting up retention policies on SharePoint sites. Here are a few:
- Legal Obligations: You might be required by law to keep certain documents for a certain period of time (i.e., all financial records have to be kept for 7 years)
- Prevent inadvertent deletions. You might want to consider retention policies if you are concerned about inadvertent deletions by your users and want to go beyond the 93 days we have for the restore period in the Recycle Bin
How to Create Site Retention Policies in SharePoint Online
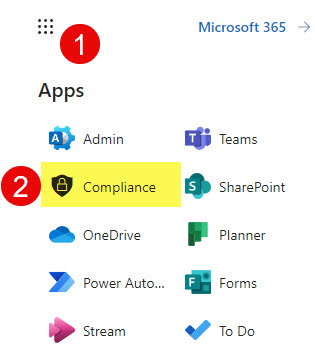
- From the Microsoft 365 App launcher, click on Compliance
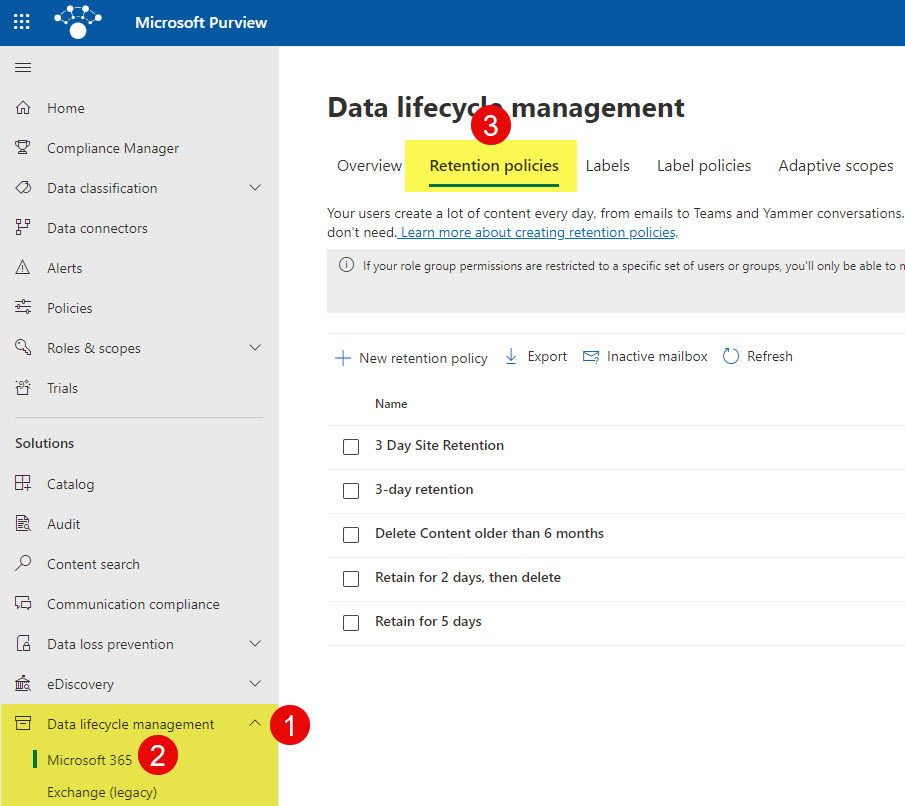
- You will end up in Microsoft Purview. From there, under Data lifecycle management, click on Microsoft 365. Then, on the Retention policies tab.
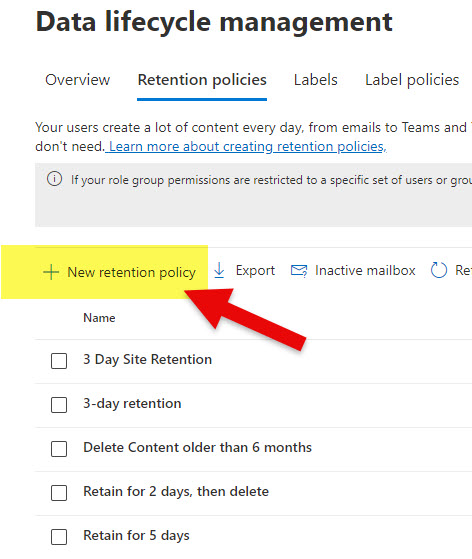
- To create a new policy, click on New retention policy
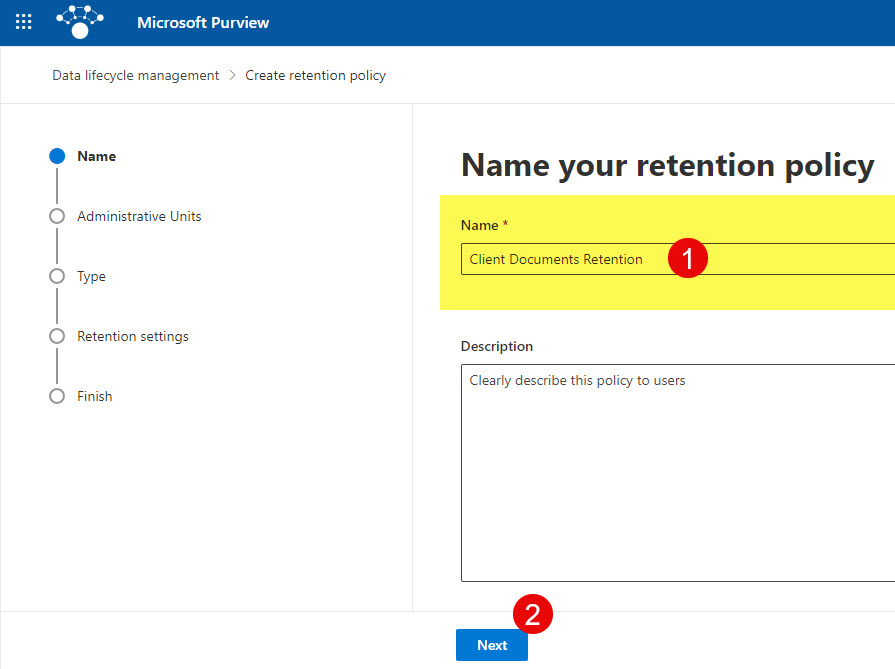
- Give your policy a name, then click Next.
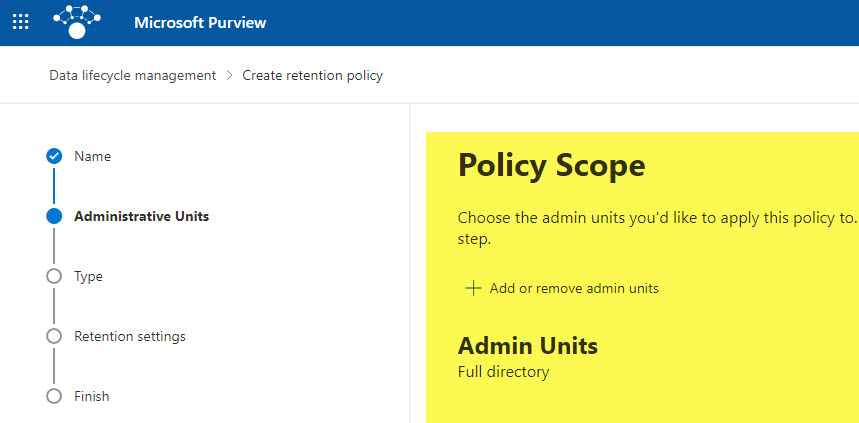
- The next screen is optional; this is where you can define Admin Units to your policy. Admin Units are handy with large organizations where you might have different departments responsible for different countries/regions and, thus, different sites. If you are a large organization and have set up Admin Units, you can apply them here. To learn more about Admin Units, check out this wonderful post from Microsoft.
- On the next screen, you have to choose the type of policy you would like to create: Adaptive or Static. Static policy scope means that you would need to select specific sites to apply the policy to. Adaptive policy scope means that you can dynamically assign a policy based on some attributes of a site (i.e., Site Title, Site URL, etc.). I explained how Adaptive Policy Scope works in this article.
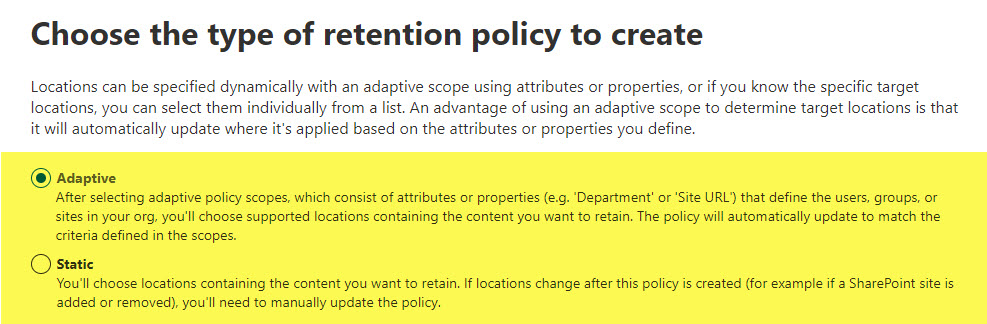
- If you choose Adaptive Policy, you must select it on the next screen.
- For this article, I chose Static policy scope.
- On the next screen, you have to select locations where you want to apply the policy to. You are not restricted to just SharePoint sites; you can also apply the policy to Exchange mailboxes.
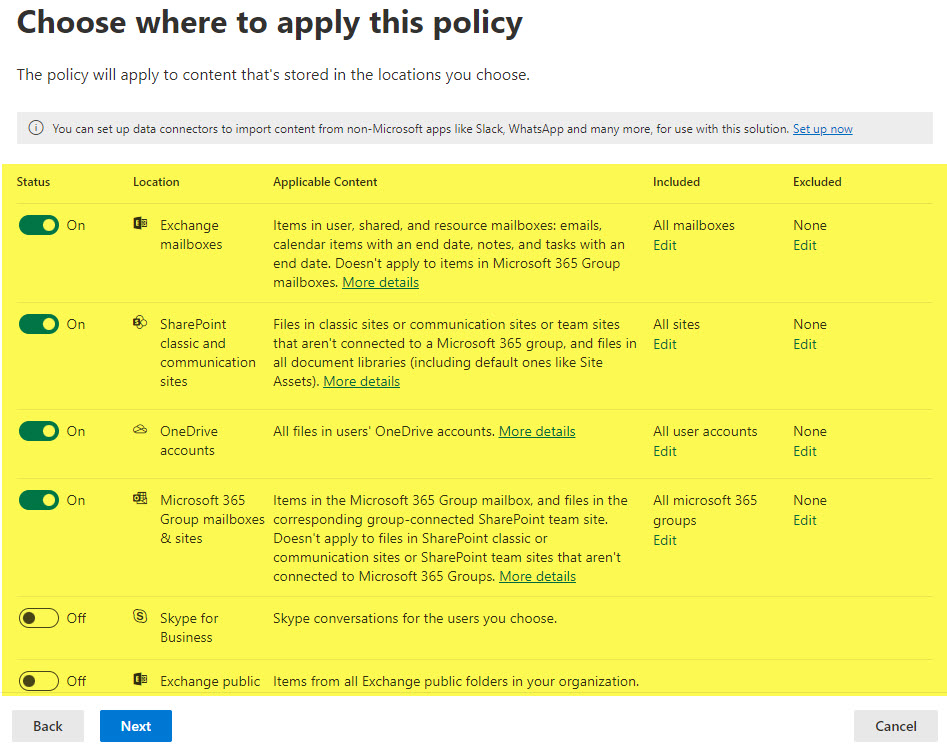
- In our case, we are applying a policy to the SharePoint site. A few options are available – depending on whether the site is connected to a Microsoft 365 Group or not.
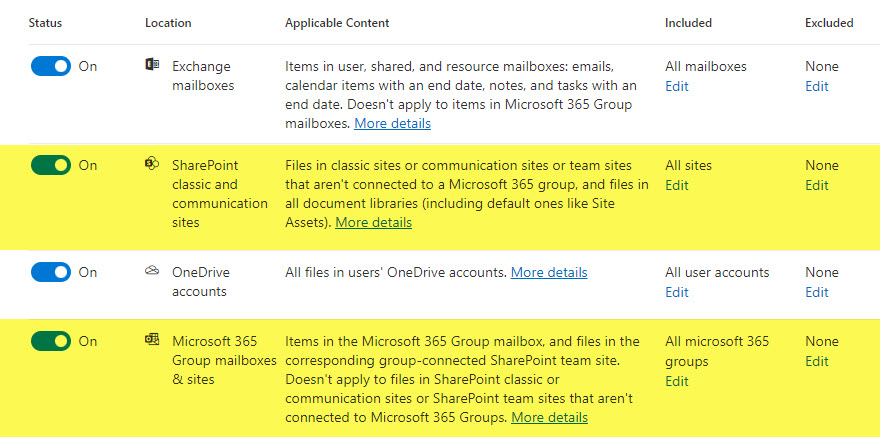
- In our case, I have a Team Site Connected to a Microsoft 365 Group, so I am choosing the option below. It defaults to all the group sites, but in my case, I only want to apply it to just one site. Click Edit.

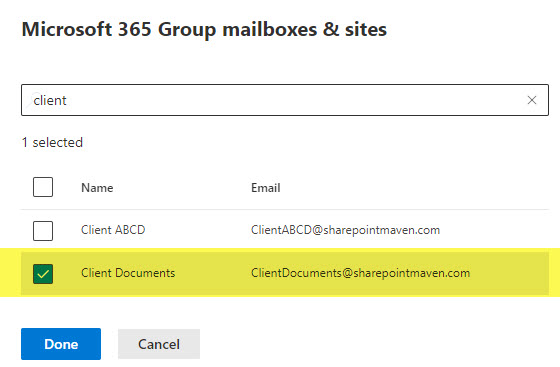
- On the next screen, select the site you want to apply the retention policy to.
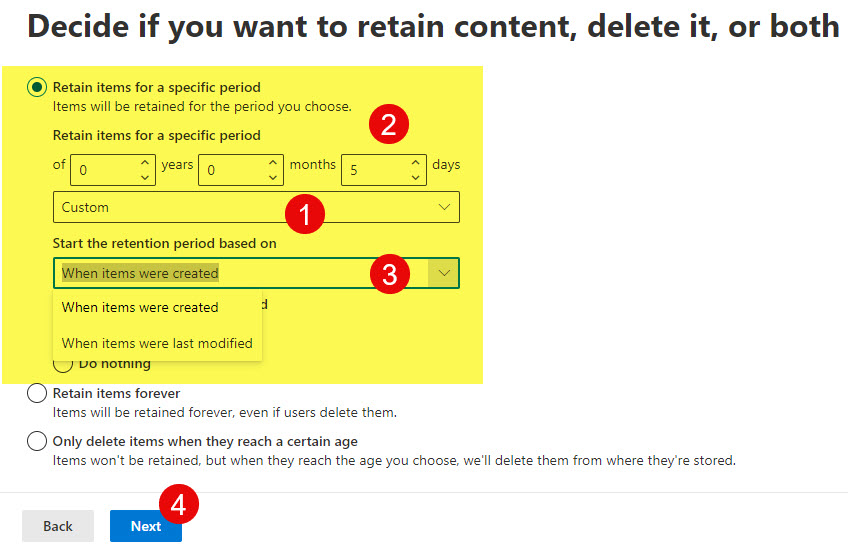
- On the next screen, you need to specify the retention period. You can either retain items forever or retain them for a specific period. You can also create a policy to delete items after a certain period.
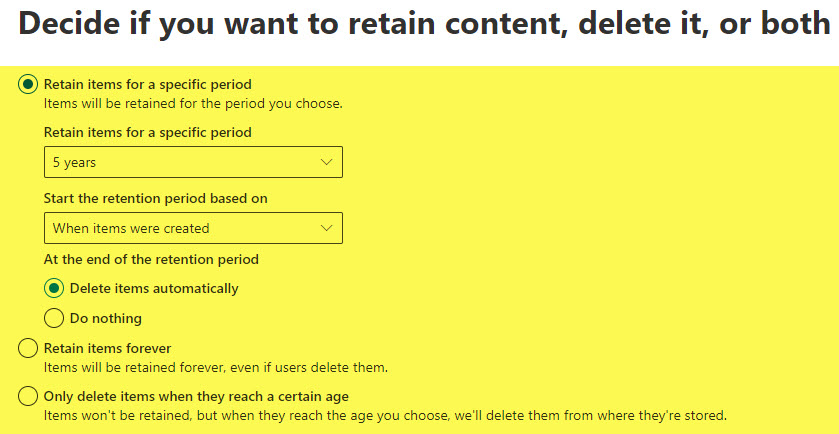
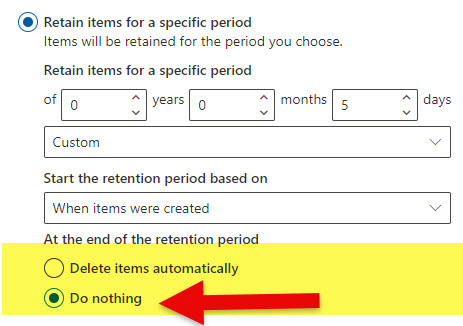
- In my case, I am setting up a retention policy just for 5 days. You can also specify what will count as a start to the period. Click Next.
- On the screen above, you can also specify what will happen once the retention policy expires. You can either choose between Nothing or have items deleted automatically after the retention period expires.
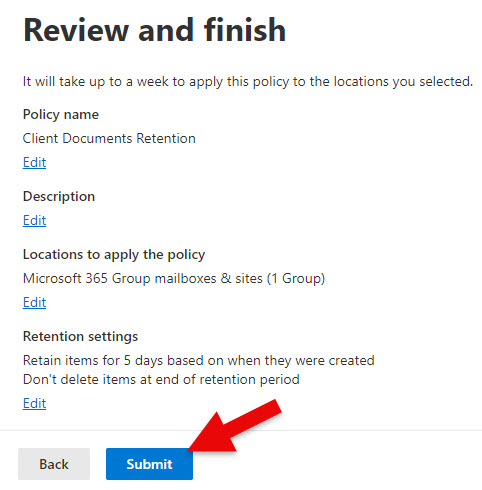
- On the next screen, you can review the policy before publishing it. If you are OK with everything, click Submit.
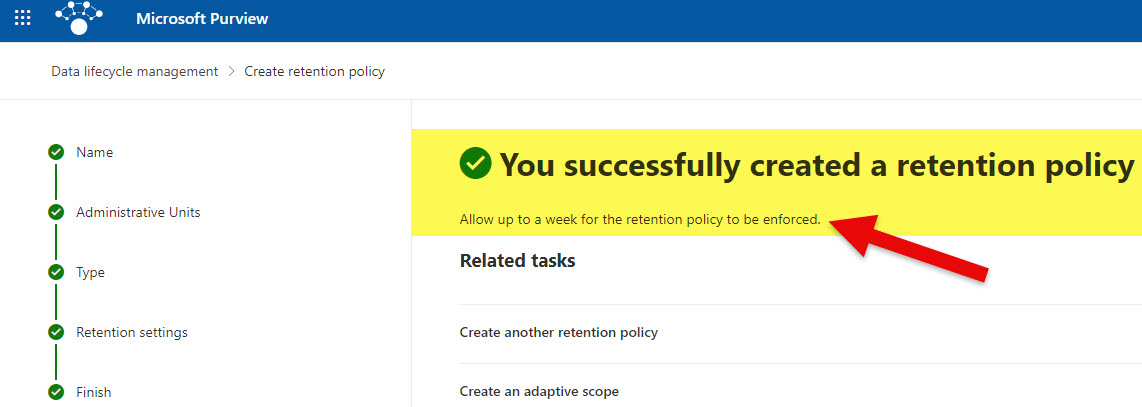
- At that point, the policy is being published to your chosen locations. Please note that per the message below, it might take up to 1 week for it to take effect.
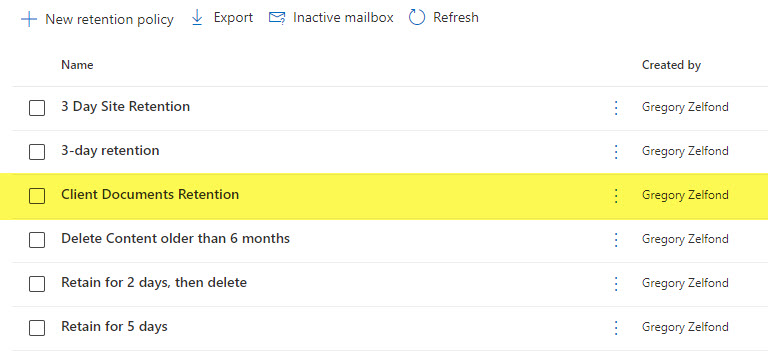
- And you will also get to see the policy appear in the dashboard/list of policies you created.
What happens after you publish a Retention Policy on a SharePoint Site
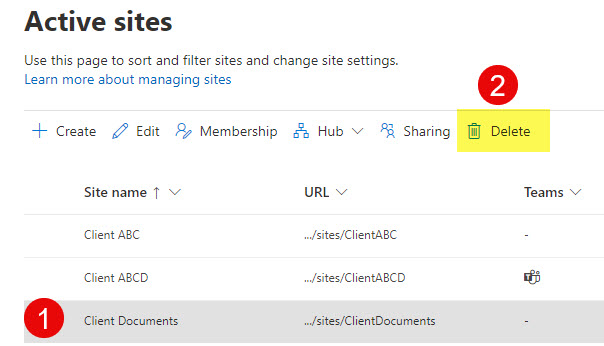
Can’t Delete a SharePoint Site
If you try to delete the site either from the SharePoint Admin Center or the Site itself, you will not be able to do so. It will display an error message: “A compliance policy is currently blocking this site deletion.”
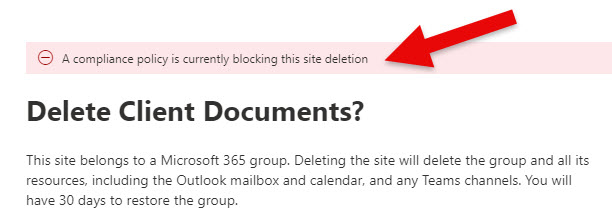
An error message when trying to delete a site from the SharePoint Admin Center
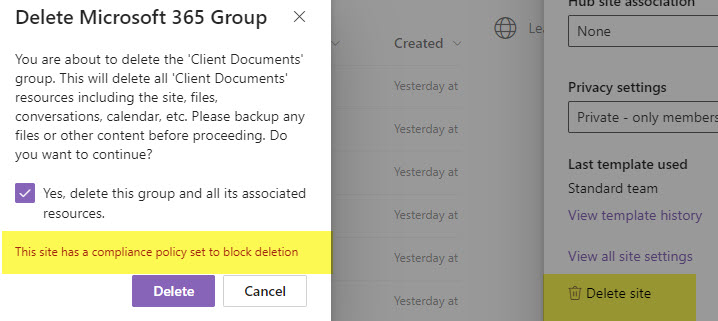
An error message when trying to delete a site from the Site Information Panel
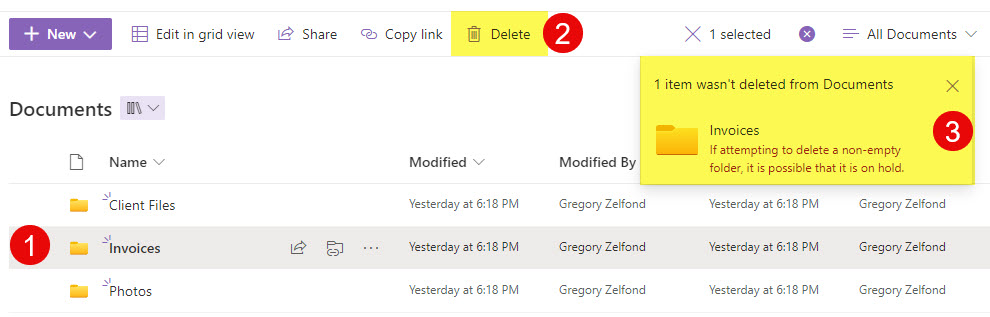
Can’t Delete Non-Empty Folders
You cannot delete a folder if it contains subfolders or files inside. If you are trying to delete a folder that is not empty, you will receive the following error message: “If attempting to delete a non-empty folder, it is possible that it is on hold.” To be able to delete that folder, you would need to delete its contents first.
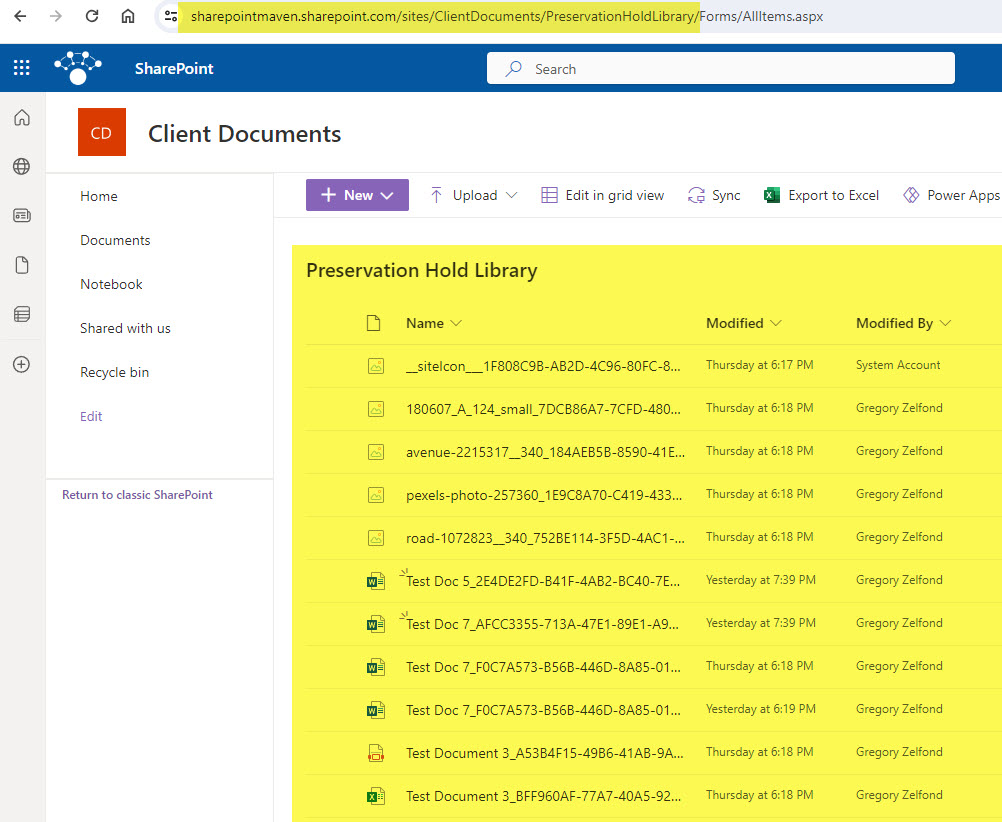
Preservation Hold Library is created
One other significant change that occurs once the site retention policy is applied and at least one of the documents is deleted is the creation of a Preservation Hold Library. It is a special document library that houses all the deleted documents for the duration of retention. You will not find this library if you click on Site Contents. To navigate to it, you must type in the following after Site URL: /PreservationHoldLibrary.
How does a Retention Policy on a SharePoint site work?
- During the retention period, the document deleted from the document library is sent to the Recycle Bin. At the same time, a copy is also sent to the Preservation Hold Library.
- Once the retention period expires, the document deleted from the document library is just sent to the Recycle Bin.
Additional Reading
Many scenarios might arise when you publish a retention policy to the SharePoint Site. I will try to expand on the topic in future posts, but in the meantime, I highly recommend this article from Microsoft as well for additional details on retention, the behavior of the Preservation Hold Library, etc.

Share Article