How to upgrade from classical wiki pages to modern pages in SharePoint
One question I often get lately from my loyal blog followers is how to upgrade from classical Wiki pages to modern pages in SharePoint. As I blogged a few times previously, modern pages in SharePoint are the way to go and I recommend that for all new sites you only create modern pages going forward. That said, naturally, the majority of pages created thus far for company intranet, department and project sites are classical Wiki pages.
So how do you update the page from classical to the modern look and feel? The truth of the matter is – there is no magic upgrade button available. You have to manually create the new pages with proper content. The purpose of this post is to explain the steps for you to upgrade quickly and easily.
Step 1: Say goodbye to custom themes
If you have done custom themes or development with classical wiki pages or even some CSS code, you will need to forget about those when you go with modern pages. None of the customizations you had done with wiki pages are supported in modern pages. To be accurate here, modern pages have their own customization framework, but hey, we are out of the box guys and girls, so not going to focus on this here.
Step 2: Conduct inventory of existing web parts
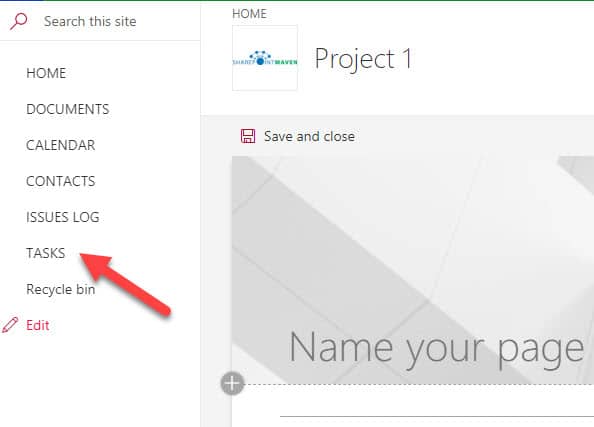
Majority of classical web parts are not supported with modern pages. For example, if you have a Task List embedded on a classical page, you won’t be able to embed one on a modern page. Same applies to Promoted Links and many others. So I suggest you conduct a simple inventory of web parts you have embedded on a page and make a decision on how to handle those with modern pages. They will fall into 2 categories:
Supported
A set of web parts will be supported in modern page experience, like a document library or a custom list.
Not supported
Not supported does not necessarily mean you can’t have it. For example, if your old wiki page had promoted links web part, you won’t find it in modern page web part list. However, you will find a similar functionality via Quick Links web part. So, separate those “not supported” web parts into two groups:
- Similar Web Part exists in modern pages and
- Similar web part does not exist in modern pages
Similar web part exists in modern pages
Great. Just map old web part to corresponding modern one. Some examples below:
- Promoted Links (old) ⇒ Quick Links (new)
- Announcements (old) ⇒ News (new)
Similar web part does not exist in modern pages
No worries. What this means is that you won’t be able to embed the web part on a modern page, but you can still have it as part of the site – just create a link to it from Quick Launch navigation.
Step 3: Come up with a list of new web parts
Just because you had Discussion Board or Newsfeed embedded on the old page does not mean you need to replicate same functionality on the new modern page. As a matter of fact, I encourage that you look into ever-growing modern page web part list and see how you can spice it up with some cool and new functionality. For example, maybe you will want to have a Yammer feed or embed a Power BI Report.

Step 4: Create a Modern Page
Exciting stuff now. Let’s go ahead and create a new page
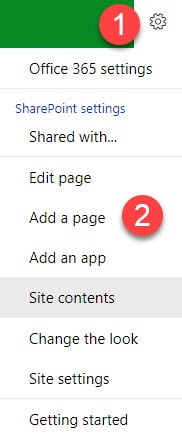
- From the existing classical wiki page, click Gear Icon > Add a Page
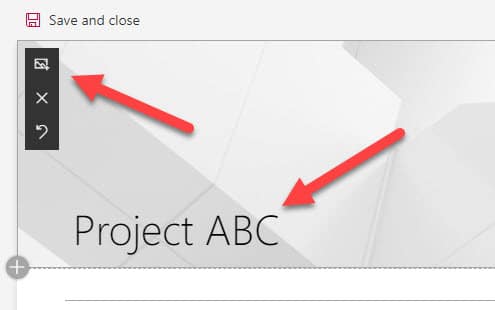
- The new modern page canvas will appear by default. Give your page a name, you can also change or delete a banner if you wish
Step 5: Change page layout
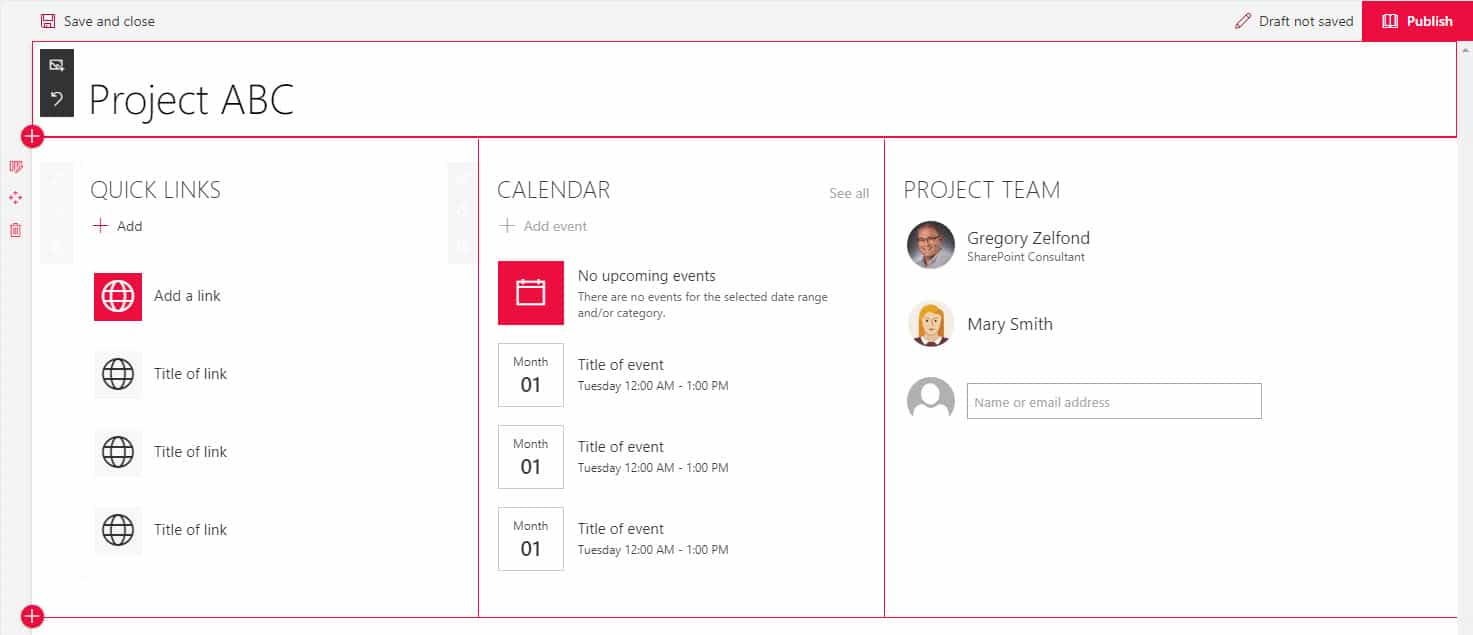
Just like with classical pages, you can change page layout and assign different zones. It is so much easier with modern pages! I usually like to do 2 or 3-column layout to take advantage of screen real estate.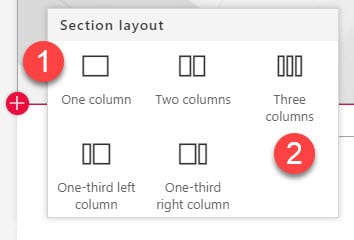
Step 6: Add Web Parts
I don’t think this step needs much explanation. Microsoft did a great job making this super easy and intuitive. If you figured out how to get breast milk as an infant, I am sure you will figure out how to add web parts to a page. Just hit the plus sign in each zone and add what you need.
Step 7: Publish the page!
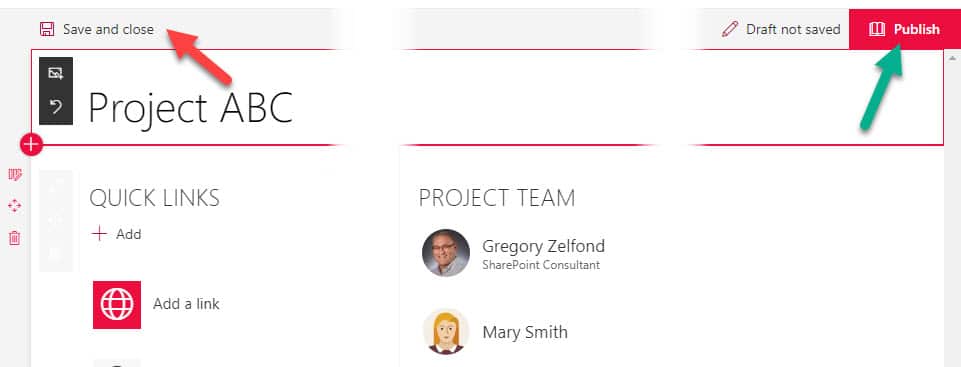
This is the most important step! Many people forget to do this. After you created a new modern page (or even after you make changes to existing one), you need to publish it to make it official. It is easy to get confused since you have both the Save button and Publish.
- Save and close – just saves the changes but does not make them available to anyone else
- Publish – saves and makes the changes available to everyone
Step 8: Make the modern page the new homepage
And we are not done yet! Though you created a new page, it is still just another page that exists at this point. You want users to click on site and make it to the modern page instead of the old classical page. So what we need to do is make the new page THE default homepage. Here is how you do this:
- Gear Icon > Site Contents
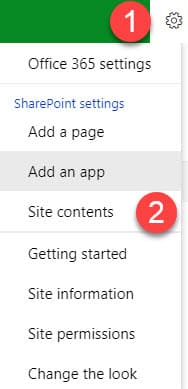
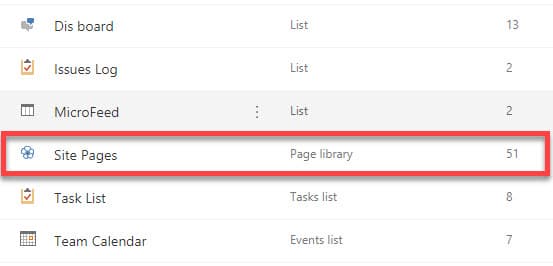
- Click on Site Pages library. This is a special document library, just for SharePoint pages. This is where all classical and modern pages you create reside.
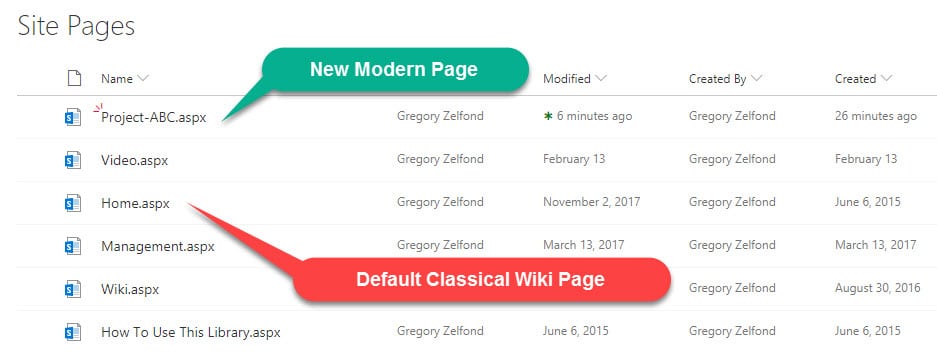
- Find the modern page you just created (should have the same name as the title you have given in Step 4).
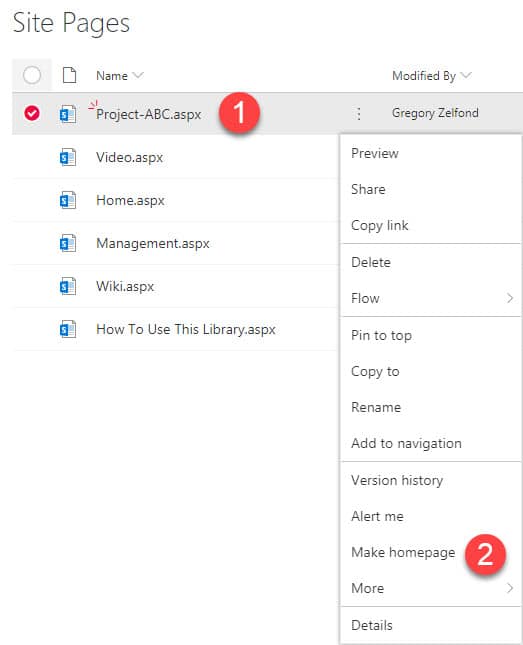
- Click the ellipsis (3 dots) next to Page Name and choose Make Homepage
- Now we are done and when you go to your site by clicking Home or just typing the address in URL – it will display the new and sexy modern page you just created!
Step 9: Delete the old page
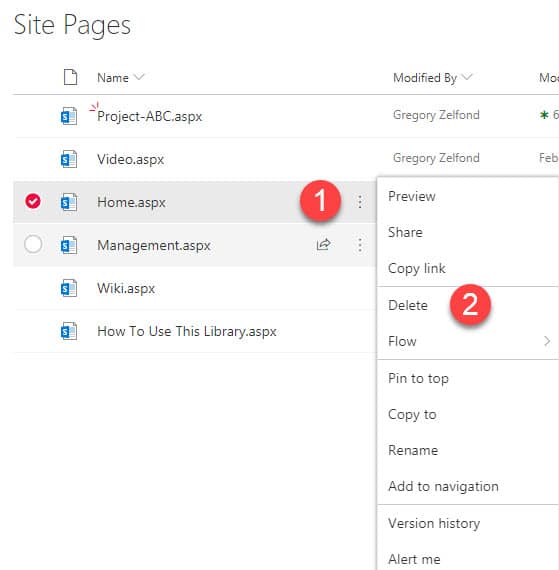
This step is optional, I never really bother with it, but if you are an OCD type, you might want to clean the house and delete the old page. Once the new modern page is in place and you are happy with it (how can you not be happy with the cool, modern page?) :-) , you no longer need the old classical one. To delete an old page, just click Delete from the pop-up menu.
By the way, I created a quick video documenting the above steps as well, check it out here:

