A cool way to display Project Phases on SharePoint Pages
I recently had a request from a client to find an interactive way to display project phases on a SharePoint page. They had a Project Management Office (PMO) SharePoint site, and they wanted to display various phases of the Waterfall project management process (Initiation, Planning, Execution, etc.), list its brief description, and document templates corresponding to each phase. So, in this article, I would like to show you the cool solution I came up with that would help you display Project Phases on SharePoint Pages.
Brief Overview of the proposed solution
Since the real estate on SharePoint pages is very limited and there is quite a bit of information to fit for each phase, I decided to use Collapsible Sections. They allow for a nice way to maximize real estate on the SharePoint page. I explained how Collapsible Sections work in this article. Then, each section is broken into multiple columns for the relevant information about each phase.
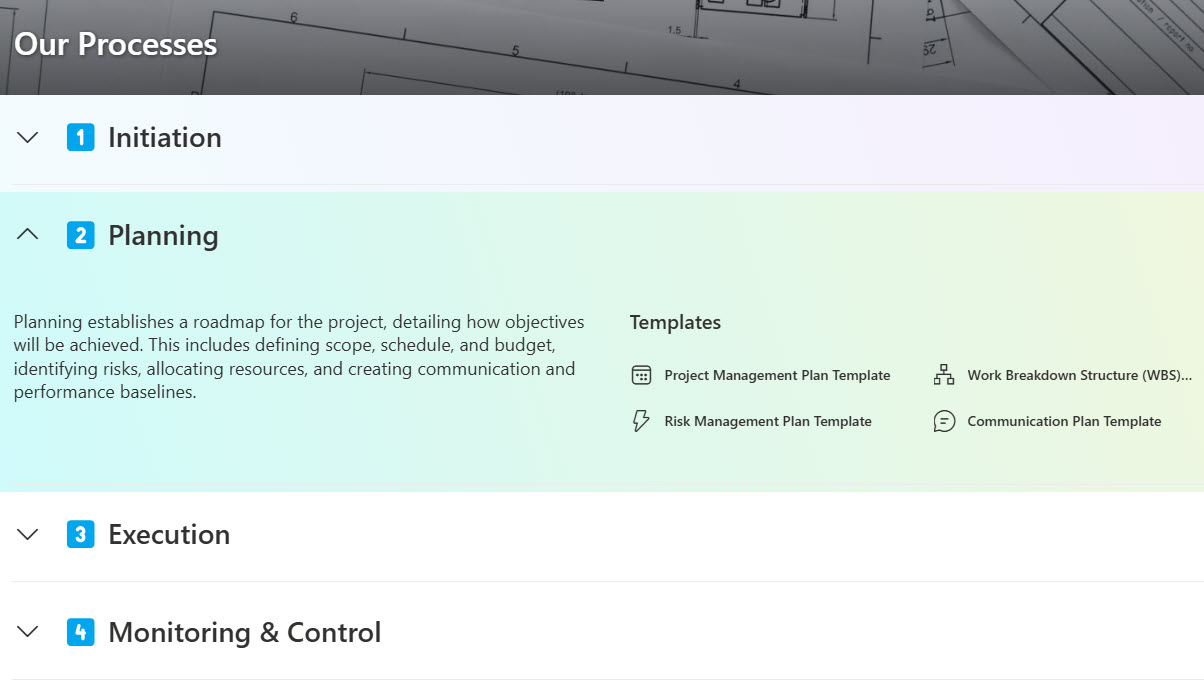
Below is an image of what the final product looks like. But let me show you how I built it.
Step 1: Define Project Phases
The first step in the process is to create a collapsible section – one for each phase. In my case, I have the following 5 project phases:
- Initiation
- Planning
- Execution
- Monitoring & Control
- Closure
Step 2: Create Collapsible Sections
- Next, we need to create a collapsible section for the first phase. For step-by-step instructions on how to do this – check out this article.

- After the collapsible section is created for the first phase, you can copy the same section for the other 4 phases (or you can duplicate them after a bit more setup/config is done – your preference).

Step 3: Split the sections into columns
The next step is to split a given section into columns. In my case, I split into two columns. The first column is for a brief description of the phase, and the second column is for the links to templates, forms, and processes involved in that phase.

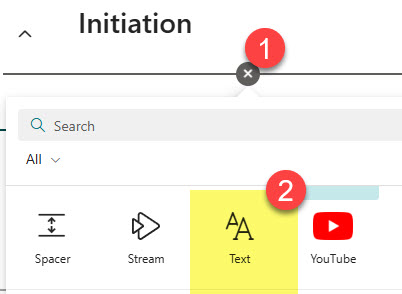
Step 4: Add Web Parts
Next, we need to add web parts to the columns above. For the Phase description, the Text Web Part was used. For the links, I thought that Quick Links Web Part would be the best fit.

Step 5: Populate with content
At this point, we are ready to populate each section (phase) with relevant content.

Step 6: Configure/format each collapsible section
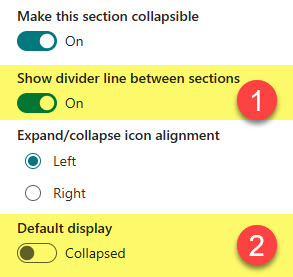
In the last step, we can configure the collapsible sections to make them look pretty. Feel free to use your imagination, but here is what I did for my page:
- Added a separation line between sections and made the sections collapsed by default
- Added Emoji icons to each phase title (On Windows PC, use the keyboard shortcut Windows key + . (period)).
- Added background colors to each section

- Once all of the steps above are completed – this is what the final Page looks like.

Example of the Phases/Processes in sections collapsed by default
An example of one of the phases (sections) expanded

Share Article