How to edit PDFs in Adobe Acrobat Desktop App from SharePoint and Teams
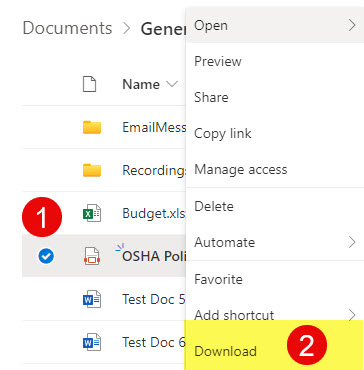
Ever since we were all introduced to SharePoint Online back in 2011, we had one minor issue with it. Naturally, it integrated seamlessly with Office files like Word, Excel, and PowerPoint. But PDFs… Adobe Acrobat PDFs were always a different story. It was always a love-hate relationship with those. Yes, you could easily store PDFs in SharePoint document libraries and view them when required, but this was a different story when it was time to edit PDFs. Once you click on a PDF document, it opens up in the browser, and that’s about it. If you had to make changes to PDF via the Adobe Acrobat software you installed on your PC – you would not be able to do so unless you downloaded the file locally. That, of course, created another version locally, and you had to remember to re-upload it back to SharePoint. The problem got worse with Teams App roll out in 2017. PDFs were just viewable from that interface as well. Luckily, with the recent round of improvements, we can now edit PDFs in Adobe Acrobat Desktop App from SharePoint and Teams. Let me explain.
Editing Office Files vs. PDF files in desktop application
We never had this issue with Office files like Word, Excel, or PowerPoint. Users always had a choice to open them using the browser experience or desktop application.
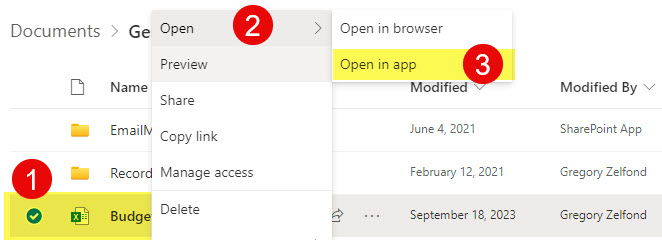
In addition, users had the opportunity to force those Office file types to open in the desktop application in SharePoint/OneDrive and Teams. In fact, I even published a separate article on the topic.
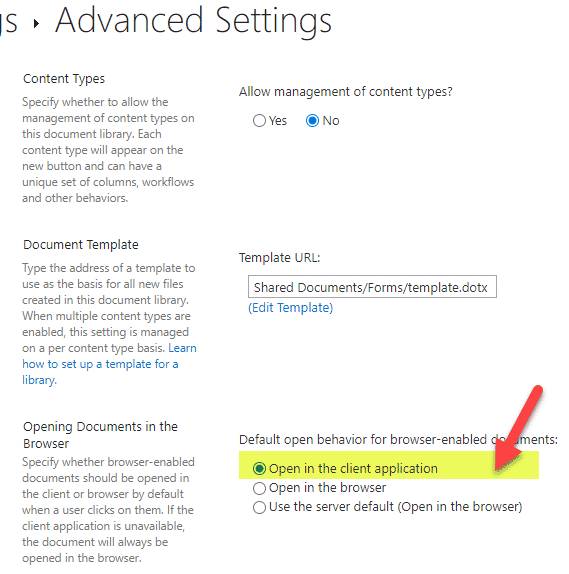
Example of a setting in SharePoint to open Office files in the Desktop application by default
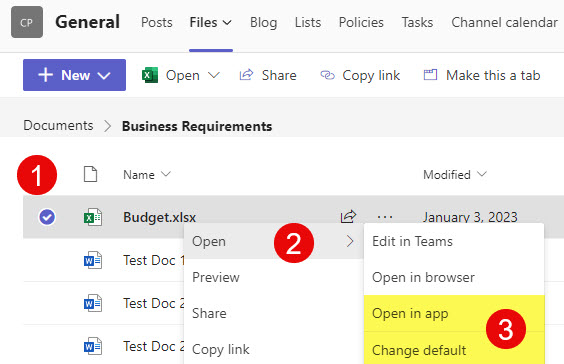
Example of setting in Teams to open Office files in the Desktop application by default
But PDFs were always a pain. Luckily, this has recently changed.
Prerequisites for editing PDFs in Adobe Acrobat
First things first – a few important prerequisites for the ability to edit PDFs in Adobe Acrobat in SharePoint and Teams:
- You must have an active subscription to Adobe
- You must have Adobe Acrobat installed on your computer
How to edit PDFs in Adobe Acrobat in SharePoint and OneDrive
If your preferred interface is SharePoint or OneDrive, you can edit PDFs in Adobe Acrobat by right-clicking on the PDF file and opening it in the desktop app (same steps as for Office files).
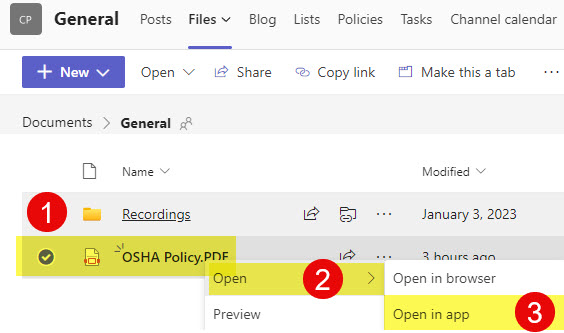
- Right-click on the PDF file and click Open > Open in app

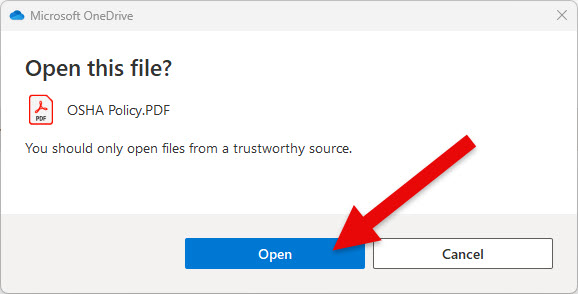
- If you get a warning message, click Open.
- The file will open in the native desktop Adobe Acrobat App.

- Don’t forget to click save after you make the changes.

How to edit PDFs in Adobe Acrobat in Teams
If your preferred interface is the Teams application, you have several options to choose from that allow you to edit PDFs in Adobe Acrobat. Here they are.
Option 1: Open in an App like from SharePoint and OneDrive
Since Teams uses SharePoint as a backbone for file/document management, you can follow the same steps as you did with SharePoint and open the files in Adobe Acrobat.
Option 2: Install Adobe App in Teams
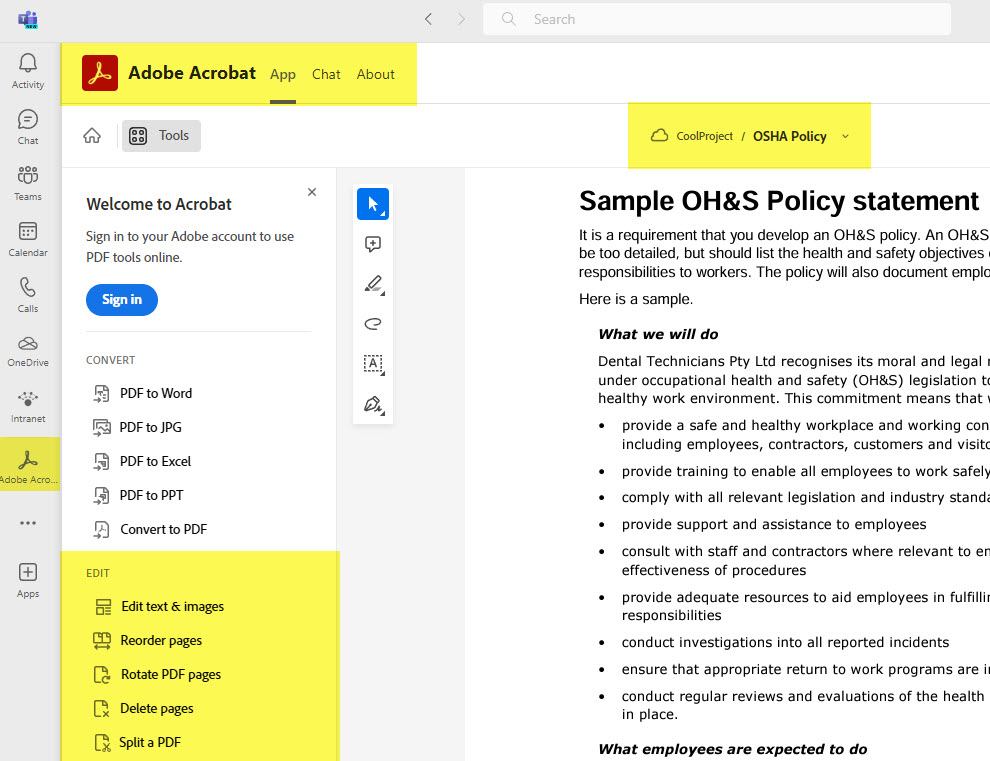
If you do not want to choose the desktop app all the time manually, you can force all PDF files to open in the Desktop App by installing an Adobe App in your Teams application.
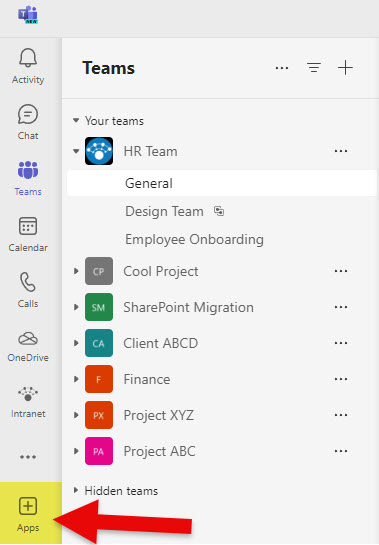
- From within the Teams app, click Apps
- Search for the Adobe app and click Add.
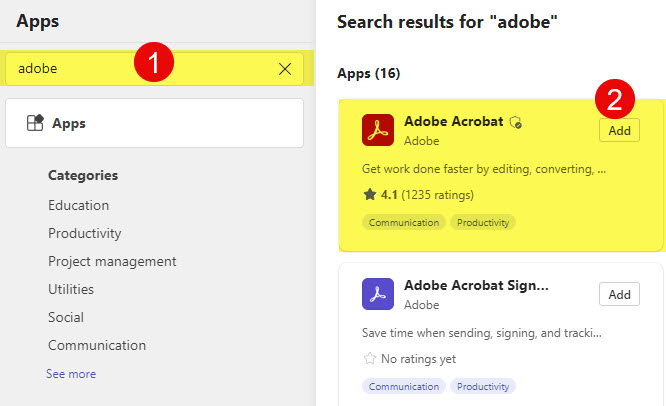
- Click the Add button again to add the App to your Teams.
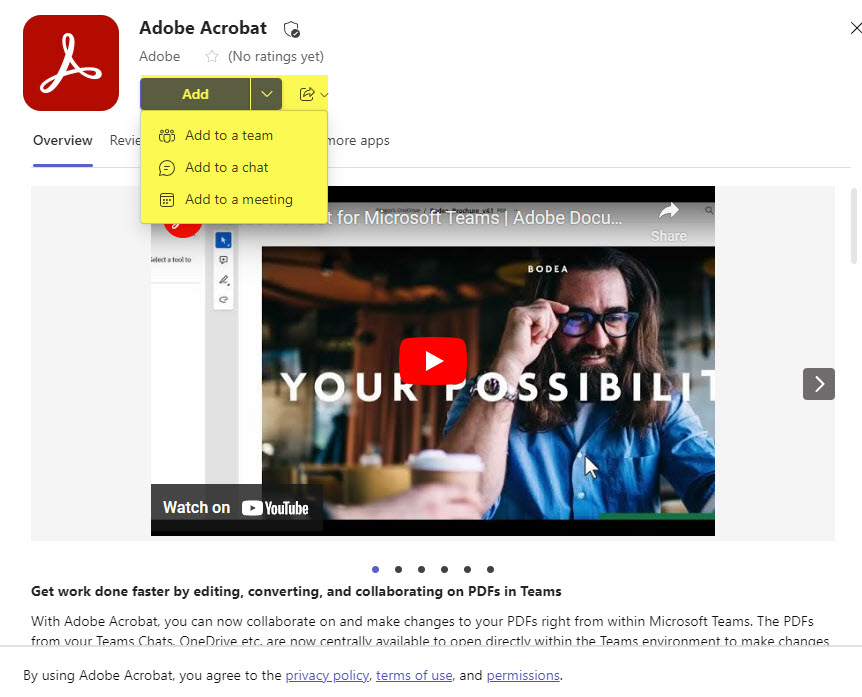
- After that, any PDF you click on from within Teams will open in the Adobe app, where you can edit it in Adobe Acrobat.
Option 3: Install Adobe App for all users
Now, this third option is not unique – it is kind of the same as the previous one – but with this option – your SharePoint/Teams admin will install the Adobe app in all the users’ Teams environments, thus pushing the default Adobe Acrobat experience to everyone by default. Here are the steps to achieve this for your Teams Administrator.
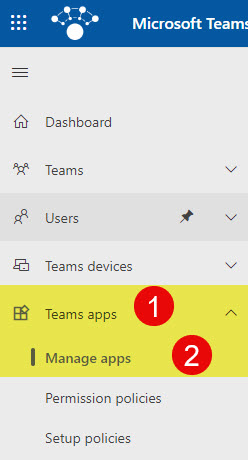
- From the Teams Admin Center, click on Manage apps under Teams apps
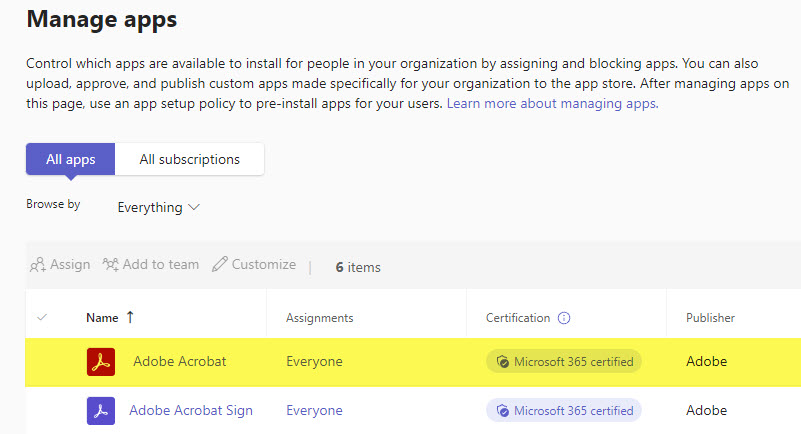
- Search for Adobe and then click on Adobe Acrobat
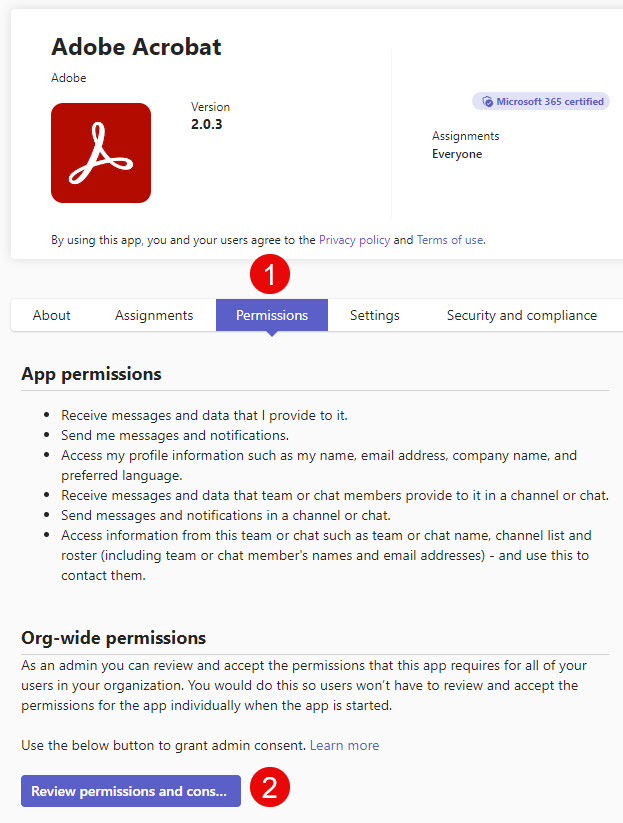
- Click on the Permissions Tab, then the Review permissions button
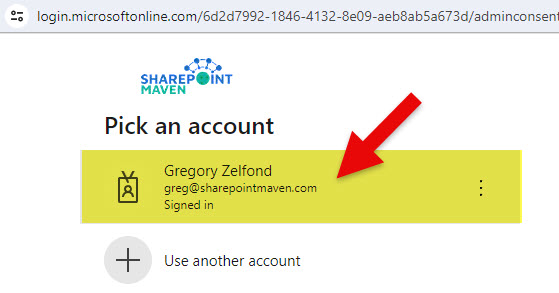
- It will prompt you to sign in
- On the Permissions requested screen, click Accept
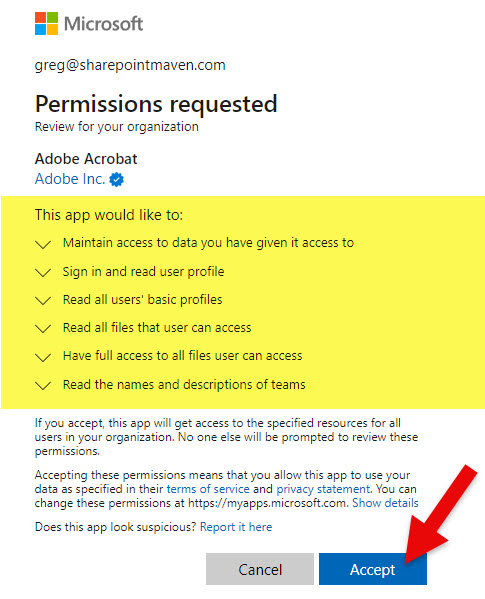
- You will receive a confirmation message. The above steps are necessary prerequisites before we publish the Adobe App to all users via Teams policies, according to Microsoft.

- Next, we need to publish the application to all the users (so they do not need to manually add it themselves). Under Teams apps, click Setup policies.
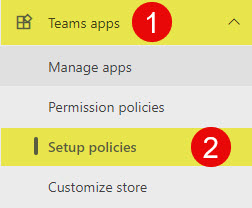
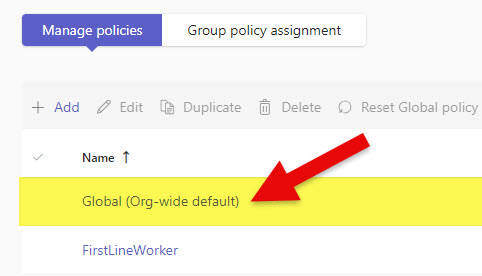
- You can create a custom policy, but can also alter Global (org-wide)
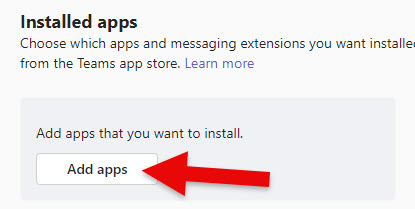
- Click on Add apps button
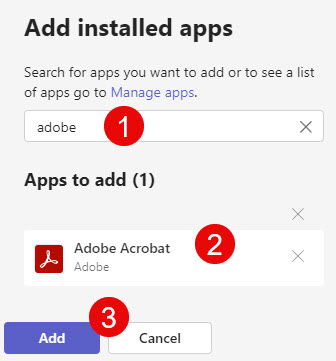
- Find the Adobe Acrobat app, click Add
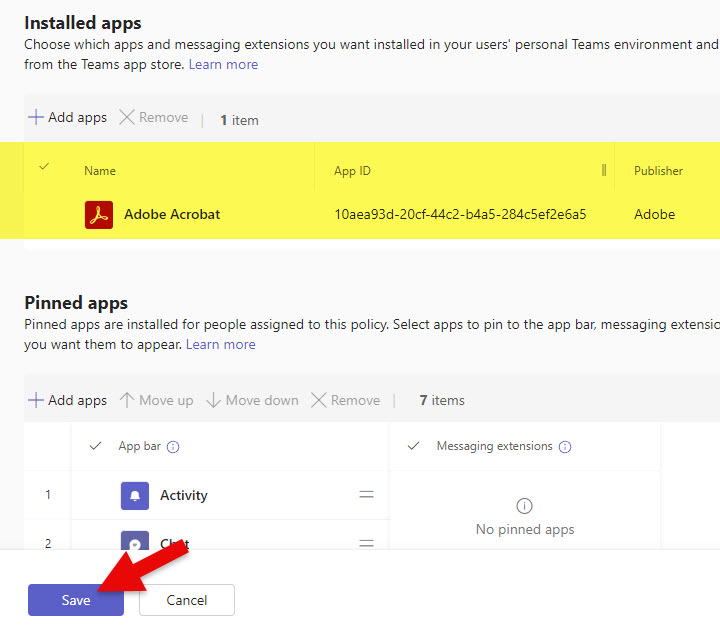
- Click Save to save the changes.
- You will receive a confirmation message. Click Confirm.
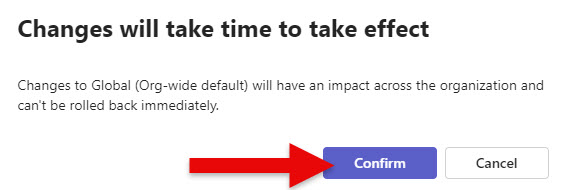
- The above setup will now default all PDFs to open in the Adobe Acrobat desktop app by default.
Alternate Options for editing PDFs via Adobe Acrobat
Now, there might be situations where the above methods might not work for some; you might get error messages here and there.
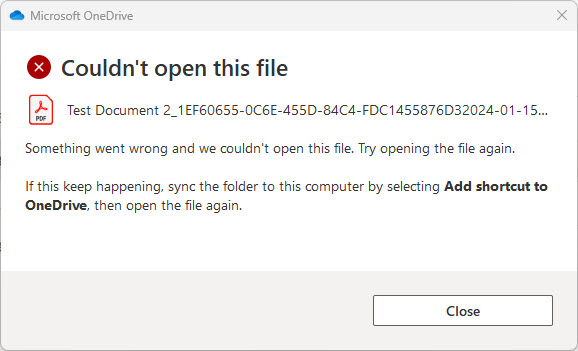
Example of the Error Message when trying to open a PDF file in the desktop app from SharePoint
Below, I outline some alternate ways for you to edit PDFs in the desktop version of Adobe Acrobat.
Alternate Option # 1: Add Cloud Storage in Adobe Acrobat
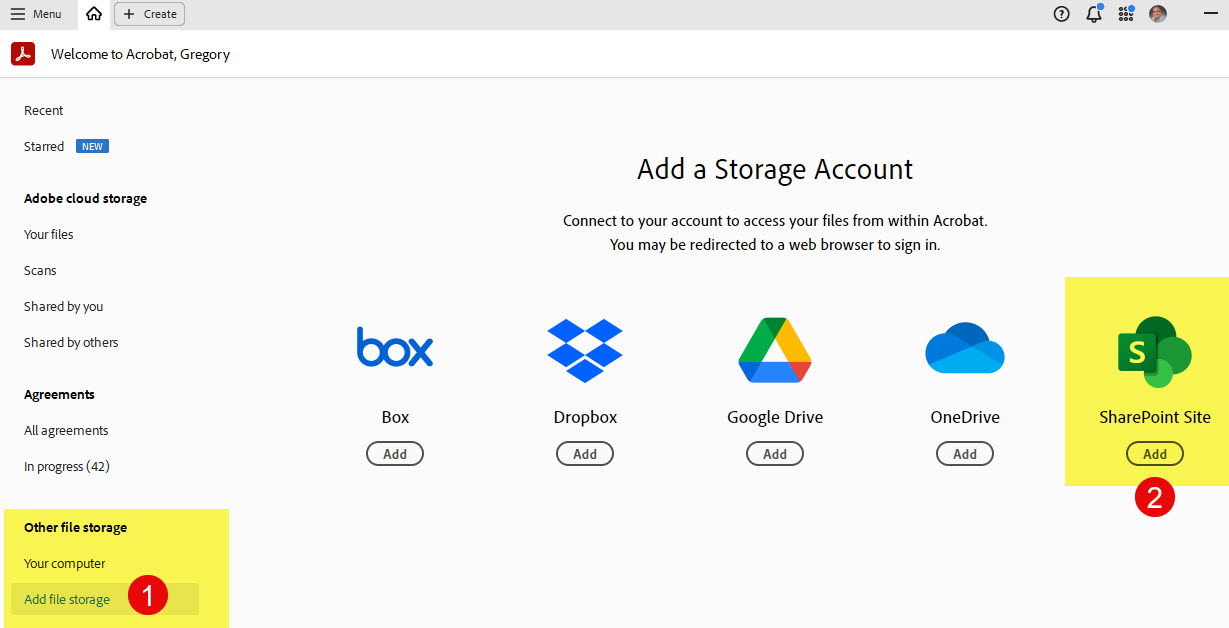
One alternate and compelling method is to add SharePoint to Adobe Acrobat as an alternate cloud storage. This option is handy if you work primarily within the Adobe Acrobat software and want to access all PDFs from there. Here are the steps to add/associate a SharePoint Site to Adobe Professional.
- In the Adobe Acrobat desktop application, under Other file storage, click on Add file storage. Then click Add under SharePoint Site.
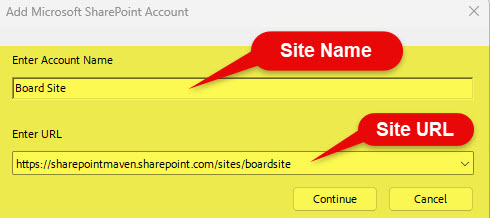
- Enter the Site name and URL you are trying to connect, and click Continue.
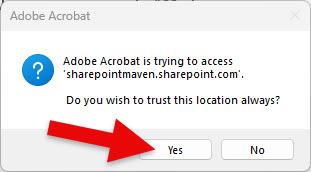
- Click Yes if you get a warning message.
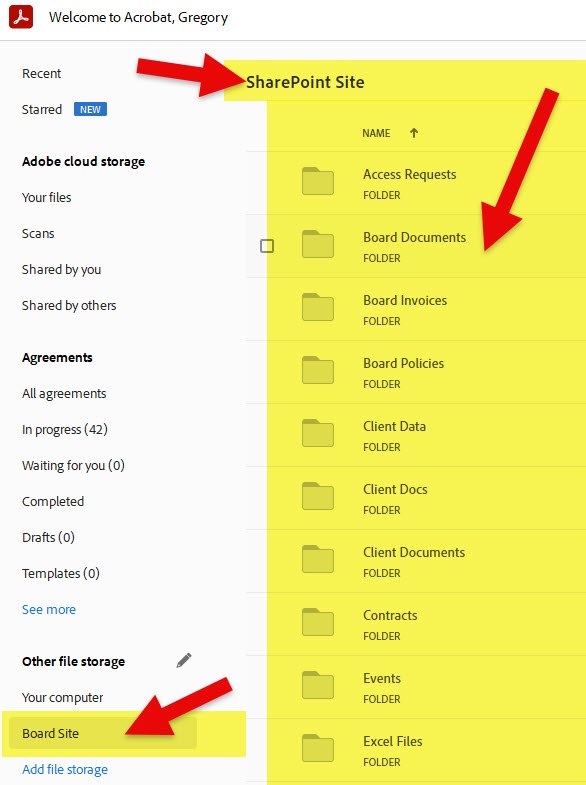
- After that, it will connect the site and it will become available as an alternate location to grab files from. Those folders in the screenshot are document libraries on that SharePoint site.
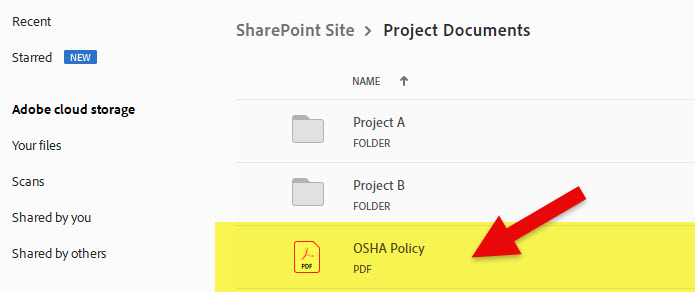
- Navigate to the library/folder and click on the PDF file you are trying to open/edit.
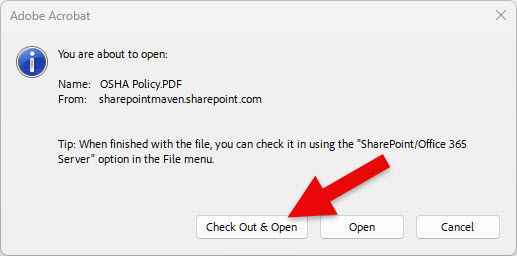
- When you edit files from the Adobe Acrobat desktop application, it will force you to check out the document. Go ahead and click on Check Out & Open.
- By the way, on a SharePoint site, the file will show as checked out against your account.

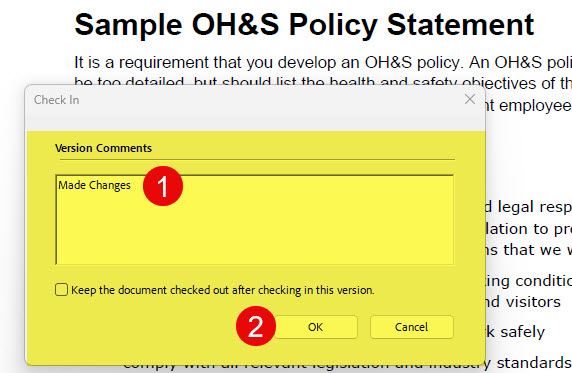
- Once you make changes to your PDF file, you can check it back from SharePoint or when you exit the PDF file within Adobe Acrobat.
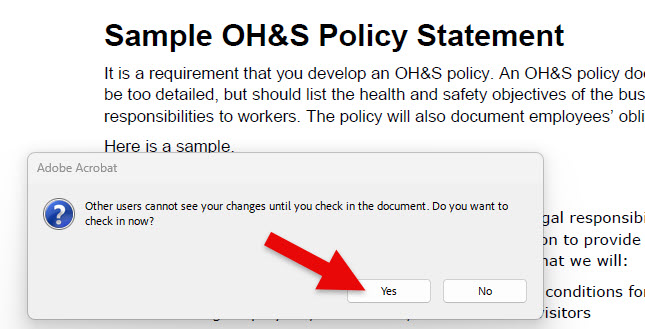
- Just like in SharePoint, it will prompt you to fill in Version comments (optional). Click OK.
Alternate Option # 2: OneDrive Sync
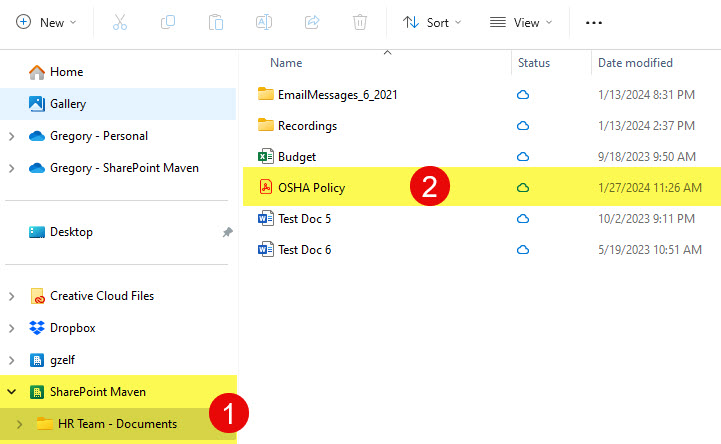
Another handy option is to sync the entire document library to your computer via OneDrive Sync. This option lets you physically get the files on your PC (Windows Explorer). So, opening them up is no different than opening any other documents from your C Drive. So, by default, all those PDF files will open up in Adobe Acrobat since it is the default Adobe application on your PC.
Alternate Option # 3: Local download
Finally, if you have those one-offs where you need to quickly edit a PDF in Adobe Acrobat – you can always download a file locally, make changes on your PC, and re-upload it back to SharePoint. That last piece is probably inconvenient and most important, but it does the job.
