How to easily save to SharePoint from Word, Excel, and PowerPoint (also known as Save As)
Some time ago, I published a post on various ways to save files to SharePoint. None of the options though replicated the behavior we are used to. I am of course talking about an ability to save files directly from MS Office applications (Word, Excel, PowerPoint). You might also know or refer to this option as Save As. For a very long time, inability to do so has been a big matzo ball for many users. However, a recent update by Microsoft made this option possible. So I am super excited to share it with you!
Why Save As to SharePoint was a problem
The reason why Save As never really worked well was that SharePoint is not file share. When you click on Save As from Word or Excel, you get to choose a folder/location you want to save your file in. But with SharePoint, we do not have a C: drive, My Computer or folders to browse through. In SharePoint, we have sites. Many sites, and even multiple site collections (think Office 365 Groups), that are not organized in any folder-like hierarchies.
Below image depicts what the user experience looked like if you tried to Save As from MS Office apps (Word, Excel, PowerPoint) to SharePoint. Was very frustrating experience, was not intuitive and required that user had a Ph.D. in document management. :-)

What has changed
Microsoft has recently implemented a change/fix that relies on Office Graph (same concept utilized by Delve and Intelligent Search). It allows you to pick from the sites you follow or visit frequently, thus solving the above-mentioned issue.

Now, I should mention, if you did not realize this already, that this solution only works for those who are in SharePoint Online (Office 365). If you are in SharePoint on-premises, you will need to rely on the other six options.
How to Save As from Word, Excel, and PowerPoint to SharePoint
Here are the steps, the user experience is pretty smooth now, just like a glass of good tequila on a Friday afternoon (which is when I am writing this post).
Step 1. Add A Place (SharePoint)
This step might or might not be necessary, depending on whether or not you already added SharePoint as a favorite place (shortcut) from within MS Office. If you see Sites section when you do Save As from Word, Excel or PowerPoint (like shown in the image), then you can skip to Step 2. If not, follow the steps below.

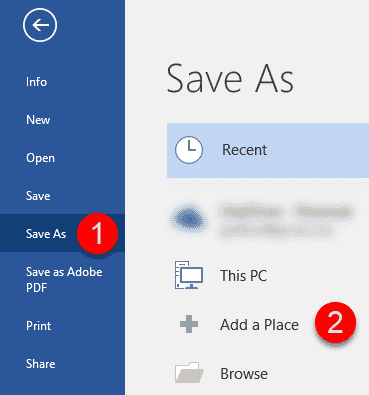
- From either Word, Excel or PowerPoint (you only need to do this on one of the apps, not all), click on File > Save As > Add a Place
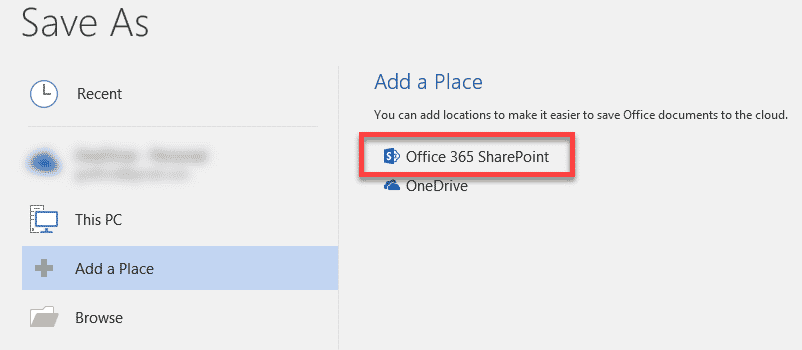
- On the next screen, choose Office 365 SharePoint
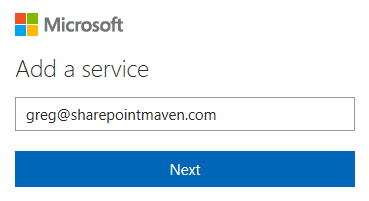
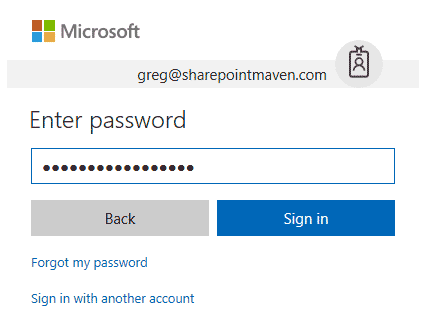
- On the pop-up, enter your Office 365 User ID (work email), click Next
- Enter Password, then click Sign In
- Bingo! Your OneDrive shortcut + SharePoint shortcut will be added to the menu
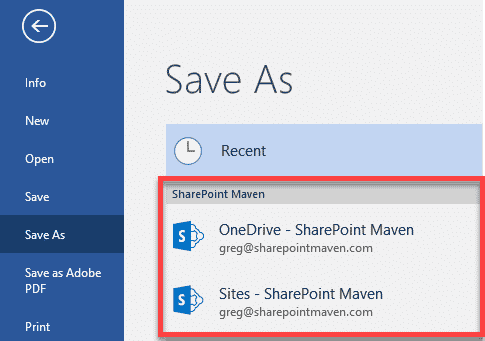


NOTE 1: As stated above, you only need to do the above steps once in one of the apps (i.e., MS Word). Once completed, same favorites will show up in Excel and PowerPoint!
NOTE 2: It will add both, SharePoint + OneDrive for Business. This means you will be able to save files to either SharePoint sites or personal OneDrive space.
Step 2. Save As from MS Office
Now the most exciting part.
- Go to Word, Excel or PowerPoint, and create a new document or open an existing one
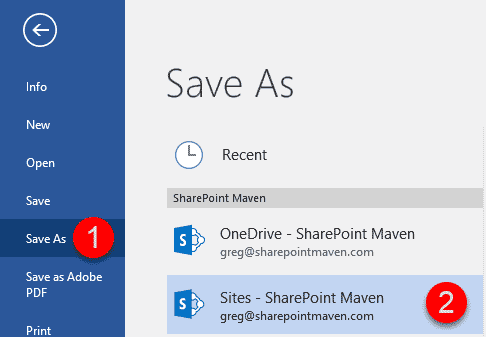
- Click Save As, choose Sites
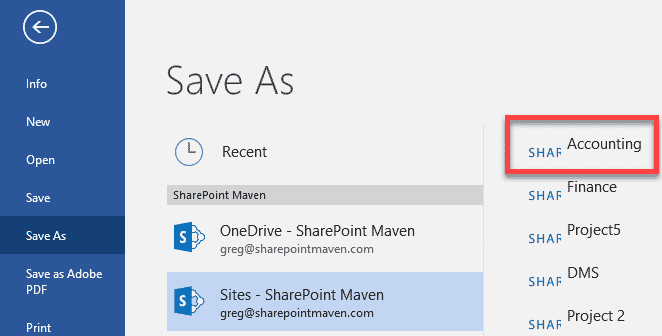
- Form the long list of sites you visit frequently or follow, choose the one you want to save to
- From the next screen, choose the document library you want to save to. In case you have created many libraries on a site, they will all appear here. Pick one.
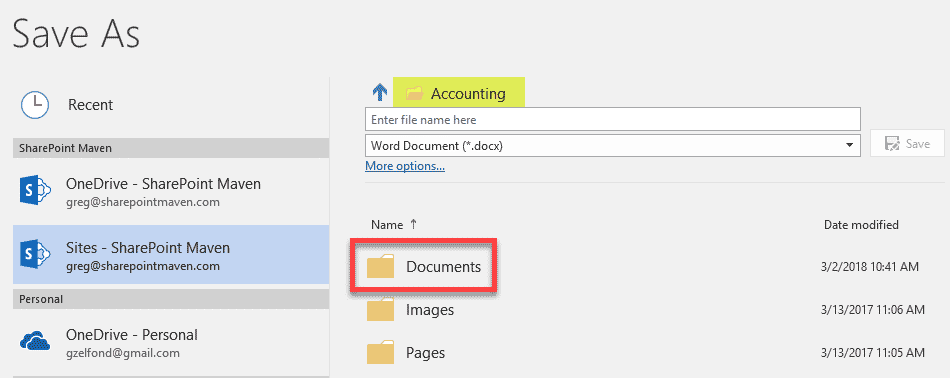
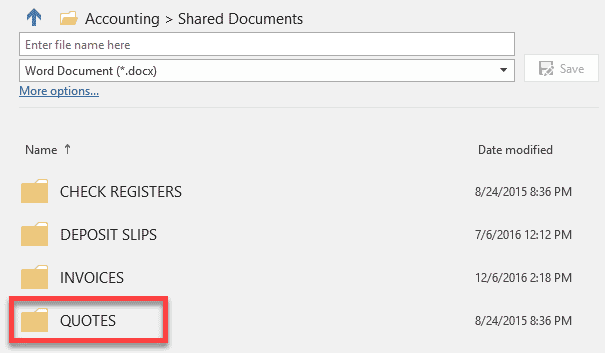
- Next, pick the folder within a library – drill down as necessary
- Provide or change a file name if necessary, then click Save
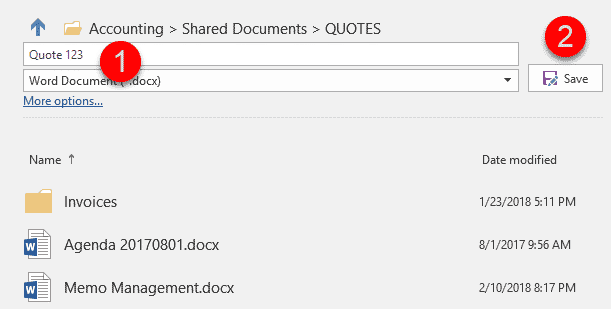
- This is it; we did it – we saved the file to SharePoint! As promised, it was nice and smooth, just like a glass of tequila.


The above would not have been possible without an Office Graph. By the way, in case you do not see the site you want to save to from the list above, make sure you are Following it. It is quite possible, your site will not show up in Frequent section, but if you follow one, it will show up under the Following section.
Don’t you just love SharePoint and all the positive (end-user and out of the box) changes happening lately? Thank you, Microsoft! OK, I can now go and finish that glass of tequila. Lehaim!

Share Article