How to Create Indexed Columns and Filtered Views in SharePoint
Half of you reading this title are probably wondering what the hell I am talking about. 😀 The other half arrived here because they experienced the infamous 5,000-item list view threshold issue. Whatever your story is, welcome. The truth is, the instructions I am about to share can make or break (literally) your SharePoint list or library. Let me explain.
The 5,000-item list view threshold I mentioned above relates to the 5,000-item limit we have had in SharePoint since ancient times. The problem arises when a list or library view needs to render more than 5,000 items at a time. Several ways can mitigate the issue, and one often recommended is indexing the columns. The idea is to create filtered views so that the query returns no more than 5,000 items. For example, say you have a list or library with 30,000 items. By default, 30,000 is more than 5,000 (at least that is what ChatGPT told me), so the list won’t display and will produce an error message. However, if we create a view based on certain Status, dates, etc., such that the result set is down to 3,000 items, we are OK. So I would like to explain how to do just that.
What is an indexed column?
The analogy I want to use here is the Table of Contents in a document or a book. Instead of reading every page to find a topic, you check the index, which tells you exactly which pages to read. An indexed column works the same way. When you filter a view on an indexed column, SharePoint does not have to scan every item in the list. It goes straight to the matching items, so the view returns fast and stays under the threshold.
How to create indexed columns
Step 1: Index the columns
- From a list or library, click the Gear Icon > List settings

- Click More library settings

- Scroll down to the Columns section and click Indexed columns
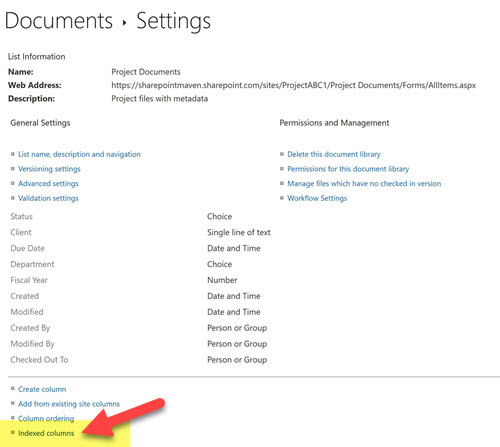
- Click Create new Index, then choose the column you want to create an index for and click Create
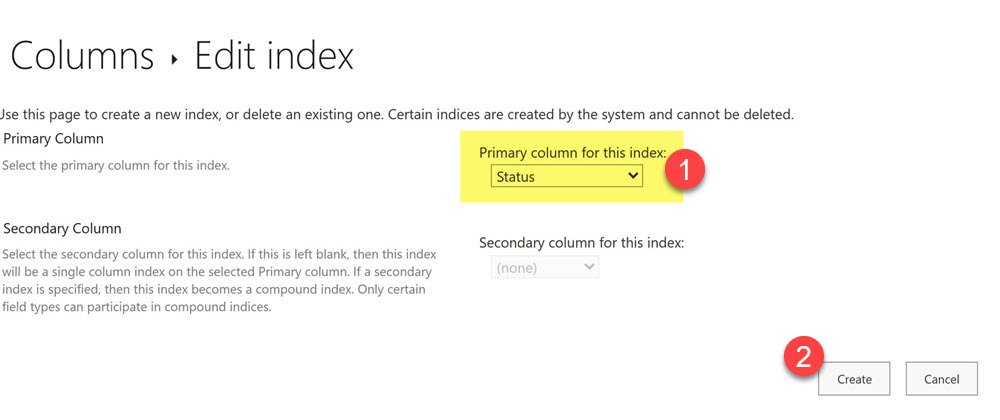
- The indexed column will be created
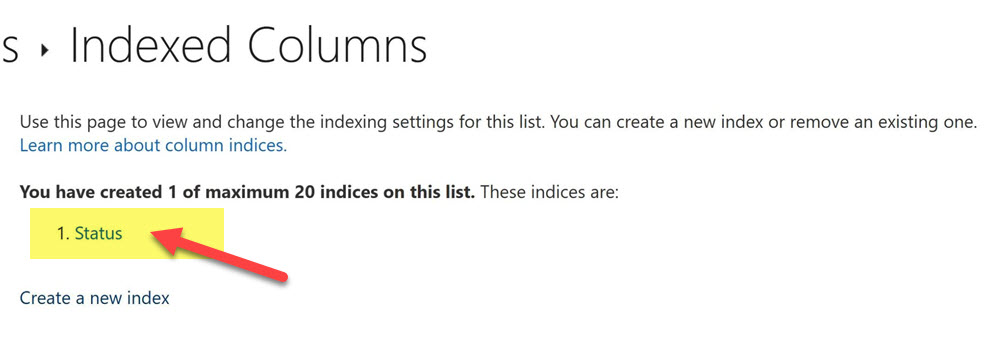
- Repeat for each column you plan to filter by. You will see all your indexes listed on the Indexed columns page.
Step 2: Create a filtered view on a list or library
Indexing the columns alone is not enough! Once the column is indexed, you will need to create a view that filters on it. For this to work, you must filter on the indexed column first! If the first filter isn’t on an indexed column, SharePoint will scan the whole list, and you are back to the error.
- Edit the existing view or create a new one

- Scroll down to the Filter section, then pick the indexed column and choose the criteria for filtering
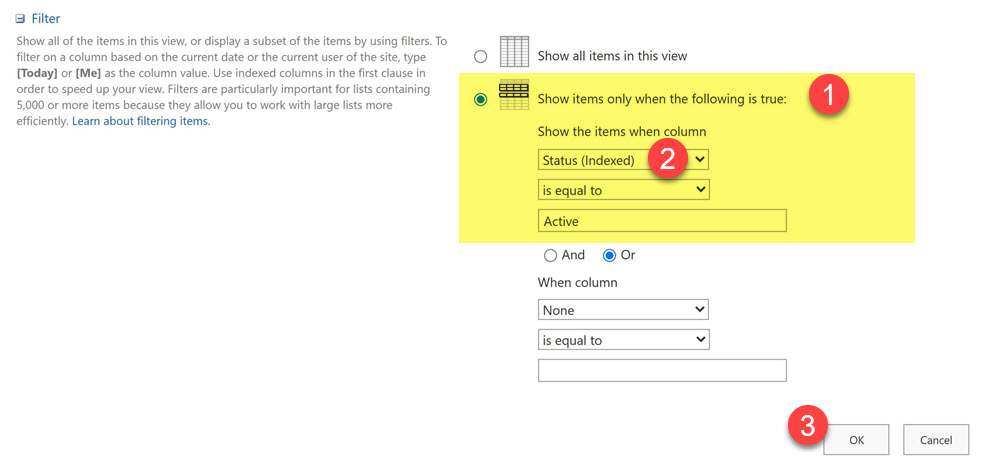 If you need more conditions, add them after the first filter. Click OK to save the view.
Nuances about indexed columns and views
- Create your indexes early. You can create indexes only when your lists or libraries are below the threshold. Once you exceed the limit, you might encounter an error message when creating an indexed column.
- Filter on an indexed column first. As mentioned earlier, for those filtered views, make sure to always filter on the indexed column first! Otherwise, it won’t work.
- Make sure no view exceeds 5,000 results. Even when indexed and filtered, make sure none of the views will display more than 5,000 items. For example, a Status = Completed view might be fine today, but exceed the limit in a few years.
- Libraries with folders. For libraries with folders, you usually don’t need to worry about column indexing, since each folder creates its own index. However, if your library has metadata, indexes are a must.
- 20 indexes max. You can create up to 20 indexes per list or library.
- Not every column can be indexed. While most column types can be indexed, some cannot (e.g., multiple lines of text, multi-select Choice, or Person and Lookup columns that allow multiple values).

Share Article