How to create an employee directory in SharePoint using Gallery View on a list
I had an interesting request come from a client the other day. They wanted to create a friendly and attractive Employee Directory in SharePoint showing basic user information like name, title, phone numbers, and a photo. They showed me a few examples they found on the Web and asked me if I could replicate them. Most of the time, I go on a spiel saying that SharePoint OOTB works in its own way and we can’t really replicate the features built with some 3rd party software/application. But ironically, this time, I said “yes”, and we came pretty close to their desired look & feel and functionality. So, let me share what I did for my client when I created an employee directory in SharePoint using Gallery View.
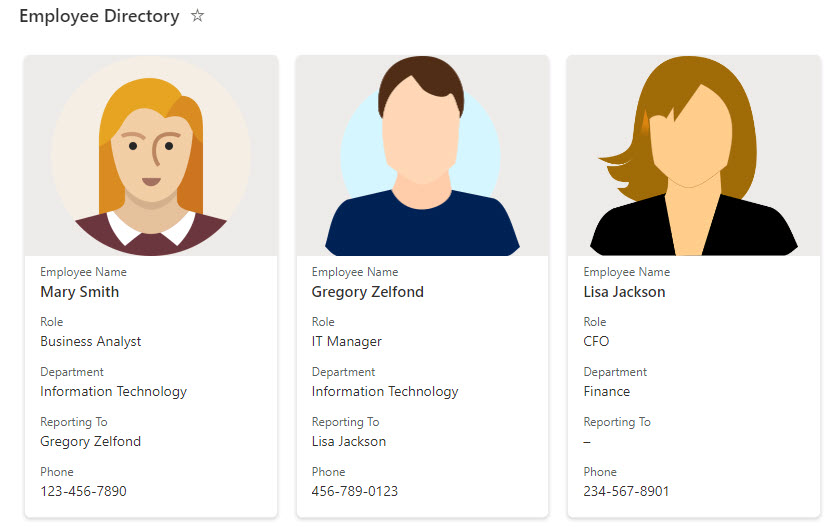
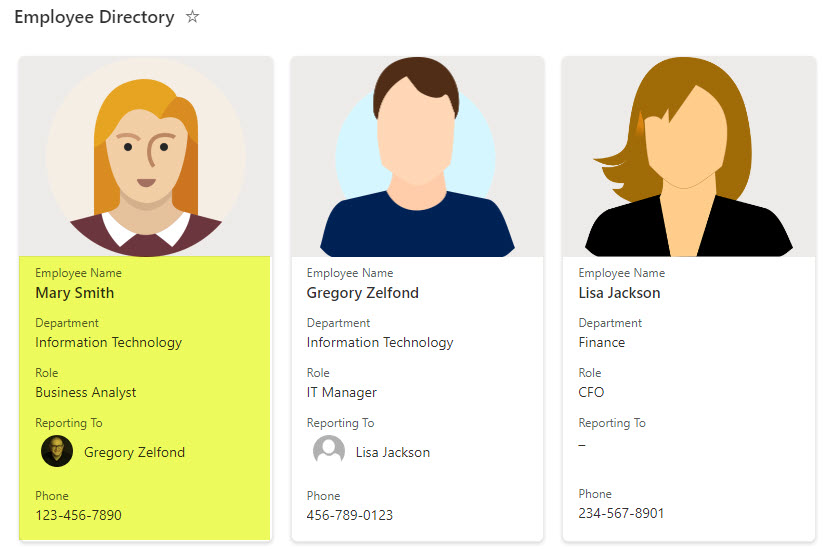
Below is an example of what we will build. For additional design inspiration, head over to my portfolio, LookBook 365.

Built-in Employee Directory
The truth of the matter is that there is really no built-in employee directory in SharePoint. Historically, the only thing that comes close is Delve, which pulls information from the Active Directory. But, it is a bit outdated and pretty fixed regarding the look and feel, and can’t be customized.

Other ways to create an employee directory in SharePoint
Other alternatives exist to creating an Employee Directory in SharePoint; I listed them all in this earlier post. However, back when I wrote this post, we did not have the option/functionality I am about to describe.
How to create an employee directory using Gallery View on a list
So, below is the method I proposed to them. Now, I must mention that this option is not for every organization. Since it involves manual entry, it definitely works better for smaller organizations with 50-100 users. If your organization has hundreds or even thousands of employees, it might be challenging to populate and maintain it manually.
The solution involves using a Custom list, and also creating a Gallery View on it, for better presentation. Let me explain.
Step 1: Define the fields/columns for your list/employee directory
The fields would be the fields you would want to display/store in terms of the information in your employee directory. I explained all the various column types in this article. Here is the list of fields I defined for mine:
- Employee Name – Person
- Role – Single Line of Text
- Department – Choice
- Reporting To – Person
- Phone – Single Line of Text
- Photo – Image
Step 2: Create a Custom List
The next step is to create a custom list with all the fields. I explained how to do this in this article. But here are quick steps for you as well.
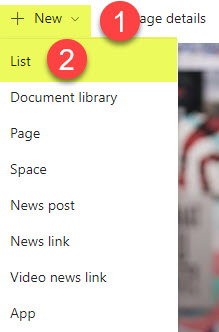
- From the SharePoint site, click New > List
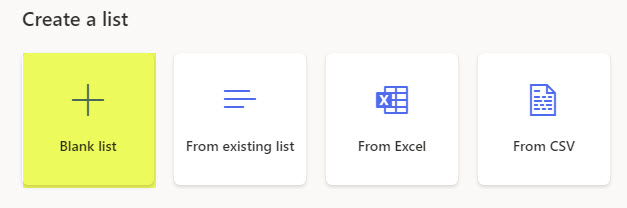
- Choose Blank list option
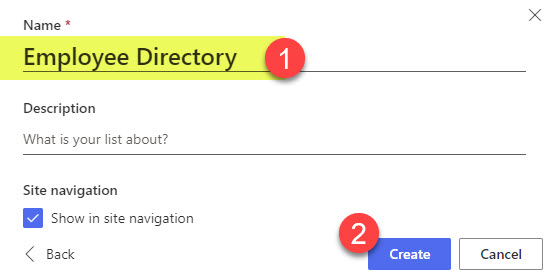
- Give the list a name. Click Create.
- Click the +Add column and add the columns that you defined in Step 1.
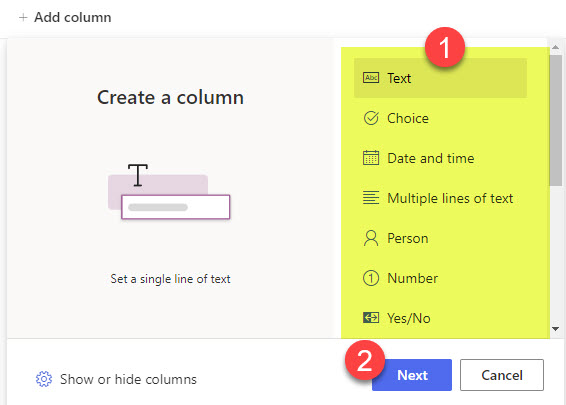
Step 3: Populate with content
Next, populate the information with content. You can either do so one record at a time or use the Grid View.
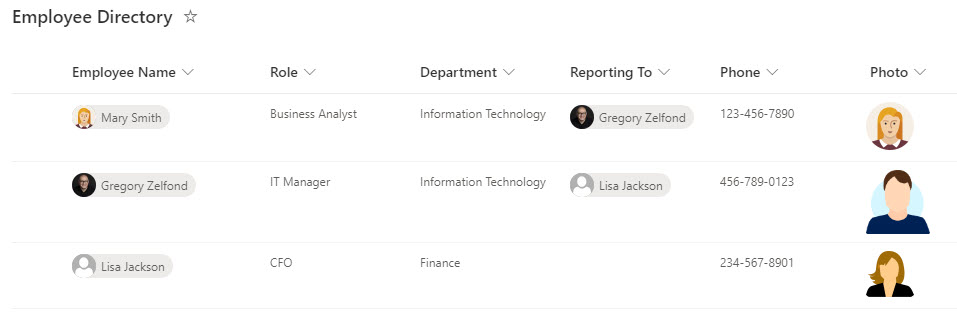
Step 4: Create Gallery View
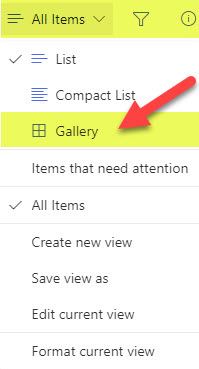
Next, go ahead and create a Gallery View. I did provide instructions here.
While the Gallery view exists already out of the box, I do like to create my own Gallery View as it will allow you to give it any name + make it a default view if need be.
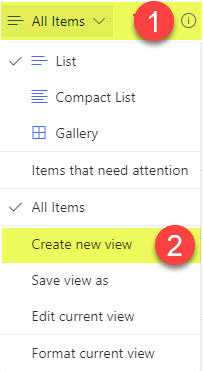
- To create your own Gallery View, click All Items in the drop-down, then Create new view.
- Next, give your view a name, choose View type (Gallery in our case), and then Create.
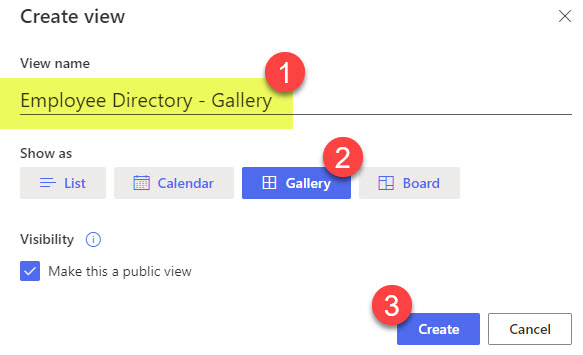
- Your Gallery View will now be created.
Step 5: Format Gallery View
Once Gallery View is created, it automatically adds all the columns to the Gallery cards. However, you can change the order of fields and the look and feel of the cards. To do so:
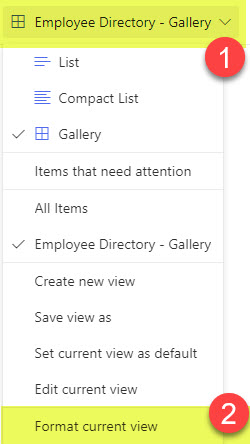
- Click on the View drop-down, then Format current view.
- Under Card Designer, click Edit card
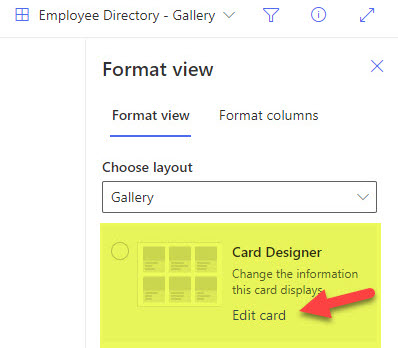
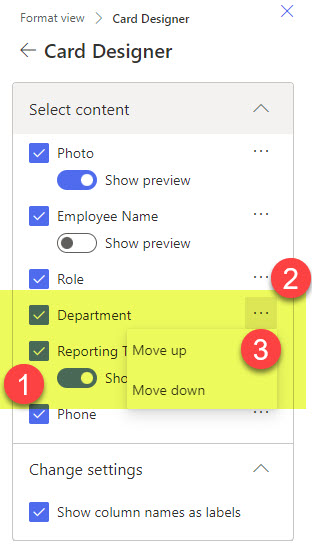
- On the next screen, you can show/hide or change the order of the fields. You can also hide the field labels if need be.
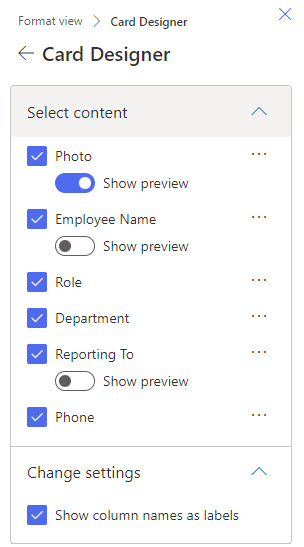
- In my case, I decided to show the profile photo of the Reporting To field and also decided to move the Department name above the Role. Click Save at the bottom of the screen to save your changes.
- Here is the end result after making the above changes.
Step 6: Pin fields to the Filter Pane
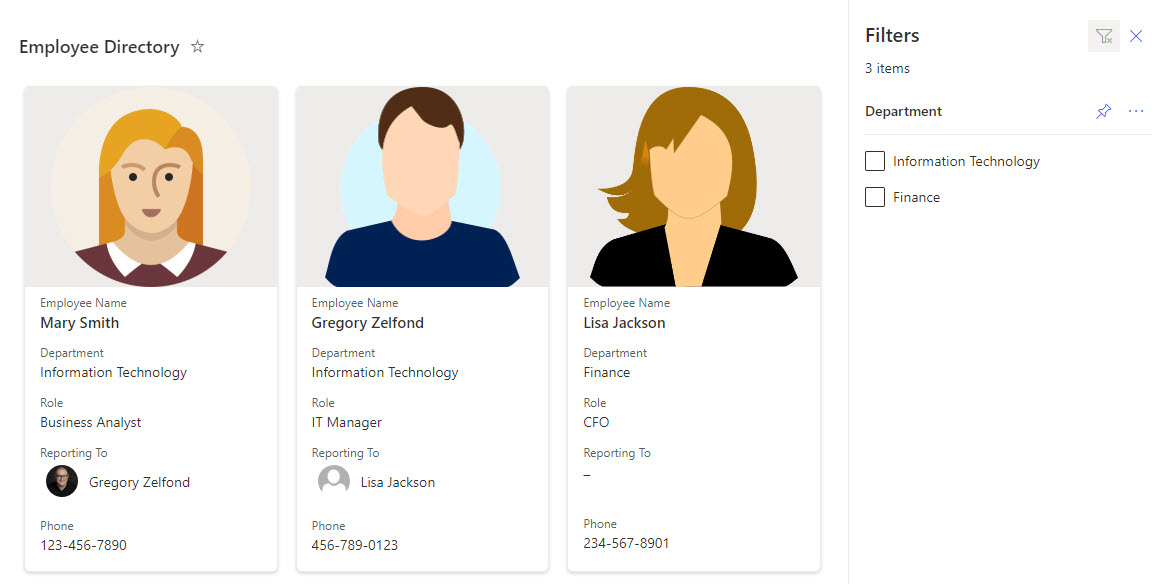
The last step before we enjoy our employee directory is cleaning up the Filter Pane. This is so that users can easily filter employees by various attributes, say, Department. To do so:
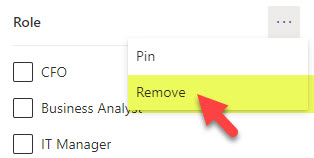
- Click on the Filter Pane and Pin the columns you would like to appear/be constantly present on the filter pane.
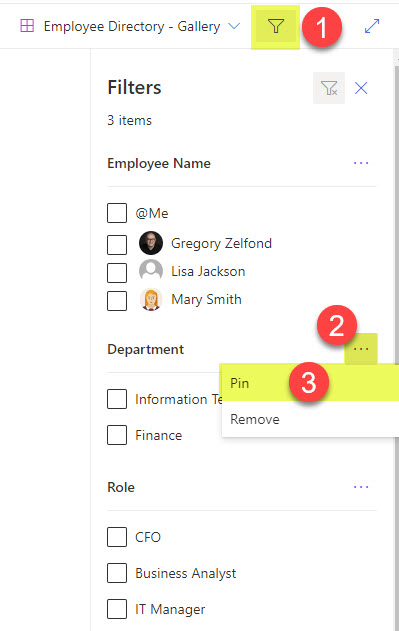
- You can also Remove the fields you do not need
- And now we are ready to enjoy the Employee Directory!
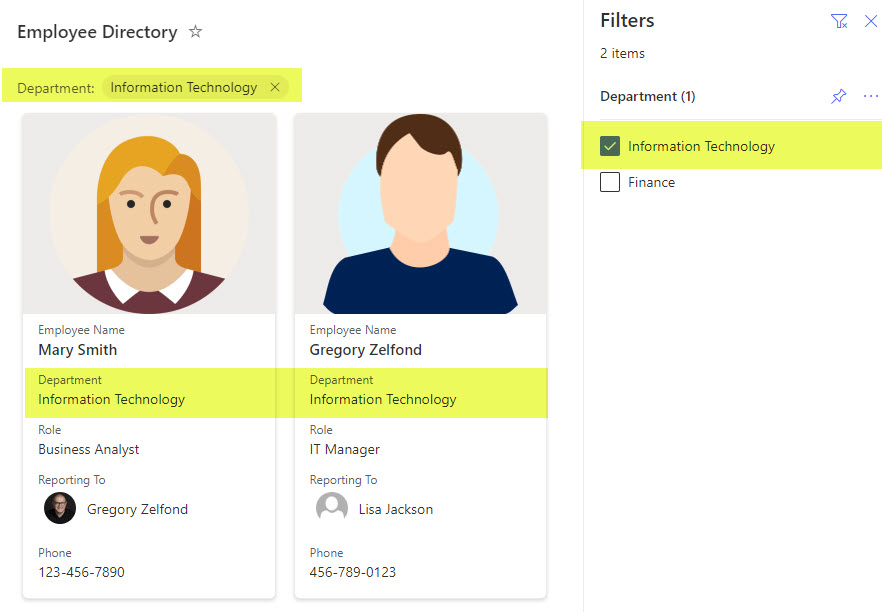
- Once you click on the filter, it will filter the Employee Directory/list of users accordingly

Share Article