How to create a Mileage Reimbursement Form by using Branching capability
I love what MS Forms have become lately. Initially released in 2016, it was somewhat limited in terms of its feature set compared to other existing platforms. However, the recent improvements in form branching, list integration, custom themes, and Copilot integration enable business users to create powerful forms that accommodate day-to-day business requirements. One such use case is the Mileage Reimbursement Form. Most organizations still maintain complex spreadsheets in Excel. By creating a Form, you simplify the process of data collection and processing. Here are the steps.
Step 1: Define the fields
I am sure your organization has its own requirements when it comes to collecting data for the Mileage reimbursement. For this article, I will proceed with the following columns (in parentheses, I designate the type of column):
- Name (System field)
- Email (System field)
- Date of Travel (Date & Time)
- Miles Travelled (Number)
- Purpose of Travel (Choice)
- Supporting Documents (Attachments)
Step 2: Create a List using the Lists App
Although we are creating a Form here, we will first create a List where the data will ultimately be collected and reside after user submissions. Then, we will create a form based on it. I described this integration in this article.
I provided step-by-step instructions on creating a list from scratch in this post.

Step 3: Create a Form from the Lists App
Once the list with initial columns has been created, we can now generate a Form from it. Again, I provided instructions on this here.
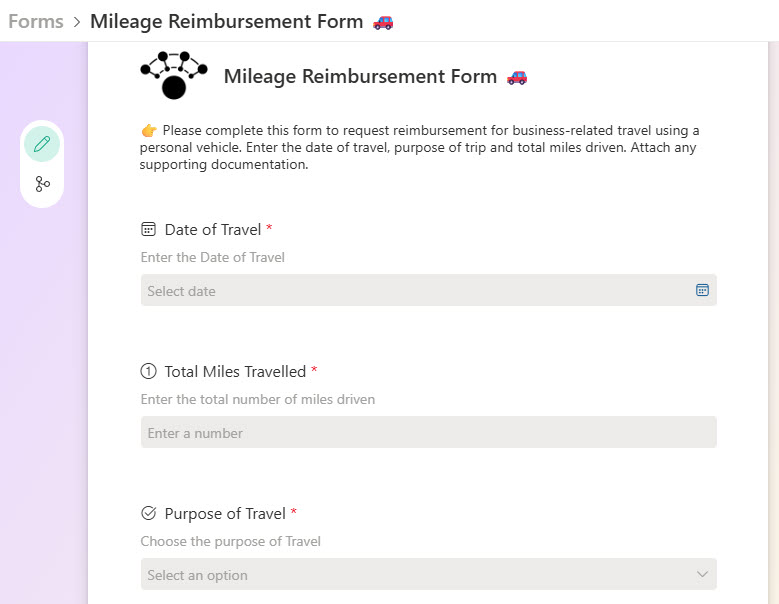
Step 4: Create additional columns for multiple trips
The next step in the process is to create additional columns to accommodate multiple trips on the same form. First, we need to determine whether there were any extra trips. This would be achieved with the simple Choice (Yes/No) column. Assuming the answer is “Yes”, the user would be prompted to fill out information for another trip. Since columns on a list must be unique, I would add “(2)” at the end. Below are additional columns we need to create:
- Do you have a second Mileage Expense to enter (Choice)
- Date of Travel (2) (Date & Time)
- Miles Travelled (2) (Number)
- Purpose of Travel (2) (Choice)
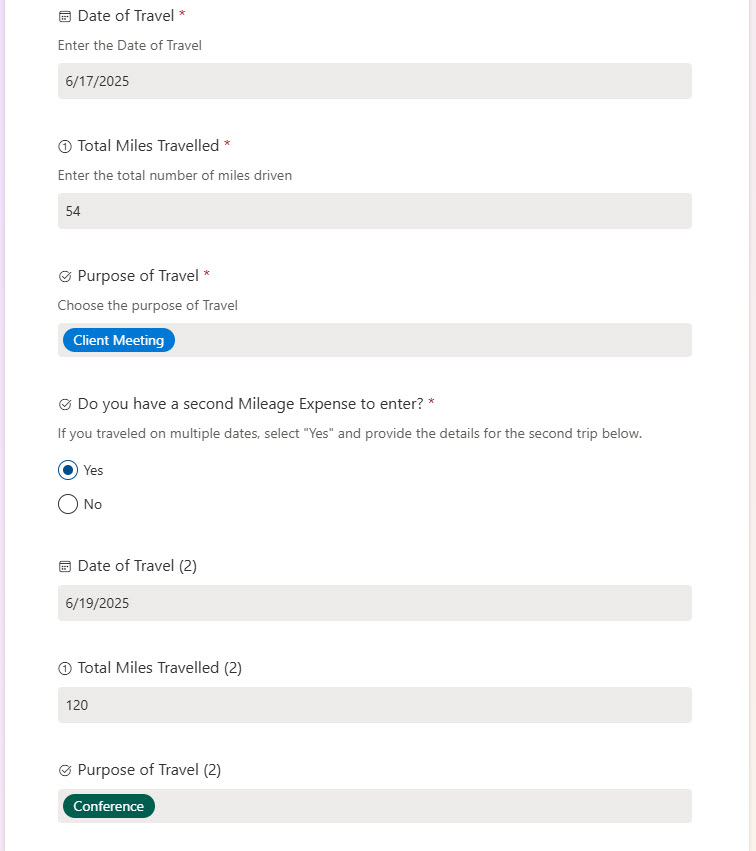
We can repeat the column creation above as many times as necessary for each trip. For these instructions, let’s limit it to a maximum of 2 trips.
Step 5: Set up Forms branching logic for additional trips
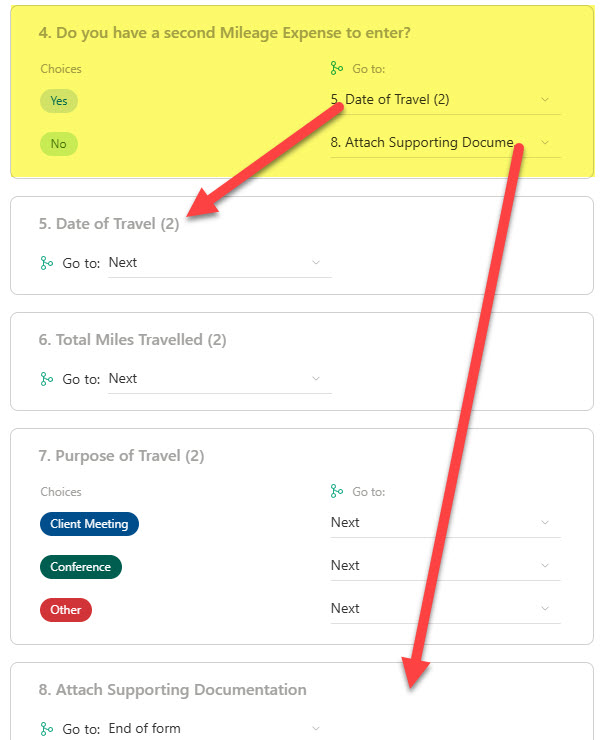
Next, we must set up branching logic. This is necessary because we can have either one trip or multiple trips on the same form. The logic we need is as follows:
- If the user answers “Yes” to the “Do you have a second Mileage Expense to enter” question, then the user will be prompted to fill out details about the other trip
- If the user answers “No” to the “Do you have a second Mileage Expense to enter” question, then the user would be prompted just to attach supporting documents and submit the form
I explained the concept of branching logic in this article. Feel free to reference it when setting it up.
Below is a screenshot of what it will look like in our Form.
Step 6: Create a Calculated Column for reimbursement calculation
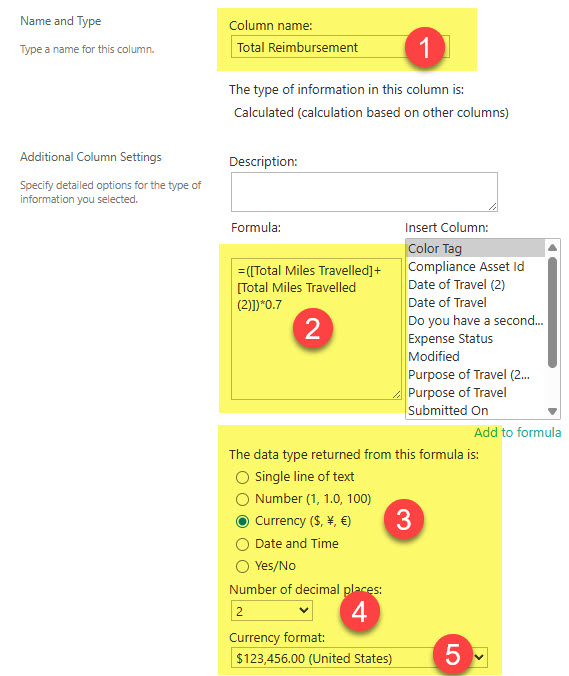
This next step is a nice bonus and a thoughtful addition. Since we have users telling us the mileage they traveled, we can calculate the reimbursement rate and display it in a list. The formula is pretty simple:
Total Reimbursement = Total Miles Travelled (all trips) X Mileage Reimbursement rate
I explained in great detail how to create a Calculated Column in this article. Below is a screenshot of the setup. 0.7 (70 cents/mile) is the Mileage Reimbursement Rate in the USA as of the writing of this article.
That is all! We now have a Form with branching and a list for the data to reside in. In addition, we have an automatic calculation for the reimbursement! If you want to see more screenshots of this solution, check out the gallery of images on my LookBook 365 portfolio site.

Share Article