How to create a Firm or Company Calendar in SharePoint using Lists
One of the most common requests I get from my clients when I build Intranet portals for them is the ability to create some sort of Firm or Company Calendar in SharePoint. Not just the calendar that would be maintained by the Intranet owner and display company holidays, but the one that would display many other types of days like employees being away from the office, birthdays, anniversaries, payroll dates, etc. An additional request is usually also to allow firm employees to be able to make and edit entries themselves.
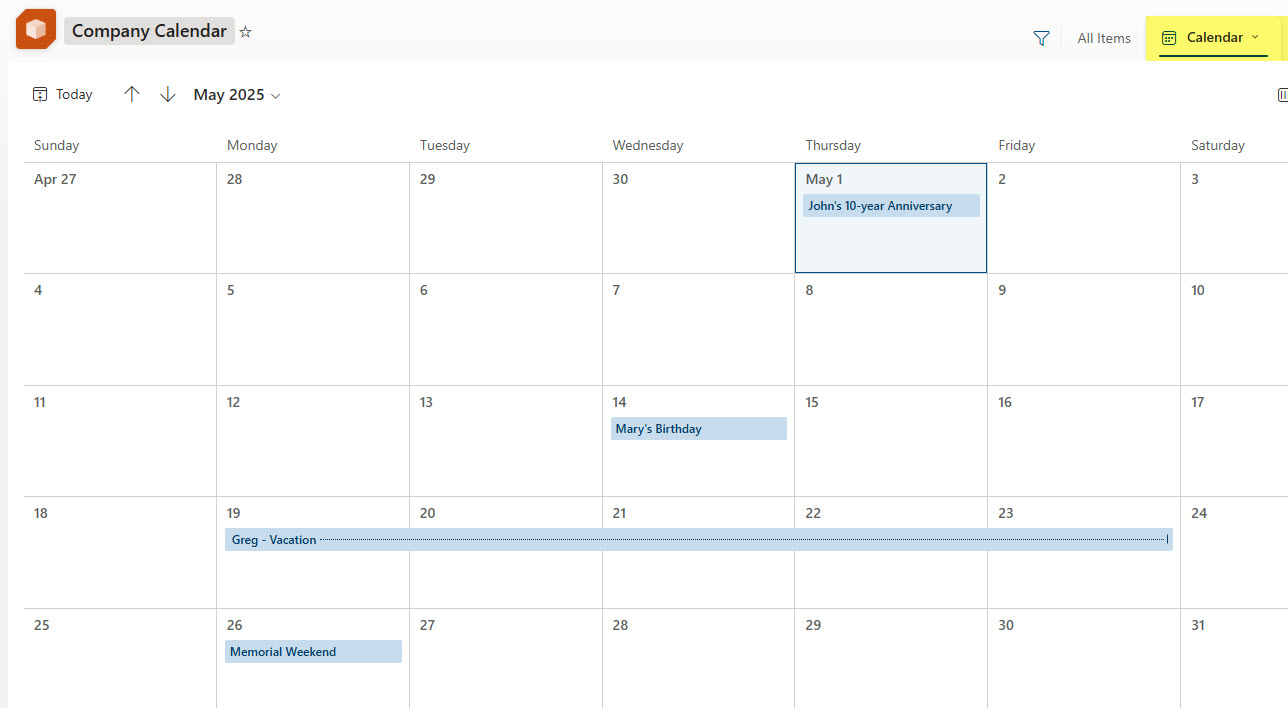
Below is an image of the Company Calendar in SharePoint that is based on a custom list. In the following steps, I also explain how you can create one.

An example of a Company Calendar in SharePoint built with a list and a Calendar View
Step 1: Create a List
The underlying idea behind this Company Calendar in SharePoint solution is to utilize a custom list with a calendar view. To create a list:
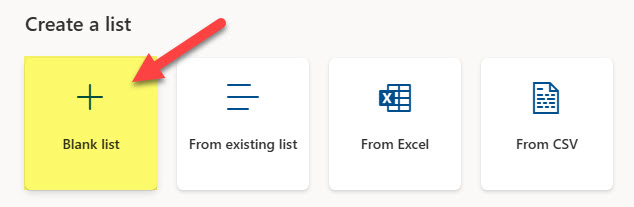
- From the SharePoint site homepage, click New drop-down > List

- Click Blank list
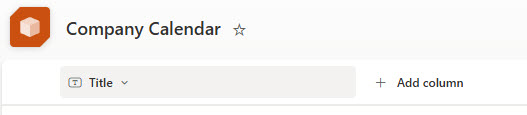
- Give your calendar a name. Click Create.

- At this point, the list is created, and we are ready to proceed to the next step
Step 2: Decide on Calendar Columns/Fields
The next step is to determine which columns we would like to have in our list/calendar. Some columns are mandatory for the calendar to work (i.e., Event name, date fields), and some are optional if you want to add additional information about an event (i.e., Event Category). Below is a list of fields I came up with:
- Event Name (Text) – mandatory
- Start Date (Date) – mandatory
- End Date (Date) – mandatory
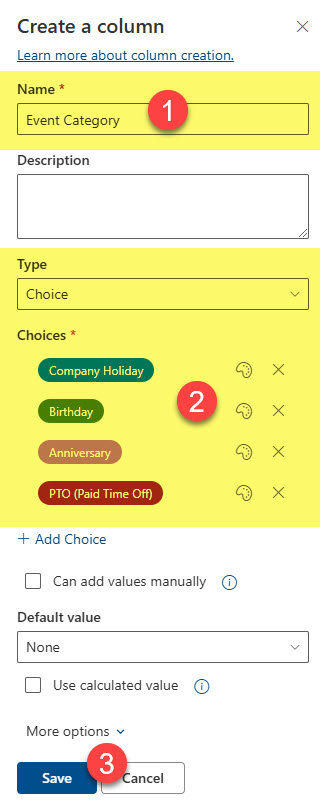
- Event Category (Choice) – optional
In parentheses, I designated the type of column we will create in the next step. Check out this article if you want to familiarize yourself with all the available column types.
Step 3: Create columns
Now that we have defined our columns, let’s go ahead and create them.
- We do not need to create an Event Name column. We can just reuse the default Title field. To do so, click Title drop-down > Column settings > Rename.

- Rename the column to Event Name. Click Save.

- Use the Date and time column type to create the Start and End Date columns.

- Give the column a name and click Save.

- For the Event Category column, we will use the Choice column type.
- This is how the list will look like when you create all the columns.

Step 4: Add some entries to the calendar list
Before we proceed with the next steps, it would be useful to add a few entries. Go ahead and add them!

Step 5: Create a Calendar view
Next, we need to create a Calendar View. I actually explain how to achieve it in this article.
- Click +Add view button

- Give your view a name, and make sure to select Calendar view type. Next, select the default layout (I prefer Month). Next, and this is super-important, map the Start date on calendar to the Start Date column and the End date on calendar to the End Date column. The Event Name column will automatically be displayed in the view. That’s why those three columns were mandatory. Click Create.

- At this point, the Calendar view is created.
Step 6: Format a Calendar
Next, you can color code your calendar if you wish to make it pretty and easier to read. For example, you can have different color codes for different event categories. I explained formatting in this article. However, there is an important nuance if you want to format/color-code a calendar:
- Since, by default, only 3 columns are necessary for the calendar to work (Event Name, Start Date, End Date), if you go ahead and try to format the calendar, you will not be able to set conditional formatting based on the Event Category column since it is not displayed/visible in the calendar. To fix this, click on the Calendar drop-down > Add or remove fields.

- Check the box next to the Event Category and click Apply

- Now that we have surfaced up the Event Category column, we can create a conditional formatting based on it. To do so, click Calendar drop-down > Form current view

- Next, click on Manage rules

- Create your conditions and choose the color

- Once all conditions have been set up – this is what it might look like. Click Save.

- And at this point, the color-coded Calendar view is all set!
Step 7: Set up permissions
The next and very important step is to set up the permissions. We need the users to be able to add/edit entries. However, since the List (Calendar) most likely resides on the Main Intranet Site – most likely it will be read-only for all users. Since we want our employees to make calendar entries but not be able to make any changes to the Intranet site itself, we will need to set up unique permissions for the calendar. I provided instructions here. However, it is literally just one step depicted in the image below.

Step 8: Set up Item-Level permissions
This step is optional but highly recommended. Using the above step, we granted everyone the ability to edit the calendar. This means that users can edit and delete entries created by others. If you are a small firm, this might work, but for a large company, I do not want some schmuck from another department to delete my vacation entry. To prevent this, you would need to set up Item-Level Permissions. Here are the instructions.

Step 9: Create a Form of a List
This next step is optional and might not be necessary, but I am a perfectionist 😊. You can also create a nice calendar entry form using the Forms functionality we now have on the lists. I explained how to achieve this here.
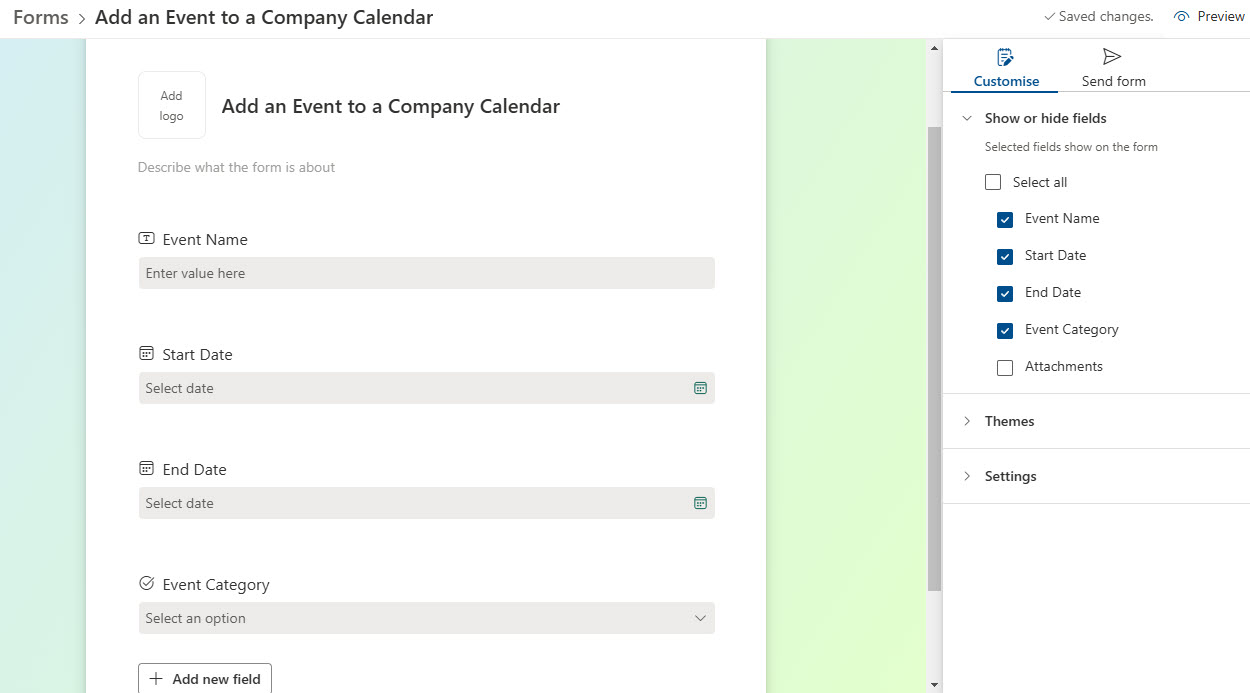
An example of a Form build-out

A Calendar Entry Form that populates the entries into the Calendar
Step 10: Link from the Homepage
Finally, you might want to create a link to that calendar from the homepage. I usually prefer to link to the calendar instead of embedding it on the page, as it takes up quite a bit of screen real estate. I always like using a Hero Web Part link to catch users’ attention. However, a Quick Links Web Part would also be a decent choice.

Firm Calendar Limitations
Despite its simplicity, a Company Calendar in SharePoint has some important limitations:
- No interface to Outlook – since this is a SharePoint List – you can’t display this information in Outlook – users would need to view, add, and edit entries in SharePoint
- Out of the Box, the formatting (color-coding) options for event categories are limited

- Just as with SharePoint’s built-in Events Calendar, this method does not allow for recurring events
- Once added, the events appear in the calendar right away. If you want events to be approved before they appear in a calendar, you would need to build an approval workflow in Power Automate


Share Article