How to share a Custom List
A welcome addition to the Custom List lately was the ability to share it and give others easy access to view, edit, or manage it. Ironically, this is really not a new functionality – we could do this in the past. However, that required a Site owner to go behind the scenes, which most users did not even know about or shied away from. In this post, I would like to explain to you how to share a custom list and what actually happens behind the scenes when you do that.
What is the Share a List feature?
Share a custom list feature allows users to share the list with other users and allow them specific access. For example, you can share a list and give the recipient view access or edit access. Or maybe you want to grant someone Full Control so they can manage list settings and metadata.

Why is Share a List feature important
In order for us to understand why we have this feature in the first place – we need to understand where the custom lists live. Custom lists are created and reside on a given SharePoint site. Your Site might have unique security, allowing certain users to have access to the site and other content you might have there (documents, news posts, links, etc.). Without the Share a list feature, you would need to invite users to the whole site in order for you to give access to just the list. This could be problematic. Maybe I just want to share a list, but don’t want you to see the site and other stuff I have in there – makes sense? This is where Share a Custom List features comes in – essentially, it allows you to designate unique permissions for the list without giving access to the whole site.
3 Levels of Custom List sharing
There are three choices to choose from when sharing a custom list:
- Full Control – gives the recipient full Admin Access to the list – the ability to manage its permissions, settings, add/edit/delete columns, add/edit/delete content (rows of data)
- Can Edit – gives the recipient the ability to add/edit/delete content (rows of data), but not the ability to manage its permissions, settings, or add/edit/delete columns
- Can View – gives the recipient the ability to view the information on a list, but not do anything else to it
How to share a Custom List
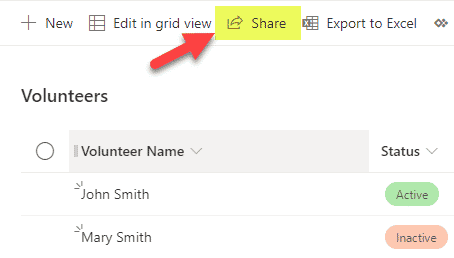
- Click the Share button in the ribbon above the list
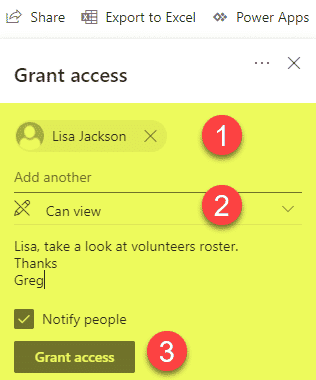
- Specify the recipient’s email, permission level you would like them to have (Full, Edit, or View). Click Grant access.


Who can share a List in SharePoint
- Users with Full Control Access to the site (Site Owners, Group Owners)
- Users with Full Control Access to just the list
All other users (with Read/View or Edit access to the list or site) can also share, however, their request to invite others will go to the Team Owners/Site Owners for the approval first.

Experience for the Recipient
- The recipient receives an email with the link
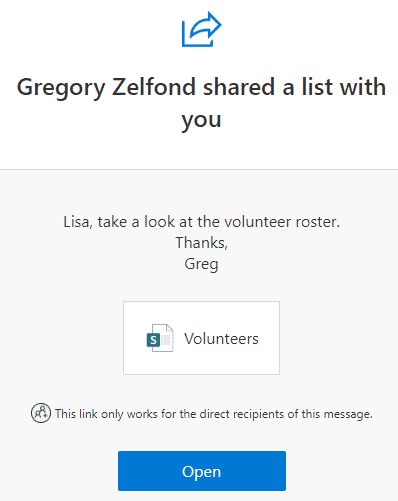
- Once the recipient clicks the Open button, he/she gets access to the List
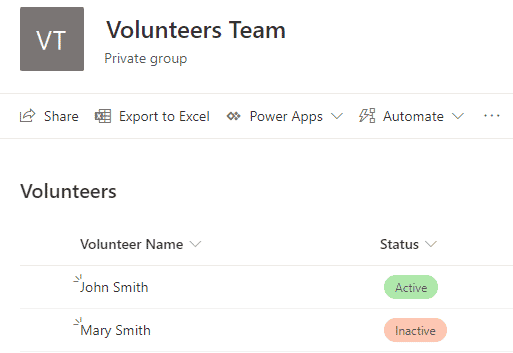
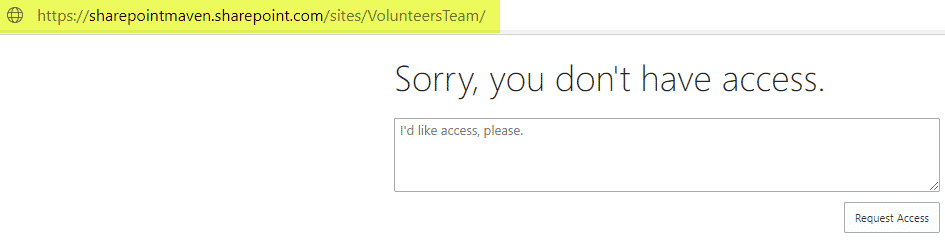
- It is important to note that the user does not have access or even see anything else on that site where the list resides. When clicking on a site logo above (which takes the user to the homepage of a site), the Access Denied message is displayed.


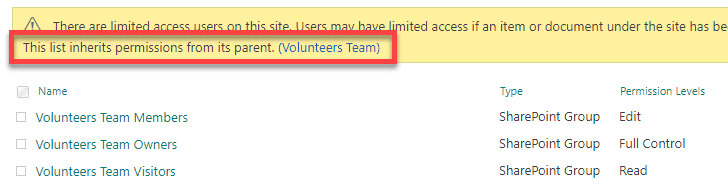
What happens behind the scenes when you share a custom list
Remember how, in the beginning, I told you that this feature is not new? Let me show you what happens behind the scenes when you Share a Custom List. To get there:
- From the list, click Gear Icon > List settings
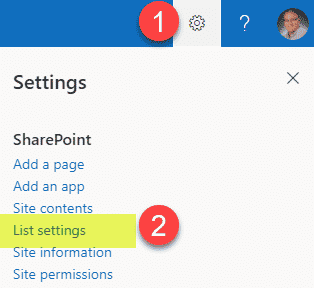
- Click Permissions for this list
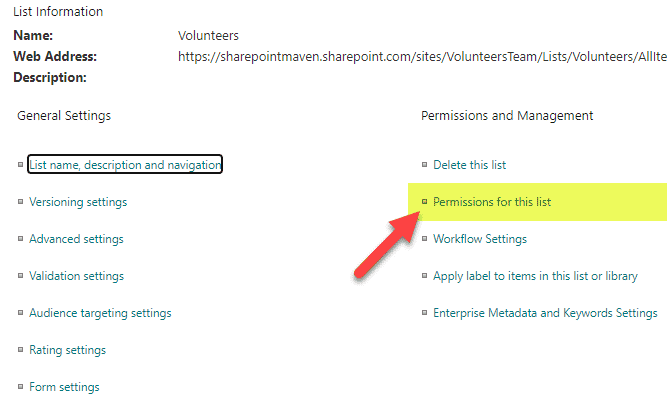
- Depending on a permission level assigned, you would see one of the images below


Full Control

Can Edit

Can View
So in the past, before Microsoft added the Share a List option to the Custom List ribbon, we used to go behind the scenes to List settings > Permissions for this list and break the inheritance between a list and a site manually, which in turn, allowed us to add additional users to the list. The Share button essentially does all of the above in 1 click!

How to revoke access to the shared list
In case you would like to revoke access to the list you shared, you would need to go behind the scenes, using the instructions above and then:
- Click Delete unique permissions
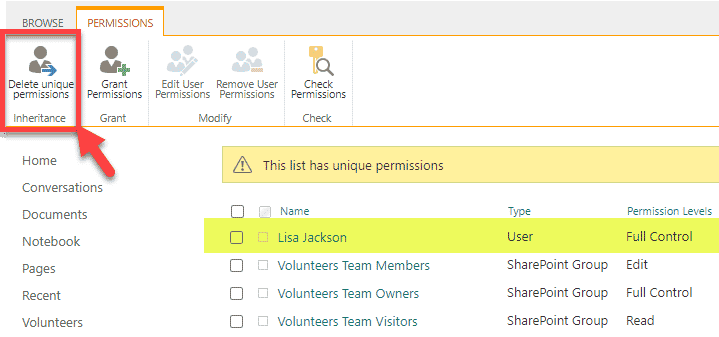
- Click OK on the confirmation pop-up
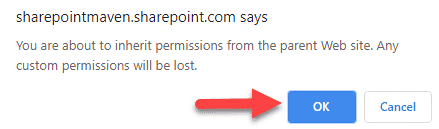
- The list will now re-inherit permissions from the site. All the recipients who are not part of the site will lose access to it.


Share Article