< All Articles
How to create a new list by creating a Board
The Lists application has really evolved over the years. In the past, all we could create with it was a typical list/grid in a table format. A while back, we also got the ability to create a board view. Board View allows organizing the list in a Kanban-style board, grouping it by one of the list’s columns (called a Bucket in Board View).
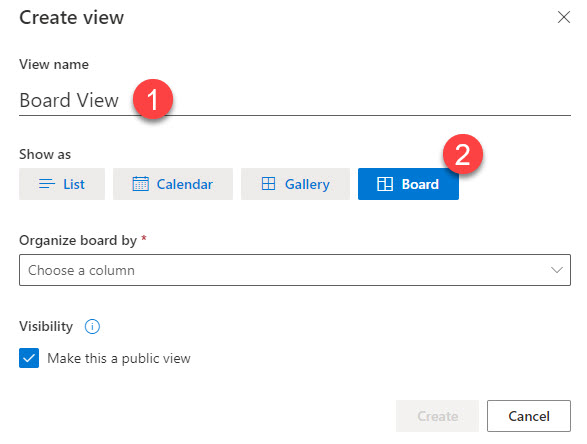
Sometimes, though, when creating a brand-new list, you want to bypass the whole list grid and quickly create the Board using Lists. And luckily, we now have this functionality. Let me explain.
- From the Site Homepage, click New > List

- From the list of available choices, choose Board

- Give a list a name and click Create

- The list with some sample data will be created for you. You will notice it already contains some sample data.
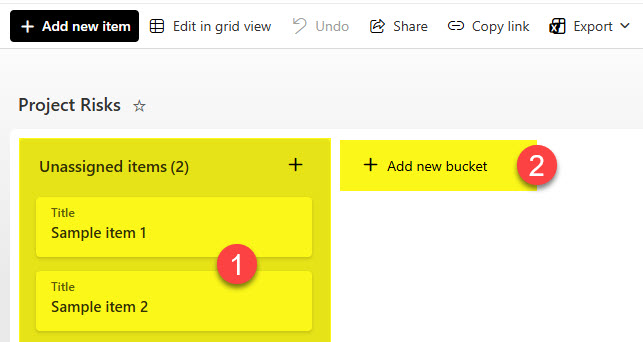
- To make sense of what has been created, click on the All Items view. You will see the same test entries in a list format. You will also notice a column called “board choice“. This is a Choice column that is used to group the Board. In other words, it is a Bucket name. So the drop-down choices you type in there are used as bucket names on the Board view.

- Now switch back to Board View again. Go ahead and click Add new bucket, then assign them some choices. In my case, I am creating a board for Project Risks, so my Board buckets will be different risk categories. This is what it looks like once completed.

- At this point, you can go back to the All Items View and rename the board choice column to something that makes sense (Risk Category in my case). You can also add other metadata columns that make sense (e.g., Assigned to).
- To customize the display of the card and which fields to show or hide, click on the Customize Card option


Board View Nuances
- Once you create a brand-new list using the method described above, you will not be able to rename the column until you add a few choices (bucket names). This is “by design.”

- When a list is created using the method described in this article, it will create a list and two views right away: All Items View (Grid View) and Board View.
- The Board View will become the default view of the list. You can, of course, change it if needed.
By the way, if you wish to see the full Project Risk Register I started in this post, check out an example on my LookBook 365 portfolio site.


Share Article