Create an Intake Form for File Uploads in SharePoint
When Microsoft Lists added Forms integration a few years ago, it was a significant change that enabled many new business processes. This allowed organizations to create intuitive, easy-to-complete intake forms without sharing the list where the data is ultimately stored.
For years, we had the same need for the document library as well. Primarily in situations when you added metadata columns to it. Uploading a document and filling out metadata was always a weird experience, as many users would simply ignore the metadata fields and upload a document, even after you made the fields required. If you wanted to have a nice uploading/tagging experience, you had to design and create a custom form in Power Apps.
Luckily, we can now create a custom form, just like on lists, and allow users to upload documents to the library. Below, I would like to explain how it works and its nuances.
Step 1: Add metadata to the library
The intake form really only makes sense if you have custom metadata columns on the library – this way, the user uploading the documents can supply additional information about the file. For this example, I will use the existing library of company policies.

Step 2: Create a form
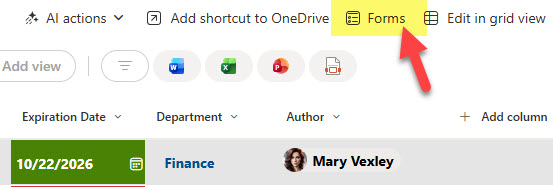
- Click on the Forms from the library header
- Click on Create new form

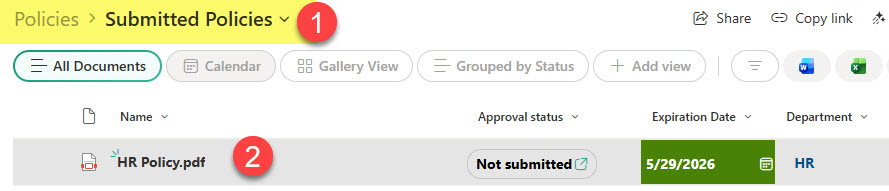
- Next, you will need to provide the folder name where the files will be uploaded. Although you might have a library with metadata, a folder is required here as the destination for the uploaded documents. Give it a name and click Create.

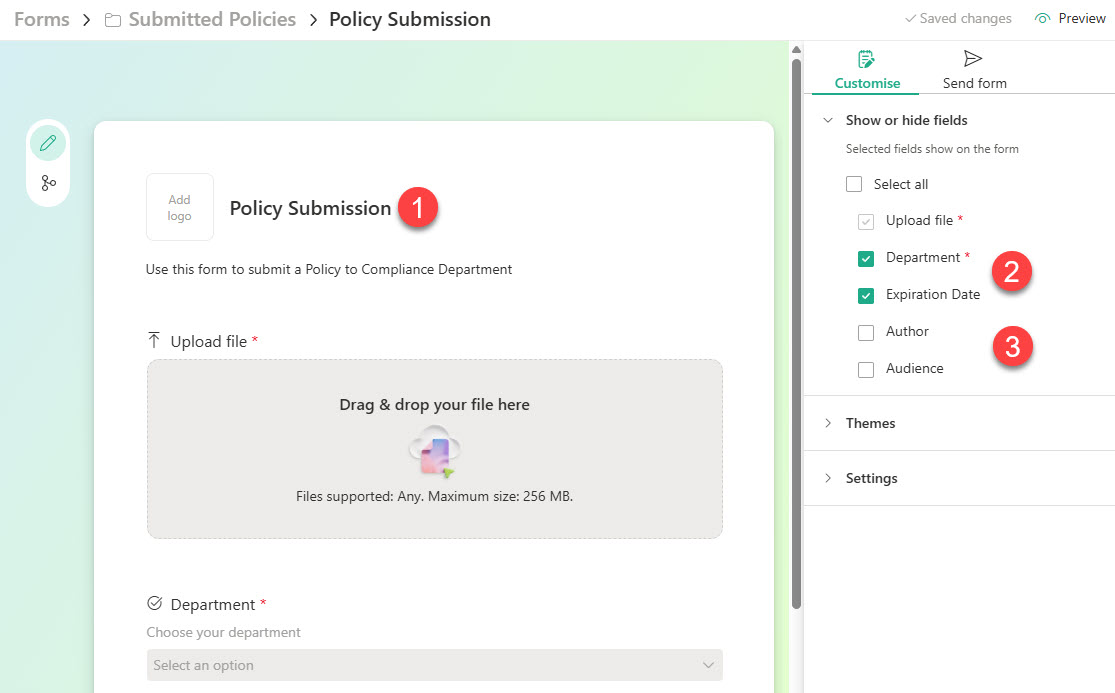
- Next, customize the form. Give it a name, check the boxes next to the columns you want to appear on the form, and uncheck the others.
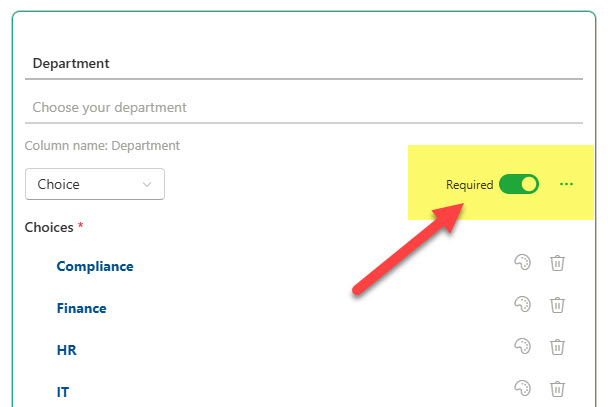
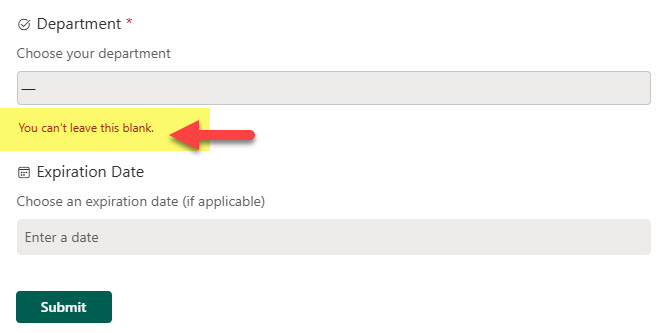
- You can also designate certain fields as Required. If you do, this will prevent users from uploading a document until they fill out the metadata.
- Copy the form link to share it with others.

Step 3: Upload the document via the Form
- This is the user experience for uploading the document.

- Once submitted, the file will be uploaded into the designated folder
Nuances about the Forms and Library integration
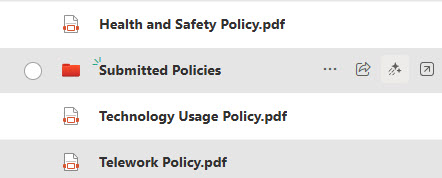
- Each Form you create creates a folder in the library, where the files are deposited. If you want to view docs without any folders, create a folderless view.
- This is super important. Making the column required and leaving it blank prevents the file upload. This contrasts with the standard document library behavior, where users can still drag and drop files, though fields are required.
- Another cool thing: the user uploading the document via the Form DOES NOT need any access to the document library. This is great from a governance and workflows standpoint.
- According to Microsoft, the maximum file size for the upload is 256 MB.
- The form you create only works for internal users, not external ones
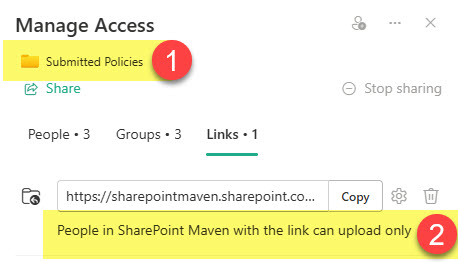
- If you check the folder permissions via Manage Access, you will notice some new and interesting permission levels being created for this folder (to accommodate the special permission just to upload the docs)

- You can submit only 1 file at a time via the form. Currently, the form does not support multiple file uploads.
- The form does support branching logic.
- You can rename or move the folder; however, if you delete the submission form, the submission link will stop working, and users will receive the following error.

Use Cases for Document Upload Intake Forms
- Legal Agreement Submissions
- Human Resources Document Submissions
- Project Deliverable Submission
- Accounts Payable (Invoices) Submission

Share Article