6 ways to archive documents in SharePoint
It is inevitable. Despite your best efforts to keep SharePoint document library under control – it will become a monster at some point. It is like your weight. You have a plan to stay in shape, and that’s your New Year resolution and all, but in 6 months, it is time to buy new pants again because you let yourself loose and ate junk food daily while watching movies on the couch.
In SharePoint, the analogy would be the number of documents in a document library. As organizations collaborate within departments and projects, we also need an effective method to “keep the house clean” and archive docs that are important but yet, no longer required on an ongoing basis. So in this post, I would like to explain the different options we have on how to archive documents in SharePoint.
Option 1: Manual Move/Delete
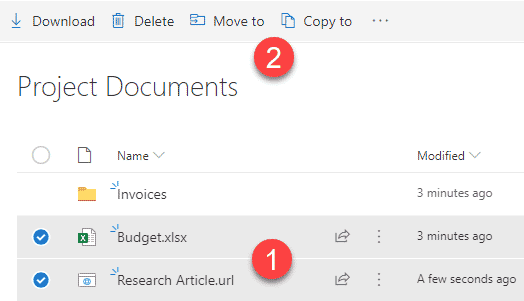
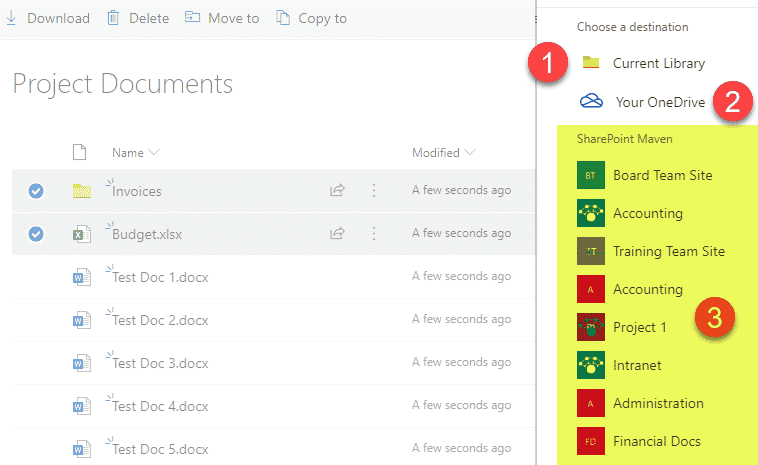
Of course, the easiest way to keep the library in control is to regularly check for outdated or irrelevant content and manually deleting or moving files and folders to a different site/library (i.e., archive document library of some sort). The new Copy/Move operation in a Modern Document Library makes it super easy.
Pros
- Nothing to set up
Cons
- Requires manual intervention by users
Option 2: Retention policies
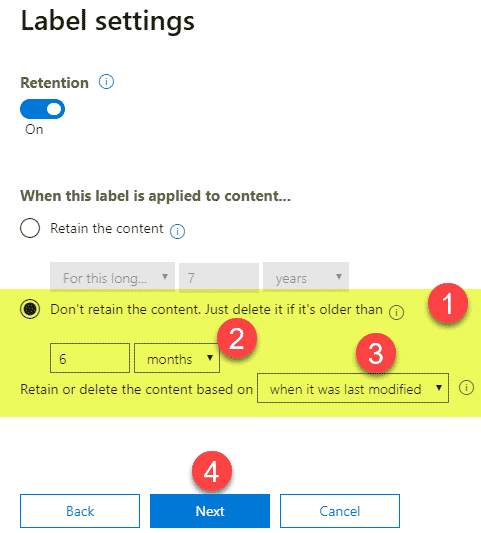
The other option to keep the document library under control would be to set up deletion retention policies based on the age of a document (i.e., last modified or created dates). You would define those in the Office 365 Compliance Center and then publish them to the respective sites. You can delete old (outdated) documents at the whole site level, library level, folder, or even file level. I documented the steps here.
To be accurate here, this is not an archival technique per se, but rather a trick to keep the library size under control, fresh and relevant as the documents of a certain age are just deleted/moved to the Recycle Bin.
Pros
- A modern way to keep sites/libraries clean, fresh and relevant
Cons
- Requires setup
- Not really an archival technique as it just deletes the documents based on the age
Option 3: Workflows
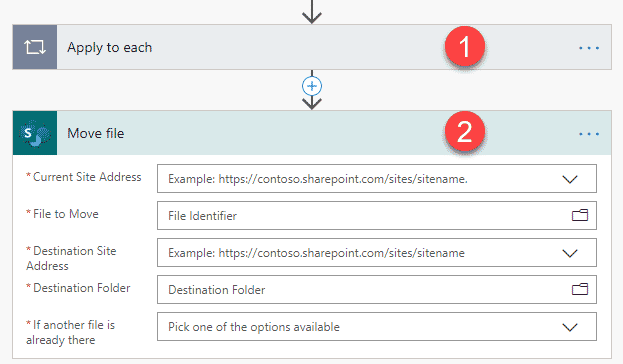
Another option to archive documents in SharePoint would be to use a workflow solution built in Power Automate. This requires a bit of sophisticated setup, so the assumption is that you are comfortable with the Power Automate application. Joanne Klein wrote a fantastic post with instructions on the topic. Please check it out here.
Pros
- A true archival option
Cons
- Requires considerable setup
- Setup needs to be replicated for all libraries/sites – lots of manual configuration
Option 4: Security Trimming
This method is more of a “workaround” and not a true archival technique, but I still wanted to provide this as an option as it might work in some instances.
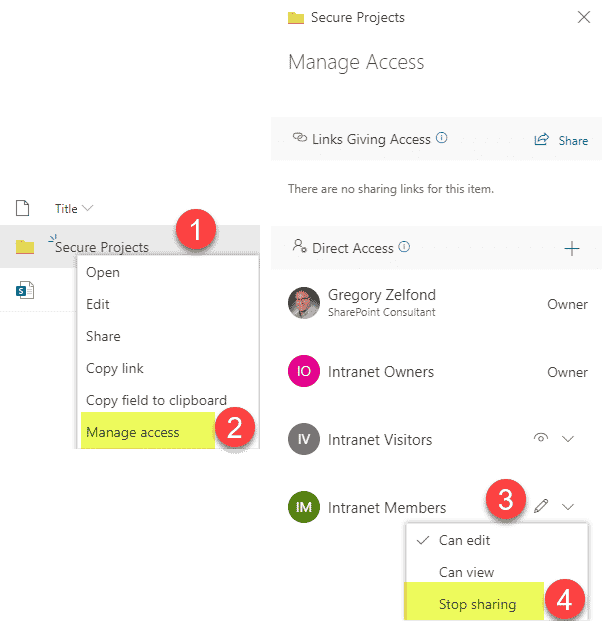
The idea behind this approach is that you would be setting up unique permissions for certain folders you need to “archive,” thus making them invisible to the end-users. So, in reality, folders will still be there, just hidden. I explained how to set unique permissions for files and folders here.
So unlike all of the options above, you won’t be physically moving content anywhere, just hiding it from the view. It is an excellent option to implement in case you need to hide stuff quickly without going through the pain of re-organizing content.
Pros
- Relatively simple to implement
Cons
- Not really an archival technique as it just hides the documents from the view
- Folders/Files cannot be hidden from the Site Owners/Site Collection Administrators. Only Site Members and Site Visitors
Option 5: Custom Metadata/Filtering
Another “workaround” method to “archive” documents involves metadata. Kind of similar to the trick above, but instead of hiding files and folders via security, we will hide them via custom metadata.
The idea behind this method is that you will need to create a custom metadata column on a library called “Status” (or whatever you want to call it) with a few drop-down choices (i.e., Active/Inactive). Once tagged, this will allow you to filter out (hide) the Inactive files.

Pros
- Relatively simple to implement
Cons
- Not really an archival technique as it just hides the documents from the view
- Can only tag files, not folders
- Requires consistency in tagging if you would like to utilize across multiple sites/libraries
Option 6: Content Organizer
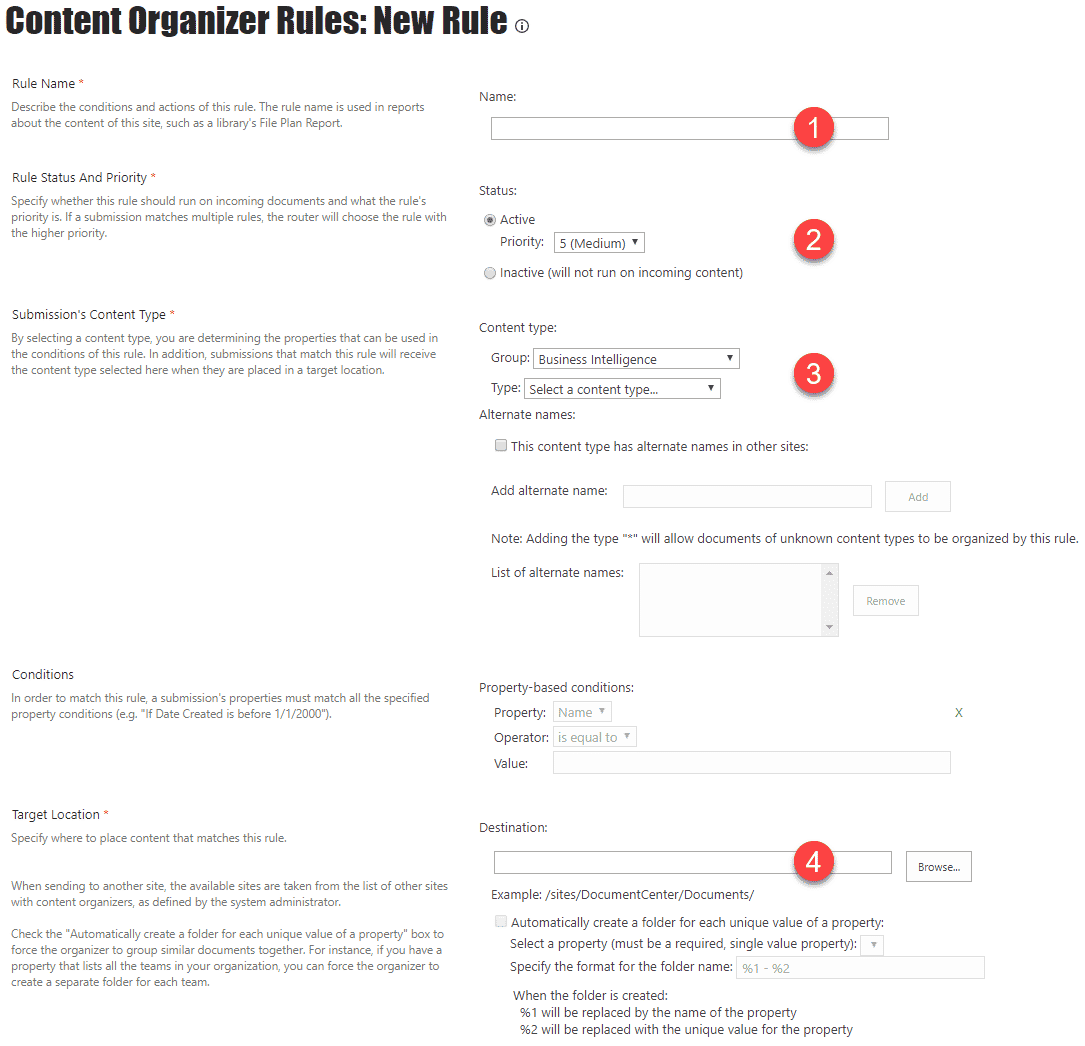
There is another option available to archive documents in SharePoint and the only real option if you are not in SharePoint Online and are still on SharePoint on-prem (older versions of SharePoint). In such cases, you would use the Content Organizer feature, which is a legacy feature that allowed us to create rules and route documents to various locations using the Content Organizer Rules. This article explains the feature further. If you are in SharePoint Online (Office 365) – it does not make much sense to use with the modern ways/options I described above.
Pros
- The only available option for archival for those who are still in SharePoint on-prem
Cons
- Requires considerable setup
I devote this post in memory of Ruth Bader Ginsburg, an American liberal icon who advocated for women’s rights and equality.
“Fight for the things that you care about. But do it in a way that will lead others to join you.”
— Ruth Bader Ginsburg, 1933 – 2020


