< All Articles
Viva Dashboard OneDrive Card
I usually blog about SharePoint Web Parts and don’t spend much time on Viva Connections or Viva Dashboard. But lately, Microsoft added some really nice-looking cards that make the Viva Dashboard more functional and personal. One of them is called OneDrive. Let me show you what this is all about.
There are two ways to adjust the Dashboard: at the global level by the SharePoint Admin (so that dashboard can be used on the Home Site within Teams) and at the Site Level, by the Site Owner. Since most of my readers are site owners and are not SharePoint admins, I will focus on how to add the Viva Dashboard OneDrive Card at the Site Level.
- Assuming you are the Site Owner, click Gear Icon in the upper-right-hand-corner, then Manage Dashboard.

- On the tab that pops up, click Create.

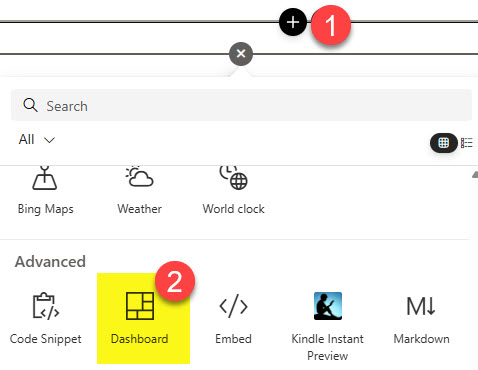
- Click on +Add a card

- From the list of available Cards, choose OneDrive card

- Once the card is added to the Dashboard page, click on Pencil icon to configure some additional settings

- On the side panel, you can change a few attributes, like Title, card size and which tabs to show. You can also configure Audience Targeting as well.

- To finalize the Dashboard, click Publish in the upper-right-hand-corner.

- Next, you will need to add Dashboard Web Part to your SharePoint page (so that Dashboard card(s) can be displayed)
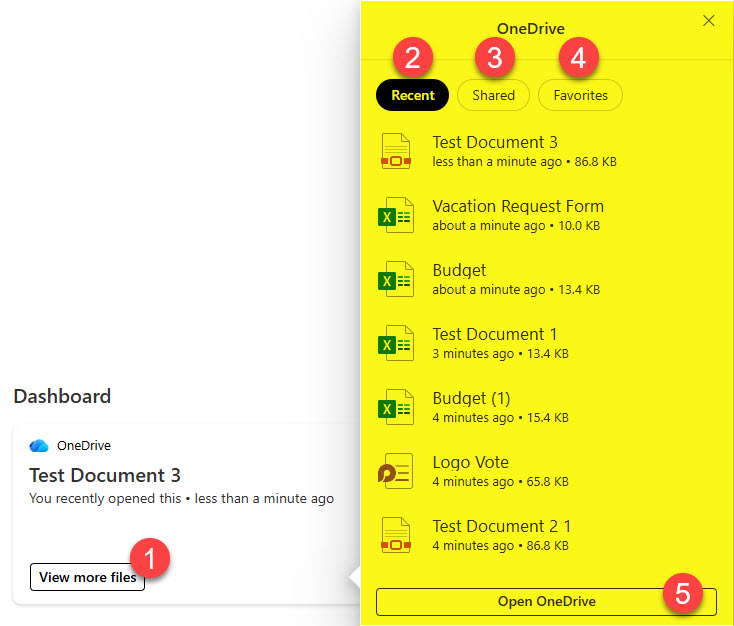
- This is the result. The card will display the latest document you accessed, and when you click View more files, it will show you other recently accessed files. You can also shift between various tabs (Recent, Shared, Favorites).

Share Article