How to set up a Disposition review for content under Retention in SharePoint Online
Every time you set up a Label Retention Policy, you must specify what will happen at the end of the retention period. You can end the retention, delete the labeled content, or change the label to another label. However, you can also involve your compliance/regulatory officers or knowledge managers to manually review the labeled content and make the proper decision via the built-in feature of Disposition review. So, in this article, I would like to explain how to set up a Disposition review for content under Retention in SharePoint Online.
Components of the Disposition Review
Before we set up the Disposition Review, it is essential to understand the components involved.
Component # 1: Stages
Stages are possible in different phases of the review. You can have anywhere between 1 and 5 stages. For example, in most cases, you might want a Department Owner to review the labeled content. So, in this case, 1 stage is all you need. However, in some cases, you might want to have a serial review. Stage 1 could be Department Owners; Stage 2 could be Compliance Officers. Stage 3 could be the Legal Department and so on. The number of Stages and their names are set when you create a disposition review.
Component # 2: Approvers
Approvers are those who will review and decide on the action when they receive a disposition email. You can have one or more approvers, and they are assigned to the appropriate stage above during the disposition review setup in Purview.
Component # 3: Auto-approval
There is an auto-approval mechanism available. This might be handy if the approver does not take proper action within a designated number of days. With Auto-approval enabled, the process automatically proceeds to the next stage.
Component # 4: Disposition Email
When it is time to act on labeled content, Approvers receive emails asking them to decide on disposition. Those emails can be customized, and I will explain it later in this post
Component # 5: Disposition Tab in Purview
Approvers can also access the disposition dashboard in Purview. Again, instructions to follow.
How to set up a Disposition review for content under Retention in SharePoint Online
-
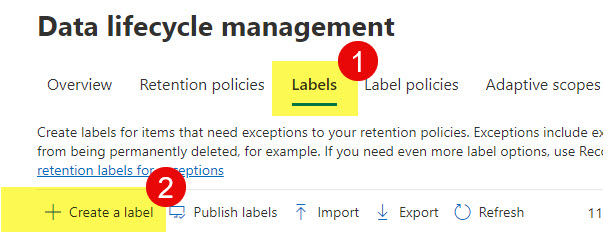
- Once in Microsoft Purview Data lifecycle management, create a new label
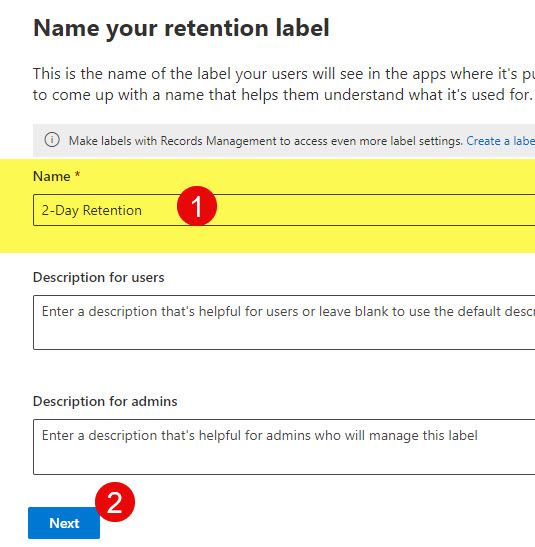
- Give your label a name, and click Next.
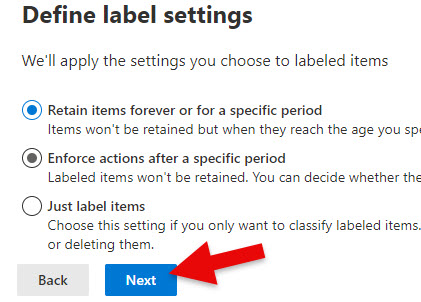
- Specify that you want to retain content, click Next
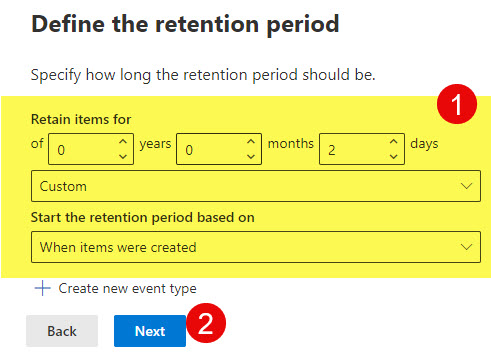
- Define the retention period. For this post, I am choosing 2 days from the date the item was created. Click Next.
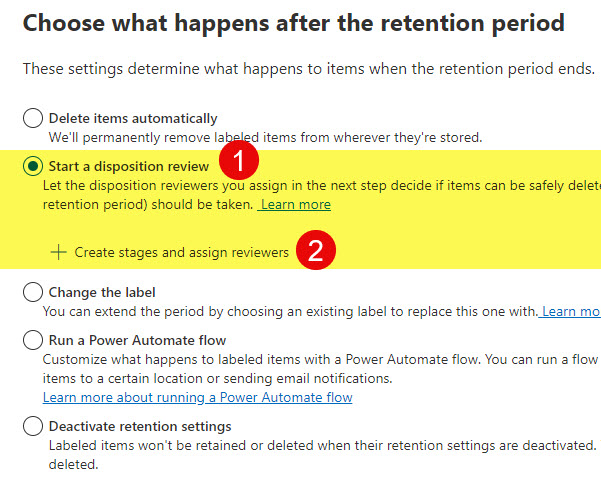
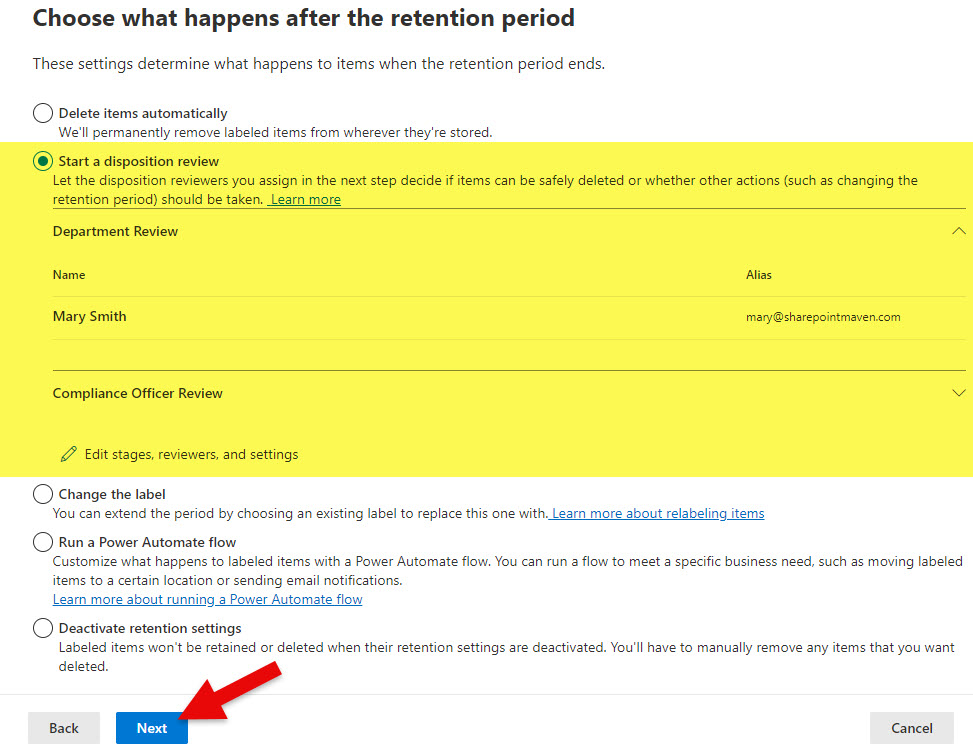
- On the next screen, you must choose what happens after the retention period ends. This is where you choose the Start a disposition review option.
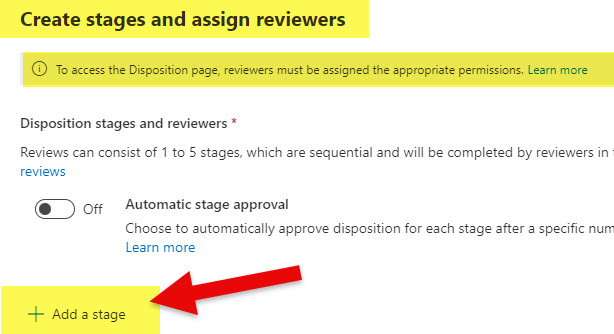
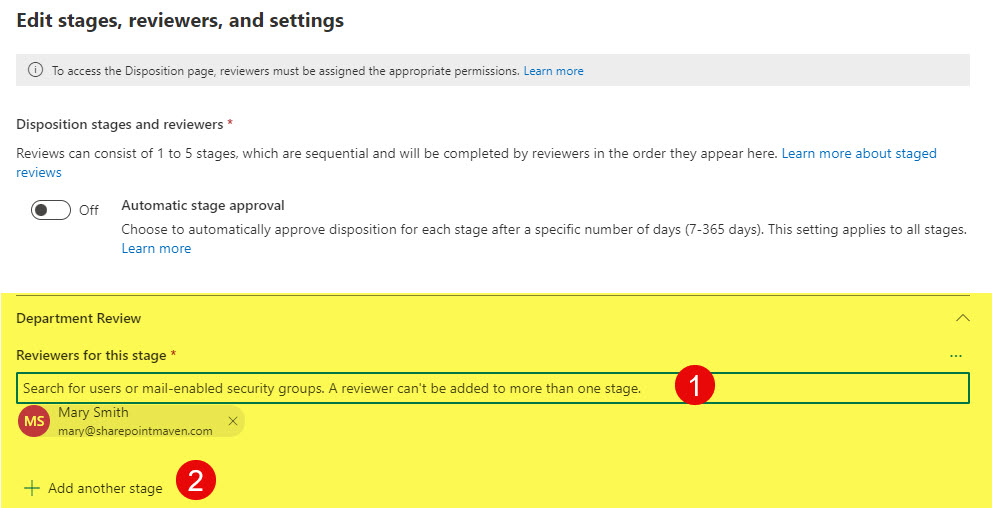
- As soon as you select the Disposition option, you can create the stages and approvers I explained above. In my example, I am creating 2 Stages: Stage 1 (Department Review) with Mary being the Approver + Stage 2 (Compliance Officer Review) with John being the Approver. Click Add a stage.
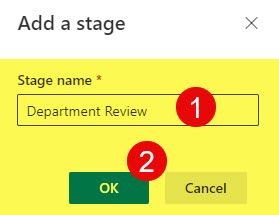
- Name the stage, and click OK.
- Click Add another stage to add a second stage (if applicable)
- Name the second stage, add its approver, and repeat for other stages (if appropriate). If not, click OK.
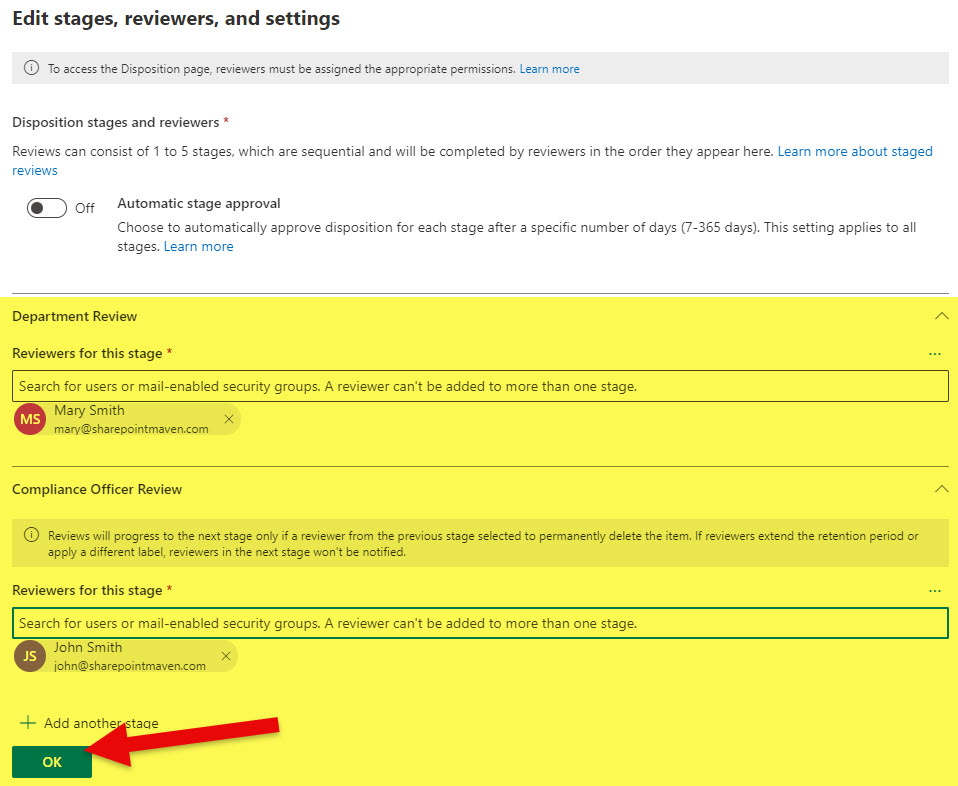
- Once you set up Stages and Approvers, click Next.
- Review the settings on the final screen; if everything looks OK, click the Create label.
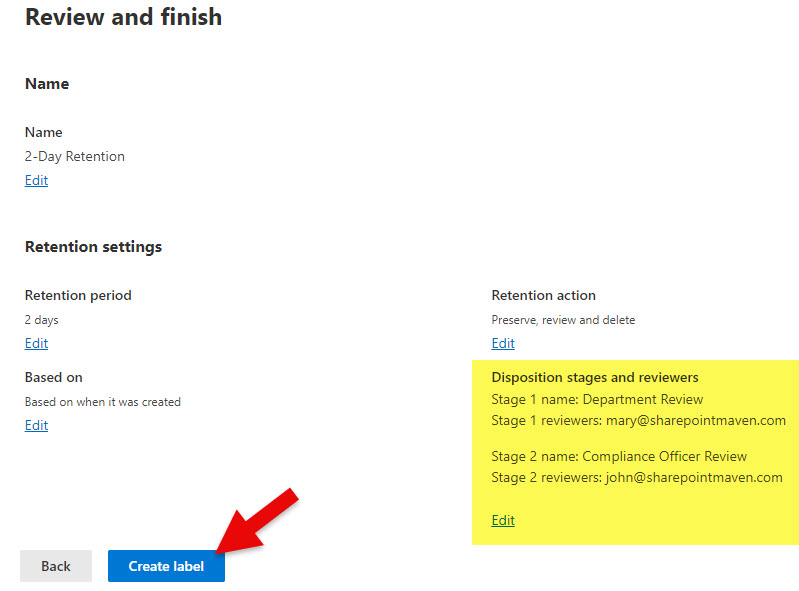
- You will receive a confirmation message that the label was created. After continuing the setup, you can publish it.
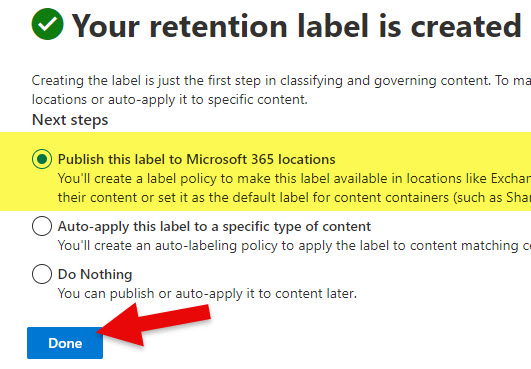
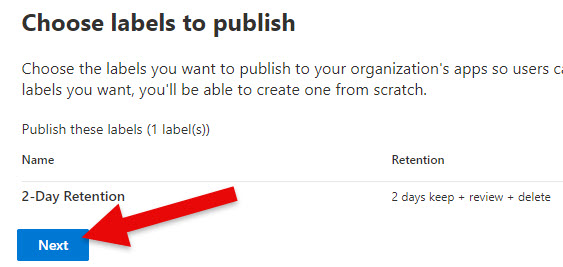
- Click Next.
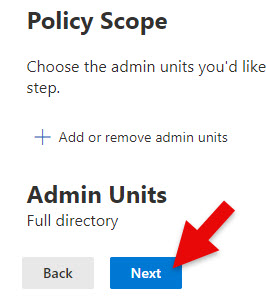
- Add Admin Units if applicable. To learn more about Admin Units, check out this article. Click Next.
- Choose between Static or Adaptive scope. Click Next.
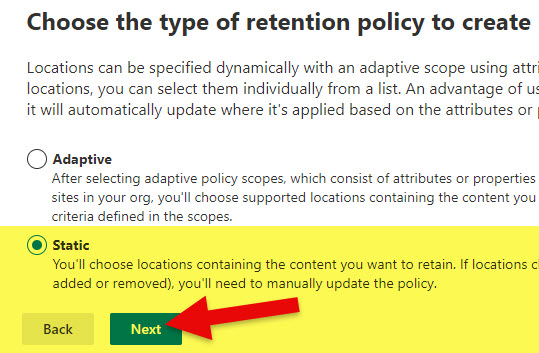
- In my case, I chose Static Scope. Choose the site(s)to apply the retention label to. Click Next.

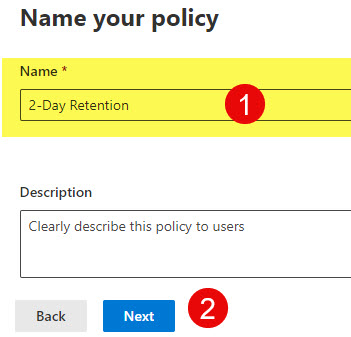
- Name the policy, and click Next.
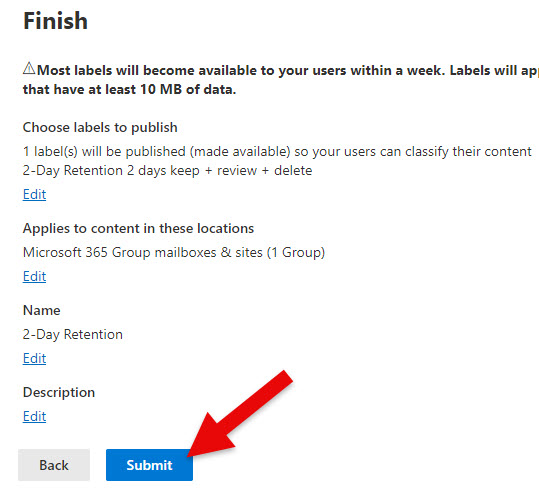
- Review the settings and click Submit to publish the policy.
- You will receive a confirmation message.

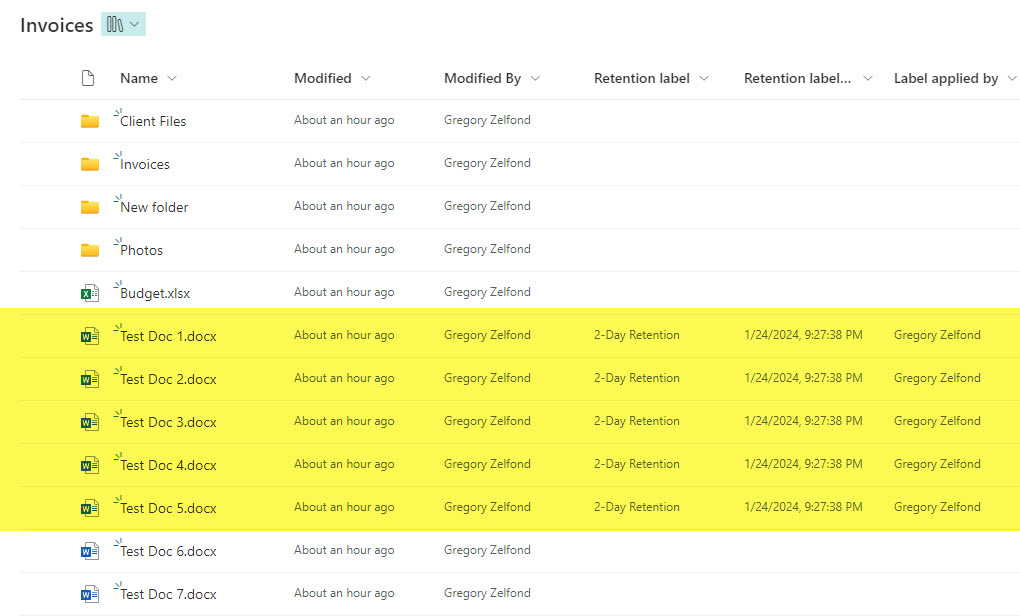
- Once the label is published to the site, apply the label to file(s) and folders.
- Once in Microsoft Purview Data lifecycle management, create a new label
Experience for the Approvers
- Once the retention period ends and the disposition review kicks in, the approvers you defined in the Stages above will start getting emails like the ones below.
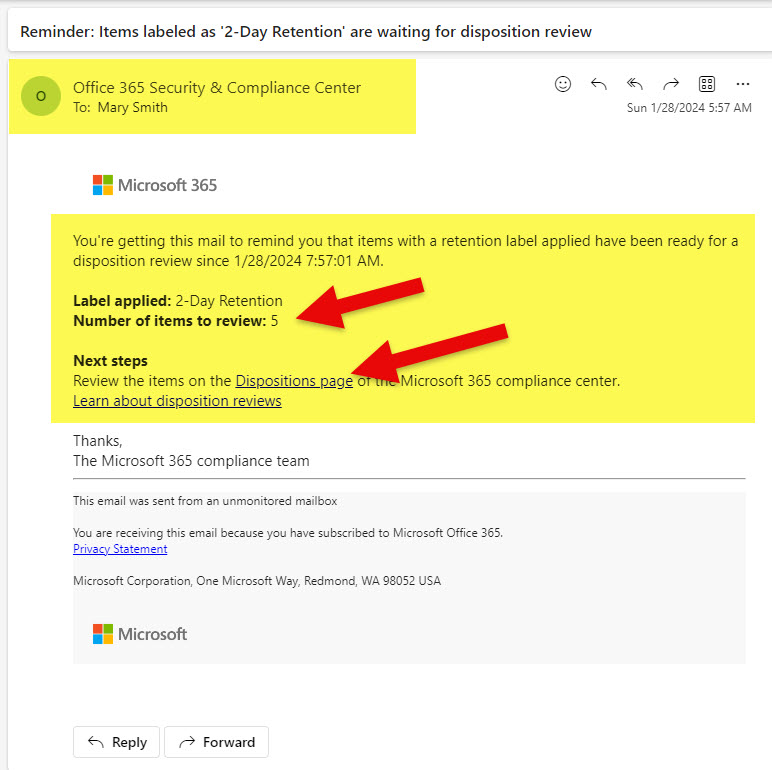
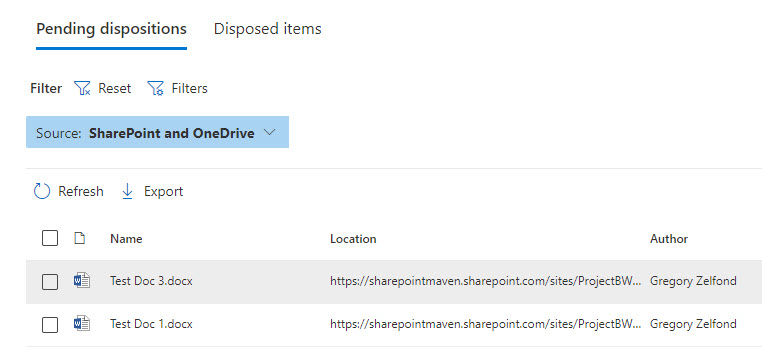
- When they click on a link in the email, they are rerouted directly to the Disposition Page within Microsoft Purview.
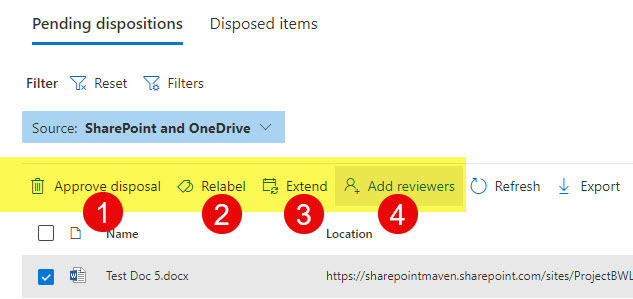
- As a reviewer/approver, you will have 4 choices to choose from: Approve disposal, Relabel, Extend and Add reviewers.
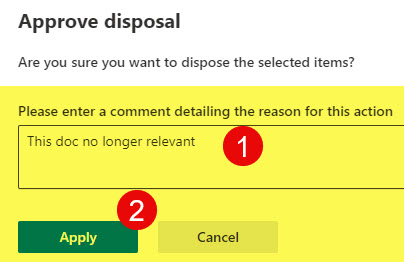
- If you decide to Approve disposal, you must enter comments and click Apply.
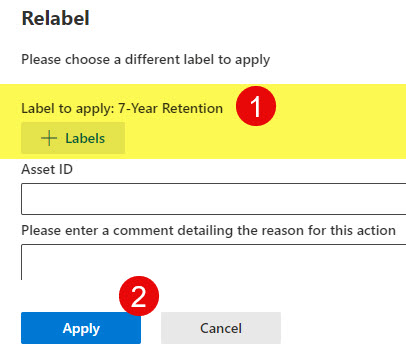
- If you decide to Relabel, you must choose a new label and click Apply.
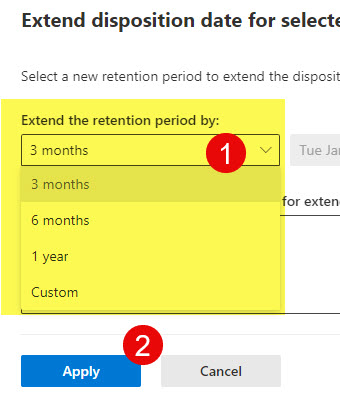
- If you decide to Extend, you must choose the extension duration and click Apply.
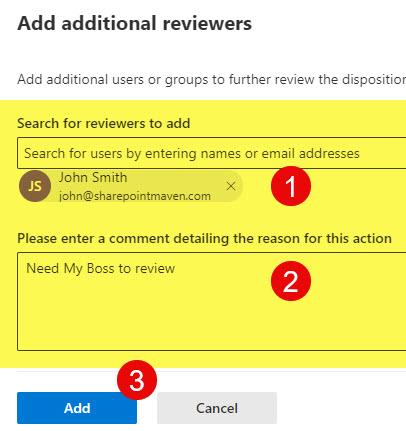
- If you decide to Add reviewers, you will need to choose the names of additional reviewers and click Add.
Important Notes
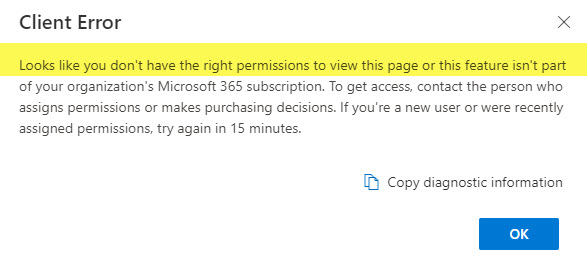
- Reviewers must have proper access and licenses to Microsoft Purview. If they do not, they will get error messages when accessing the Disposition Review Page.
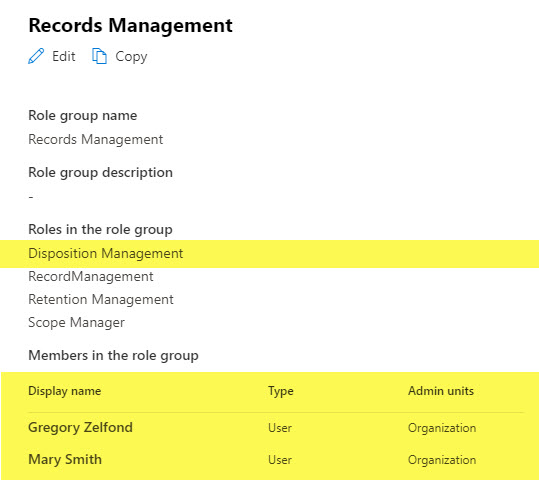
- Specifically, reviewers will need to be part of the Disposition Management role.
- Reviewers will also need to be part of the Content Explorer Content Viewer role to view content from the sites.
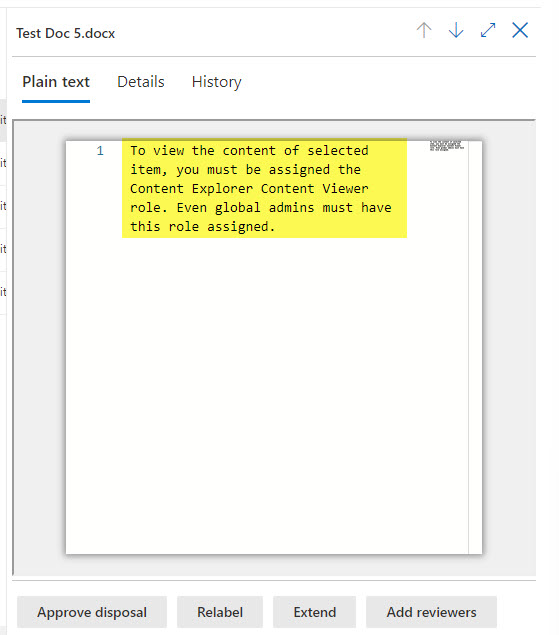
- Even a Global Microsoft 365 Admin isn’t granted the Disposition Management and Content Viewer roles above by default. They would then need to be assigned manually. Microsoft has some excellent instructions here.
- It will also help if Reviewers have access to the site(s) where the content resides
- If you do not want to have some reviewers as bottlenecks, you can enable Automatic Stage Approval toggle switch when you define stages and approvers – this will allow you to automatically proceed to the next stage if the approver fails to take action during the specified period
- You can also customize email messages sent to approvers at the end of the retention period or at the start of the disposition process. Microsoft provides instructions on this.

Share Article