How to prevent file download in SharePoint by creating a Custom Permission Level
As I work with clients and help them migrate to SharePoint, OneDrive, and Teams, one of the frequent requests after we set up security and permissions for the sites is usually a request to prevent the ability to download documents in SharePoint. There are several ways to achieve this in SharePoint. However, most require such capability to be set up at the global/admin level. The technique I would like to describe today can be implemented by SharePoint Site Owners themselves.
SharePoint Permissions out of the box
Before I explain the mechanism behind this option, I think it first makes sense to explain the default permissions. As documented previously, we have 3 main Permission Levels in SharePoint.
- Site Visitors (Read and Download)
- Site Members (Add/Edit/Delete)
- Site Owners (Full Control)
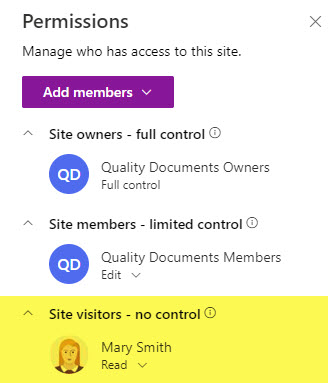
Example of Mary being part of the Site Visitors Group
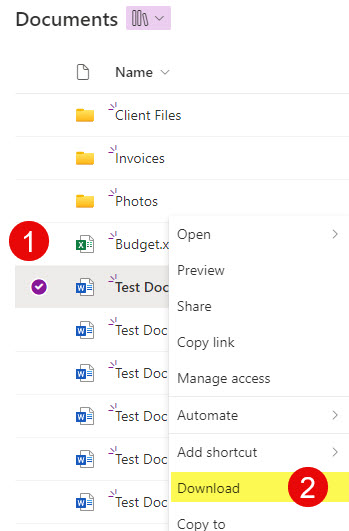
Mary can download files as well
So as we can see, users can download the documents from SharePoint even with the minimum Permission Level (Site Visitors).
Step 1: Create a Custom Permission Level that prohibits file download
We would need to create a custom permission level to get around the default permission setting. We will use the same steps and technique I outlined previously, when I demonstrated how to create a custom permission level to prevent file deletions. Here are the steps to achieve this.
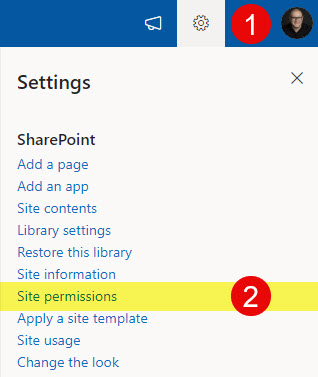
- Click the Gear Icon > Site Permissions
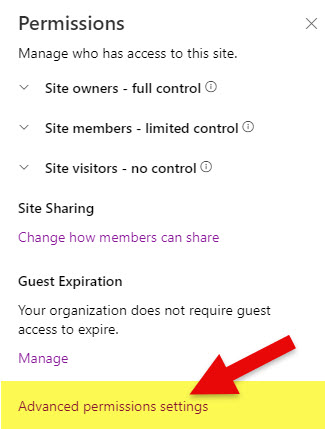
- Click on Advanced permissions settings
- Click on Permission Levels

- You will see that people with the Read permission level can view and download, which we are trying to prevent.

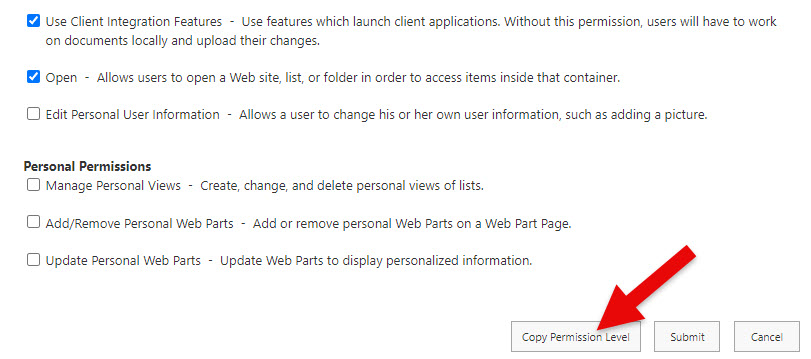
- While we can Create a Permission Level from scratch by clicking Add a Permission Level button, it would be far easier to make a few changes to the existing Read Permission Level instead. So click Read on the screenshot above. Next, click Copy Permission Level button at the bottom of the page.
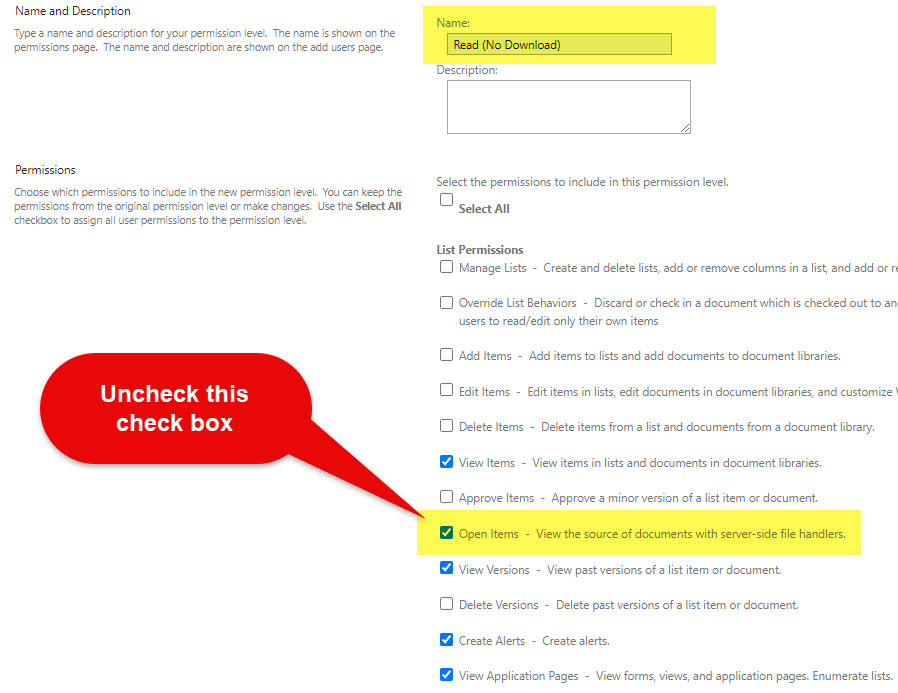
- Next, give the new Permission Level a name and then uncheck the checkbox next to Open Items.
- Click Create at the bottom of the page

- You will now see the custom permission level created

Step 2: Assign a Custom Permission Level to the user(s)
Once the Custom Permission Level has been created, you must assign it to the users. We cannot use the modern interface to do so, as it only allows to add users to the three default permissions. So, we have to do so from within the classic page.
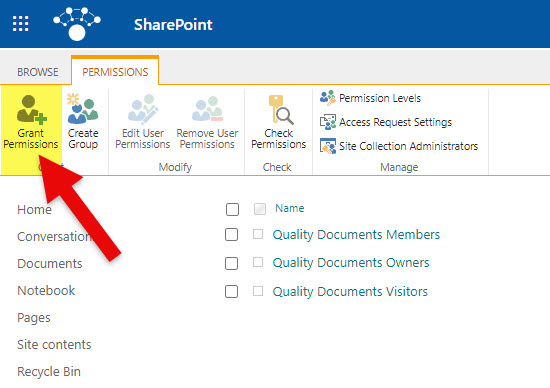
- Click on Grant Permissions button
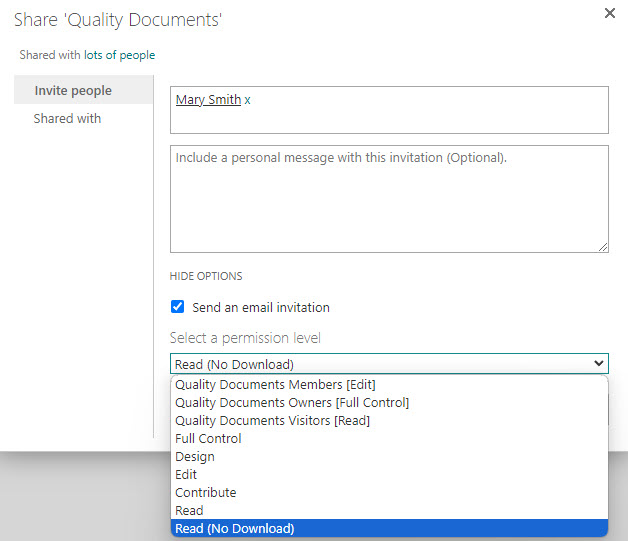
- Type in the User’s Name and choose the custom permission level from the drop-down. Then click the Share Button.
- You will now see that the user has been assigned a custom permission level.

Experience for the Users
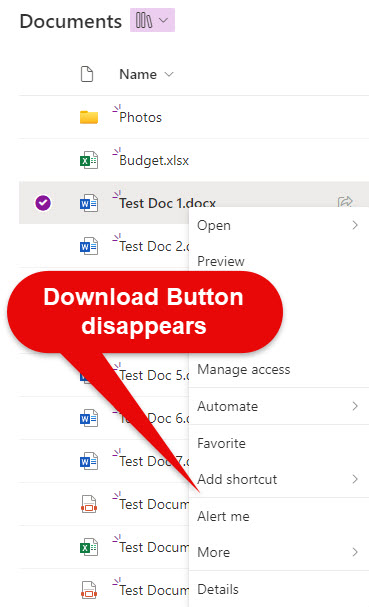
Once the user has assigned the custom permission level, they will no longer see the Download Option appear in the file menu.
Likewise, the Sync button at the library level will disappear as well.


