How to manage Version History settings in SharePoint
Version History is one of the most famous and essential features of SharePoint. Whether you accidentally made a change you did not want and need to restore the original, or just need to compare the document to its previous edits, SharePoint Version History is a lifesaver. I can’t tell you how many times I turned into a “hero” by restoring my clients’ documents or pages when they were inadvertently messed up.
While Version History is very powerful, it has one tiny drawback. Every time you revise a document, it creates a new version, which contributes to the allocated storage. A few years ago, one of my clients could not understand why their storage usage skyrocketed all of a sudden. It turned out they had a ~300 GB XML file that they constantly kept updating, which, in turn, through Version History, pretty quickly drained their tenant storage allocation.
Since Version History is a legacy feature that originated from the Classic days of SharePoint, we had limited abilities to manage version settings. As a matter of fact, they were very limited. We could switch between major and minor versions, but we could not even totally disable version history on default document libraries – the minimum we could go was 100. By default, every single document library retained the last 500 versions of each file. There was no difference in terms of version importance either. So no matter if you modified the file 300 times over the last month or last modified it 5 years ago – its last 300 versions were still out there contributing to storage allocation.
Recently, I assume, thanks to customer feedback, Microsoft implemented additional version settings that we now have, allowing us to control the number of versions we can save and set the logic for saving and retaining those versions.
Version settings apply to both SharePoint document libraries and users’ OneDrive. Instructions below mostly reference SharePoint, but towards the end of the post, I will explain how to control it in OneDrive as well.
Default Version Settings
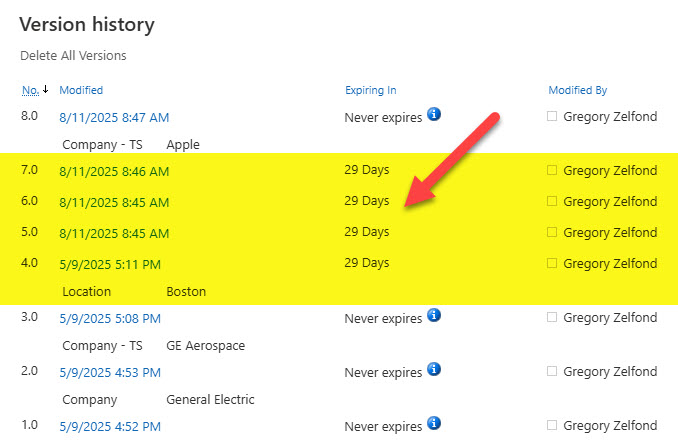
By default, SharePoint stores the last 500 versions of each and every document. If you check the version history of a given file, you will see its sequential versions, which never expire (up to 500 versions, the default).
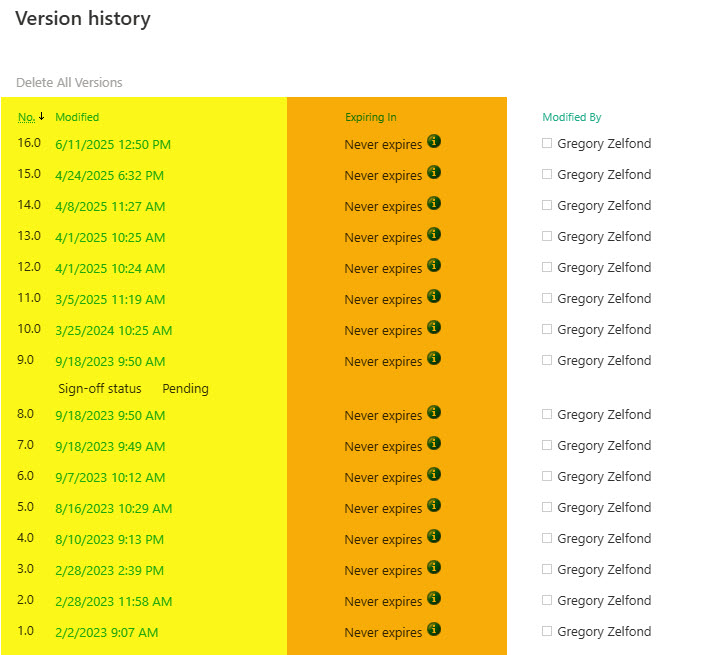
Example of a Version History on a document in SharePoint
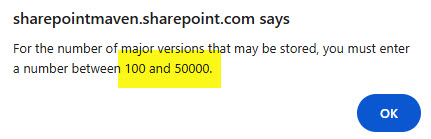
The number of versions was controlled at the library level, and the only way to control it was via the maximum number of versions stored. As stated above, the default is 500; the minimum is 100, and the maximum is 50,000.

New Version Configuration Settings
The recent version settings capabilities rolled out not only allow us to control version settings in other locations (other than a document library), but also allow us to control how the versions are saved and retained.
3 New Version Setting Options
- Manual with no time limit (versions are accumulated up to a maximum specified – default option)
- Manual with a time limit (older versions are deleted after a specified period/duration)
- Automatic (versions are deleted based on an internal algorithm that weighs the importance of versions). For example, if 200 versions were created 2 years ago and just a few were recently created, the majority of those older versions would be deleted due to their insignificance/irrelevance.
3 New Locations for Version Settings
- Tenant Level (applies to all sites and libraries)
- Site Level (applies to all libraries on a site)
- Library Level (applies to a single library)
Let me explain each option below.
How to manage Version History settings in SharePoint
Tenant Level
- To manage Version History settings in SharePoint at the tenant level, click on Microsoft 365 App Launcher > Admin
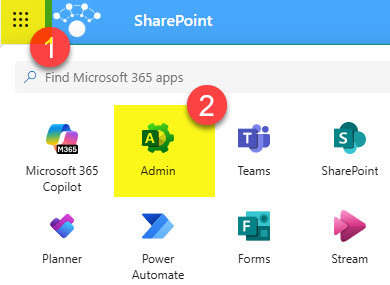
- Under Admin centers, click SharePoint

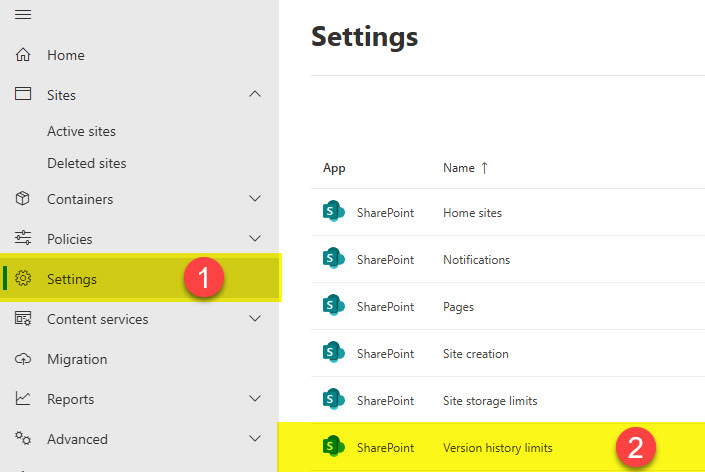
- Once in the SharePoint Admin Center, click on Settings > Version history limits
- By default, it is set to store 500 versions of each file (Manual with no time limit). As mentioned above, you can change to either Manual with a Time limit or Automatic.
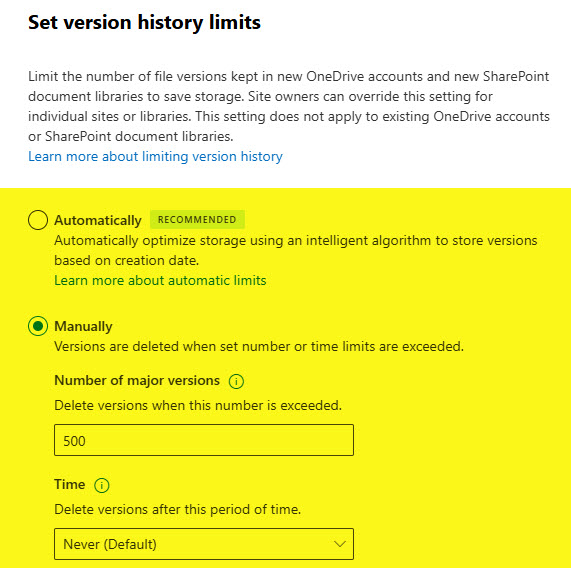
- If you opt for Manual with a Time limit, you will need to enter a period after which versions will expire.

Site Level
Site versioning settings can currently only be set via PowerShell. Please reference this article from Microsoft for specific PowerShell commands to run.
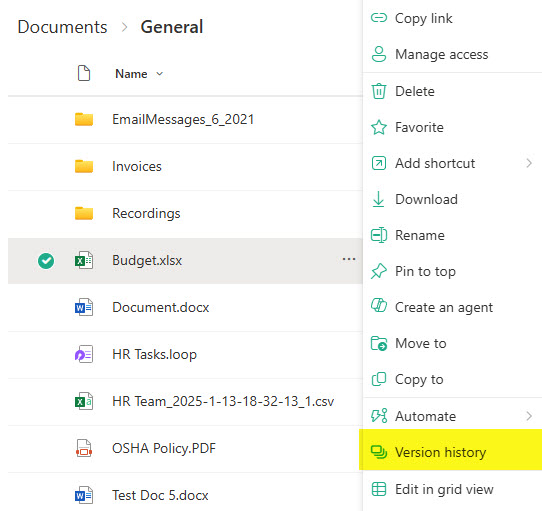
Library Level
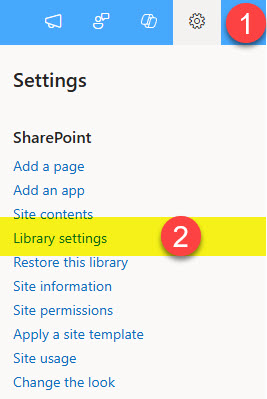
- From a given Document Library, click on the Gear Icon > Library settings
- Click on More library settings

- Click on Versioning settings

- Under the Version time limit section, you will see the three available options: No time limit, Automatic, Manual
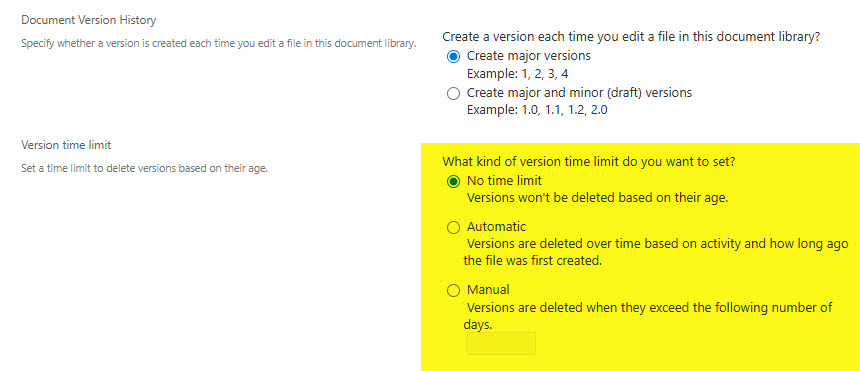
- If you choose Automatic (the option recommended by Microsoft), some older and insignificant versions will be deleted.

- Depending on the setting you chose, as you make changes to the content, you will start seeing version setting expiration dates within the Version History menu.
OneDrive
The steps above focused on version settings in SharePoint. You can also configure version settings in your own OneDrive as well, since OneDrive is nothing more than your personal and private document library. Here are the instructions:
- From your own OneDrive for Business, click on the Gear Icon > OneDrive settings

- At the bottom of the screen, click on Return to the old Site settings page

- Once on the old page, click on the Gear Icon > Site contents

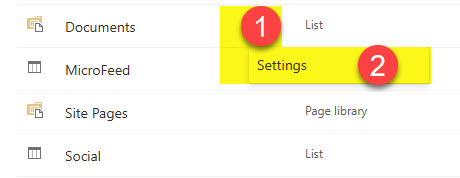
- You will then see the contents of your OneDrive. Next to the Documents library, click on the 3 dots, Settings
- Then just click on Versioning settings and follow the same instructions/options as with the SharePoint library.

Nuances on Version History settings in SharePoint
- Changes set at the tenant level only impact new sites and libraries created, not existing ones
- Tenant-level settings propagate to the site settings and, in turn, to the library settings
- The versioning settings at the lowest level win (Library Settings win over Site settings and over Tenant settings)
- Versioning settings described above only apply to document libraries, not lists
- Version settings described above also apply to the Site Pages Libraries
- The latest (current) version is never deleted
- When setting a manual option with the time limit, it first prioritizes the max number of versions specified (i.e., 500) and then deletes the ones (from that max number) that expire after a period of time
- In case you have retention policies applied to content, the retention policy overrides the versioning settings
- According to Microsoft, if you update the version expiration setting at the library level, the new limit will only apply to versions created after the change. That means that older versions before the change will not be impacted/deleted.

Share Article


