How to hide a field in SharePoint lists and libraries with the conditional formula
Working with SharePoint reminds me of watching James Bond movies – you think you have seen them all and know all the cool spy gadgets, yet, a new movie comes out, and there is a set of the new tricks in the book. The same with SharePoint – it is like a goldmine of cool stuff. Recently, I learned a cool trick, thanks to another SharePoint consultant, Ami Diamond, who happens to reside in Israel – my favorite country. The trick is about a way to hide a field in SharePoint lists and libraries with the conditional formula.
B the way, I already published a few posts where I described how we can benefit from using formulas in SharePoint. For example, check out this article for the calculated column and this one to learn how to do validations.
Use Case
- I have a document library of company policies with several metadata columns
- One of the columns is called Status (with Active/Inactive drop-down choices). Another column is an Expiration Date (date field).
- When the users fill in metadata for the policies, I do not want the Expiration Date field to appear in the form if the User chooses Inactive for the Status
The formula for the condition
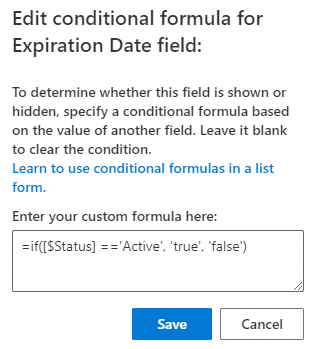
Translating the above text into the proper syntax of a formula, I end up with the following formula for the Expiration Date column:
=if([$Status] == ‘Active’, ‘true’, ‘false’)
Before you ask me, “How the hell did you end up with such a formula”? – please reference the Notes section at the end of a post for the proper syntax when you need to hide a field in SharePoint lists and libraries with the conditional formula.
How to access the conditional formula for the column
Instructions on how to access the conditional formula for a given column differ between the lists and libraries.
Document Library
For the document library (our use case), there are a few clicks for you to get the right place.
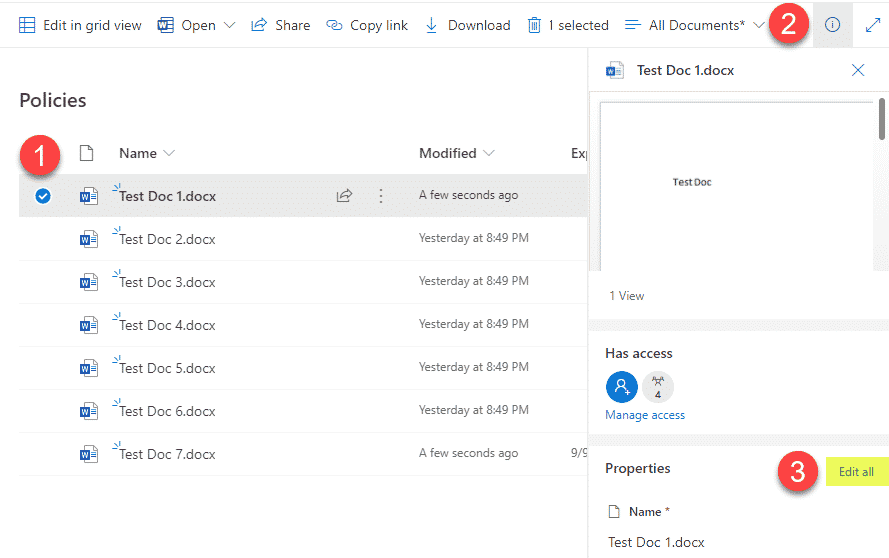
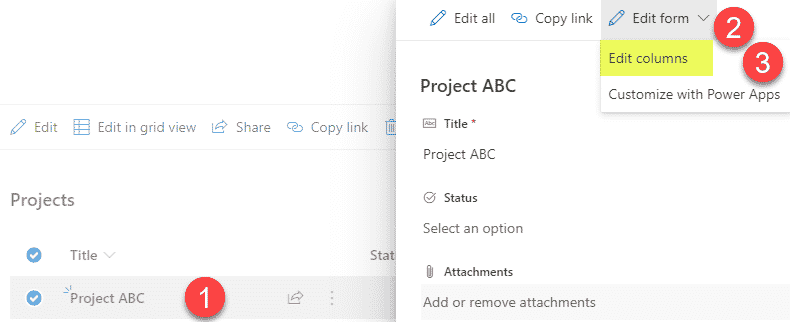
- Check the box next to any document, click on the “i” in a circle, then click Edit all
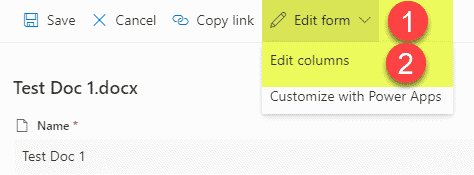
- On the pop-up that appears, under Edit form, choose Edit columns
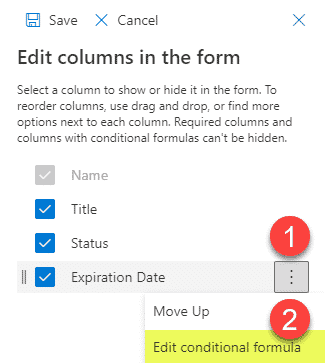
- On the next screen, hover over the column that you want to hide based on a formula, click on 3 dots next to it, then Edit conditional formula (NOTE: You need to hover over the field for 3 dots to appear)
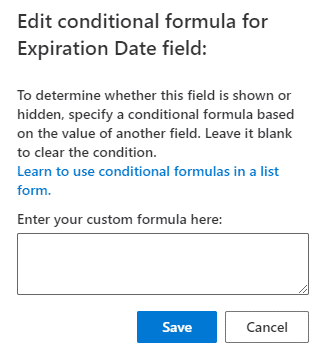
- You will then get to see the place where you can type in the formula
Custom List
The process of getting to the formula field for SharePoint lists is much easier. Just click on any item/row, then Edit form > Edit Columns, followed by Steps 3 and 4 above.
Paste the conditional formula
- Type in/paste the formula into the formula field. Click Save.
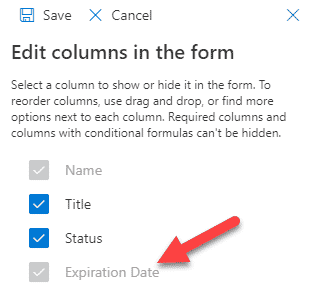
- Once the formula for the field has been set, you will notice that it becomes grayed out
Experience for the End User
- When the user tries to tag the document, the Expiration Date (the field where I pasted the conditional formula in) does not appear on the form until the user makes a choice
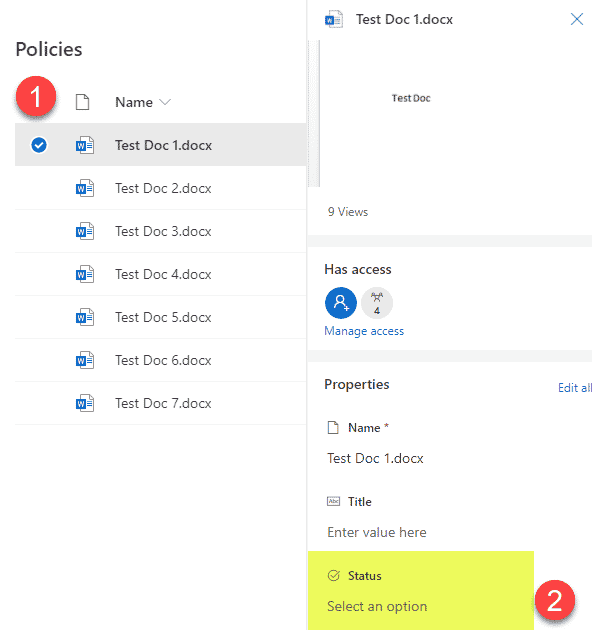
- If the user selects Inactive for Status, the formula produces a ‘false’ result, still hiding the Expiration Date field
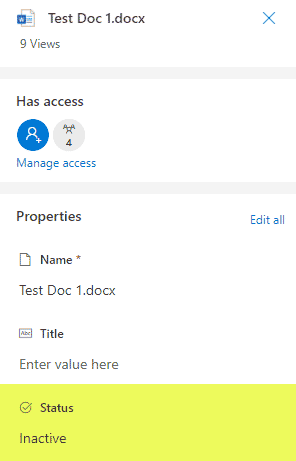
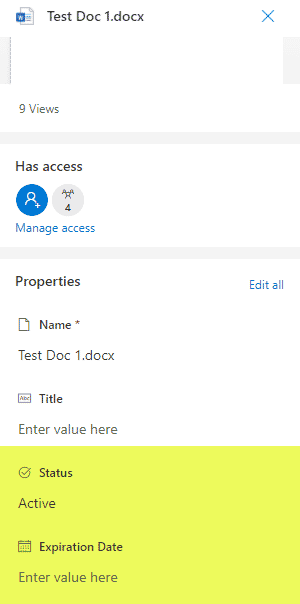
- However, if the user selects Active for Status, the Expiration Date field will appear as the result of the formula will be ‘true’
Notes
- The field you are doing validation against needs to have a ‘$’ sign in front of the column name (i.e. [$Status])
- The field you are doing validation against needs to be enclosed in square brackets [ ] (i.e. [$Status])
- If you need to reference a column in the formula that contains a space, you will need to remove the space when typing the column name in a formula (i.e., [$PolicyStatus] instead of [$Policy Status])
- The formula must produce either a true or false result for it to work
- When you type in the formula, keep in mind that true and false are case-sensitive. You need to type in true and false, not True and False
- You must have a double-equal sign for the formula to work (==) (for formulas that require that condition)
- This conditional formula functionality is not supported on the Site Columns. The columns being referenced in the formula have to be created locally at a list or library level.
- The above-listed technique (conditional formula) does not work with the Quick Edit function. The field will not be hidden in those cases.
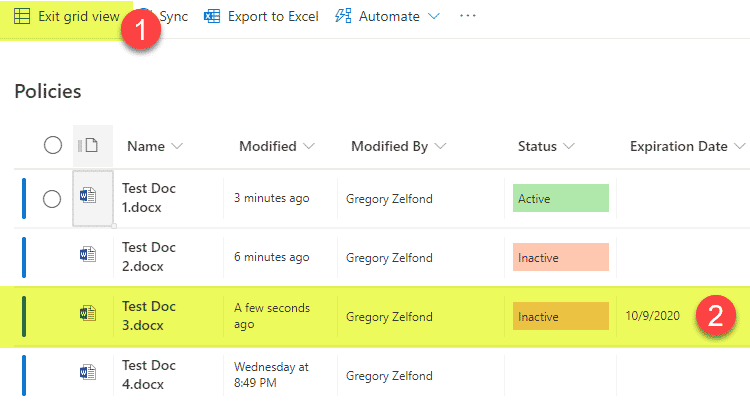
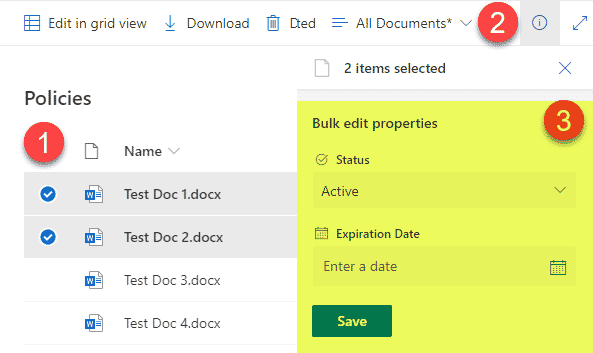
- That said, the technique does work for bulk edit of metadata (when multiple files are selected at once)
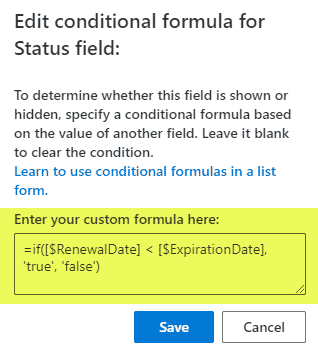
- You can reference other columns in the same list or library as part of a conditional formula. Example: =if([$RenewalDate] < [$ExpirationDate], ‘true’, ‘false’)
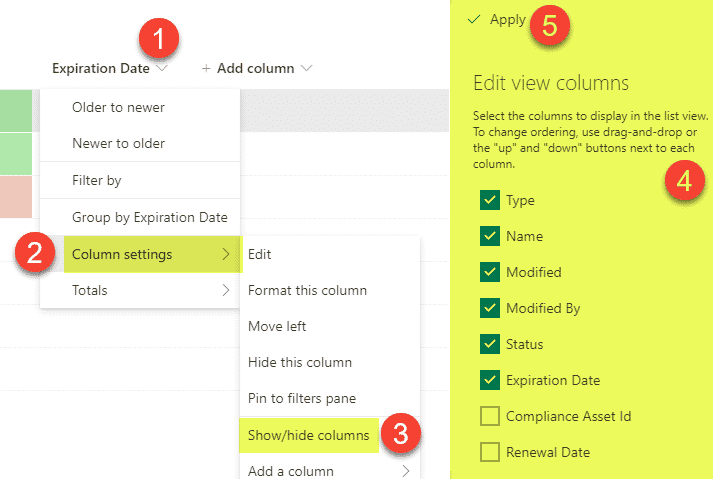
- The above trick only hides the field from the entry/edit form. If you want to hide the field from the view, you would need to edit the view of a list or library.
- Reference this formal article from Microsoft for additional examples and syntax


