How to create Retention Labels based on Events
Some time ago, I published a post explaining how to create and configure retention labels and publish them to SharePoint and OneDrive. Those labels would retain the content tagged with retention labels for a certain period. The article above assumed that the retention period would start after the content was created, last modified, or sometimes even when the content was labeled. However, sometimes, you might have a legal obligation to start the retention based on some specific event. Let me give you an example.
Say you are working on a large project for a government client. The project went on for 2 years and was completed at some point in time. The client might ask you to satisfy their legal or regulatory obligation to keep all the project records (documentation) on file for a period of 7 years. So, in this case, the clock for retention starts ticking not from the document created or last modified dates (which can be all over the place) but rather from the project’s official end date. Luckily, we can start the retention period based on the event. So, in today’s article, I would like to explain how event-based retention works and how to set it up.
Before we proceed with the setup, it is essential to understand a few key pieces of terminology that will come up during our setup. So, the first few paragraphs will be about those terms and their explanation.
Events vs. Event Types
The first thing you might want to understand is the difference between an Event and an Event Type. Both will come up during our setup, so we are covering them first. Let me explain:
Event Type
Event Type is just the type of event that might trigger the retention period. Think of it as a general category of events. Here are a few examples of Event Types:
- Completion of the Project
- Company Acquisition
Event
An Event is an actual event that will trigger the Retention. The Events will have a given title/name and exact date and will obviously be associated with the Event Type I mentioned above. Here are a few examples of Events:
- Example of Event: Project ABC is completed on May 31, 2024 (Event Type: Completion of the Project)
- Example of Event: Acquisition of Company XYZ is completed on April 15, 2024 (Event Type: Company Acquisition)
Asset ID (Compliance Asset ID)
The other piece of terminology you need to understand is Asset ID. All this is just a text-based identifier for a given Event. Asset ID allows you to associate a specific event with the documents that need to be retained. Let me give you an example.
Using the Project Example above, say you are working on 5 different projects for a client. All the project documentation is in a single document library with a folder for each project. And, of course, some projects are just starting, some are in progress, and one project has just been completed. You have to retain all project documentation for 7 years after the project is completed. So, while you might have the same 7-year retention label applied to all the project folders (and its content, since it propagates), the retention period start date would differ for each project folder. A unique identifier (Asset ID) will help resolve this dilemma. An Asset ID can be anything from a Project Number to a Project Name – something unique to a given project. Asset ID is something that is populated at the file level when a retention label is assigned. Then, when a specific event has occurred, an asset ID is referenced at that time as well. This way, the retention period will kick off on only specific files within a document library (which have a given Asset ID assigned as well).
The above explanation was just an example, so you understand how it works. There might be more complicated scenarios with content all over the place (different sites. libraries, etc.). Once again, Asset ID will “tie it altogether”.
It is also worth noting that Asset ID is an optional field. It is mostly for situations where you, as an organization, do not use metadata and rely on folder structure. Suppose you did your homework and tagged your project documents with project-specific metadata (i.e., Project Number, Project Code, Client Name, etc.). In that case, you can also use those identifiers instead of Asset ID. I will explain this further when I show you how to configure the retention labels.
Now that we covered the terminology, let’s proceed with the setup.
How to create Event-based Retention Labels
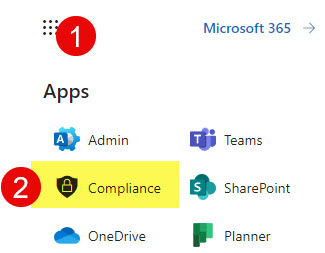
Step 1: Access Microsoft Purview
- From the Microsoft 365 App Launcher, click on Compliance
Step 2: Create Event Type
While we can do this later on, I recommend you do the homework first and create an Event Type.
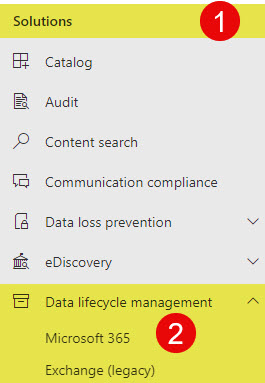
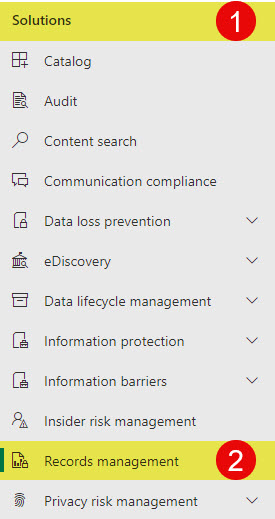
- Under Solutions, click on Records management
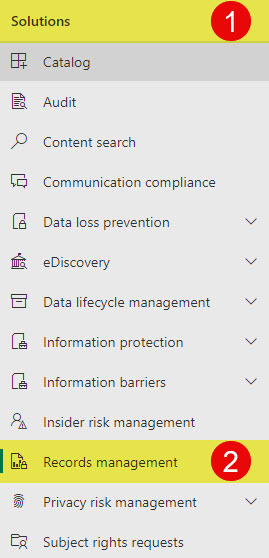
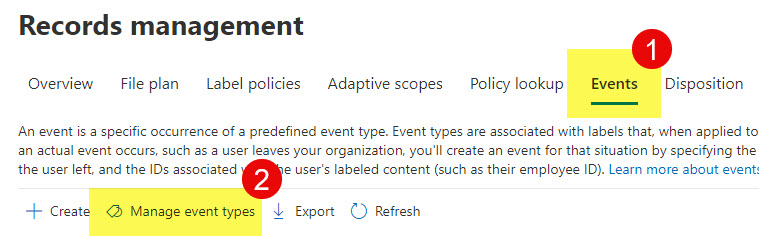
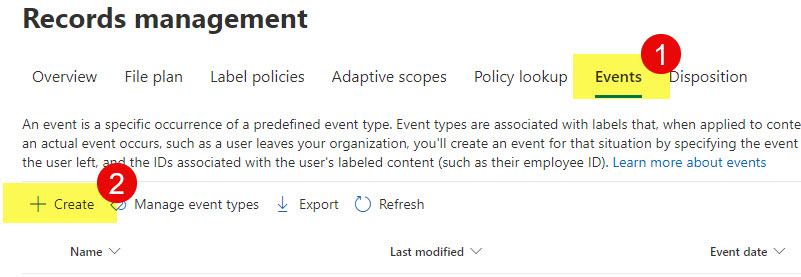
- Once in the Records management section, click on the Events tab

- Click on Manage event types
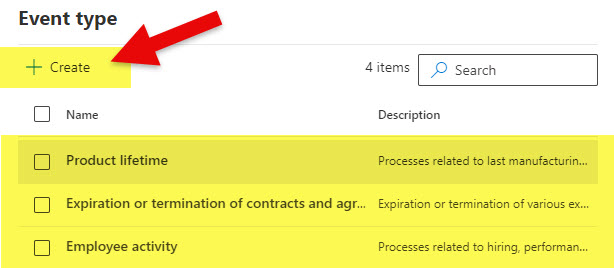
- You will see some out-of-the-box event types in the list already. Click Create to create a new Event Type.
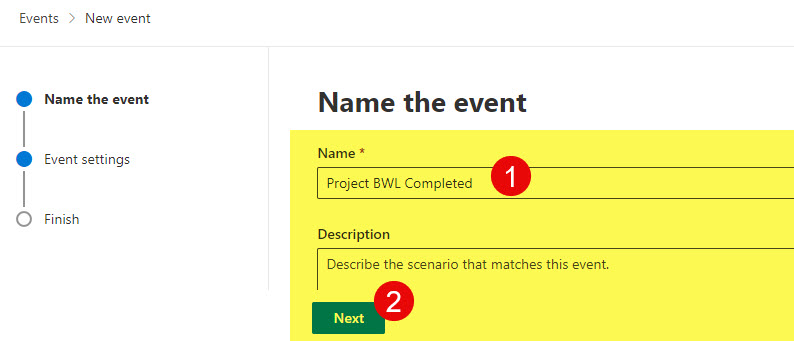
- Give it a name and a friendly description. Click Next.
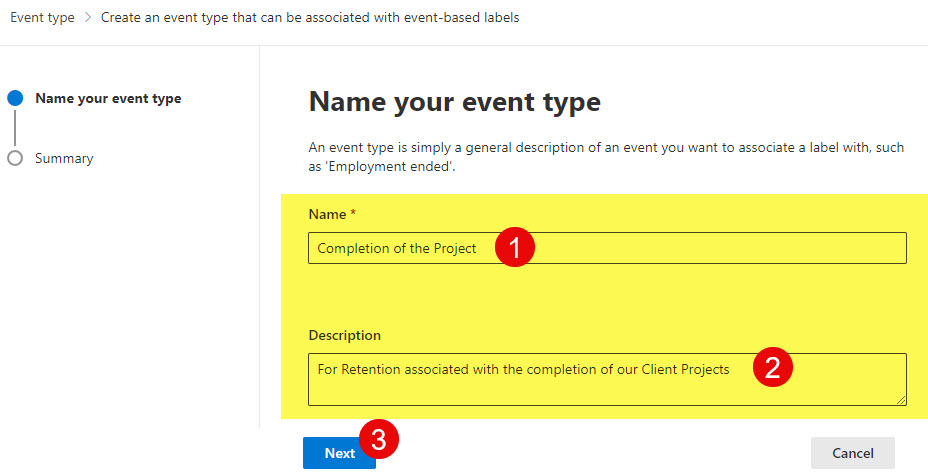
- On the next page, confirm everything by clicking Submit.
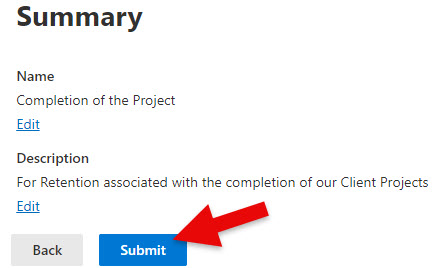
- You will receive a confirmation message.

Step 3: Create a Retention Label
Next, it is time to create a Retention Label. The mechanism of creating a retention label based on the event is, for the most part, similar to the process of creating retention labels based on the created or last modified date. I explained the steps in this article. However, I have to compete with artificial intelligence, so let me repeat the steps for you here. 😊
-
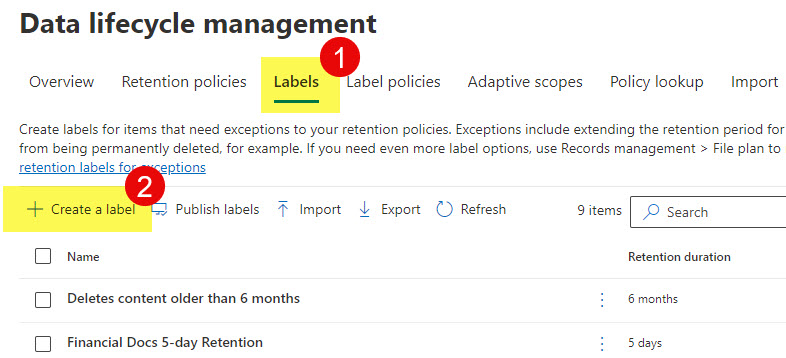
- From Microsoft Purview, under Solutions, Data lifecycle management, click on Microsoft 365
- Click on the Labels tab, then Create a label
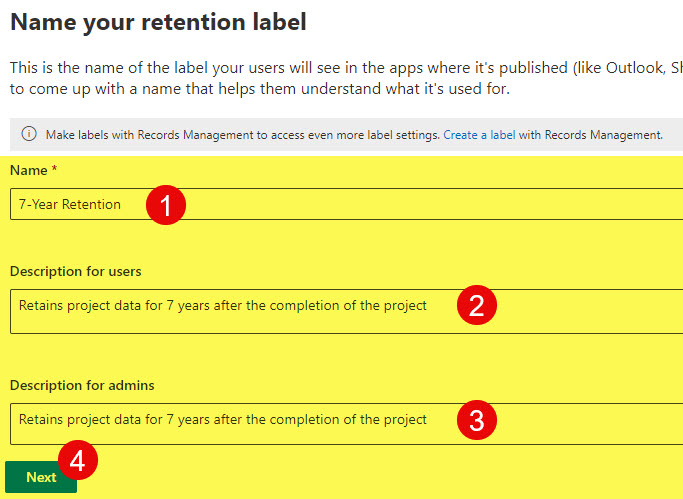
- Give your label a name and description, and click Next.
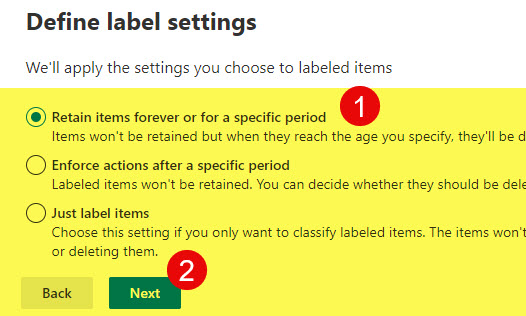
- On the next screen, choose the first option (Retain items forever for a specific period). Click Next.
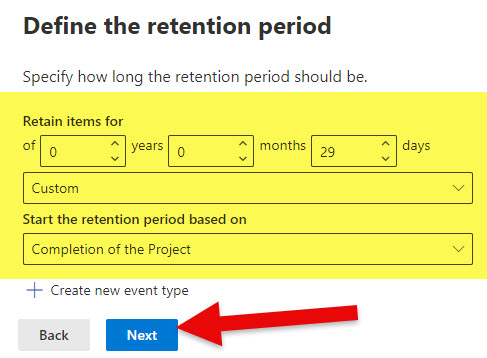
- On the next screen, define the retention period. Though my label says 7 years, for the purpose of this exercise, I am setting it to just a month of retention (just in case within 7 years I win a lottery and won’t need to do any more consulting). 😊 Note that at the bottom, you can create an Event Type on the fly. We do not need to do this since we already did this in STEP 2 above.
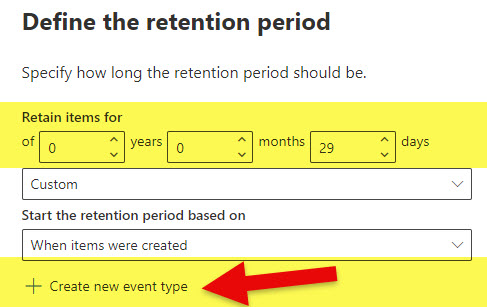
- Under Start the retention period based on the drop-down, choose the Event Type you created in STEP 2 above.
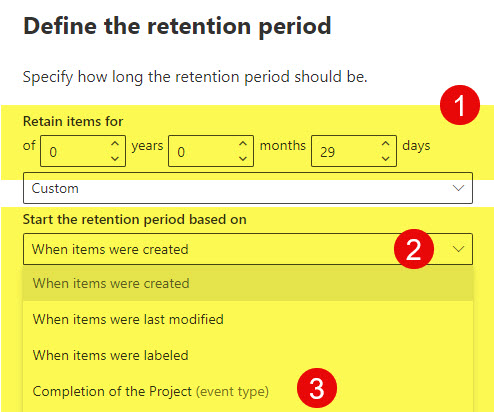
- In my case, I start the retention after the Completion of the Project Event Type. Click Next.
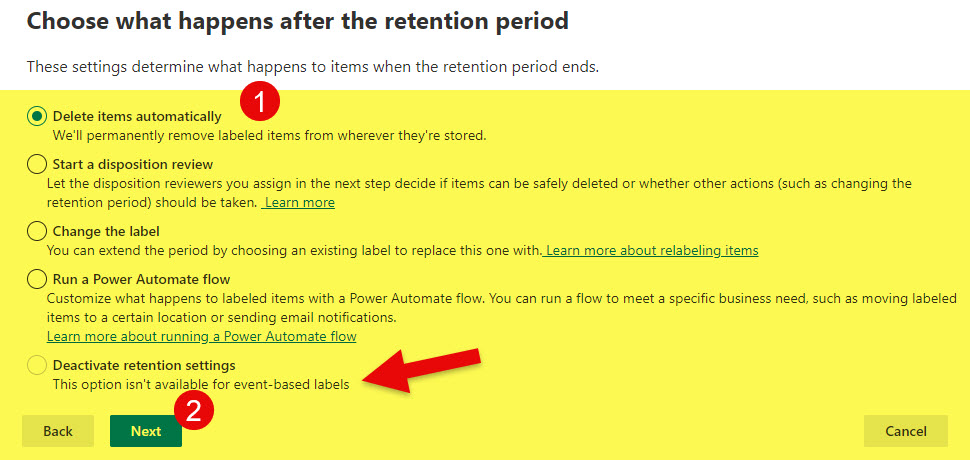
- On the next screen, choose what happens after the retention period ends. I plan to describe all these options in greater detail in a separate article later on my blog. Let’s choose the first option (Delete items automatically) for now. In your case, you could choose other options. Click Next.
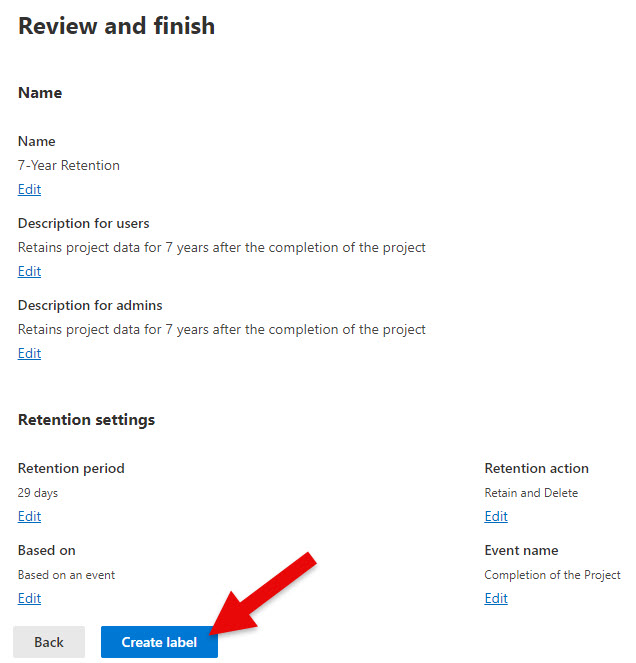
- On the next screen, review the changes and click the Create label.
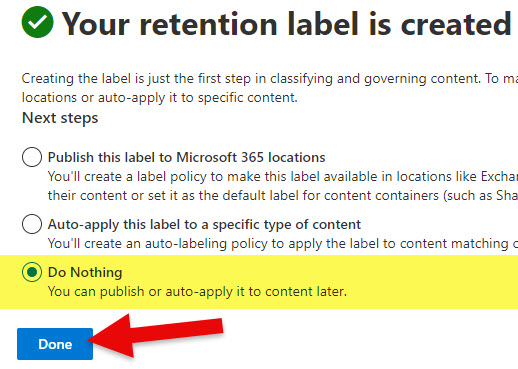
- You will get a confirmation message. You can publish the label right away, but we will do so in the next Step. Click Done.
- From Microsoft Purview, under Solutions, Data lifecycle management, click on Microsoft 365
Step 4: Publish the Event-based Retention Label
Next, we must publish the above retention label to the respective site(s).
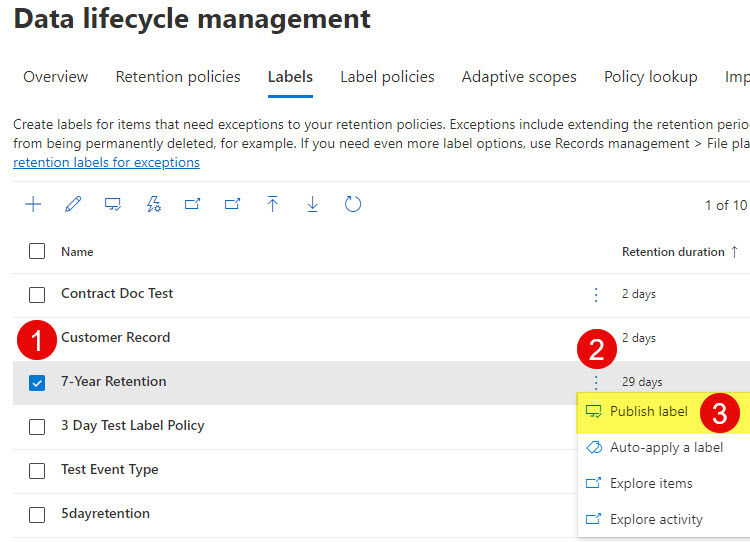
- From the same Data lifecycle management screen where you created a Label, click the checkbox next to the Retention label and choose Publish label.
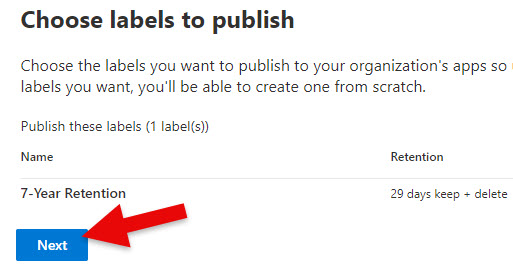
- On the next screen, click Next.
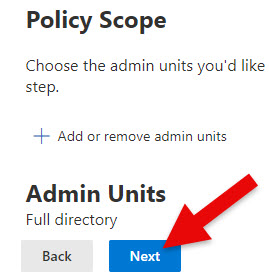
- On the next screen, you can choose to add Admin Units. To understand what these are, read this post.I plan to explain these on my blog later in a separate article. For now, please read this article from Microsoft.
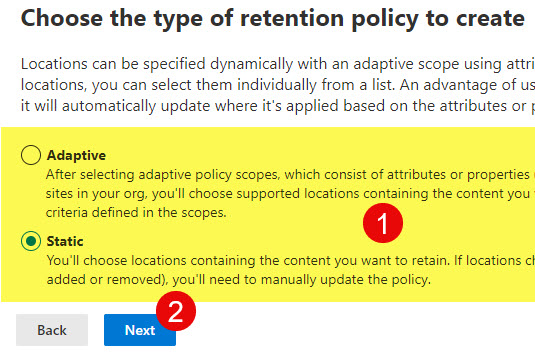
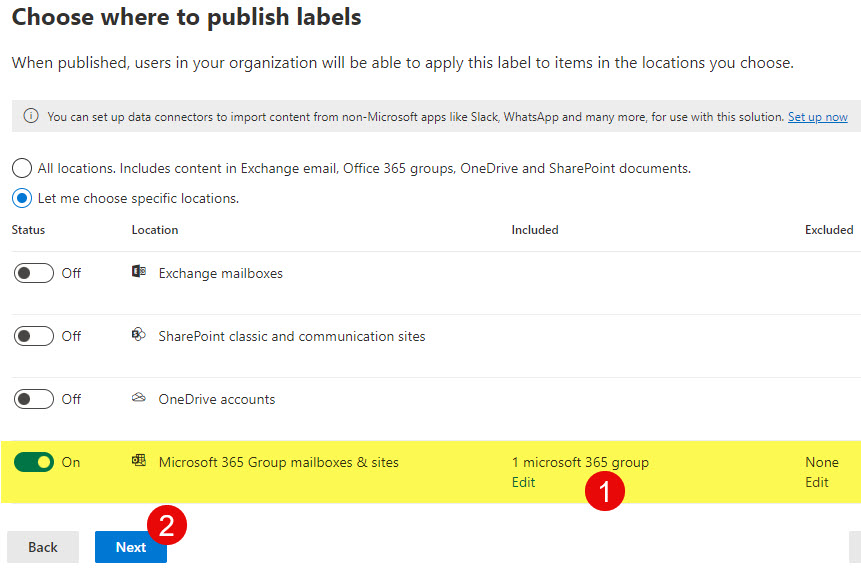
- On the next screen, you have to choose the policy scope: Adaptive or Static. I explained the difference in this article. I will choose Static for this exercise as I will publish this to just 1 SharePoint site. Click Next.
- Next, choose the locations you would like to publish the labels to (in my case, just 1 SharePoint Site).
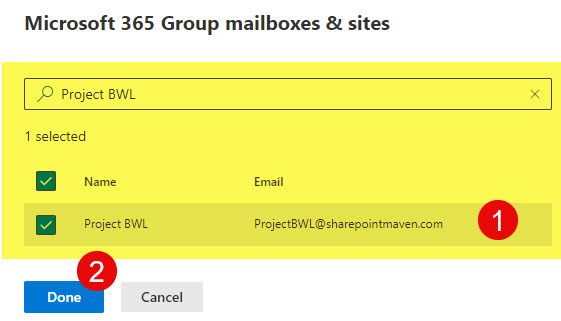
- Click Next.
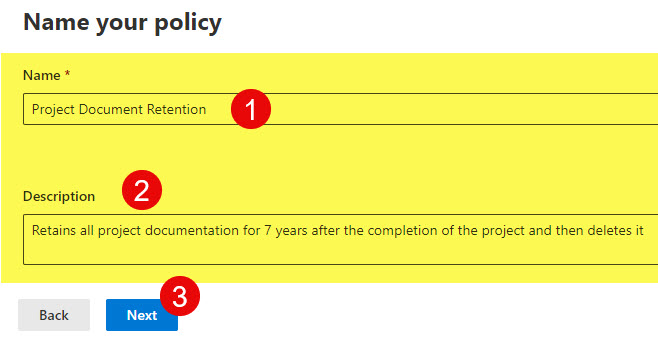
- Give your policy a name + description. Click Next.
- On the final screen, review the settings and click the Submit button.
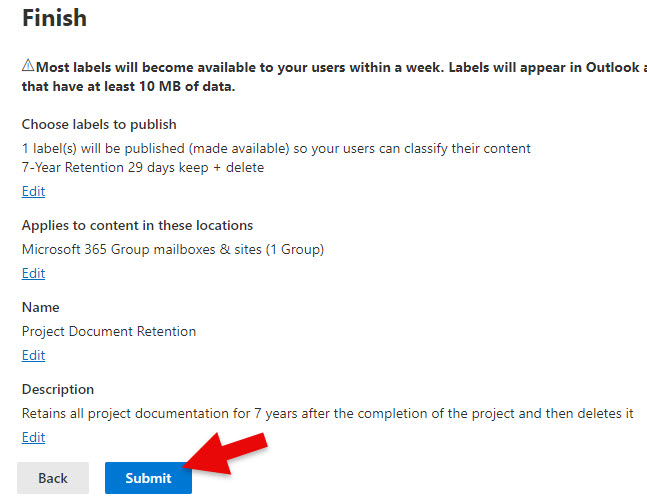
- You will receive a confirmation message.

Step 5: Apply the Retention Label
The next step would be to go ahead and apply a retention label to the content. Per the message above, it might take up to a week for the label to be published, but realistically, it would probably be 1-2 days.
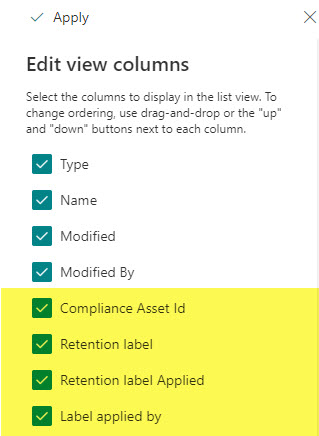
- Before we take the files with the retention label, I advise adding some additional columns to the library. Add the below 4 columns to the view: Compliance Asset ID, Retention label, Retention label Applied, and Label applied by. They will help you easily see whether the retention labels have been applied to a file. Compliance Asset ID, specifically (something we will add in the next step), will also help us here.
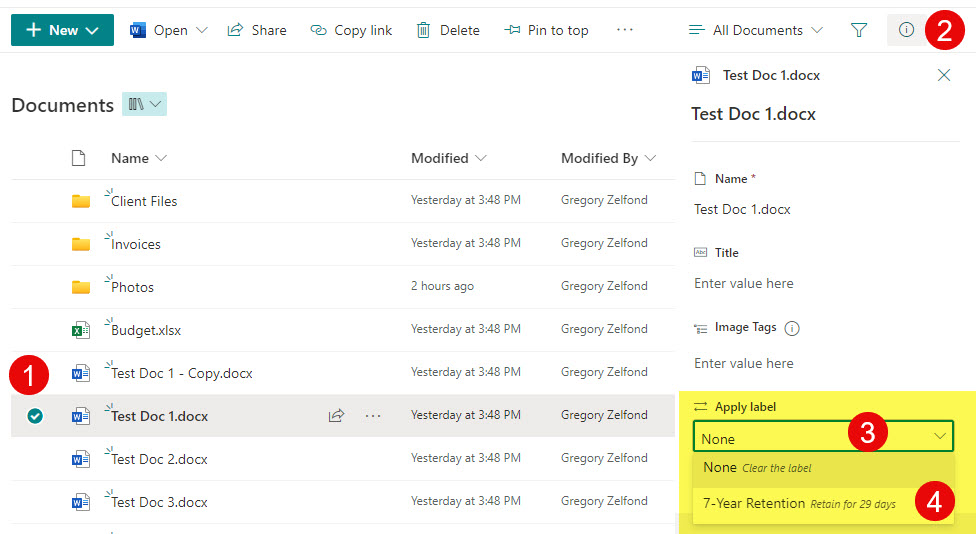
- Next, apply a retention label to a file by clicking the checkbox, “i” in a circle, and Apply the label.
- Repeat the above step for other files or folders as necessary.
Step 6: Assign the Asset ID to the files
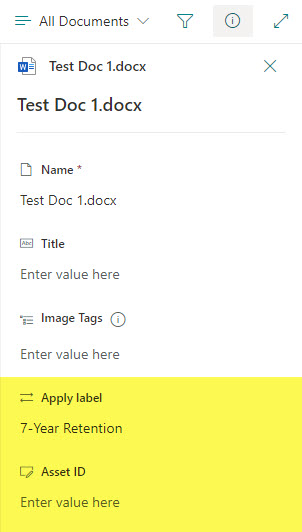
As soon as you apply a retention label to a given file, an extra field will show up called Asset ID. This is the Compliance Asset ID I mentioned at the beginning of the article. It is a unique identifier that will be tied to a given Event (we will create it in the next step) that will help determine which files to apply (start retention) when a given event is created.
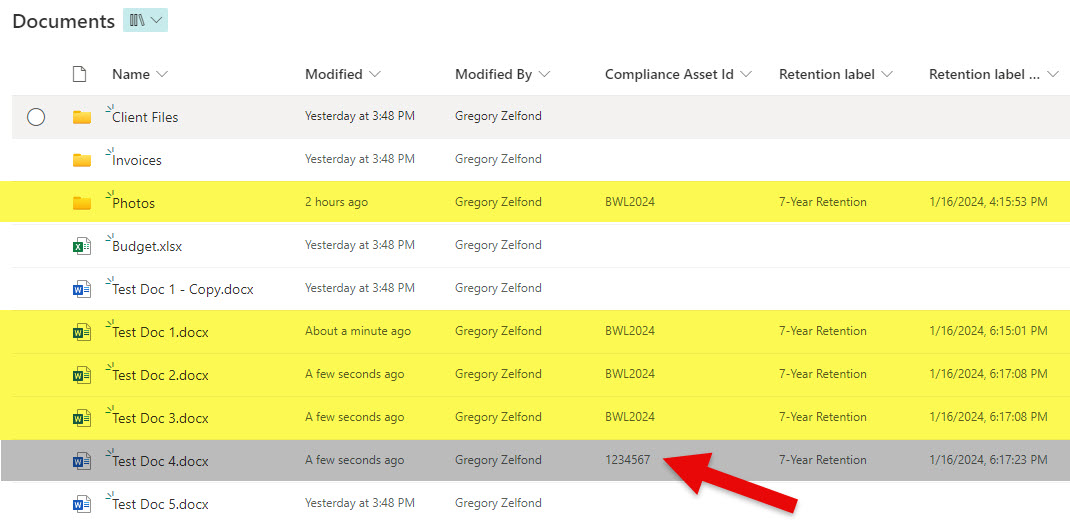
- Go ahead and assign a unique identifier you will use when creating an Event. In my case, it would be a Project Code.
- You can tag both files and folders with the Compliance Asset ID; however, unlike the retention label, the Asset ID field does not propagate to the files inside (more on this in the Nuances section at the bottom of this article)
- Depending on how you organize your content, you might have different Asset IDs for different files within the same document library.
Step 7: Create an Event
Now, we are ready to create an Event. This kicks off the retention process and enforces the label/policy on a given file.
-
- While in Microsoft Purview, under Solutions, click on Records management
- Click on the Events tab, then Create
- Name the Event, and click Next.
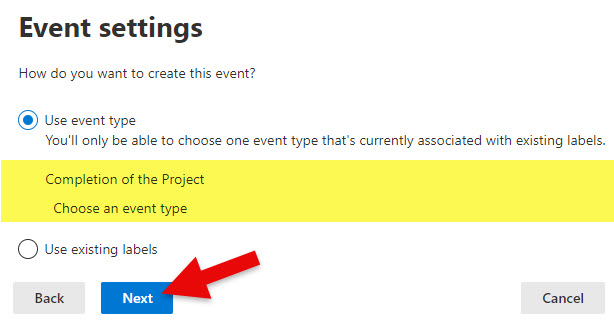
- On the next screen, you must associate the Event with an existing retention label or Event Type. It does not matter which one you choose since both are tied together (we did this in STEP 3). In my case, I will proceed with the Event Type.
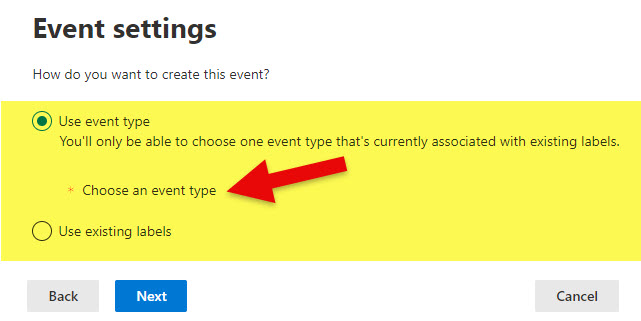
- On the next screen, choose the Event Type you created in STEP 2.
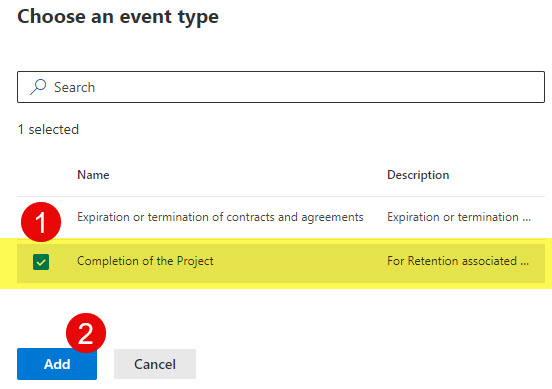
- Once Event Type has been selected, click Next.
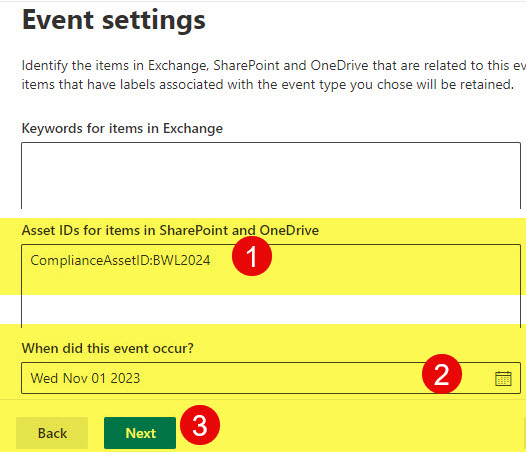
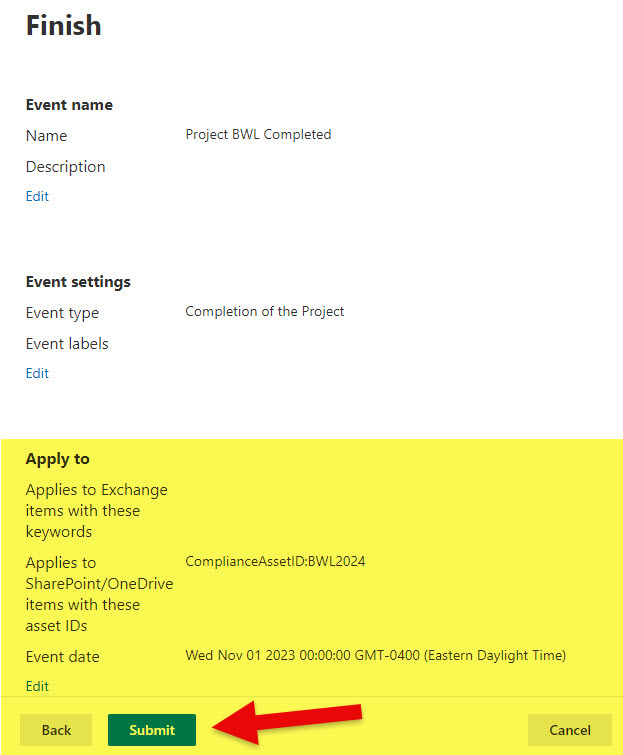
- On the next screen, we have to specify the Compliance Asset ID. As mentioned earlier in the article, Compliance Asset ID helps choose specific documents within a library to apply the retention to. For example, you might have documentation from multiple projects stored within the same document library, and the retention labels might be applied to all the documents. However, once one project is completed, Asset ID helps start retaining just the documents belonging to the completed project.
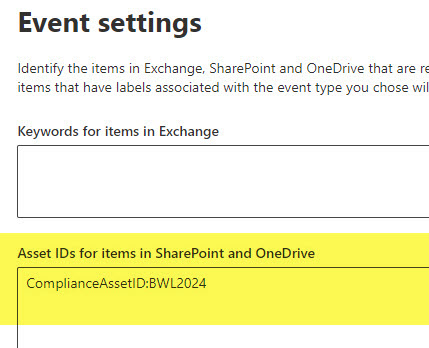
- It is important to note that you have to enter Asset ID in the KQL format (managed property:value). In my case, it is ComplianceAssetID:BWL2024.
- After you type in the KQL query, choose the event date. It can be in the future or in the past. Click Next.
- On the next screen, review the changes and click the Submit button.
- You will receive a confirmation message.

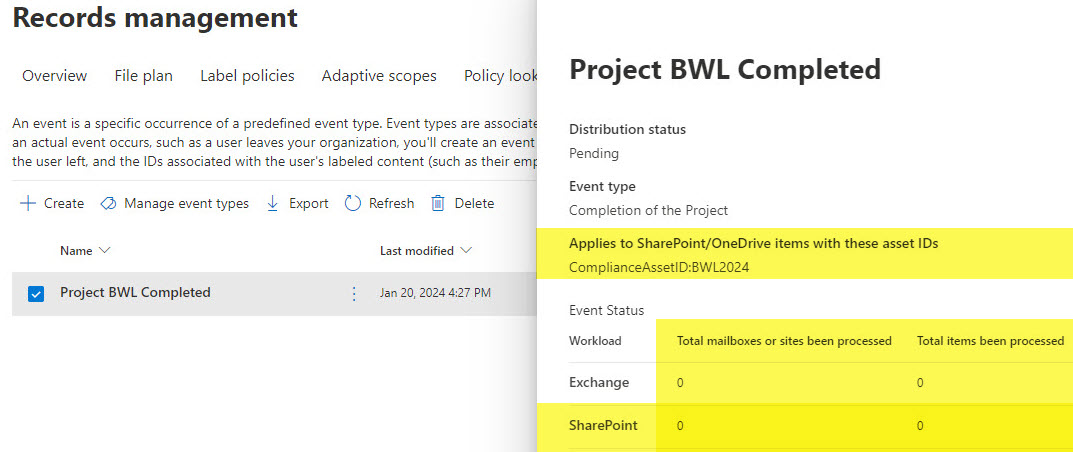
- You will now see the Event appear in the dashboard.
- While in Microsoft Purview, under Solutions, click on Records management
Step 8: Check Retention Progress
Now that you created an event, you have to wait and see. According to Microsoft, it will take 7 days for the system to process the request and identify items to be retained and deleted (based on Compliance Asset ID). In reality, it takes much longer (in my case, it took 11 days!
Clicking on the event you created from the Records Management dashboard will keep you aware of the progress. But again, you might need to wait days/weeks to see any changes here.
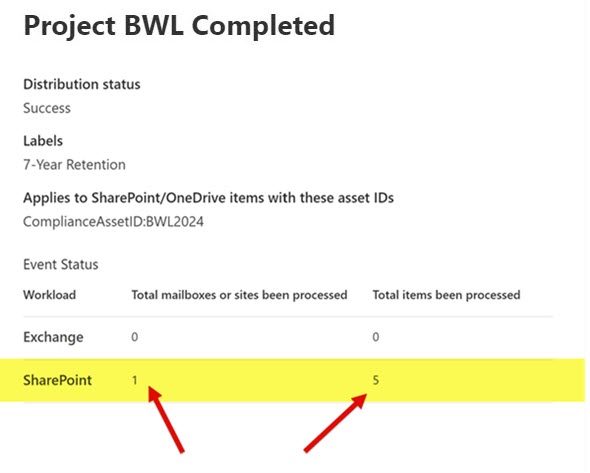
Step 9: Confirm the Event Retention processing
Depending on the duration of the retention you set up for the retention labels, it might take a while for you to see the actual results at the library level. However, you can always return to the Records Management Dashboard above to see if the items have been processed. Regardless of the retention period, as mentioned above, it does take a VERY LONG TIME to process items below – see the Nuances section below for additional details.
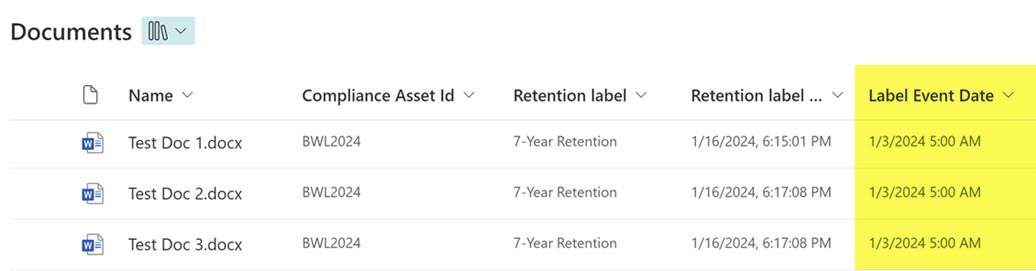
Once you see the items processed on the screen above, you can add another column to the document library view called Label Event Date. You can add that column to the library view only at that point.
Step 10: Wait for Retention/Deletion to take place
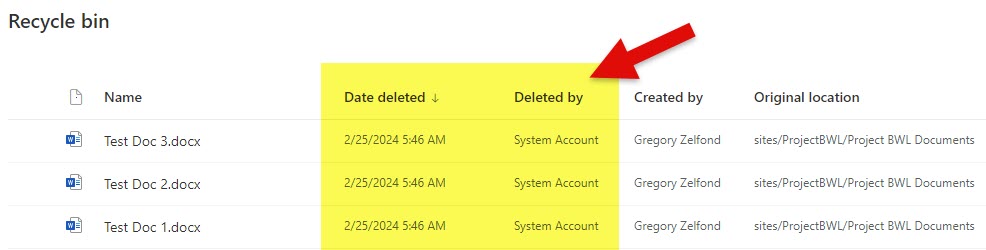
Depending on what you set out for the Event Label settings in terms of retention, the retention period will kick in, and items will be kept and deleted after the Label Event Date. Just like with “regular” retention/deletion labels, the items will take up to 7 days to be deleted from the document library. Once the items are deleted, they will go directly to the Recycle Bin.
Important Nuances about Event-based Retention
- Compliance Asset ID does not propagate to files from a folder (unlike a retention label). It has to be populated on each and every file manually or automated somehow!
- It is also essential to note that when you apply event-based retention labels to the files within a document library, they will be kept indefinitely by default from when the label is applied. In other words, a Preservation Hold Library will be created when users make changes and delete those labeled documents. Once the Event is created, the indefinite retention period will switch to that specified in the retention label (i.e., kept for 5 years, then deleted).
- It is also important to note that you are not restricted to just using the Compliance Asset ID field. If your organization already relies on metadata identifying the documents meant to be retained, you can use those metadata fields in place of the Compliance Asset ID. For example, if you label project documents with a Project Number metadata column, you can paste that Project Number into the Asset ID window in STEP 7. Just like with the Compliance Asset ID, you would need to use KQL syntax to query for that information. For example: ProjectNumber:12345.
- It does take a while for Event-based retention to work. In my case, it took 11 (eleven!) days for SharePoint/Purview to process the items!
- For Event Retention to work and for SharePoint/Purview to process items, you must have an E5 license. I initially created an event under a test account with an E3 license, and it never processed any items at all!

Share Article