How to apply modern retention labels to libraries and folders in SharePoint Online
I recently blogged about modern retention labels and how you can create labels, publish them to sites, and then have them available for users to apply to files. This though, assumes that end users apply the label manually to every file. However, in reality, this is not sometimes practical, especially if you are dealing with hundreds or thousands of files. Luckily, we have a way to apply retention labels to libraries and folders, thus automatically tagging and setting retention for the files inside.
How to create Retention Labels
Before we can apply the labels to the folders and libraries, we have to create them first in the Compliance Center. I documented this process previously. So please follow instructions in this post to create the retention labels and publish them to the desired sites.
Apply retention labels to libraries and folders
How to apply retention labels to the library
If you want to apply a retention label to the entire library and all of its contents, please follow these steps:
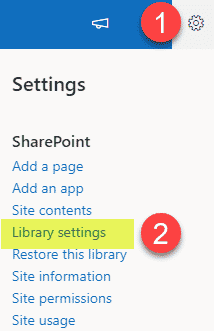
- Navigate to the document library that you want to apply a retention label to, then Gear Icon > Library Settings
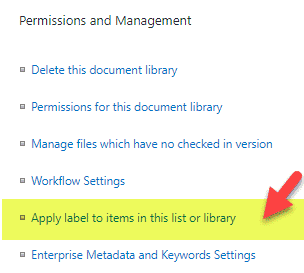
- Click on Apply label to items in this list or library.
- From the drop-down, choose the retention label you want to apply to the library. You optionally check the box Apply label to existing items in the library – this will apply the labels to items you have uploaded previously. Click Save
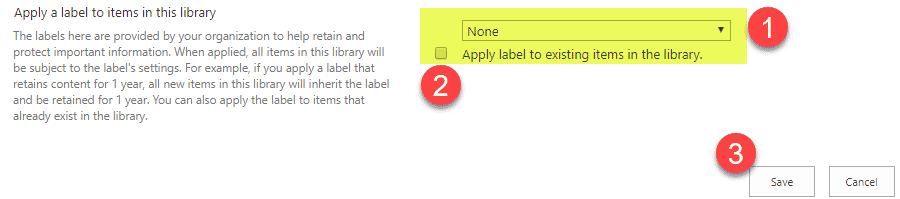
- This shows the settings I have chosen.

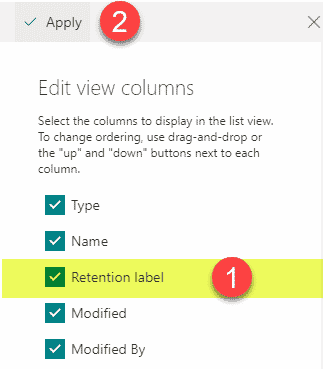
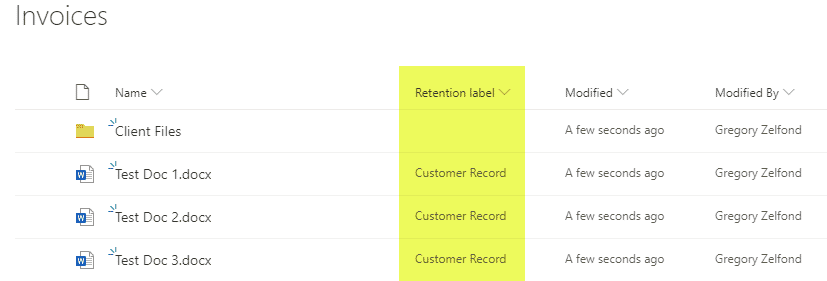
- At the library level, make sure to add Retention label metadata to the view (so you can see the level applied)
- And in a short while, you will notice the Retention label assigned to the files we already had in the library. All the new files uploaded to the library will automatically be assigned the retention label as well.


How to apply retention labels to the folder
Likewise, you can apply the retention label to just a specific folder and not the whole library.
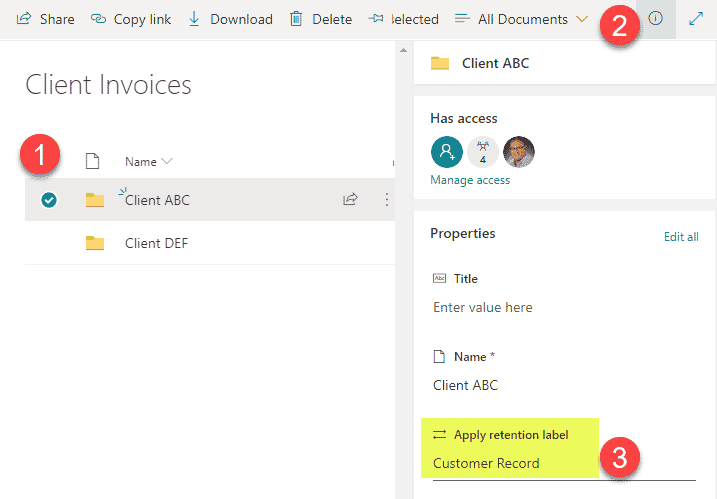
- Click the checkbox next to a folder, then “i” in a circle, then choose the proper retention label from the available choices.
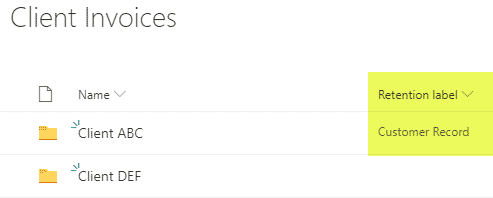
- You will now notice the folder getting the retention label.
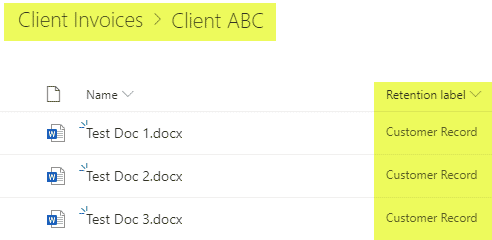
- All the files inside the folder will also be tagged accordingly.


Notes:
- Retention labels can be overwritten at the file level (i.e., removed or assigned an alternate retention label) if need be
- If you move a file from one folder with its retention period to another folder with another retention period, it keeps the original retention period that was set at the source.
- Check out this article from Microsoft for the latest changes and updates to this functionality.

Share Article


