How to create drop-down navigation in SharePoint
Today, I want to explain something straightforward, yet very powerful. I am talking about drop-down navigation in SharePoint. As you add navigation links or your Intranet Hub, you might want to organize them into some logical hierarchies. For example, you might want to list links to all Operations Sites under the Operations drop-down within your Intranet. Or perhaps add links to various document libraries under the Documents drop-down on the Team Site. Whatever the scenario is – it is pretty easy to do. Let me explain.
Where can you create drop-down navigation?
- Team Site or Communication Site: Drop-down navigation can be created on any type of site. So whether you have a Team Site or a Communication site does not matter.
- Hub Site: If you registered your site as a Hub Site, you will get another type of navigation called Hub Navigation. You can create drop-down navigation there as well!
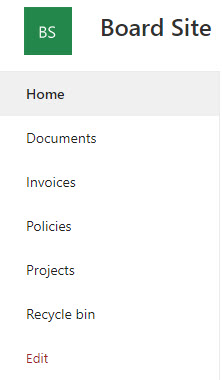
Example of Site Navigation on a Team Site
 Example of Site Navigation on a Communication Site

Example of Navigation on a Hub Site
What are the elements of the drop-down navigation?
It is quite important to get familiar with the elements and functionality of the drop-down navigation:
- Labels – allow to create non-clickable text (to organize the links underneath)
- Sublinks – allows to organize links into a drop-down cluster
How to create drop-down navigation in SharePoint
I am going to pick a Communication Site for this example. The steps for the Team Site and Hub Site are the same; the presentation will just be a bit different.
-
- Click Edit within the Menu Navigation

- Click the Plus Sign, choose Link within the drop-down, and switch to Label
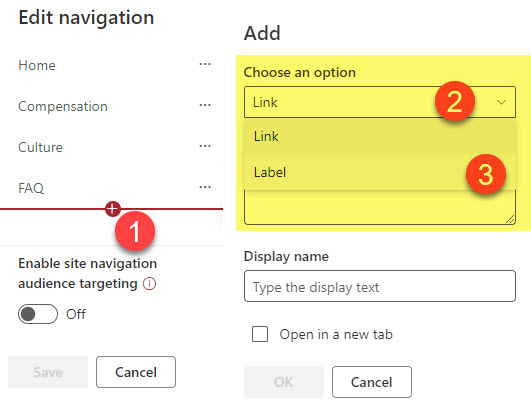
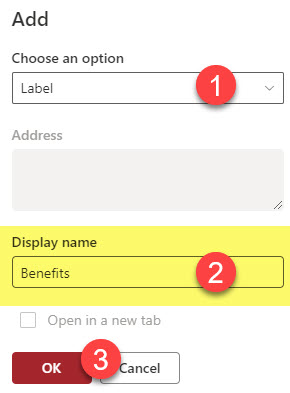
- After you switch drop-down to Label, just give it a name and click OK.
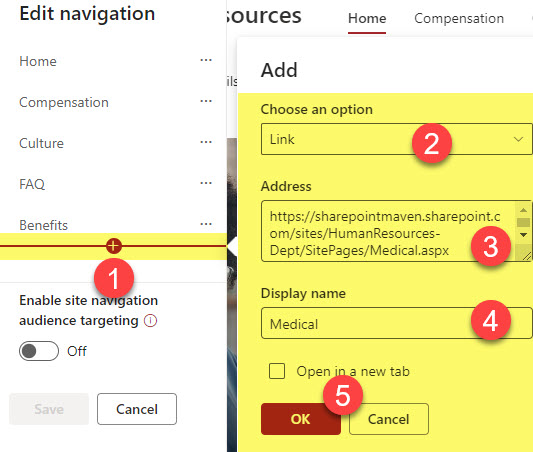
- Next, click the Plus Sign under the label you just added, and choose Link in the drop-down. Paste the URL, give it a name, and click OK.
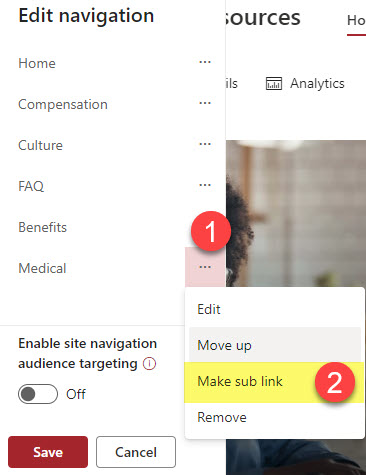
- The above step will add the link directly below the label. To turn this into drop-down, click 3 dots next to the link and choose Make sub link.
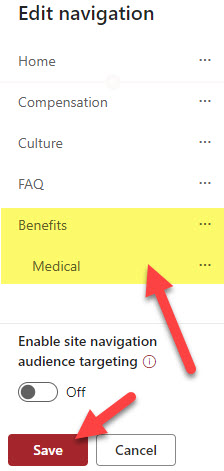
- This will offset the link, as shown below. Click Save.
- And this is the end result – drop-down navigation in SharePoint.

- And this is an example with several sublinks added

- Click Edit within the Menu Navigation
Nuances about drop-down navigation in SharePoint
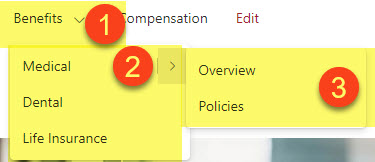
- You can only create two levels of sublinks max in the navigation
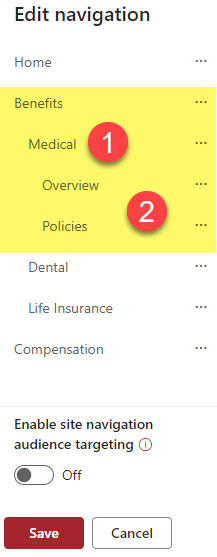
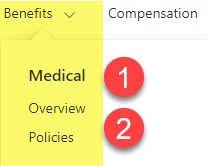
- Drop-down Navigation links are only for visual presentation – they do not organize linked sites in any hierarchical way – SharePoint sites still follow flat architecture.
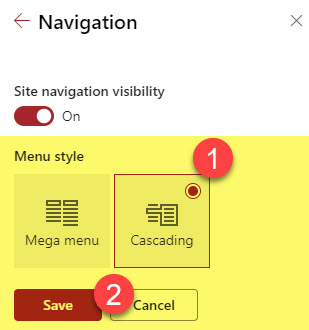
- On the Communication site, you can change the style of Navigation from Mega menu to Cascading
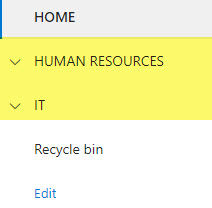
- On the Team Site, your drop-down navigation (sublinks) will always be collapsed by default
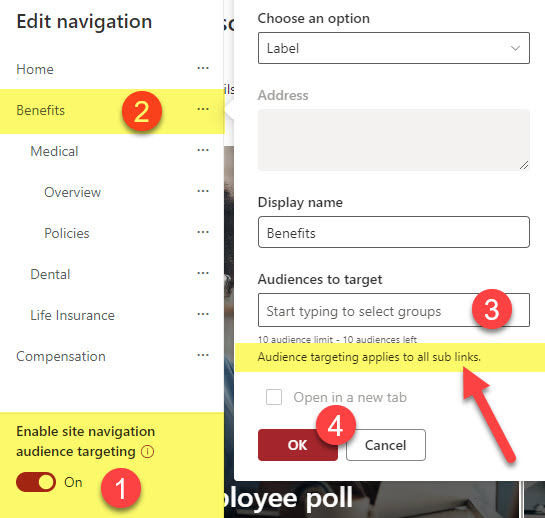
- You can add Audience Targeting to both navigation links and navigation labels. If you set Audience Targeting on a top label, all its sublinks and sub-labels will also follow (inherit) the Audience Targeting settings.
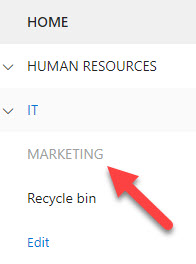
- If you create a label with no sublinks underneath – it will be grayed out in the navigation
- It is always recommended (best practice) to have the sublinks organized inside non-clickable labels and not the other links/sublinks (to avoid user confusion on what’s clickable and what’s not).


