Configure Approvals in SharePoint
One of the reasons I am such a staunch advocate of SharePoint out of the box is that it already contains so much goodness. Lots of functionality that you typically would need custom development for, or the use of Power Automate, for example, is already baked into the SharePoint app. One such capability is to configure approvals for documents. Let me explain how to do so.
We used to have a Content Approval feature in SharePoint since its classic days. However, it was a pretty outdated feature that made no sense in a modern experience.
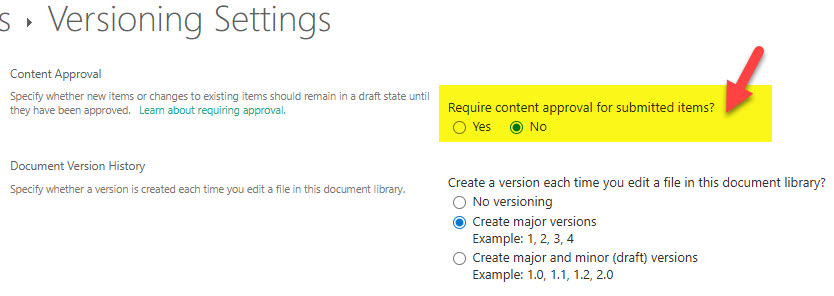
Example of the Classic Content Approval in SharePoint

Classic Content Approval Feature in SharePoint
Microsoft recently modernized the whole Approval experience and made it rely on the new applications we now have within Microsoft 365, like Power Automate and Teams. Let me explain.
How to Configure Approvals in SharePoint
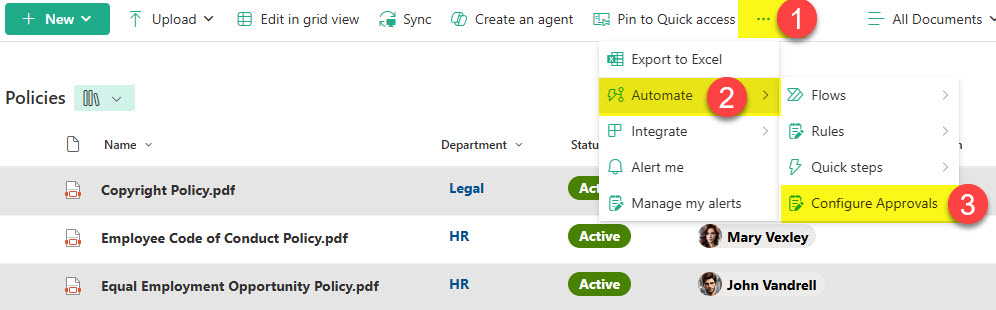
For this demonstration, I will be using this sample document library that contains several company policies.

- To configure approvals in SharePoint, from the document library menu, click the 3 dots > Automate > Configure Approvals
- You will then get this pop-up (by default, approvals are not enabled)

- Enable Approvals by changing the toggle and clicking Apply

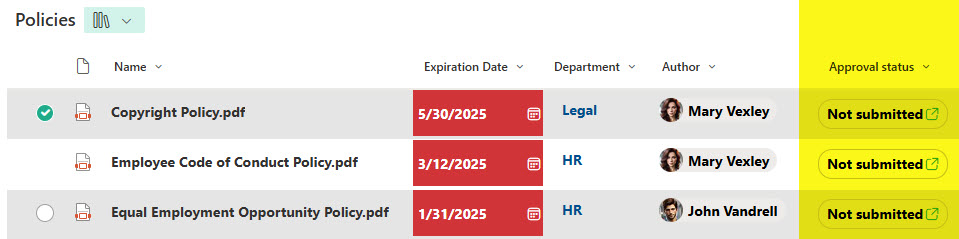
- You will right away notice an extra column called Approval status added to the library (you actually get more columns, more on this in the Nuances section below)
How to submit a document for Approval
Once Approvals are enabled, it is a very smooth approval experience for both the submitters and approvers.
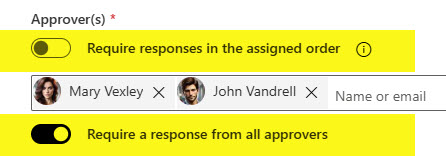
- To submit a document for approval, simply click on the Not submitted button. You can then give your approval a name (file name by default), specify the name(s) of the approvers, and add notes (Details). Click Submit.

- You will then notice the Approval status changing to Requested

- The same status will be visible inside the Teams Approval App under the Sent tab.

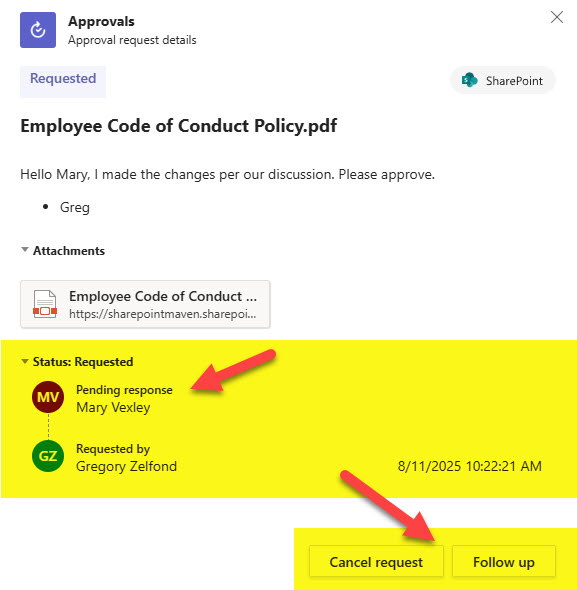
- If you then click on the approval request, it will list the submitted information and allow you to Cancel the request or Follow up (which will send another notification/reminder to the approver)
Experience for the Approver
- The Approver will be notified via the Teams Approval App about the approval request. Once clicked, it will list the submitted information and status, and give the approver the ability to either approve or reject a request (or reassign it to someone else).
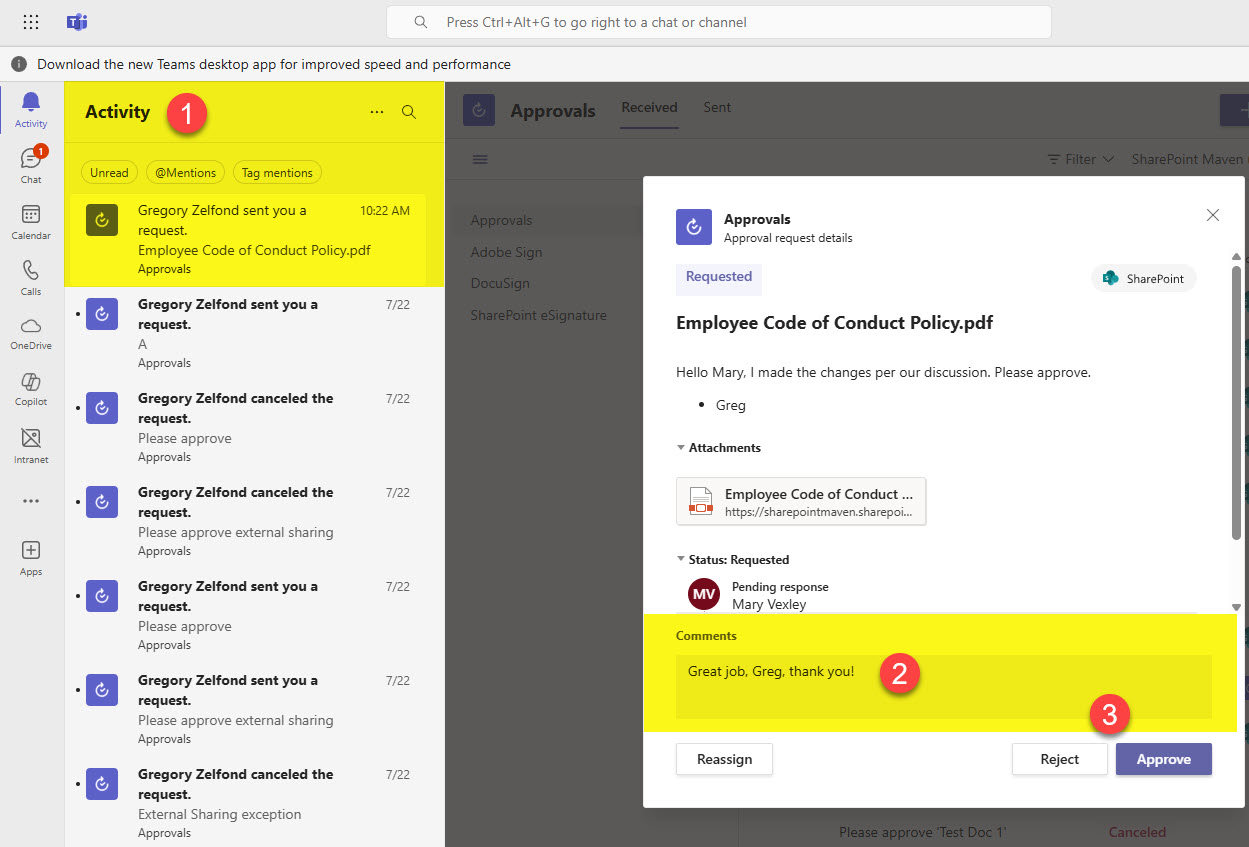
- Depending on the action (in my case, I approved the document), it will display the status accordingly.
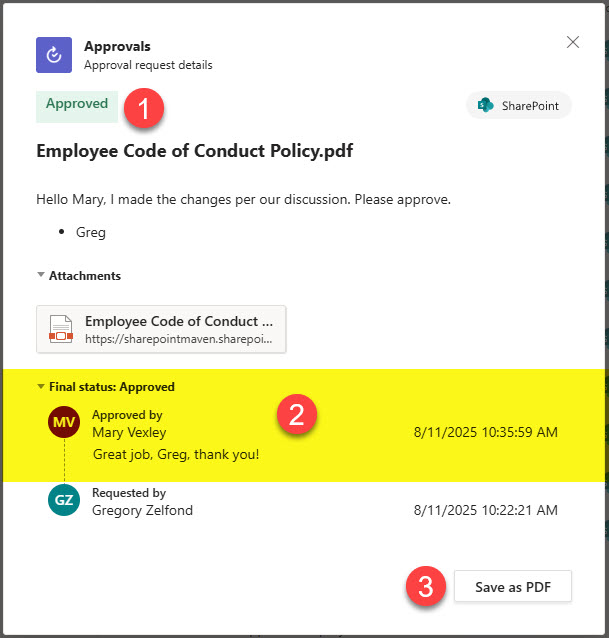
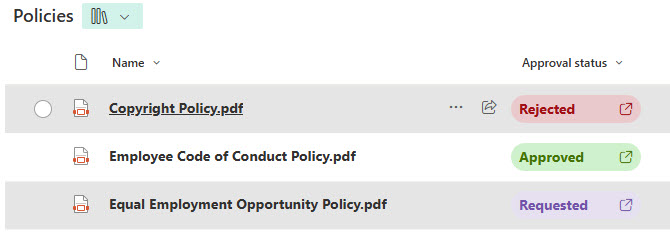
- The Status will also be updated accordingly within the document library under the Approval status column
Nuances about the Approvals Feature in SharePoint
- Making a change to the document (within the document itself or to its metadata columns) while the approval has been requested will cancel the approval request and display warning messages


- The Configure Approvals feature described in this article is available on both lists and libraries
- You can only request an approval for a single document or item (can’t submit multiple items at once).
- There is no change to the Version History when the item is either approved or rejected.
- The Configure Approvals functionality described in this article is somewhat similar to the Request Sign-Off capability I described previously. However, the former is for one-time sign-offs and is less customizable and elegant than Configure Approvals.
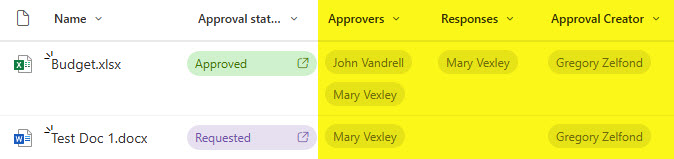
- As mentioned earlier, when you enable the Configure Approvals feature, it automatically adds the Approval status column to the library. However, you can also add three more related columns via Show/Hide Columns: Approvers (names of requested Approvers), Responses (records the names of those who either approved or rejected), and Approval Creator (records the name of the user submitting the document for an approval).

- When you submit a document for approval, you can list multiple approvers. By default, just the first one to approve will make the document fully approved. However, you can also require all approvers to approve, too. And you can also specify the approval order.
- The following 3 Statuses are shown in the Approval status column: Requested, Approved, Rejected. You cannot change them.

Share Article