Major vs. Minor Versions in SharePoint Online
Version History has got to be one of the most important document management features in SharePoint. Just like a time machine, Version History allows you to go back in the history of a given document or an item. It also allows you to trace the changes that occurred. To translate into pure English – Version History allows you to save your butt when you messed up the document or an item by restoring a previous version of it. I explained the concept in great detail here.
However, we have 2 flavors of version numbering – major and minor. Today, I would like to explain to you, my loyal blog followers, the difference between Major and Minor Versions in SharePoint Online.
Accessing Version History
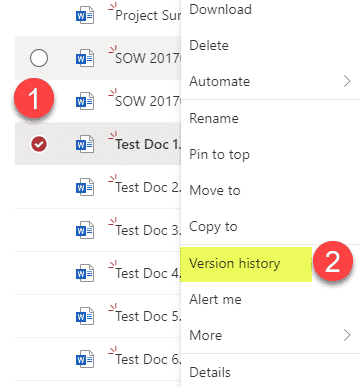
To access the version history of a file, page, or item, right-click on the document and click Version History.
Major Versions
Major versions use sequential numbering when you make changes to the content (document, item, page, etc.). It starts at 1.0, then 2.0, 3.0, and so on. You cannot control when and how Major versions are created – they are created by default every time you edit and save a document. If you edit the document in a browser and not in the native app, versions are automatically created as changes are auto-saved.
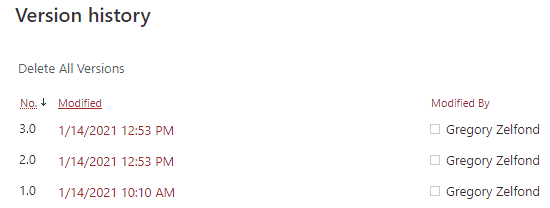
Example of Major Versions
Minor Versions
Minor Versions are incremental versions between major versions. For example, 1.1, 1.2, 1.3, … 1.100, and so on. You need to have Major versions enabled for minor versions to work. Just like with major versions, you have no control over how often they will be created.
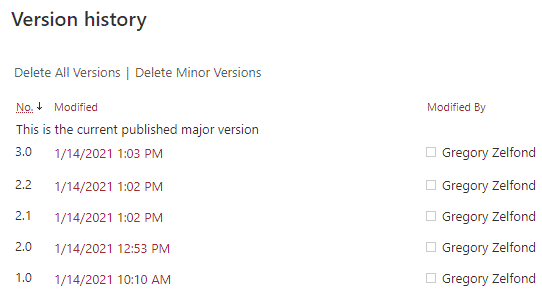
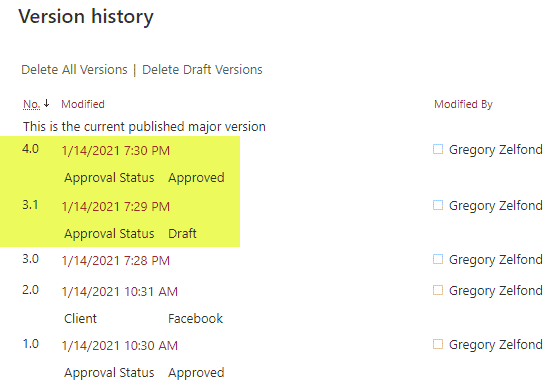
Example of Major and Minor Versions
How to enable Major and Minor Versions?
Depending on the type of library you have, you might have different scenarios with major and minor versions.
Document Library
- Major versions are on by default in a document library
- Minor versions are off by default in a document library and need to be enabled
- Versioning cannot be disabled in a document library. The minimum number of versions you can have is 100, and the maximum is 50,000. The minimum threshold is necessary to restore previous versions and for the file retention to work.
To alter the number of versions or enable minor versions, please follow the steps below:
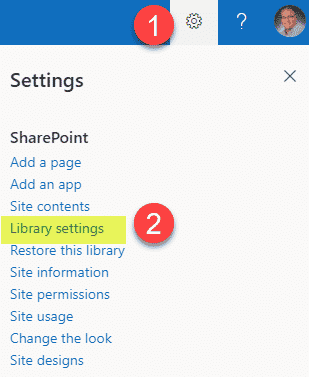
- Gear Icon > Library Settings
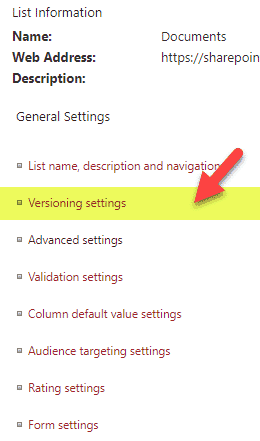
- Click on Versioning Settings
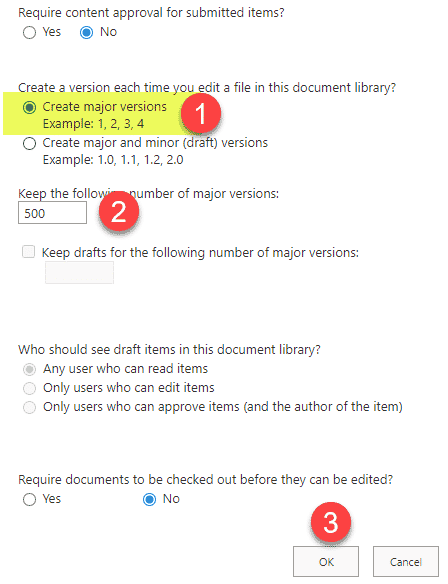
- Change the number of major versions to be captured as necessary (default is 500) and click OK
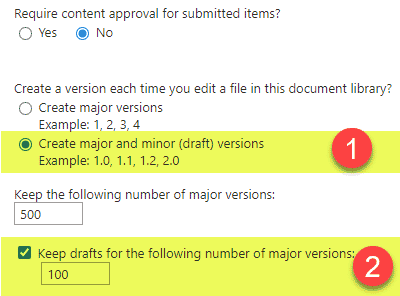
- If you also would like to capture minor versions as well, you need to check an appropriate box and specify how many major versions will also have minor versions attached
Site Pages Library
- Major versions are on by default in a Site Pages library
- Minor versions are on by default in a Site Pages library
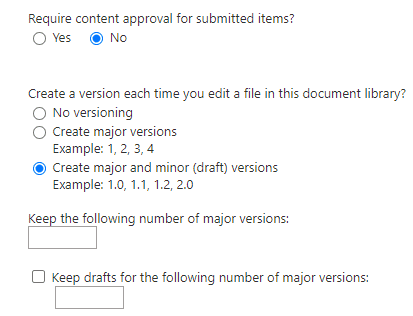
- You can disable minor Versioning in a Site Pages Library or you can turn it off completely. The reason why both major and minor versions are on by default in a Site Pages is that both are necessary for the Page restore process. I documented that process in this post. I do not recommend altering any of the versioning settings on the Site Pages library though – it will break the Page restore functionality I mentioned above.
The below image shows the default versioning setup for the Site Pages library (you would access it the same way as you did on the Document Library).
Custom List
- Major versions are on by default in a custom list
- Minor versions are off by default in a custom list and need to be enabled
- Versioning can be disabled in a custom list if need be. By default, it captures the last 50 major versions in a custom list. The maximum you can capture would be 50,000.
Here is how to alter versioning settings in a custom list:
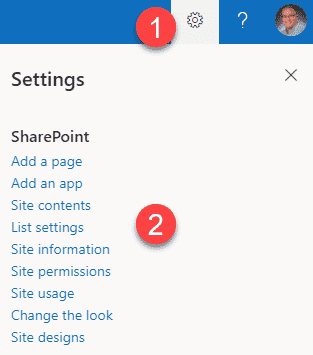
- Gear Icon > List Settings
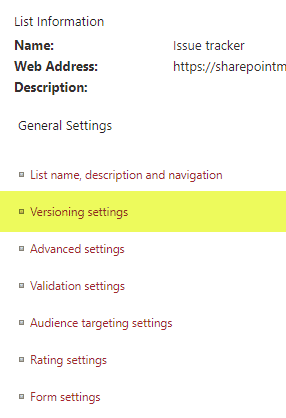
- Click on Versioning Settings
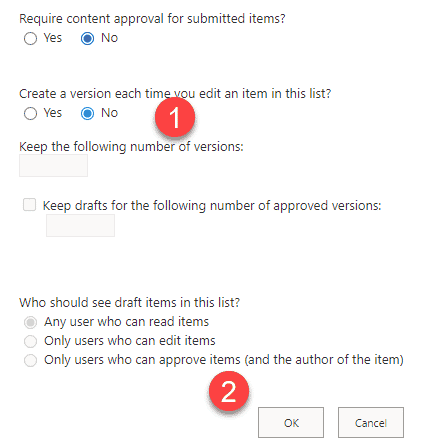
- Change the settings as necessary
How to promote from minor to major versions
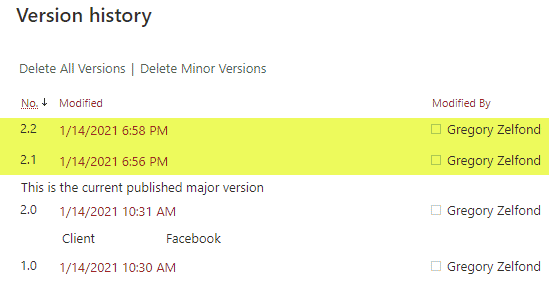
If you decide to use minor versions – any changes you make to the files will be captured via a sequential minor version numbering (1.1, 1.2, 1.3, 1.100, etc.). But how do we then switch from minor to major versions? For example, I want to go from Version 2.4 to 3.0. There are a few scenarios that allow us to do that.
Publish
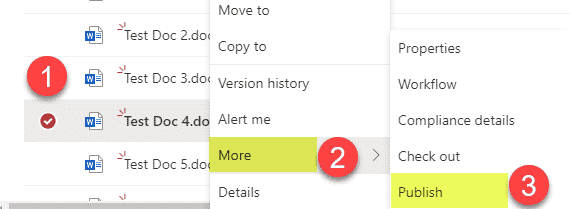
- Right-click on a file, then More > Publish
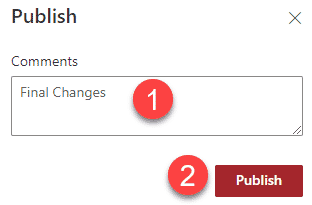
- Type-in the comments (optional) and hit Publish
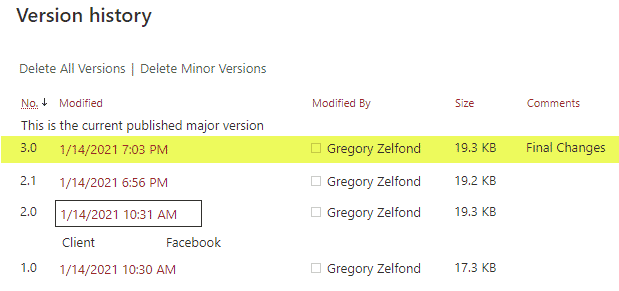
- The version will now go from minor to major
Check Out/Check In
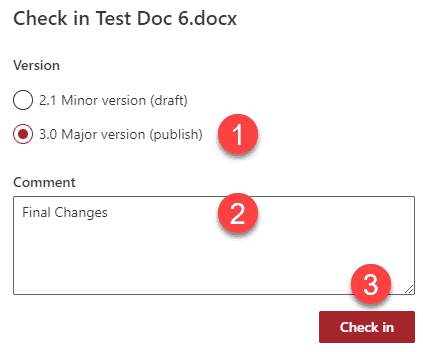
Another thing you can do to upgrade from minor to major version is Check out a file and then Check it back in after the changes. I described the process of check-in/check-out here. When you check the file back in – it will give you an option to Check-in and Publish simultaneously (thus upgrading to a major version).
Enable Content Approval
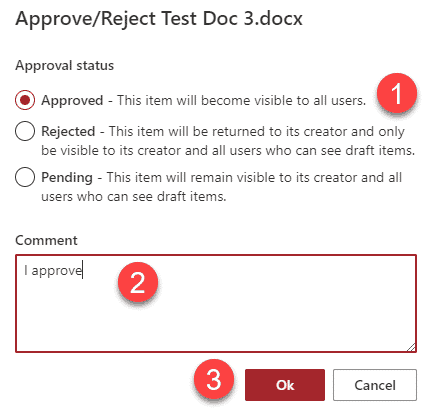
Another option that will allow you to upgrade to a major version is Content Approval. I described the feature previously here. Once you approve the file, it will update to a major version.
Additional Reading
I also highly recommend that you read the following post from Ellen van Aken. She documented some handy findings of major and minor versions.


