How to Create a One-Click Checklist in Microsoft Lists with Quick Steps
While I’ve always liked using Microsoft Lists, they’re missing one of the most valuable checklist features: quickly checking off items. There’s just something satisfying about checking things off as you complete them. We can easily complete a task in Planner, To Do, and Loop. But not in Lists. If you want to mark the item completed, you have to edit the list item, scroll down to its field, and make the change. Checking off an item as completed sometimes took more time than actually completing the task 😊
This all finally changed with the introduction of Quick Steps. I blogged about this feature some time ago. So let me share with you some quick instructions on how to create a true checklist using Microsoft Lists.
Step 1: Create a Custom List
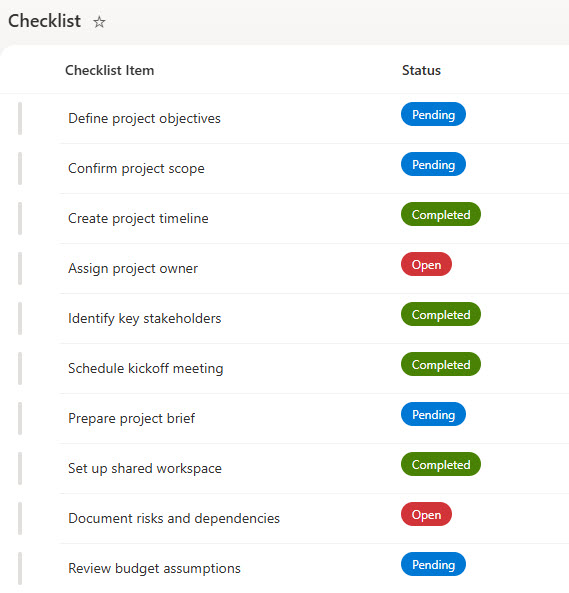
First, create a simple list with a task (Title column) and a Status Column (Choice type with Open/Pending/Completed options).
Step 2: Create a Quick Step with a condition
Next, create a quick step that marks the task as completed, but only if the Status column value is not equal to Completed. Here are the instructions.
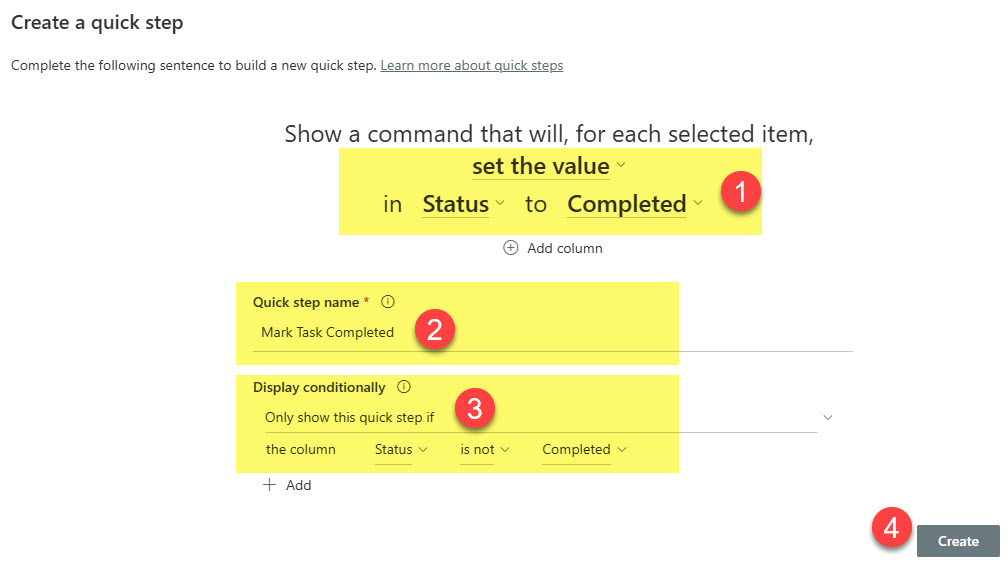
With this logic, the list displays the Quick Step only for tasks that are not yet completed (Open or Pending Status).
Step 3: Create a Quick Step Column
Finally, add a Quick Step column to the list. This article explains how to do this.

Here is how the checklist should look:
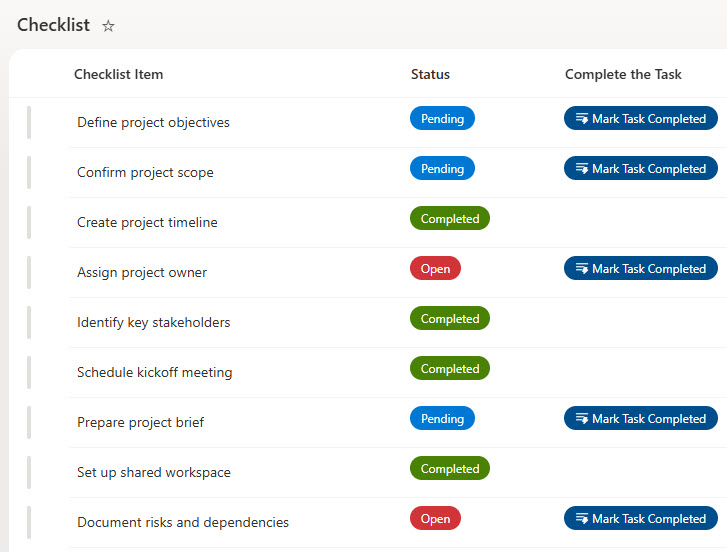
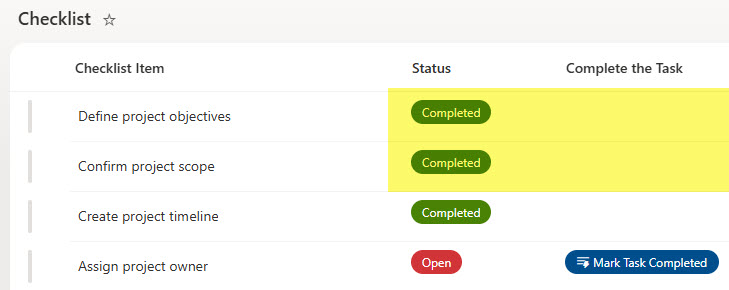
Clicking the Mark Task Completed button changes that row’s status column to Completed. In the example below, I did exactly that to the first 2 tasks.
By the way, you can also refer to this other post I wrote on other ways to create checklists in SharePoint and Microsoft 365.

Share Article