8 ways to create a checklist in SharePoint and Microsoft 365
I wrote a post about checklists in SharePoint back in 2018. It is no secret that things have changed quite drastically since then. As a result, many solutions I proposed back then are no longer valid. That said, we also got a few new options, thanks to new functionality and the new applications we got altogether. So, in this article, I will document the various new options we now have to create the checklist in SharePoint and Microsoft 365. I would also like to list the pros and cons of each approach.
What is a checklist?
First, let me define a Checklist for you so we are on the same page here. By checklist, I mean a document or tool that allows users to track the completion of repetitive tasks. Checklists help minimize or eliminate potential mistakes and oversights due to human error. I am sure you have a handful of checklists in your organization, but here are a few examples of some of the checklists:
- New Employee Onboarding Checklist
- SharePoint Migration Checklist
- Equipment Maintenance Checklist
- Vendor Onboarding Checklist
- Financial Audit Checklist
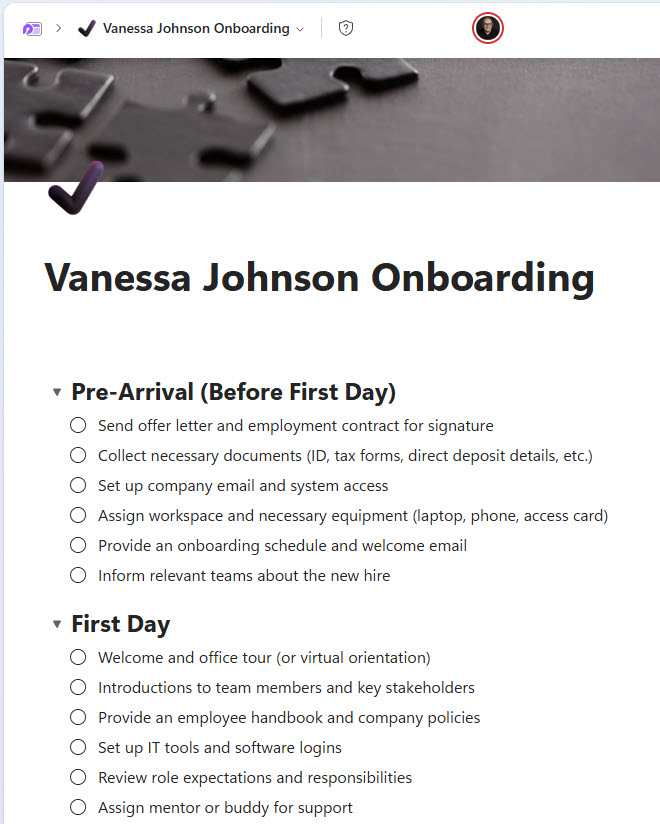
To demonstrate to you all the available options to create the checklist in SharePoint and Microsoft 365, I will be using an employee onboarding checklist for a new employee.
Option 1: List with rows for tasks
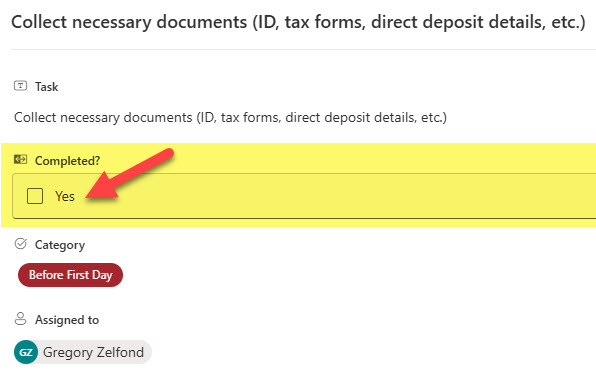
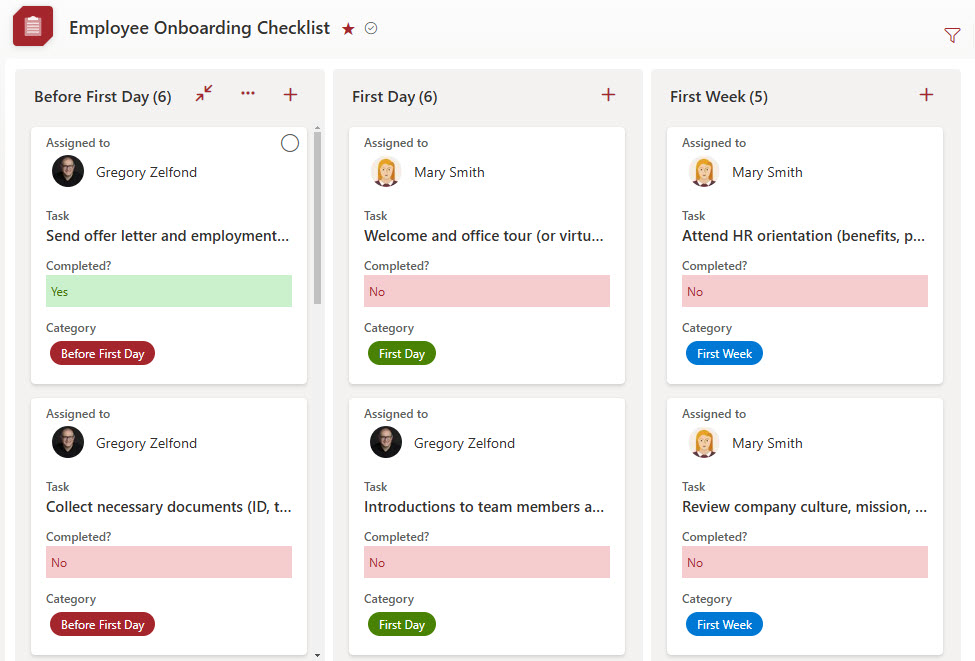
The first option to create a checklist is to use MS Lists functionality. With this option, the actual tasks appear as rows within the list. Users can designate each row (task) as completed via the Yes/No column type.
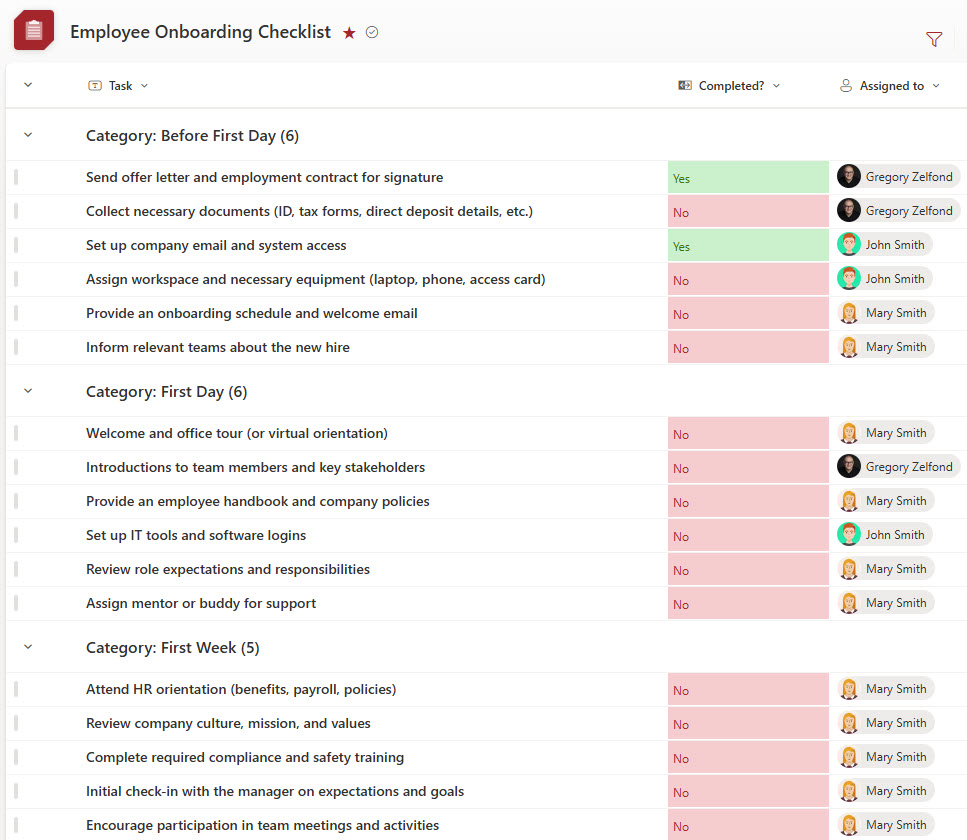
Pros
- Resembles the “typical checklist” look and feel
- You can add additional columns/metadata to a checklist as necessary (i.e., Comments Text field, Category, Date Completed, etc.)
- Version history is available if there is a need to retrace the task history
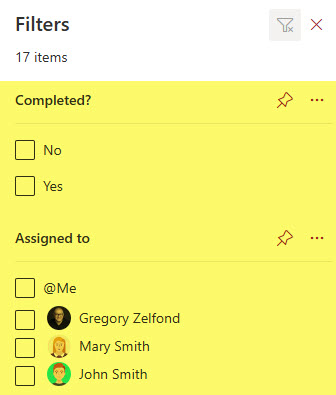
- Ability to quickly sort/filter/group data by any metadata column
- Ability to view checklist in alternate views if necessary (i.e., Calendar, Gallery, Board)
Cons
- Copying the checklist requires multiple steps, as copy list functionality does not copy the list’s contents. So you would need to copy the list first, then copy/paste the tasks into the new checklist.
Option 2: Lists with columns for tasks
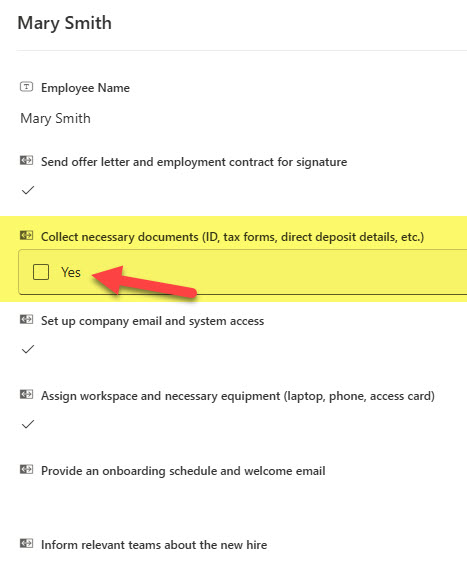
The second option also utilizes MS List functionality. However, unlike Option 1, the idea here is that for each checklist item (task), you create a Yes/No column type. So, instead of checklist tasks being rows in a table, they become columns, and each employee being onboarded becomes a row in the list.

Pros
- The list can easily be copied using the Copy List functionality
- Version History on a list keeps track of checklist updates
- Ability to quickly share a list and allow users only to maintain content, not metadata
- All checklists end up being stored in a single list, which might be convenient
Cons
- The look and feel of the checklist might not be a typical “checklist” people are used to
- This option works great only for a limited number of checklist items; it might get wild with the # and width of columns
- No ability to track other information about the task (i.e., date completed, comments) like with Option 1
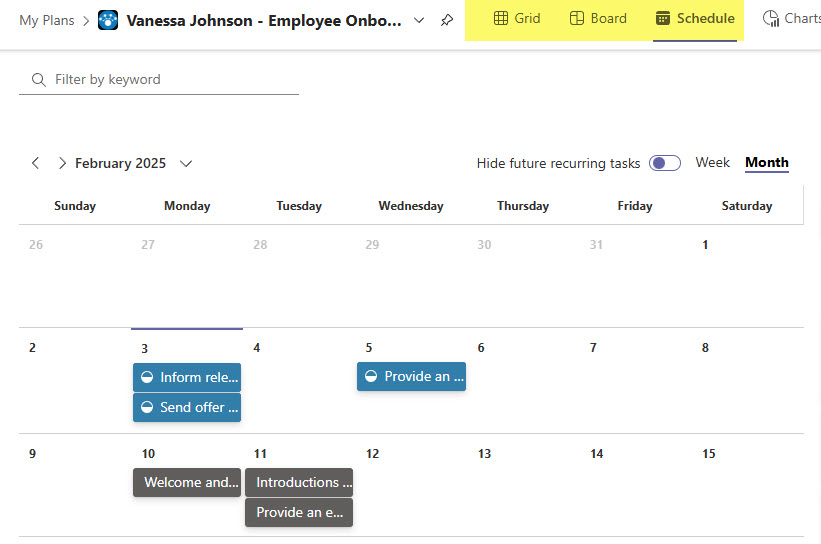
Option 3: Planner
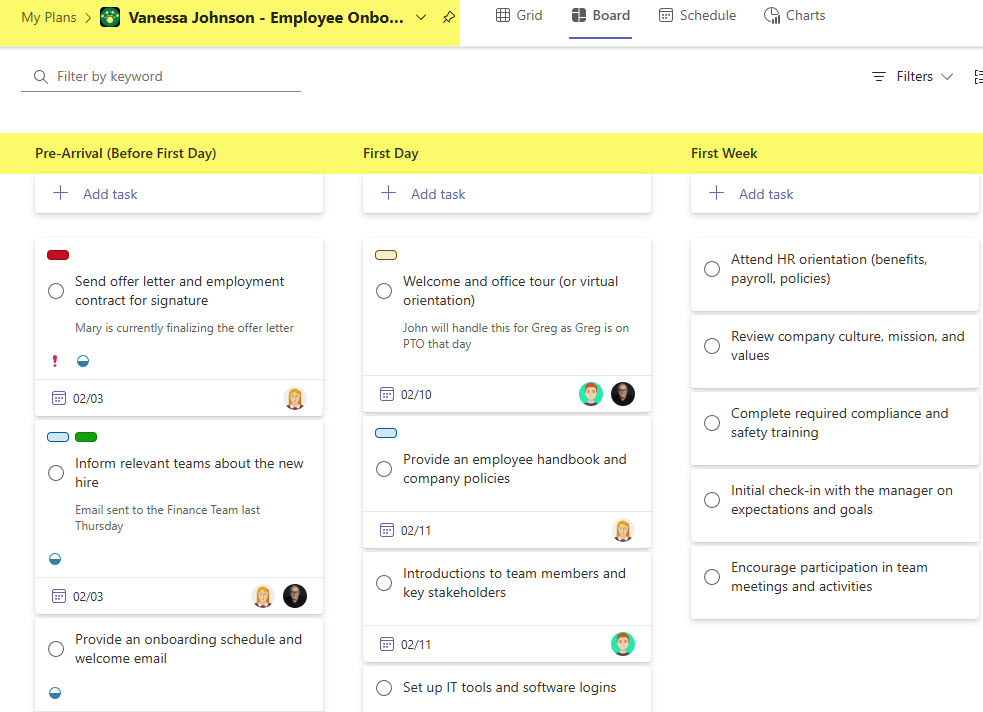
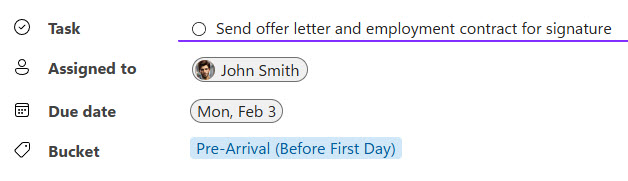
The third option uses the Planner functionality. The idea behind this option is that you create a checklist by creating a Plan for each employee being onboarded and then creating a task for each “checklist item.”
Pros
- Since Planner is a dedicated task management tool, it has an easy and intuitive ability to mark tasks as completed
- Ability to organize checklist items via Buckets
- Ability to view the checklist in Board, Grid, and Calendar views
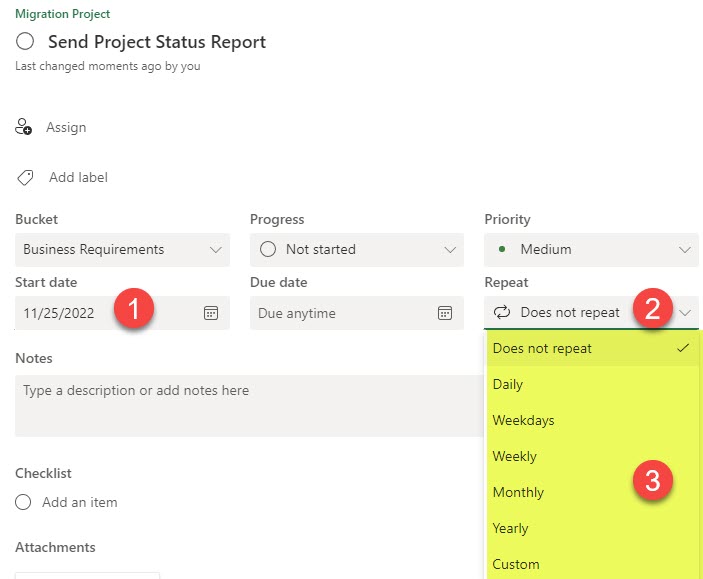
- Ability to populate other Planner task fields like priority, comments, status, due dates, attachments, etc.

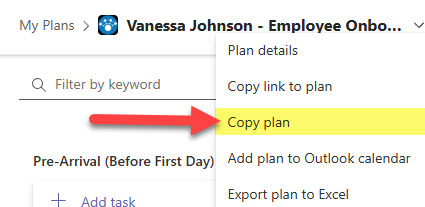
- Ability to quickly duplicate a plan with tasks/checklist items via the Copy plan feature
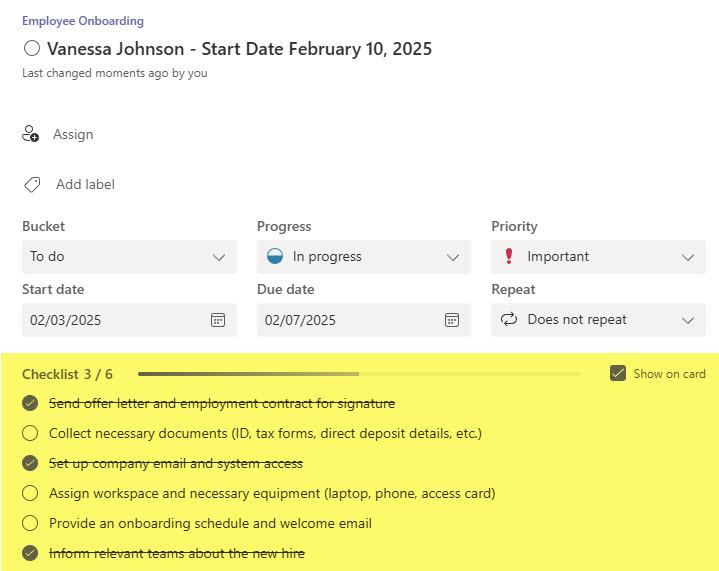
- Ability to break a task into smaller tasks via the Planner checklist functionality

- Ability to add recurring tasks if need be
Cons
- The current security model of Planner dictates that each plan is tied to a given Microsoft 365 Group. So, it is critical to have all plans tied to the same group for easy access, etc.
Option 4: Planner Checklist function
This is kind of a special case, but could be used in some situations for a checklist. I mentioned the Planner’s checklist feature above. It allows you to break a task into smaller tasks. The idea behind this option is that once again, you use Planner and create a Plan, but each task within a plan is a checklist for a given employee by itself. Then, you use the Planner checklist feature to create checklist items within a given task (checklist).
Pros
- Works great for small checklists
- Ability to easily copy a task/checklist
- Since each task is a separate checklist, all data for all employees resides within the same Plan in Planner
Cons
- It might get tricky if you need unique security for each checklist as, once again, each Plan is tied to a given Microsoft 365 Group
- A limit of 20 checklist items exists per Planner task – so this option might only work for very small checklists
- No way to add additional fields/info about each task
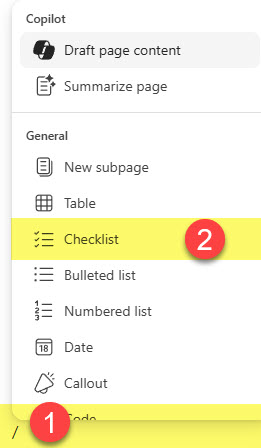
Option 5: Loop Checklist Component
This next option is here thanks to the new app we got as part of Microsoft 365 – the Microsoft Loop. I have blogged extensively about it and its features already. The Loop application has a few “components” that could be used for the checklist functionality. The first component worth mentioning is surprise, surprise, called Checklist 😀
Pros
- Easy to build and maintain
- Ability to organize checklists within Loop Pages and Workspaces
- Ability to embed checklists in other Microsoft 365 applications (i.e., Teams conversation)
- Ability to Co-Author the Checklist in real time (since it is a Loop component)
Cons
- It might get tricky with security, permissions, and governance as the Loop application is relatively new and still evolving
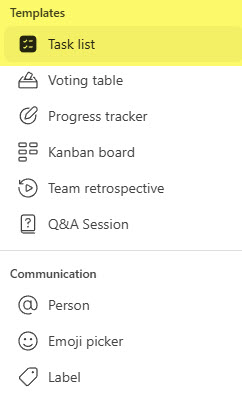
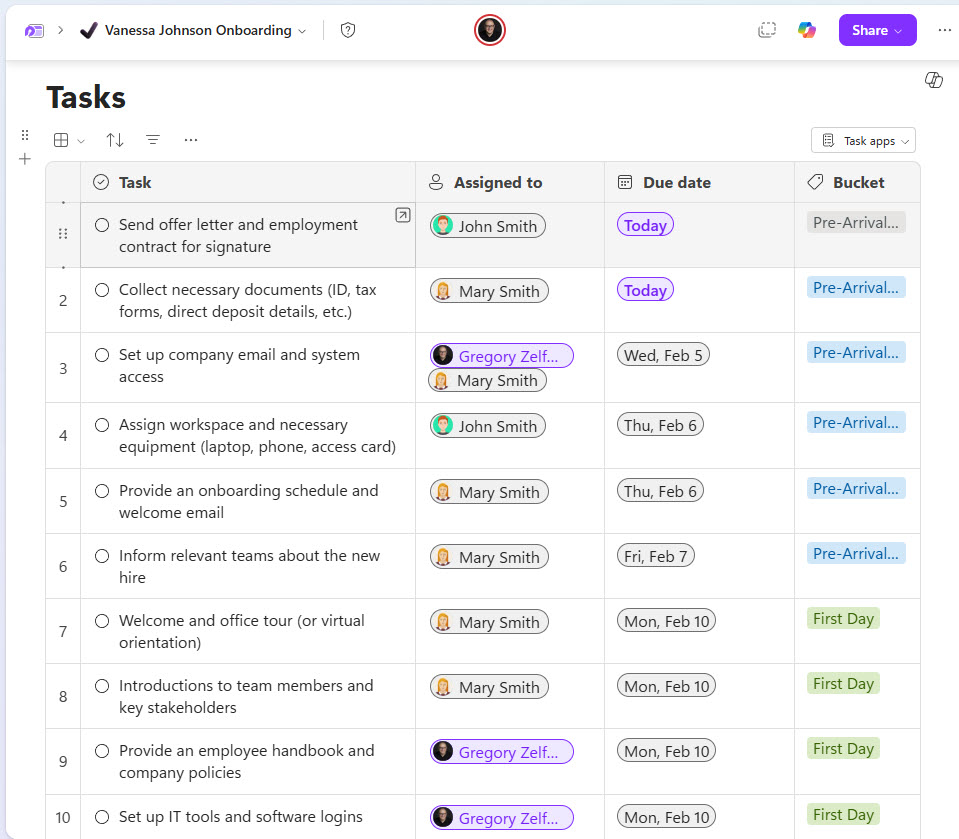
Option 6: Loop Task Component
The other option is also here, thanks to the Loop application. You can use the Tasks Component to track checklist items, similar to Option # 1 (Lists app).
Pros
- Same Pros as for Option # 5
- Ability to view checklist in Table or Board (Kanban-style view)
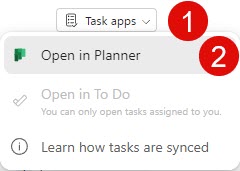
- Ability to sync checklist items with Planner and To do (as explained in this earlier article)
Cons
- No way to add custom columns/fields to the Tasks Table beyond what is available by default
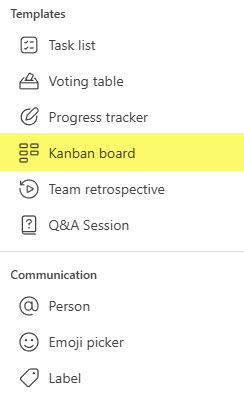
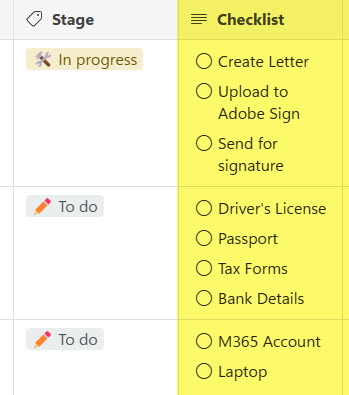
Option 7: Loop Kanban Board Component
Another option to manage Checklists in Loop is via the Kanban Board Component. While this option initially does not make much sense, some of its benefits (which I outline below) might make you reconsider.
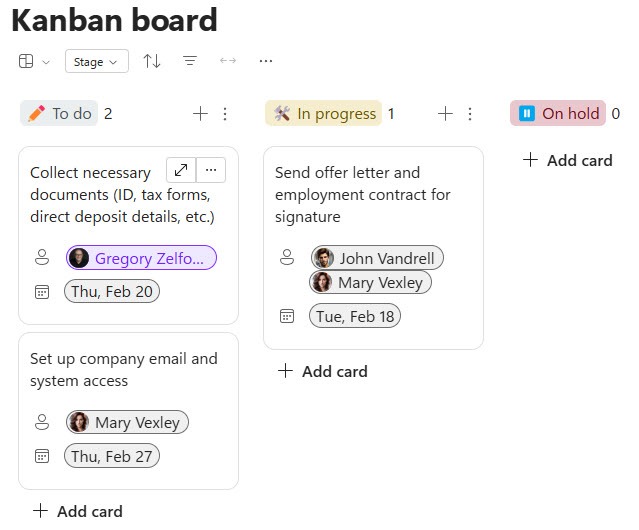
Pros
- Ability to view the Board in a Table format
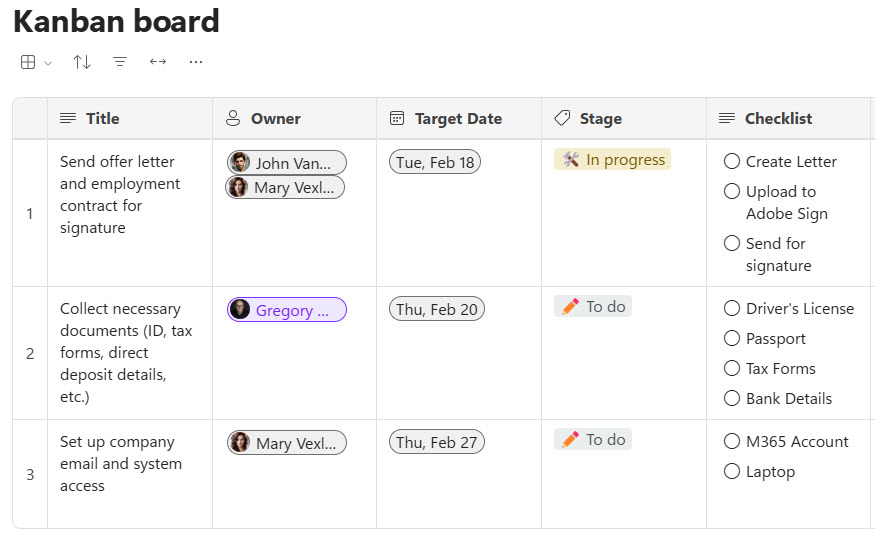
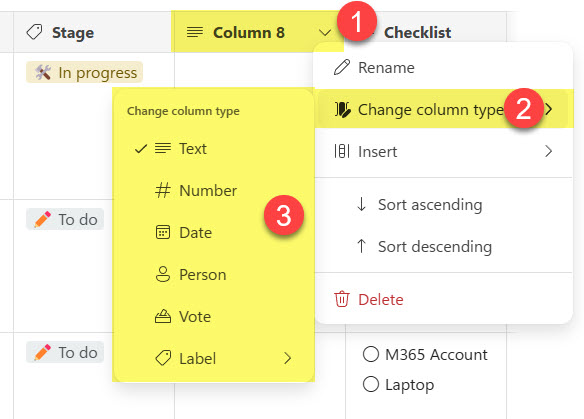
- Ability to add custom fields/columns (unlike with the Tasks component)
- Ability to create checklists (subtasks) for each task
Cons
- It might get tricky with security, permissions, and governance, as the Loop application is relatively new and still evolving
Option 8: OneNote
The last option here might not be the most versatile one, but it might make sense if your organization or employees use the OneNote application. If you paste the tasks into the OneNote Page and assign a To Do tag, it will add a checklist box next to the tasks.
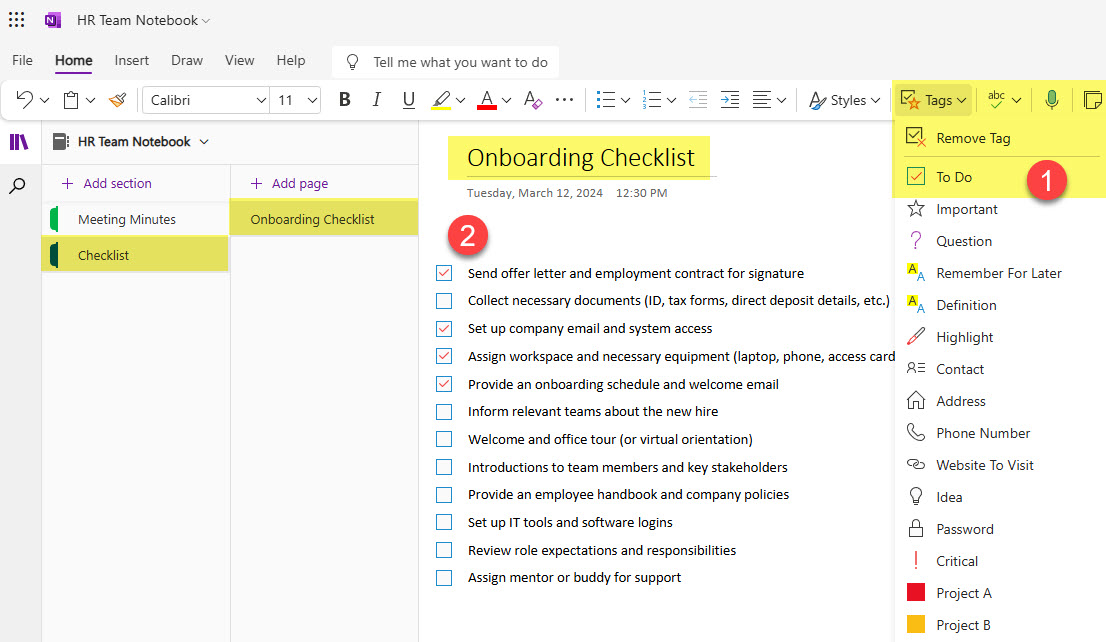
Pros
- The option to consider if you prefer to store content in the OneNote application
Cons
- This option is not as versatile as the other options listed in this article
- The information is stored inside the OneNote app, which makes the interface with Planner and other apps impossible.
If you are looking for some actual, real-life examples of Checklists that can be built in SharePoint and Microsoft 365, check out these visuals on my portfolio site, LookBook365.

Share Article