How to limit the selection of choices in a People column
Today I want to show you a trick you can use to limit the selection of choices when using the People column. For example, you have a column on a list or library that utilizes the People picker. By default, you will be able to enter the names of any of your colleagues who are part of the User Directory. However, say you want to limit the selection to just a few. In this post, I will show you a cool way to do so.
Step 1: Add the People column to your list or library
The first step is easy – you need to add the People column to your list or library.
- Click on Add column > Person
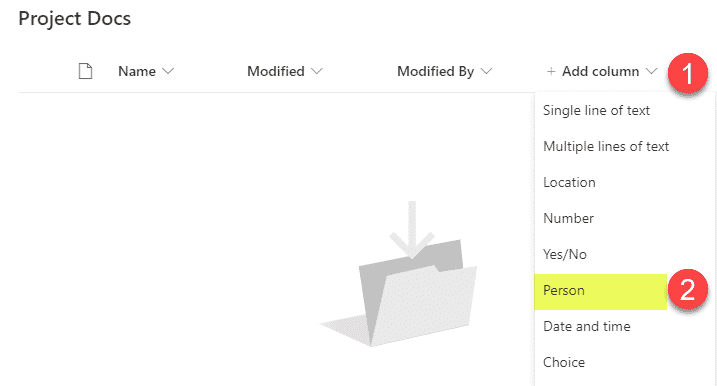
- Typ in the column name, then click Save
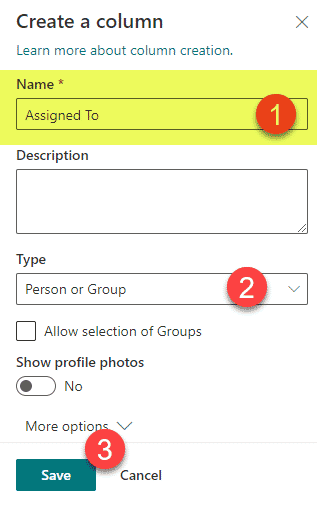
- The column will now be added to a list or library
Step 2: Create a SharePoint Security Group
In this next step, you have to create a SharePoint security group on your site. For a difference between the SharePoint group and other groups, check out this post.
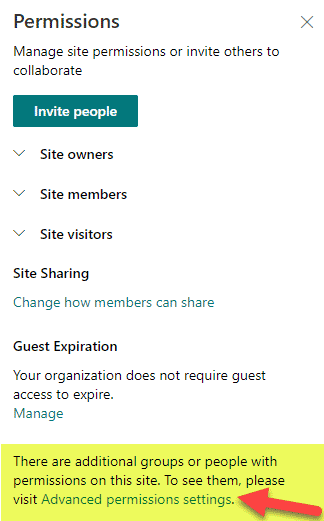
- Gear Icon > Site Permissions
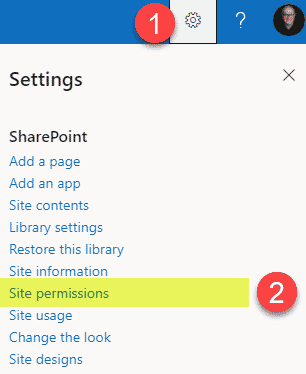
- Click on Advanced permissions settings
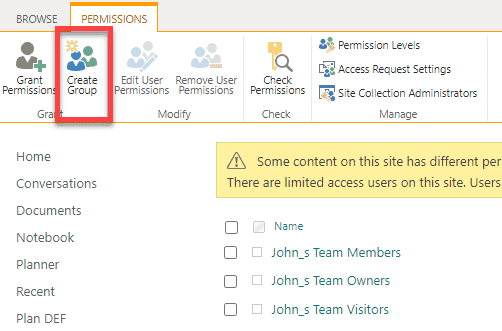
- On the next screen, click on Create Group
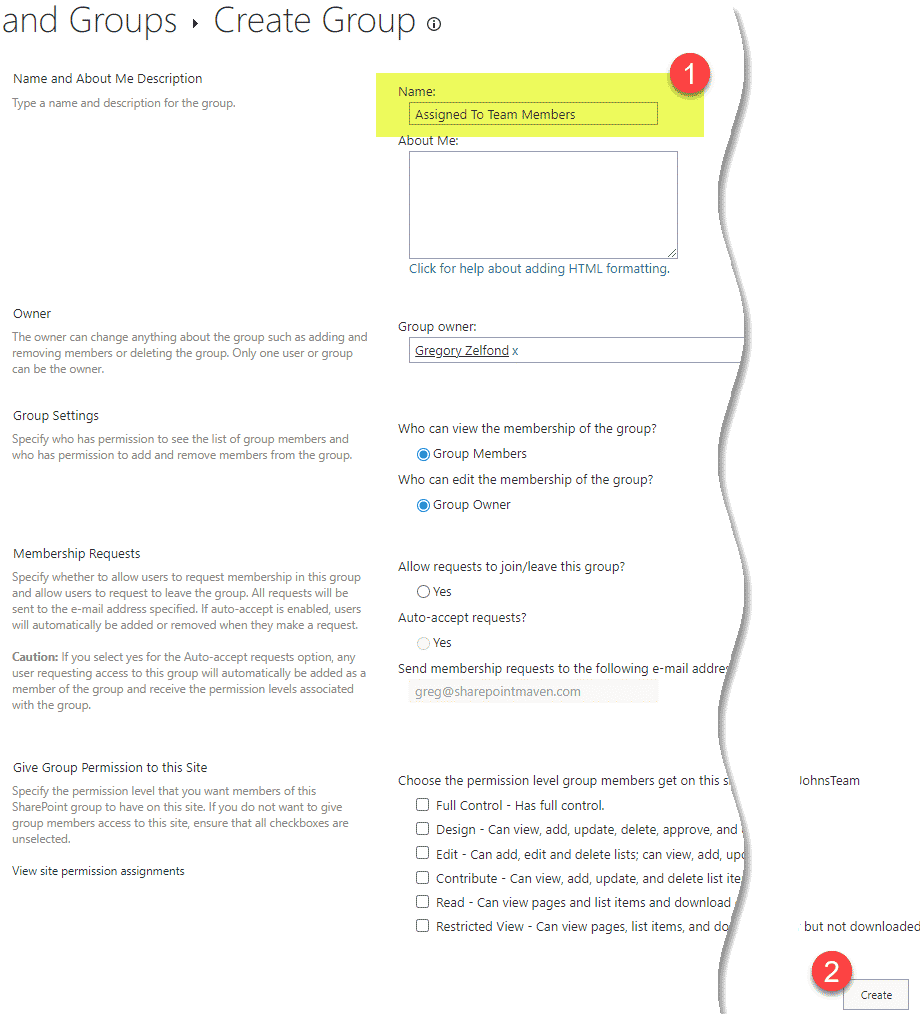
- Give the group a name and click Create. To clarify what we are doing here, while we are creating a SharePoint security group here, we are not using it as a true “security” group and assigning it permissions. We are just creating it to capture a subset of users who will be the only available choices in the People column. It will become more obvious soon!
Step 3: Add users to the SharePoint Security Group
Next, you need to add users to the group that will represent a selection pool of users.
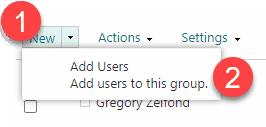
- Click New > Add Users
- Type the names of the users to who you want to limit the People Column to. Click Share
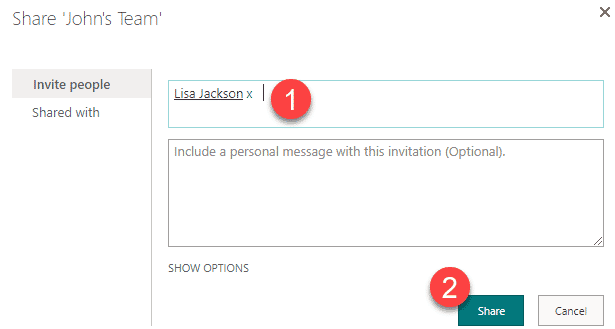
Step 4: Edit the People Column using the classic settings
Finally, we will need to edit the People Column in the classic interface to select the group we created in Step 2 above.
- Go back to the library or a list, click Gear Icon > Library settings
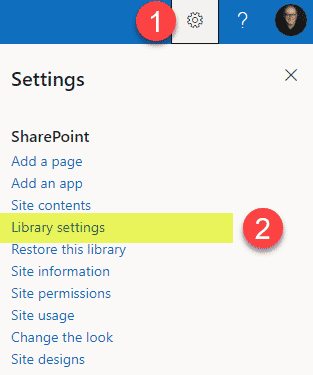
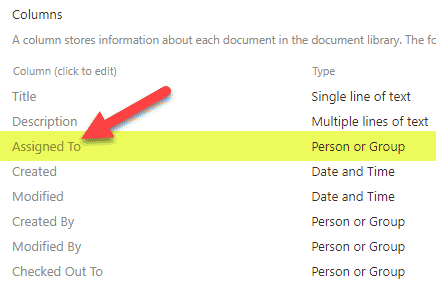
- Scroll down to the list of columns and find the People column we created in Step 1. Click on it.
- Next, under Choose from: select the SharePoint Group radio button and select the SharePoint security group from Step 2. Click OK.
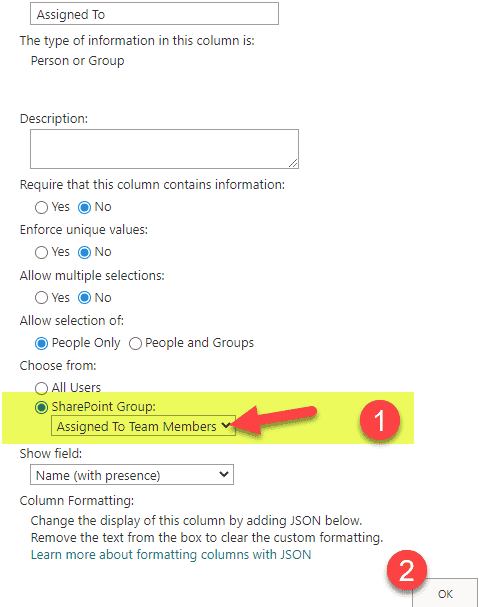
- That’s all in terms of setup. Mazel Tov! We are ready to test!
Here is a Result once you limit the selection of choices in a People column
When users try to choose a user you specified in Step 3, they will be able to add them just fine.
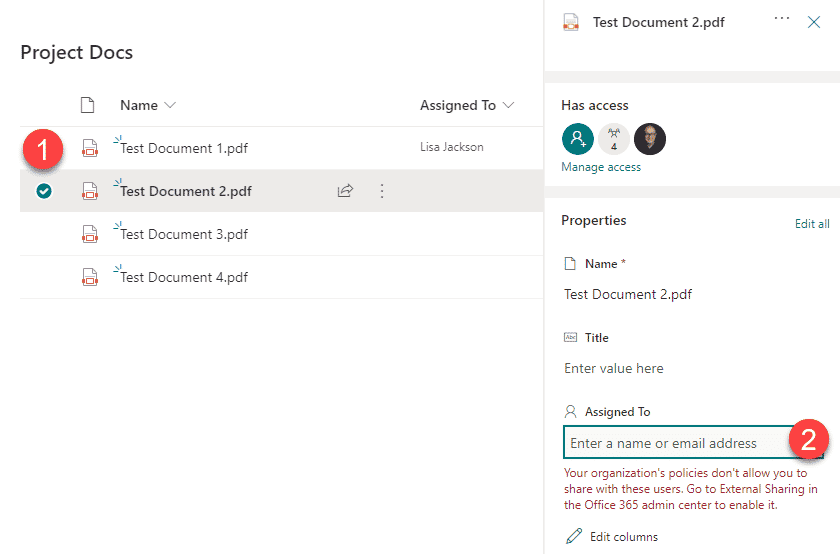
However, when users type in the user who is not part of that group, they will not be able to add them (they will get an error message instead that doesn’t really correspond to the given scenario: “Your organization’s policies don’t allow you to share with these users. Go to External Sharing in the Office 365 admin center to enable it.”).
