3 ways to prevent documents from appearing in search results in SharePoint
Not everything you store in SharePoint is meant to be seen by others. Say, you uploaded a pretty confidential document, like a company business plan. How do you assure it is not picked up by mighty SharePoint search engine? Here are a few ways to prevent documents from appearing in search results in SharePoint Intranet.
Option 1: Create unique Permissions for a document library or folder
Since everything in SharePoint is permission-driven, all you have to do is set unique permissions for a given site, library or folder. This will prevent the document from surfacing up in a keyword search to those who don’t have access to it. The best option is to set the security at the site level. Here are instructions on how to do this. However, if you want to limit unique permissions for a specific library or folder, here are the steps to follow:
Create Unique permissions for a library
- Navigate to the library where you want to set unique permissions
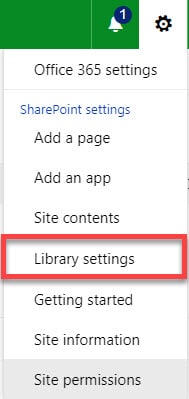
- Gear Icon > Library Settings
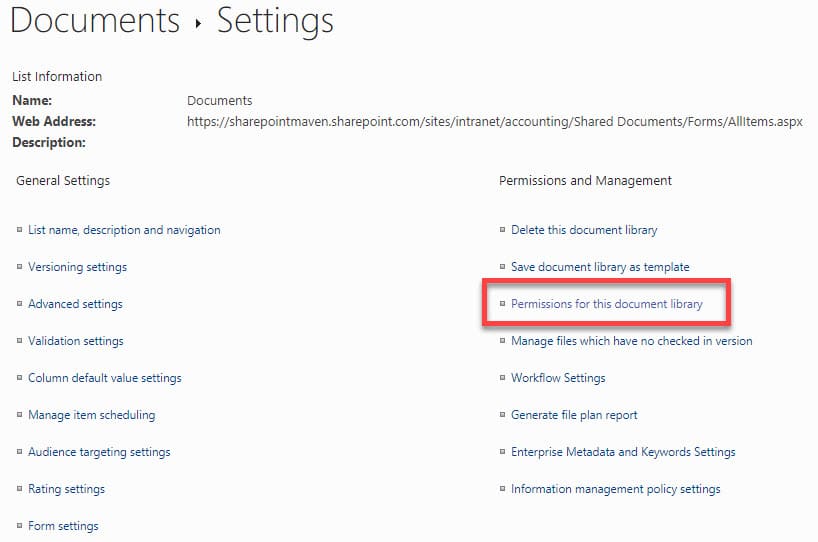
- Click on Permissions for this document library
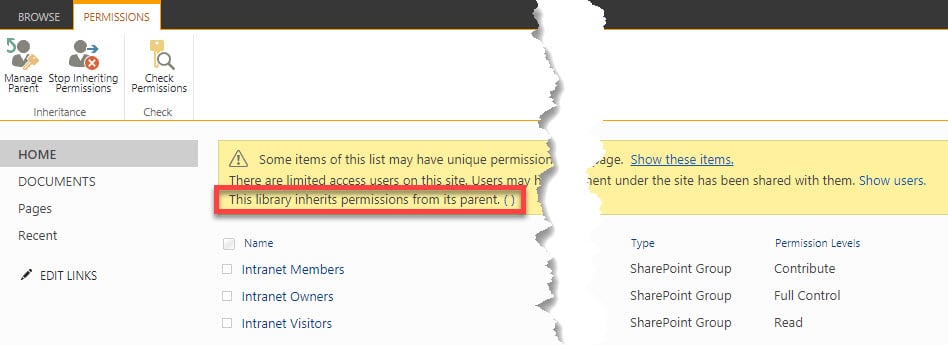
- You will notice that, by default, the library inherits the permissions from the parent (parent being the site). So that means that whatever security you set up at the site level propagates to the document library and all the files and folders underneath.
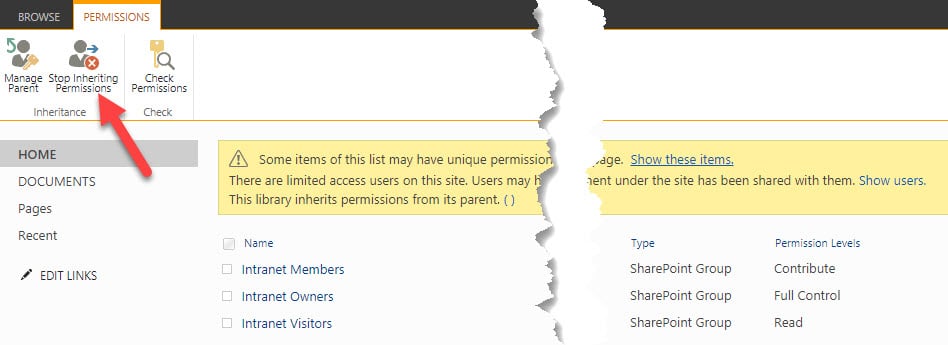
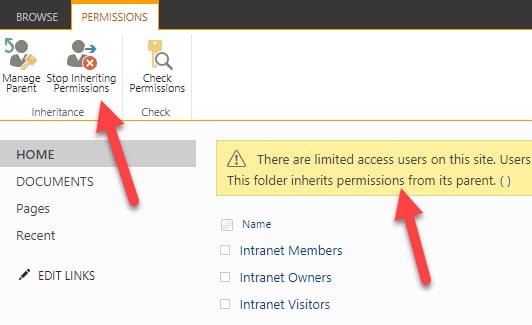
- We need to break that inheritance. Click on Stop Inheriting Permissions
- Press OK button when you see a pop-up
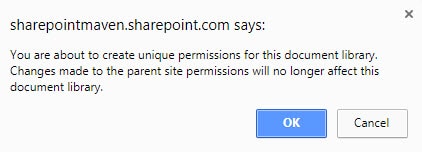
- Next, you can add/remove groups and users as you wish. Changes you make here only impact the library and its contents, nothing else on the site. That said, if you decide to click on a security group and add/remove users from it, the change will impact all places where the group is used. So a smart thing to do would be to remove existing groups from the library and create new ones or add users outside of the group as necessary.
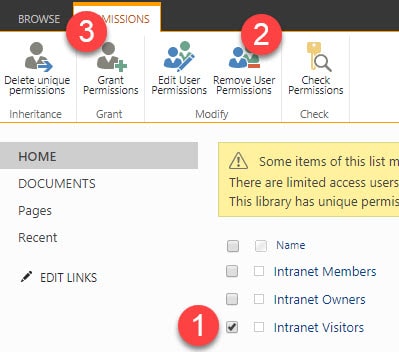
Create Unique permissions for a folder
You might need to go more granular if all you are trying to hide from search is just a particular folder. To do so:
- Click the checkbox next to the folder you want to hide, then “i” icon
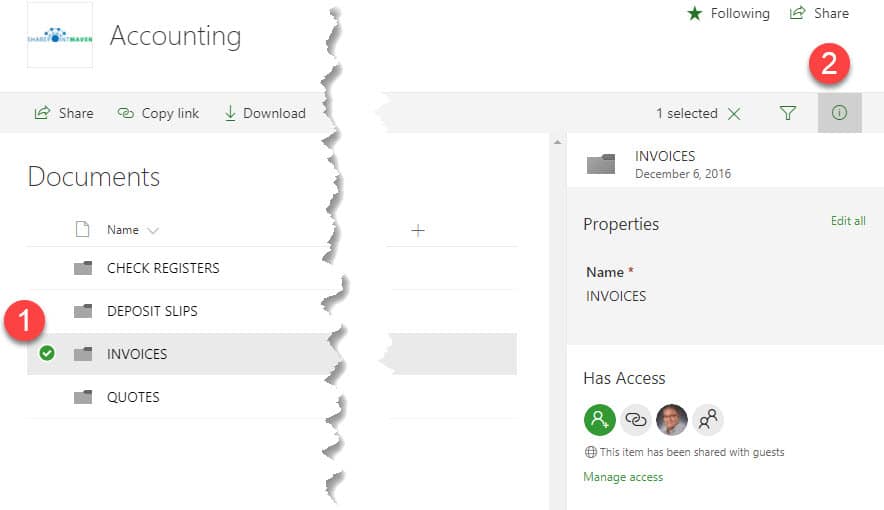
- Click on Manage access
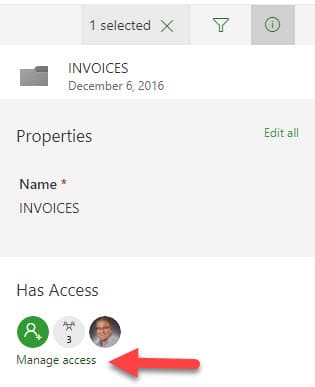
- On the next screen, you can manage unique permissions for the folder by removing users/groups from it or adding others.
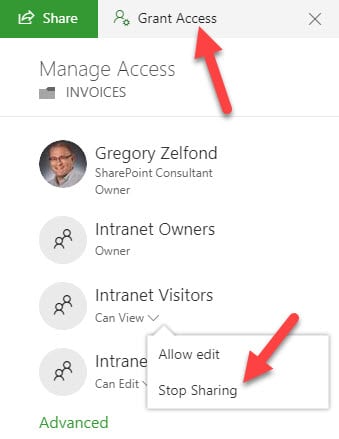
- You can also press on Advanced at the bottom of above pop-up, that will open “classical” security management page. From there, you can remove groups and members, just like we did for document libraries above. All the changes you make will only impact that folder only, though.
Option 2: Disable search indexing at the library level
Another option is to leave security as-is, but prevent the document from being indexed (picked up) by the SharePoint search engine. To do this:
- Navigate to the library
- Gear Icon > Library Settings
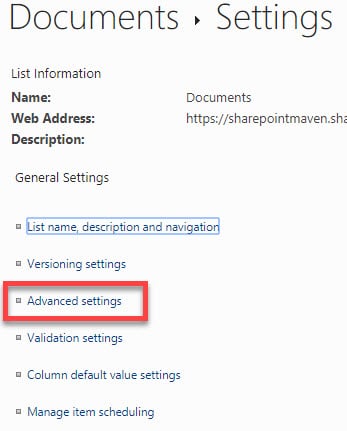
- Click on Advanced settings
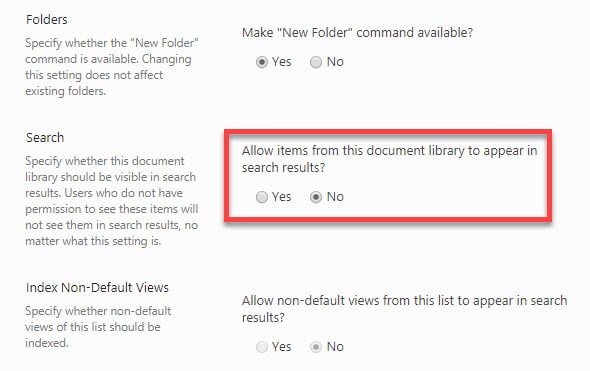
- Scroll down to the middle of the page to the Search section and change the radio button for Allow items from this document library to appear in search results? from Yes (default) to No
- Click OK at the bottom
Notes:
- This will prevent files and folders in this document library from appearing in the keyword search but would allow users to navigate to the library if they have access
- The same technique works for any list, not just document libraries
Option 3: Disable Search Indexing at the Site Level
Similar to the above option, you can prevent the whole site from appearing in search. To do this:
- Gear Icon > Site Settings
- Under Search, click on Search and offline availability
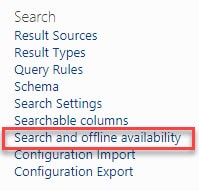
- In the Indexing Site Content section, change Allow this site to appear in search results? from Yes (default) to No

Notes:
- Just like with the document library above, the site might still be accessible (unless you set unique security for it) by others. The change above will only prevent site contents from appearing in the keyword search.


