How to request files in SharePoint
This has become one of my favorite and long-anticipated features in SharePoint Online. We can now request files from other users and have those files uploaded automatically into designated folders in SharePoint Online. In this article, I would like to explain the feature to you and tell you what you need to do to enable it.
Request Files in SharePoint vs. Request Files in OneDrive
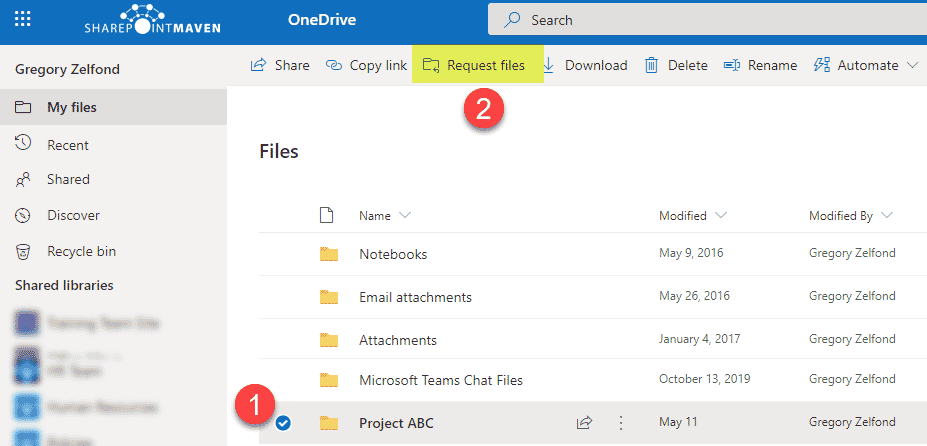
The ability to request files in SharePoint is not novel – we had the same capability in OneDrive for Business for some time. However, it only became available in SharePoint quite recently.
Allow anonymous sharing on a SharePoint site
The first step in the process is for you to enable anonymous sharing on a SharePoint site. If you try to request files in SharePoint, you won’t find the feature at all, and the reason for this is that an anonymous sharing setting on a site is a prerequisite for this feature. That is because when you request files from others, they could be users from inside or outside of the organization.
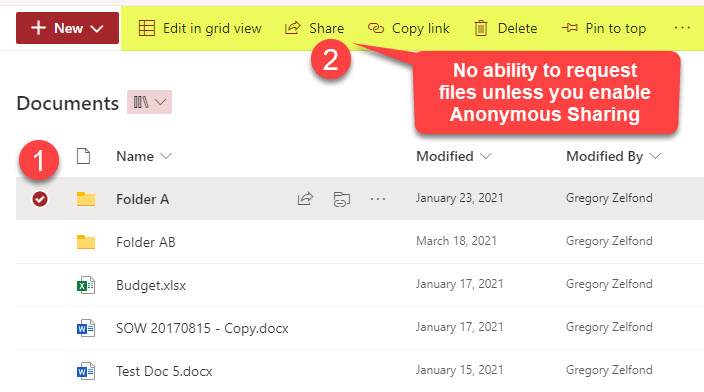
I explained how to configure those settings in this article, but essentially, you have to ensure anonymous sharing is allowed at the tenant level and then on the specific site where you want to request files.
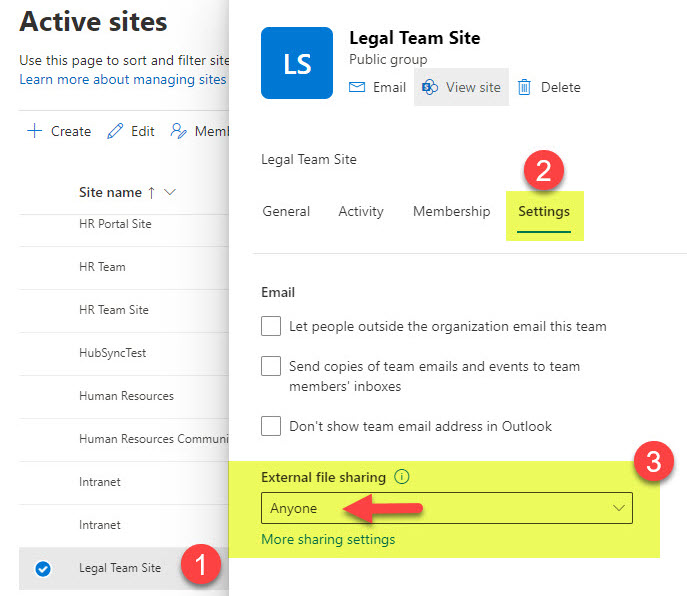
Please note that you need to be a SharePoint Administrator to change sharing settings for a site!
How to request files in SharePoint
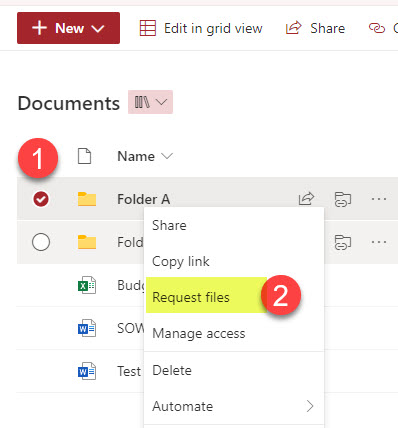
Once you enable Anonymous sharing, we can request the files in SharePoint. Here is how to do this:
- Check the box next to a folder you want users to upload files to and choose Request files
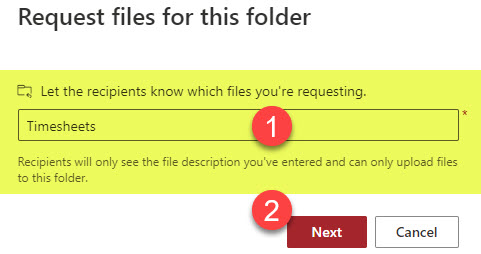
- Next, describe what you want users to upload and click Next. This info will be used in the email sent to the recipients.
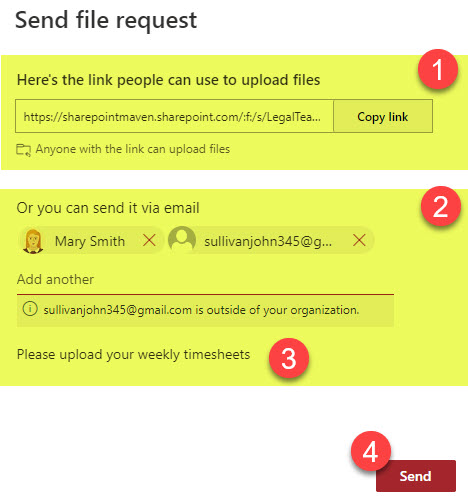
- On the next screen, you will receive a link to copy and paste and send to either internal or external recipients. Alternatively, you can type in the emails, include additional information/instructions, and Send an email from within SharePoint.
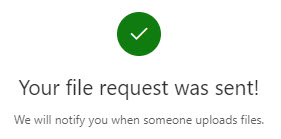
- You will then get a confirmation message that the email has been sent.
Experience for the user
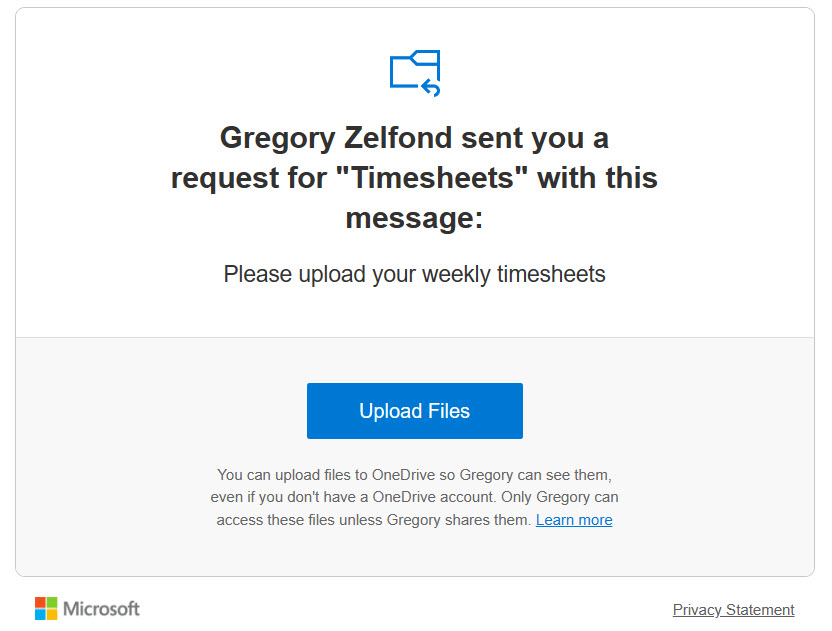
- The recipient receives an email and just clicks the button to upload the file(s)
- On the next screen, the recipient clicks Select files
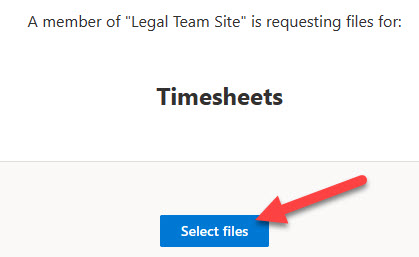
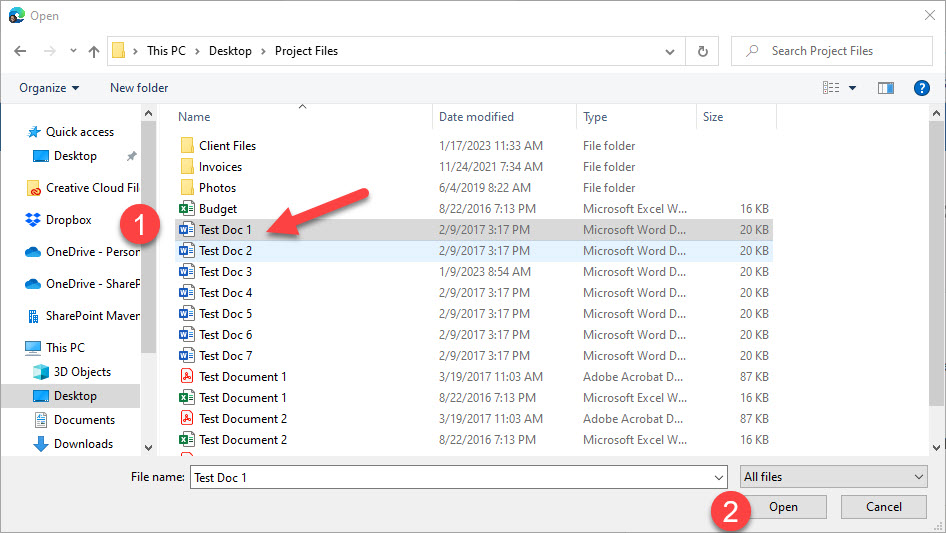
- The recipient will then choose the files(s) to upload
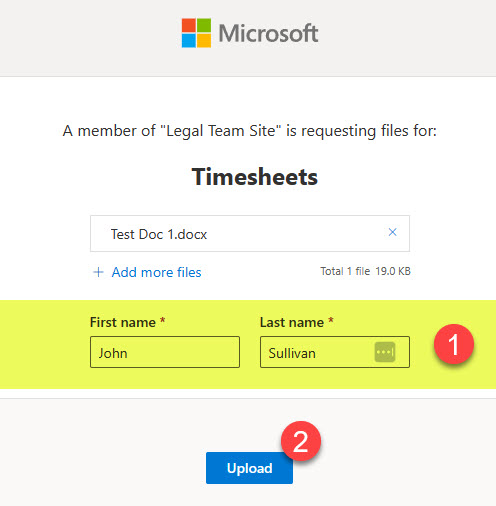
- After selecting the file(s), the recipient has to type the First and Last Name
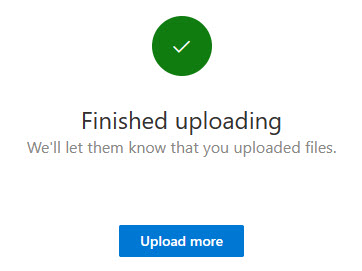
- Once uploaded, a confirmation message will appear.
Experience for the requester
- After the recipient uploads the file(s), the requester gets an email like the one below.
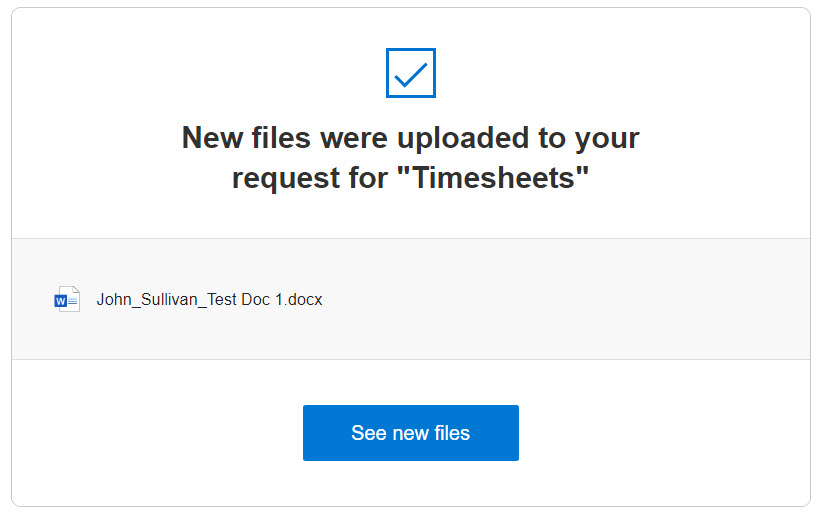
- Once the requestor enters the folder to which the file(s) were uploaded, the requestor will see the file(s). The files will all be prefixed with the Name of the person who uploaded the file(s) (from Step 4 above).


