How to properly set up Permissions on a SharePoint Site
I have written several articles about best practices for setting up SharePoint permissions. Still, I want to provide clear and simple instructions on how to properly set up permissions for a given SharePoint site.
Determine the type of SharePoint Site
The way we manage permissions in SharePoint depends on the type of site you have. We have three types of sites in SharePoint:
- Team Site (most common type)
- Communication Site (second most common type)
- Team Site without a Microsoft 365 Group attached (third most common type)
To learn about the differences among all of them and determine which one you have, please reference this post.
- If you have either a Communication Site or a Team Site without a Microsoft 365 Group – proceed to OPTION 1.
- If you have a Team Site – proceed to OPTION 2.
Option 1: Use Site Permissions for Communication Sites and Team Sites without a Microsoft 365 Group
If you have either a Communication Site or a Team Site without a Microsoft 365 Group, that means we have to manage permissions at the site level itself. This is how we managed permissions for many years in SharePoint until Microsoft 365 Group came into existence. Essentially, the site has 3 SharePoint Groups:
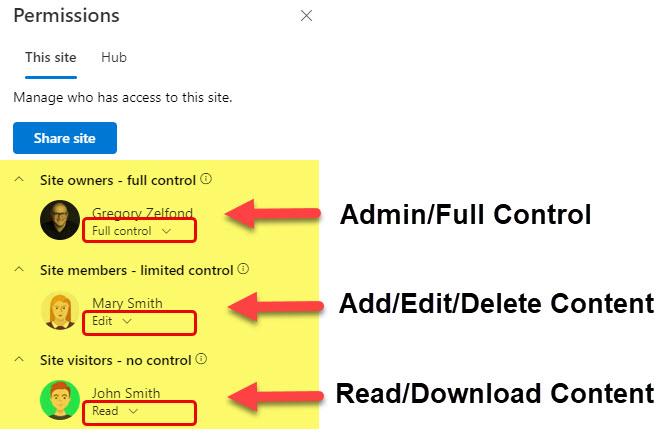
- Owners (Full Control/Admin)
- Members (Add/Edit/Delete content)
- Visitors (Read/Download content)
To manage site permissions, you just need to add users or security groups to one of these groups. To do so…
-
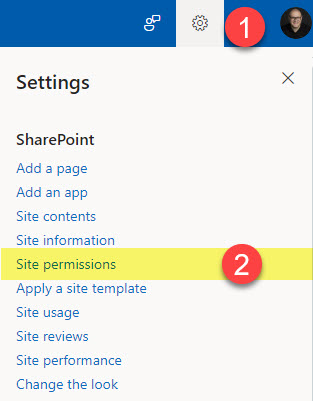
- On a SharePoint site, click Gear Icon > Site permissions
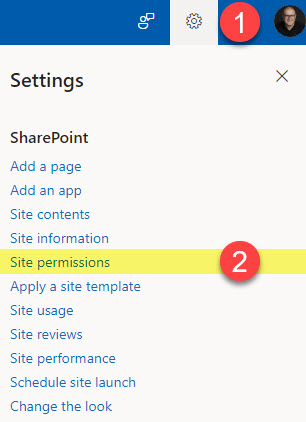
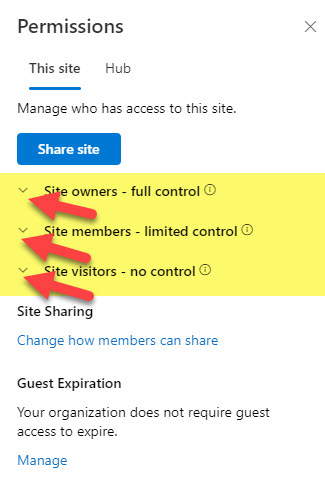
- You will see the 3 default SharePoint security groups mentioned above (Site owners, Site members, Site visitors). Expand all three groups by clicking the arrows.
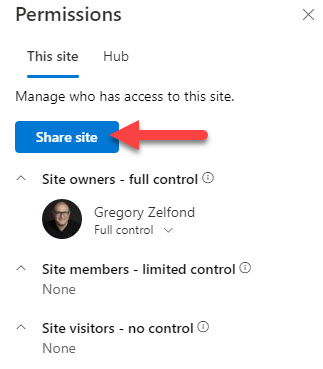
- Click Share site button
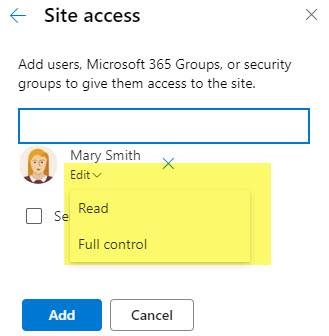
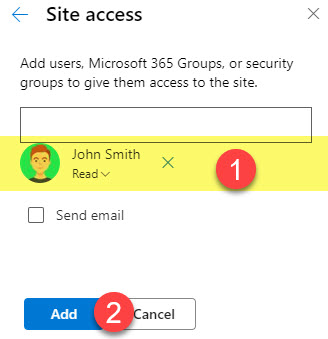
- Type in the name of the user you would like to invite. Next, choose the permission level you would like to assign. I personally uncheck the Send email checkbox. Click Add.
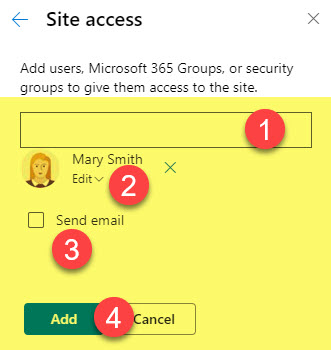
- On the screen above, when you assign a permission level, you can choose between 3 levels: Full Control (this will add the user to the Site owners Group), Edit (this will add the user to Site members group), and Read (this will add the user to Site visitors group).
- Add other user(s) as necessary.
- Once the users have been added, you will see them appear in one of the three SharePoint security groups. Note the correlation between Security Groups and permissions levels in the image below.
- On a SharePoint site, click Gear Icon > Site permissions
Option 2: Use Group Membership for Team Sites
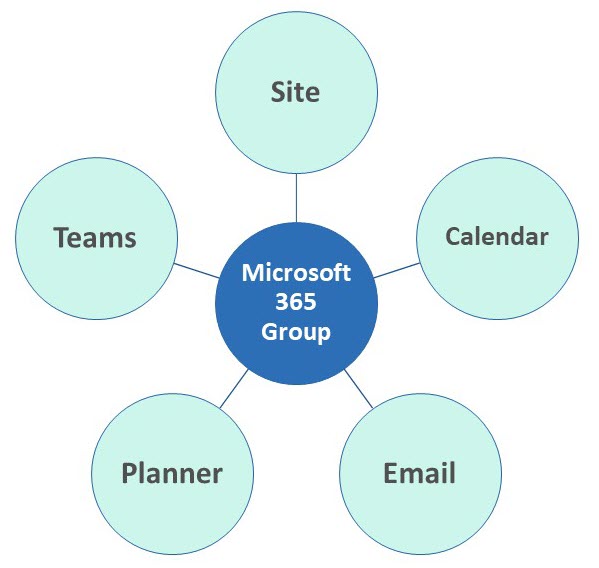
If you have a Team Site, that means you have a site connected to a Microsoft 365 Group. Microsoft 365 Group manages the permissions of the Team Site, Teams, Planner, and other apps.
You only have 2 roles within the Micorosft 365 Group:
- Owners (Full Control/Admin)
- Members (Add/Edit/Delete content)
There is no Visitor (Read) access with this option (unless you add the user directly to the site that I explain in Option 3)
To manage permissions for the site, you need to add users to the Microsoft 365 Group membership and make them either the Owner or Member. This will give users access to the SharePoint Team site and other apps connected to it. It is important to note that the role assigned (Member or Owner) applies to all connected apps (SharePoint site, Teams, Planner, etc.).
To add a user to the Microsoft 365 Group:
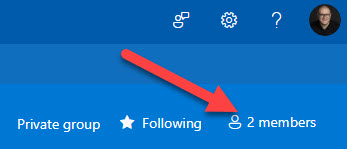
- On a Team Site, click on the Members link in the upper-right-hand corner
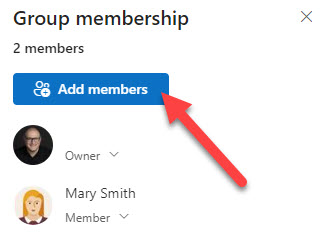
- Click on Add members button
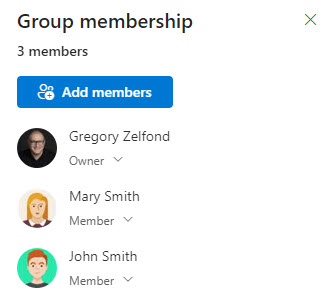
- Type in a user’s name and make them either a Member (default) or Owner. Click Save.

- The user will be listed as a Member of the Site. As mentioned above, the user will also have access to all the other apps connected to Microsoft 365 Group (Teams, Planner, etc.)
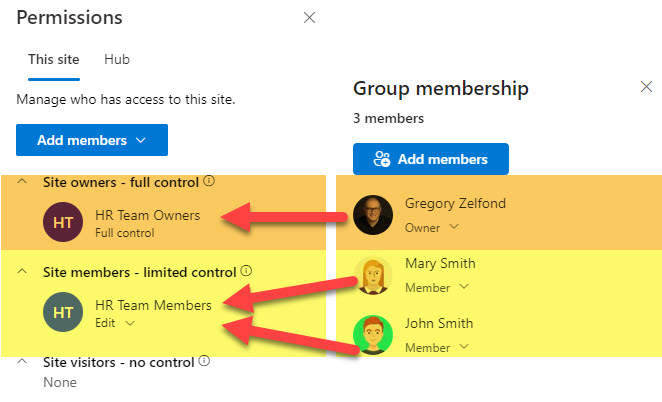
- If you are wondering what happens under the hood and how this Microsoft 365 Group membership translates into Site access, click on the Gear icon on the SharePoint Site and choose Site Permissions.
- You will then see the contents of the 3 SharePoint Security Groups. Members of the Microsoft 365 Group will end up inside the Site members SharePoint group. Owners of the Microsoft 365 Group will end up inside the Site Owners SharePoint group. Hopefully, this makes sense.
Option 3: Use Site Permissions on a Team Site if you just want to share a Site
OK, this option is for special use cases, which are quite common. It is somewhat of a combination of Options 1 and 2. Here is a use case: Say you have a Team Site connected to the Microsoft 365 Group from Option 2.
However, you want to add users to the SharePoint site only without giving them access to the other apps (Teams, Planner, etc.). For example, you have a project Team Site, and you want someone to have access to the site itself, just all the docs, but do not want them to have access to chats in Teams or plans in Planner. In this case, you cannot add them as members of the Microsoft 365 Group.
The way around this would be to bypass the Microsoft 365 Group membership and add users directly to the SharePoint site. To do this, just follow the instructions from Option 2 on a Team Site connected to the Microsoft 365 group or read this post where I explain how to do this step-by-step.


Share Article