How to display Office Locations using Gallery View on a SharePoint List
What I love about SharePoint is that it is almost like a Lego set. It has so many cool and hidden features and capabilities that allow you to create an experience and satisfy certain business requirements without significant custom development or purchasing third-party web parts. When I build intranet portals for my clients, one requirement is to display various office locations and basic information about them, such as address, phone number, hours of operation, etc.
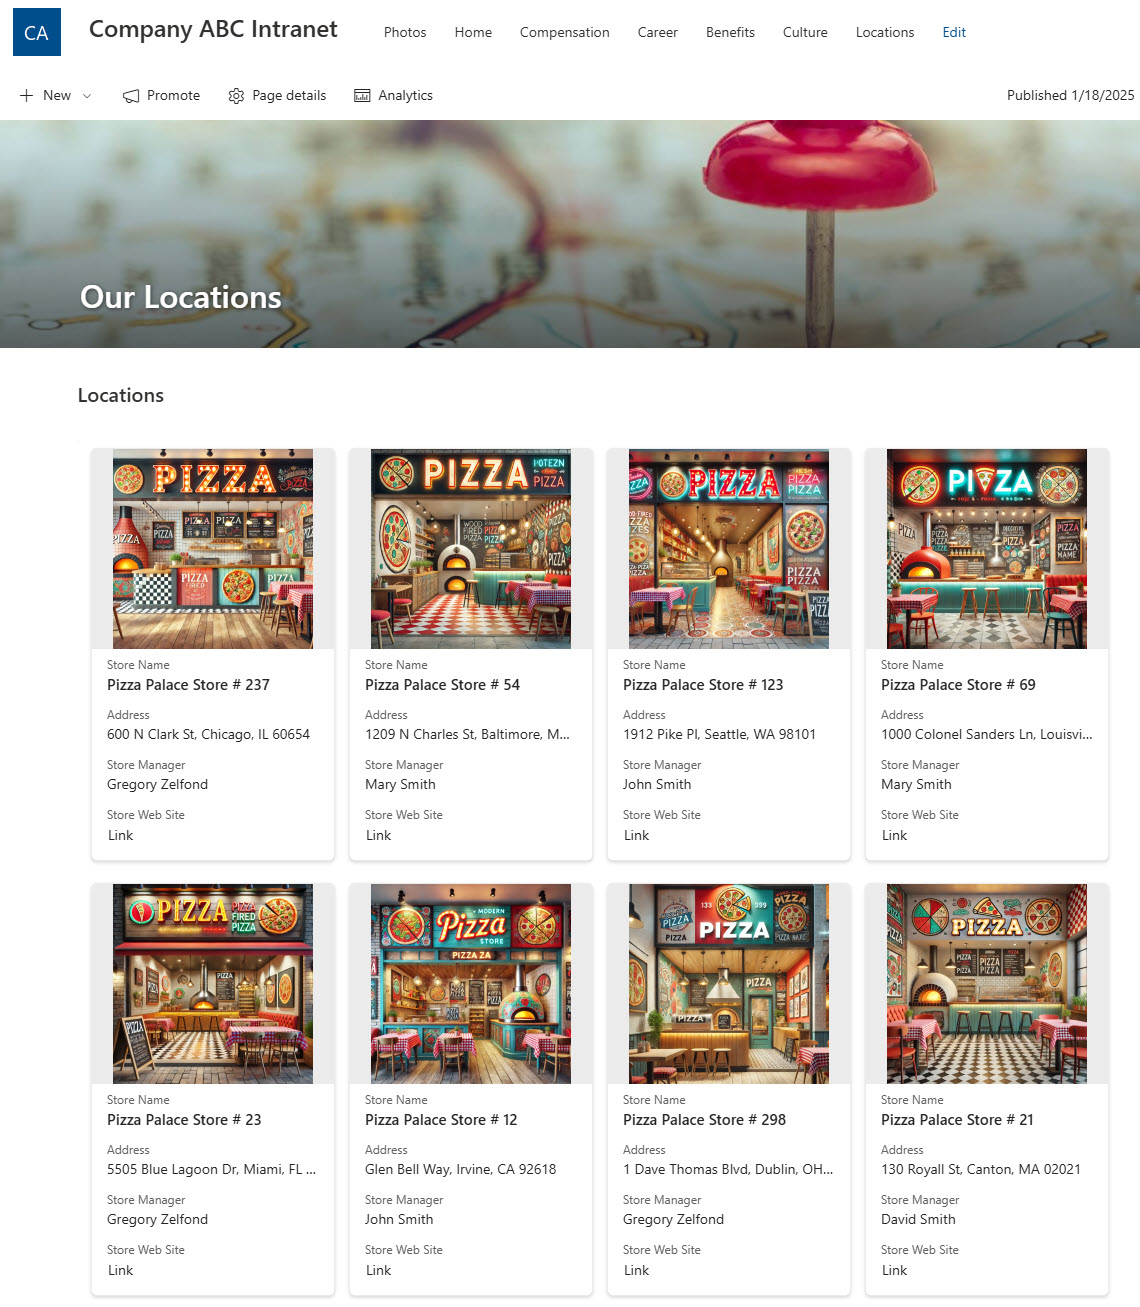
I recently built an Intranet for a Retail company with several stores/locations in various US states. They wanted to display store information on their homepage in a nice way. There are a few ways to achieve this, but the method I would like to describe is using the Gallery View on a List.
Below is an image of what I built. Let me show you how I did it.
Step 1: Create a New List
The first step is to create a new list. There are several ways to do this, all documented here.

Step 2: Define the columns you would like to have
This could vary based on your specific needs. For this example, I created the following fields. In parenthesis, I designated the type of column we will use in the next step.
- Store Name (Text)
- Address (Text)
- Store Manager (People)
- Store Website (Hyperlink)
- Photo (Image)
Step 3: Create all the columns
Next, we need to create all the columns above. I documented the different types of columns in this article.


Step 4: Populate the list with the information
Next, paste the information into your list. You can either do so one row at a time or multiple rows at once using the Edit in Grid View.

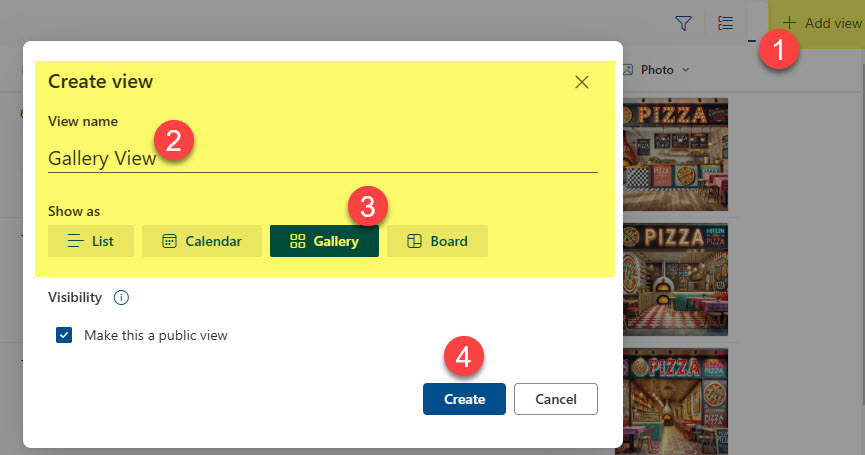
Step 5: Create Gallery View
Now, the exciting part begins. By default, the list is created in the Grid View, but you can create a Gallery View out of it. I explained the steps here.

Step 6: Embed a Gallery View into SharePoint Page
This last step is optional. You can link to the list from any site, but we can also make it pretty and embed the Gallery view within a SharePoint page using the Lists Web Part.
- Edit the SharePoint page
- Click the plus sign to add the web part and choose List

- Next, choose the specific list you would like to embed.

- Next, configure the properties of the List Web Part. Make sure to select Gallery View from the drop-down. Also, make sure to hide the Command Bar and See All links so our page looks clean and professional.

That’s it – our locations page is finished, and below is an image of the end result. This reminds me, I am hungry, and it is time to eat some 🍕🍕🍕!

Share Article


