< All Articles
How to Create an Offboarding Checklist with Loop
While I primarily specialize in SharePoint, I also love to introduce my clients to other applications that may be beneficial for specific business processes. One such application is Loop. Unlike other apps in Microsoft 365, it requires minimal setup and upfront configuration. One practical use case for it is to create an Onboarding/Offboarding checklist in it – let me explain.
Below is an example of the offboarding checklist we will build.
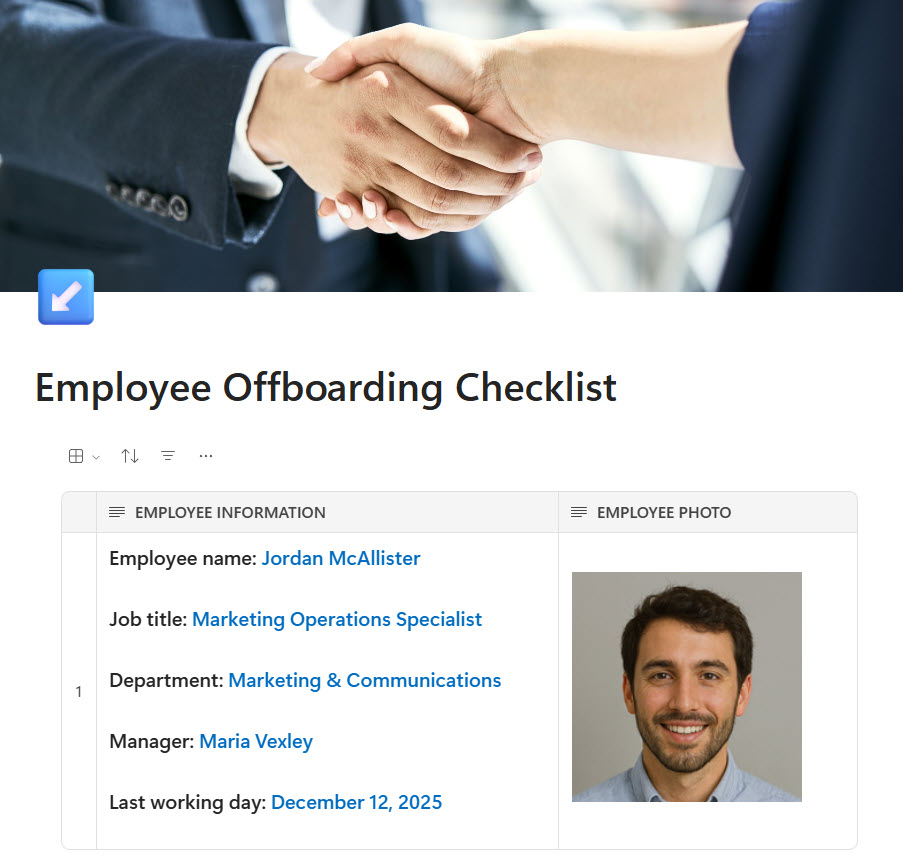
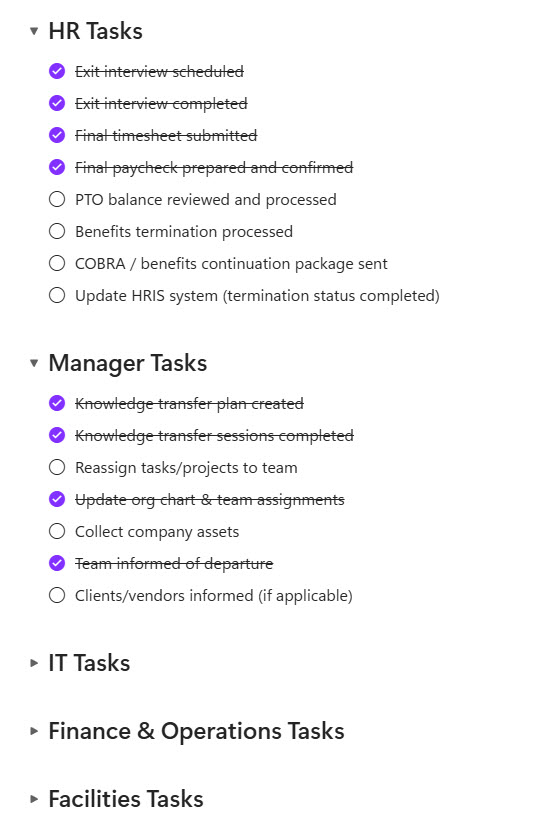
Create an Offboarding Checklist with Loop
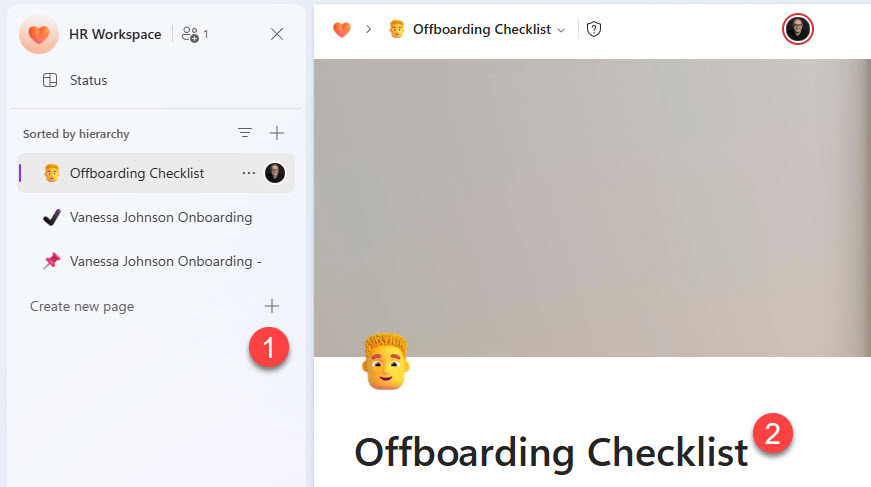
- Create a new Loop page in one of the workspaces. To learn about the difference between pages and workspaces, click here.
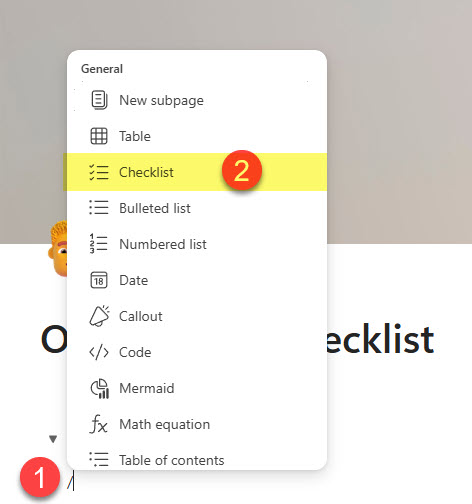
- Add a collapsible heading component. Type “/” and then choose Collapsible heading. I explain this feature in more detail here. That will serve as a collapsible section within the checklist (e.g., HR Tasks, IT Tasks, etc.). Type the name of the first section (i.e., HR Tasks).

- Within the heading above, type “/” again, then add the Checklist component. This will be used for checklist items in each section. Add a few checklist items.
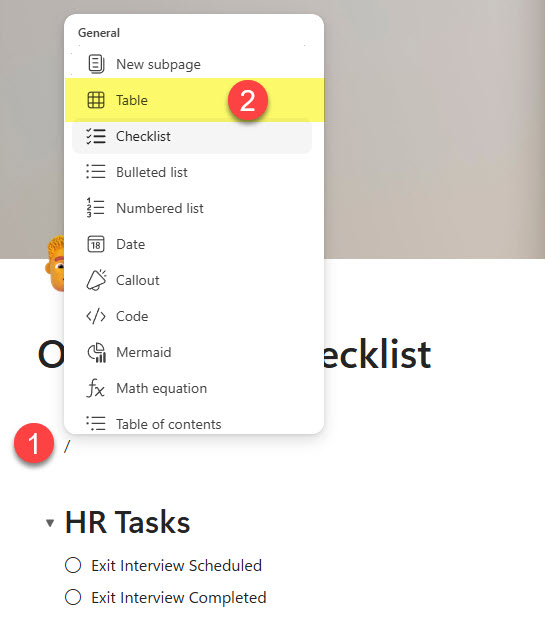
- The next step is optional, but we can also add a Table Component to add employee information and a photo. Go ahead and type “/” and add Table.
- This will add a Table below. You can change the column names and add the corresponding information.
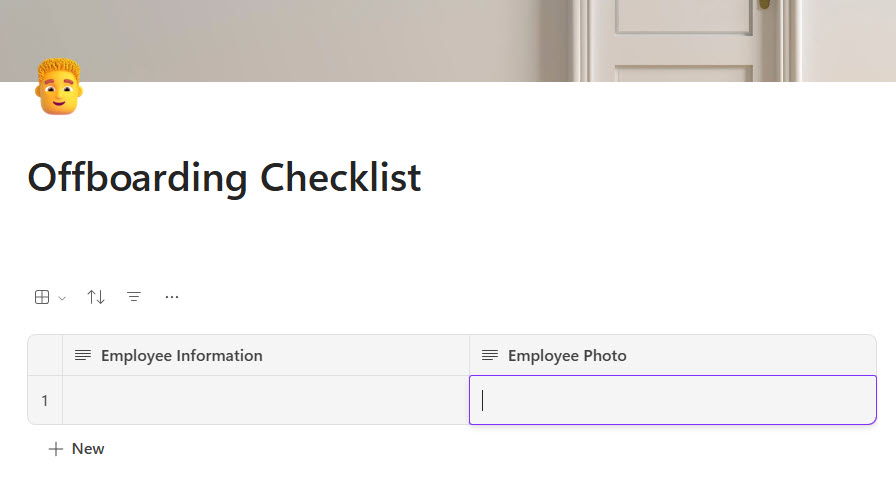
- Populate the table above with the information. Next, add the remaining sections (collapsible headings) and checklist items to finalize.
- Whenever you have another employee to offboard, you can simply copy the Loop Page using the Duplicate option.

To view the full set of images for the final deliverable, see this example on my portfolio website.

Share Article