How to create a Room Reservation Solution in SharePoint Out of the Box
My relationship with SharePoint sometimes feels like dating a beautiful and intelligent woman and then, after marrying her, discovering that she is an excellent cook! 😊 Having used SharePoint for nearly 20 years, I’m still impressed every time it helps me address a real business challenge. One such use case came up quite recently from one of my clients. They asked me if they could use SharePoint to help them with their organization’s conference and meeting room reservations. Just several years ago, this would have required custom development or the use of Power Automate/Power Apps. But I am Jewish, so naturally, I am looking for an inexpensive solution 😊. Since I am a staunch advocate of out-of-the-box capabilities, I was able to create an amazing Room Reservation Solution with which they fell in love. Let me share with you what I did and how I did it.
Before I explain everything step-by-step, below is an image of the final result.
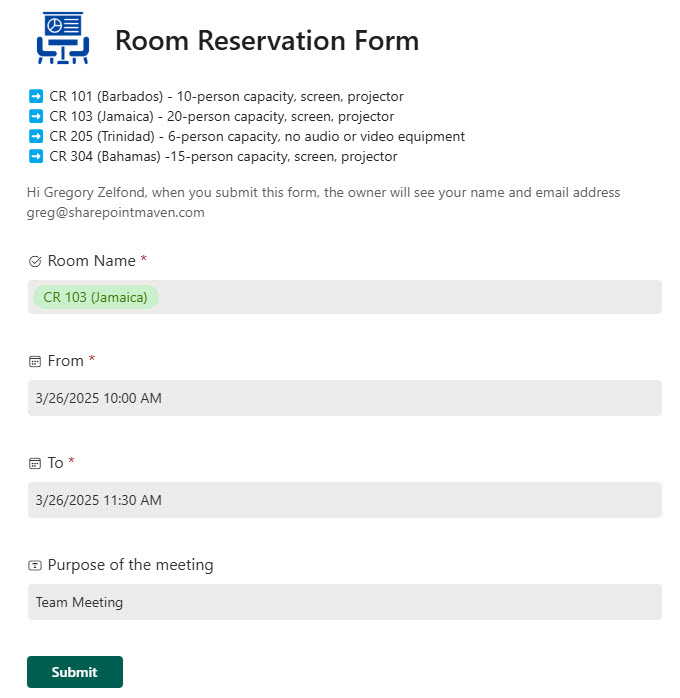
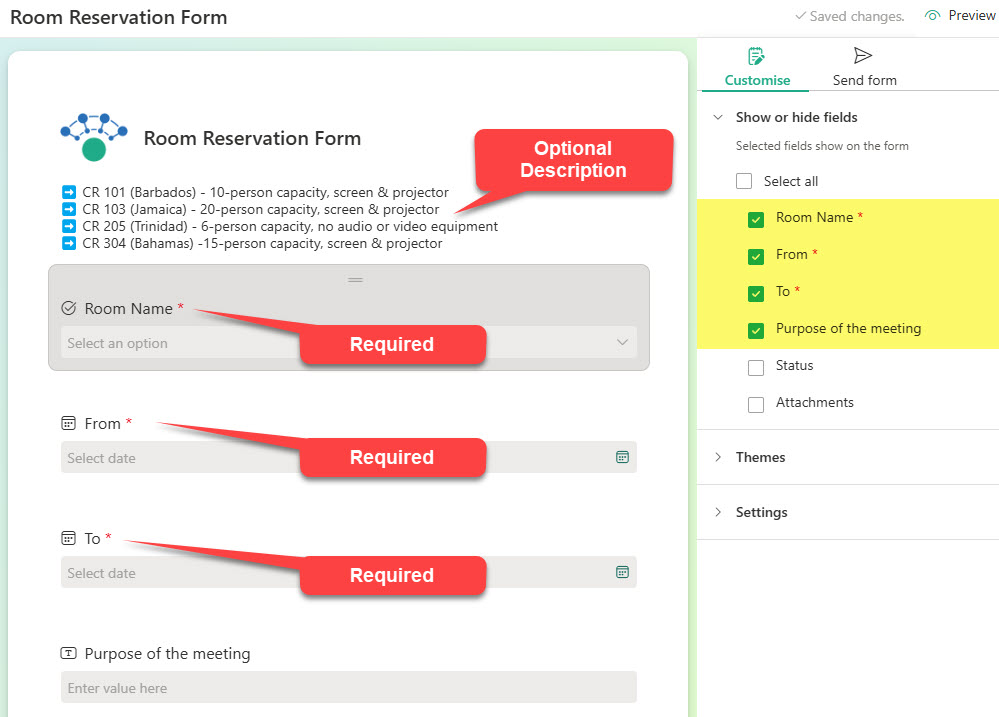
Example of the Submission Form for Conference Room Reservation

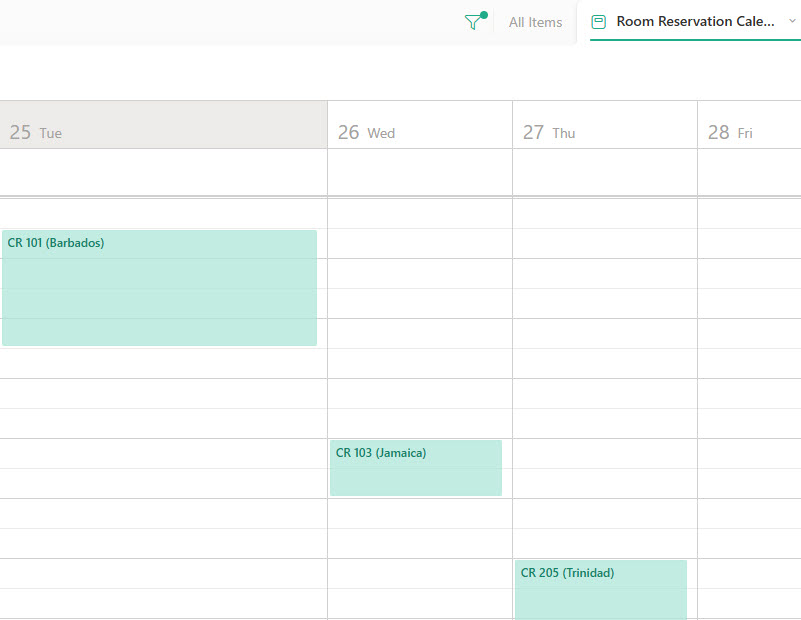
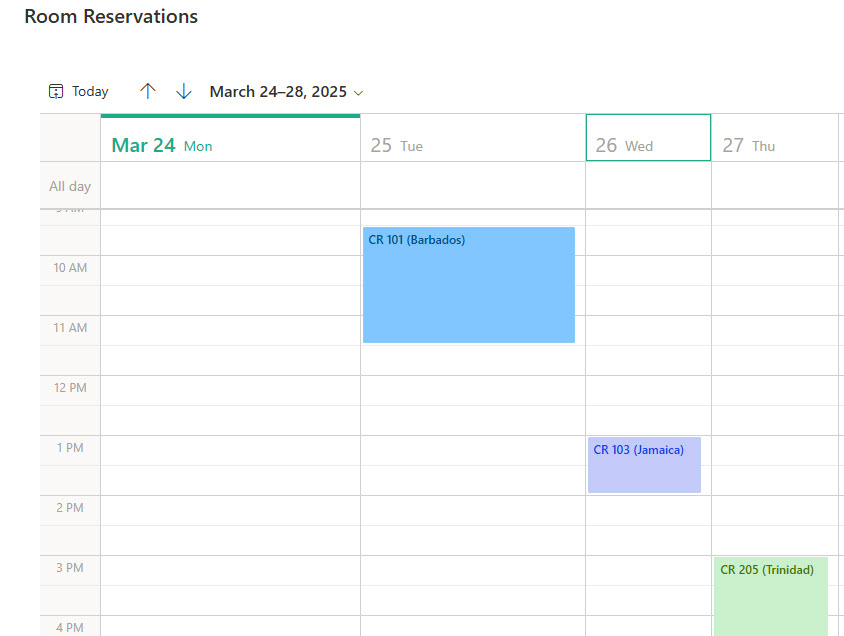
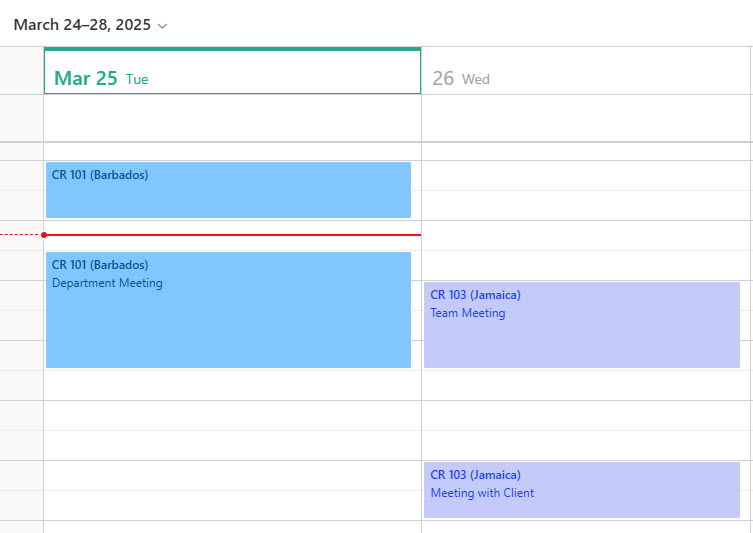
Example of the Reservation Room Calendar
Intrigued? 😀 Let’s jump in!
Step 1: Define the process
Now, I realize that every organization is different and has different needs, but these were the requirements the client shared with me.
- Requirement # 1: Ability for employees to request meeting and conference rooms located throughout the building
- Requirement # 2: Once requested, Executive Assistants would need to be notified about a request for a given room for a given date and time
- Requirement # 3: Different rooms would need to be approved by different Executive Assistants due to rooms being located on different floors of the building
- Requirement # 4: Once approved, the Room reservation will appear on a Room Reservation Calendar
- Requirement # 5: The Room Reservation Calendar would then appear on a company Intranet such that employees would be able to see room availability in live mode
While your specific needs might be unique, I am sure you could very likely relate to the standard and common requirements above.
Step 2: Define the data to be collected
To create a Room Reservation Solution, we would need to collect the following information from the employees:
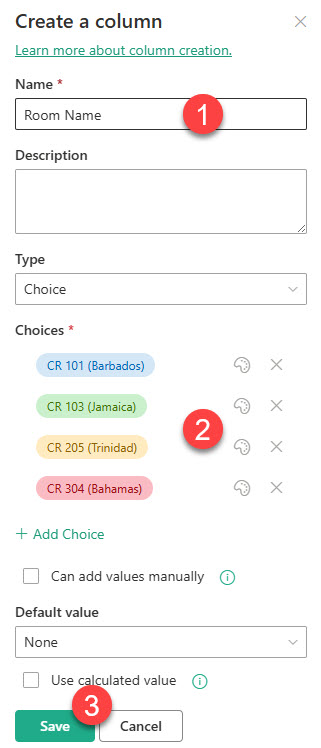
- Room Name (Choice column)
- From (Date column)
- To (Date column)
- Purpose of the meeting (Single line of text)
- Requested by (Person or Group column)
- Requested on (Date column)
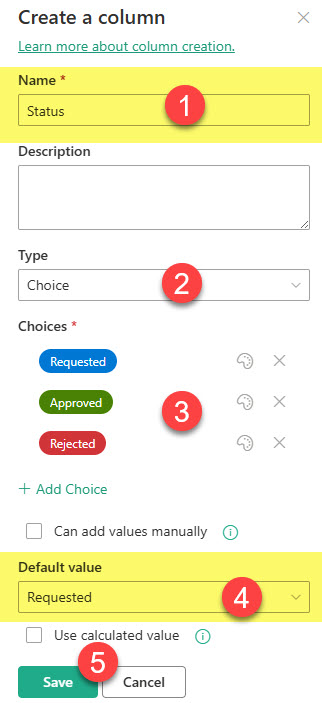
In addition, we would need to also track the Status of the submitted request (whether or not the Room Reservation was approved or not). So, we will also have the following column on our list:
- Status (Choice column)
In the parenthesis above, I listed the type of SharePoint column we are going to use on our List/Form. This article provides a detailed explanation of all the column types.
Step 3: Create a list with columns
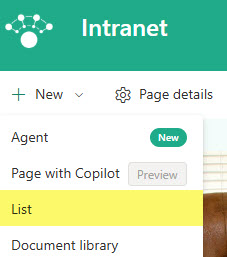
Now is the time to roll up your sleeves. Go ahead and create a new List with the columns above.
- From a given SharePoint site, click New drop-down > List
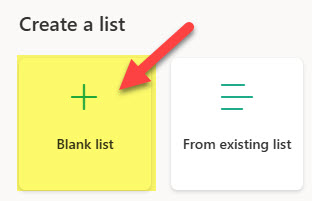
- Choose Blank list
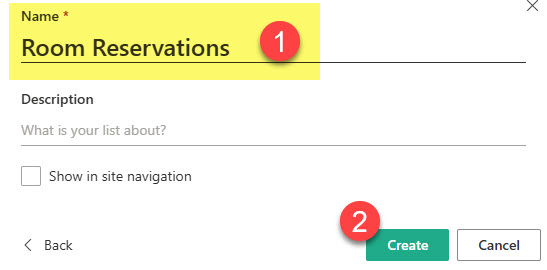
- Give your list a name and click Create
- Once the default list is created, we can proceed with column creation
- To create a Room Name column, click + Add column > Choice > Next
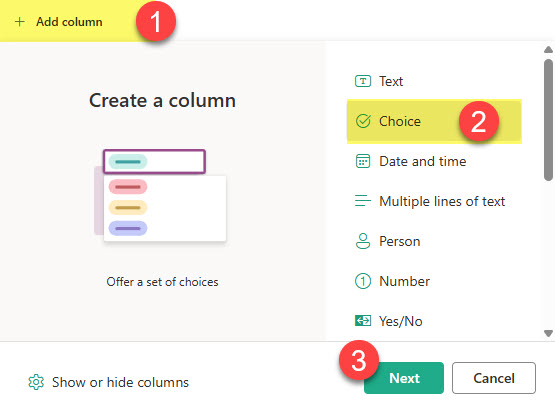
- Give it a name, list all the choices, and click Save
- To create the From column, choose the Date and Time column type. Make sure also to enable Include Time toggle, as we will need to know the exact start time as well.

- Repeat the above steps for all the remaining columns: To (Date and Time), Purpose of meeting (Single line of text), and Status (Choice).
- The Status column is also a Choice column, and I made it default to one of the drop-down choices to track all submitted reservations before they are either approved or rejected.
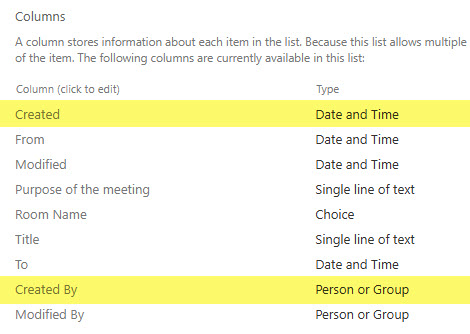
- While we are done with new column creation, there are a few more steps to tackle in terms of list cleanup. We need to hide the Title Column (which we don’t really use) and rename the Created and Created by columns.
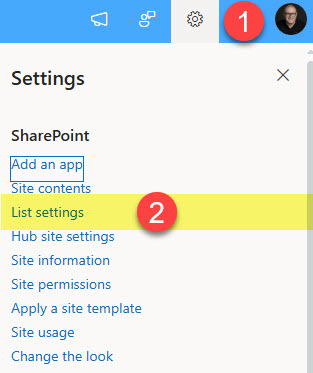
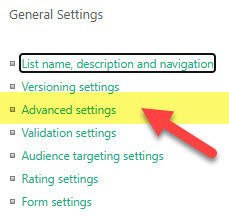
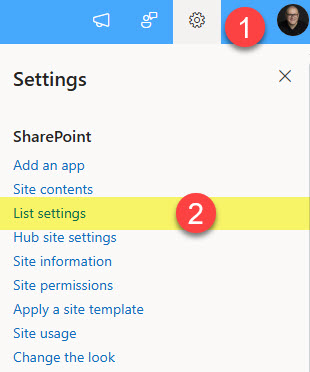
- To hide the Title column, we need to activate the Content-Type functionality. When on a list, click Gear Icon > List Settings
- Click on Advanced Settings
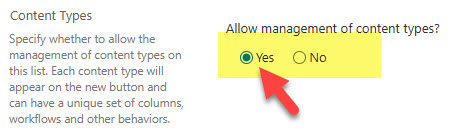
- Under Allow management of content types, choose Yes.
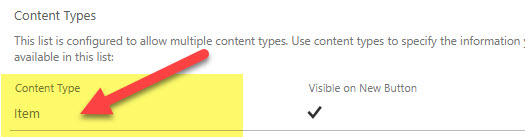
- Once the Content Type is enabled, we can remove the Title column. To do so, click on Item.
- Click on the Title column
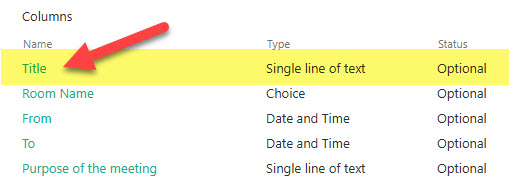
- Select Hidden and press OK. This will make the column disappear from the intake form.
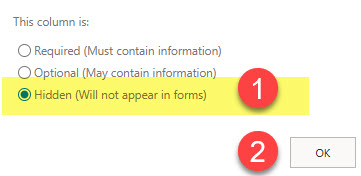
- We also need to hide the Title Column from the main view. To do so, click Title > Column settings > Hide this column.

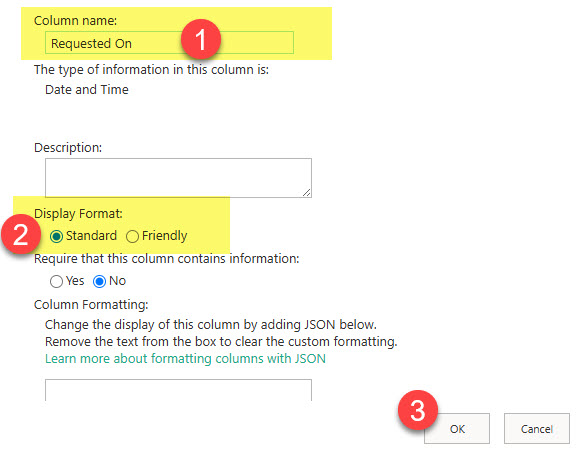
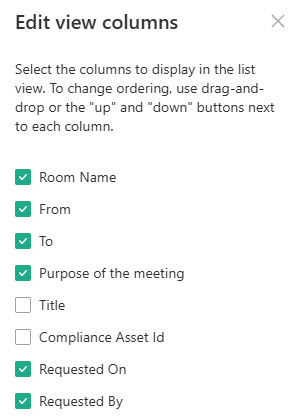
- Next, we need to rename the default Created and Created by columns. This is because they carry information on who submitted the form. While we can leave their names as-is, we can make them more user-friendly and rename them to Requested On and Requested By respectively.
- Go ahead and change them accordingly
- Next, make sure to display the above two columns on a view
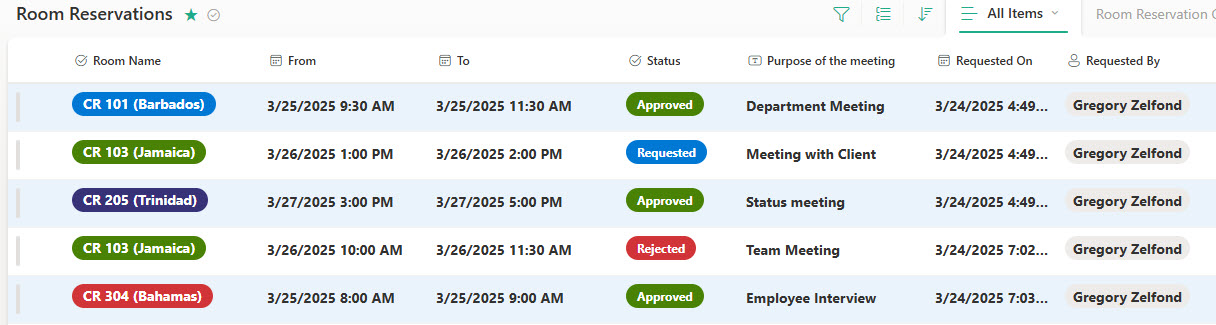
- At this point, the list configuration is completed, and this is what it should look like

Step 4: Create a Form off the list
Next, we will employ a relatively new functionality on Microsoft Lists—the ability to create intake forms. In this article, I explained how to do this step by step. I just want to highlight the following important details related to the Form:
- Out of all the columns on our list, we just need to capture the Room Name, From, To, and Purpose of the Meeting
- Requested by and Requested on are automatically captured via system columns (Created by and Created).
- We don’t need to collect the Status field as it will only be visible by the approvers and will default to the Requested choice.
- Room Name, From, and To will be required on the form submission, while the Purpose of the Meeting can be optional
Step 5: Create Calendar View
Next, we need to create a Calendar View off our list. The calendar is what will be seen by the employees before they submit a new request for a room reservation. The purpose of the Calendar view is two-fold:
- Show room reservations in the calendar format that is easy to read/digest
- Only show approved room reservations. While users may submit room reservations, we do not want them to appear on the Calendar until they are approved. Hopefully, that makes sense.
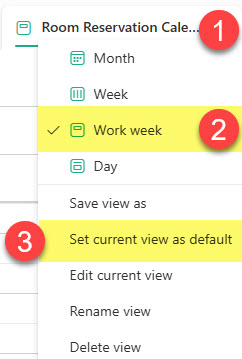
For now, go ahead and create the Calendar View from the list we created. I actually explained how to do so step-by-step in this article. You can also reference the images below for specific config related to our use case. In the next step, I will show you how to limit the view of events on the calendar based on the Status.
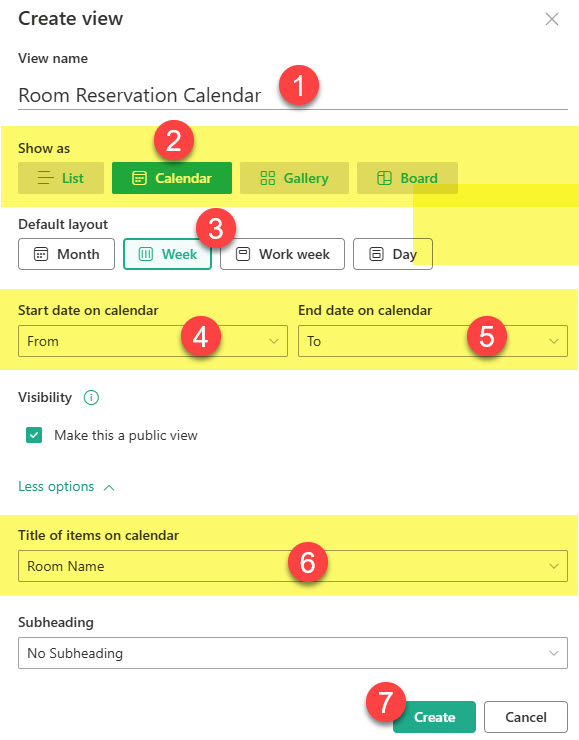
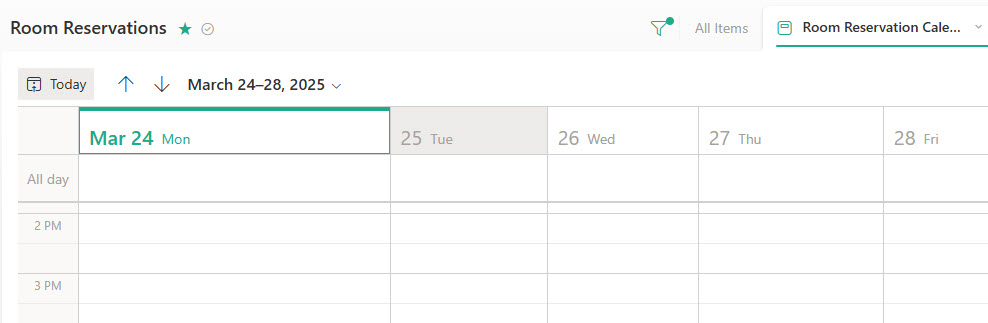
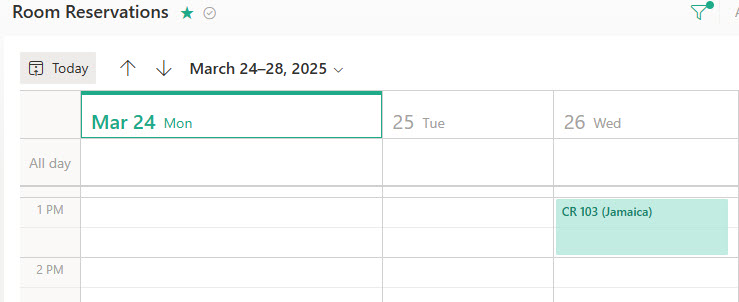
Example of the Work Week Calendar View
Step 6: Configure Calendar View based on Status
For this next step, we need to limit the room reservations on the calendar we created above to show only the ones that have been approved. It is OK for all room reservation requests to show up on a list, but the calendar will be visible to all employees, so we need to only show Room Reservations that have been approved (Status = Approved). We do not want to show requests that just have been received or, worse, rejected.
To see the end result of our work, it helps to populate a few fake entries into the list with various statuses. So go ahead and do that.

Once you switch to the Calendar view created previously, all those requests will appear on a calendar.
However, there is an issue. We only want Approved requests to show on the calendar view. For this:
- Click on Gear Icon > List settings
- Scroll all the way down to the Views section and click on the Calendar View we created

- Scroll down to the Filter section and change the filters as shown in the image below. Essentially, we are filtering out all non-approved reservations.
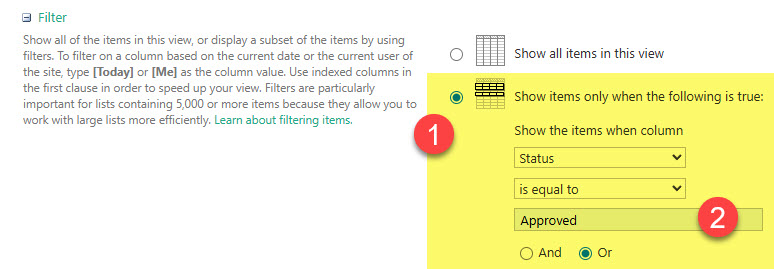
- Click Save at the bottom to save the changes to the view.
- You will now see only approved items on the Calendar
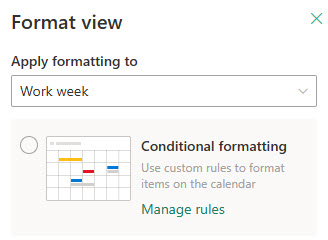
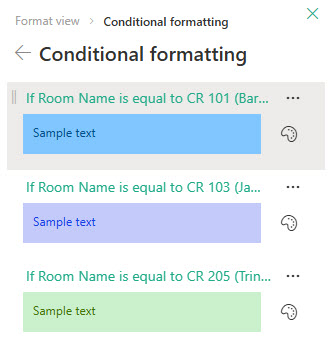
Step 7: Set up conditional formatting
This step is optional but definitely helpful as it will make the calendar more user-friendly and easy to read. We can set up conditional formatting (color-coding) for different items based on specific criteria. I explained how to achieve this step-by-step here. In my case, I am color-coding items according to different Room Names.

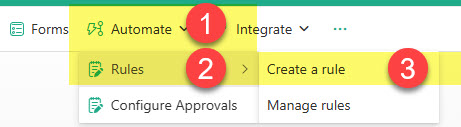
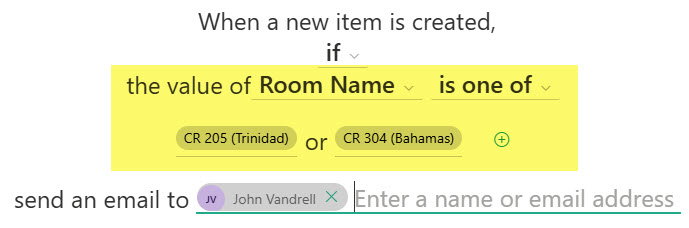
Step 8: Setup Rules for Email Notification
Next, we need to set up Rules so that users are notified when Room reservation requests come in. We have different approvers for different rooms, but luckily, all of this is possible using out-of-the-box Rules capability (no need to create custom Power Automate workflows). Check out this post for instructions, but you can also figure it out yourself using the screenshots below.
- Click Automate > Rules > Create a rule
- Choose “A new item is created.”
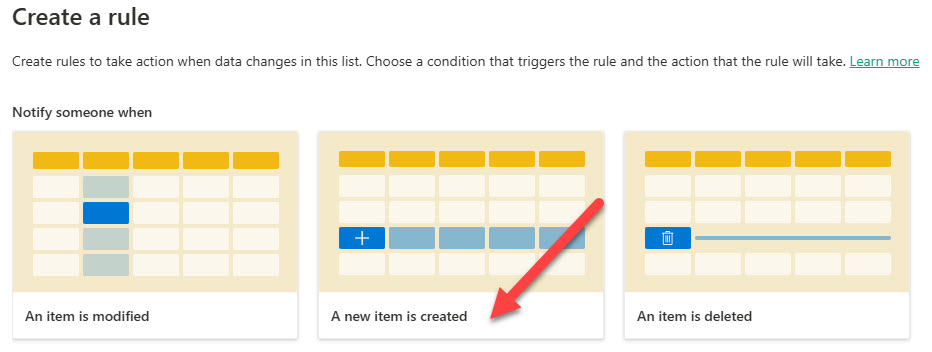
- Configure the rule/email notification as necessary
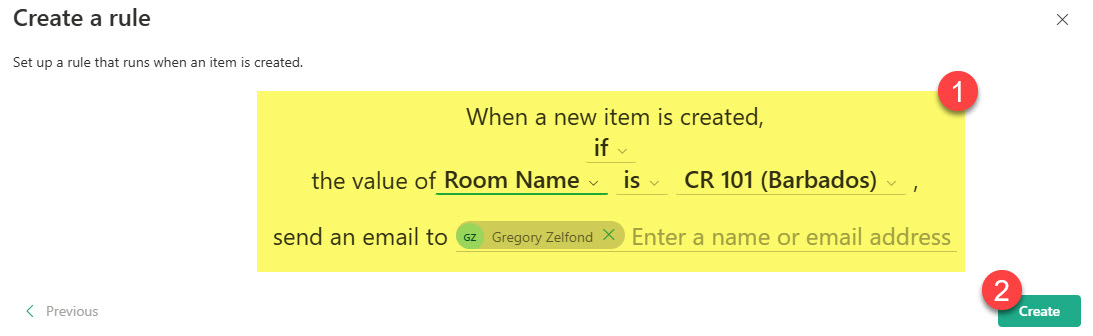
- You can also configure notifications to go tothe same person for multiple rooms
Step 9: Embed the Calendar on the SharePoint page
While we can link to the calendar, we can also embed it on the main Intranet page. For this:
- Choose the view you want to embed, and let’s make it a default view
- Follow the instructions in this post to embed a Calendar View on the SharePoint page.
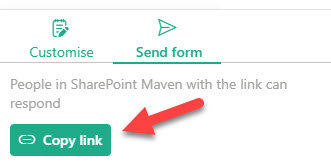
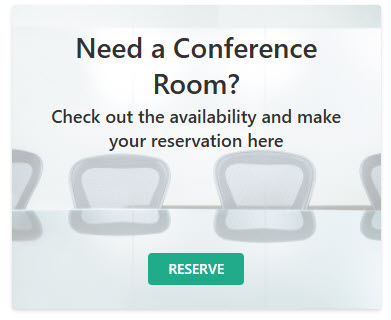
- For the Form that users fill out, you can grab its link and use either Quick Links or the Editorial Web Part to produce a nice Call to Action
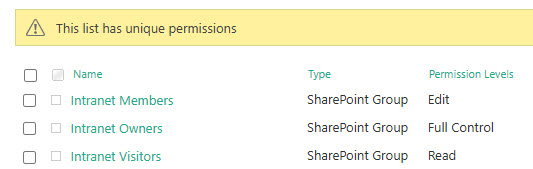
Step 10: Set up Proper Permissions
This could vary depending on where your calendar resides. My Calendar resides on the main Intranet Site, so it essentially inherits permissions from the site where all employees are read-only. The approvers would need to be in the Members Group.
Additional Details
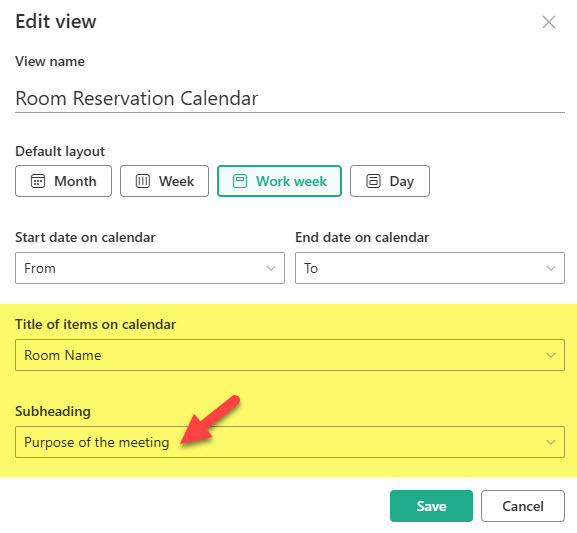
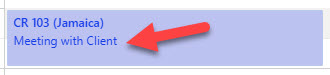
- When setting up a Calendar view, you can specify the subheading. This allows you to display another piece of information on the calendar. For example, in my case, I chose the Purpose of the Meeting. However, it could be any other column from a list.
- This is what a typical email notification for the approver looks like
- Once the approver receives an email, they can navigate to the Calendar List and change the Status of the submission from Requested to either Approved or Rejected

- The above change will make the entry either appear or not on the Calendar View
- The list (Grid) view is always available to approvers to track submissions and statuses
Check out additional screenshots of how this might look by checking my portfolio site, LookBook 365.

Share Article