How to create a Managed Property in SharePoint Online
In one of my earlier posts, I introduced you to the world of Crawled and Managed Properties. As stated in that article, crawled properties are created automatically in SharePoint once you set up columns (metadata) and upload documents. Managed Properties, on the other hand, might or might not be created for you, depending on how you set up your metadata. In this post, I would like to explain how you can create a Managed Property in SharePoint Online and map it to one or more crawled properties. This might be necessary if you are aggregating information from various sources (sites/lists/libraries).
Auto-created Managed Properties
As mentioned above, some Managed Properties are created for you automatically. Please reference this link for an explanation of those conditions.

Example of an auto-generated managed property (system metadata)

Example of an auto-generated managed property (defined in the Term Store)
Use Case
To demonstrate the power of managed properties, I will use the following example with documents tagged against different types of wine.
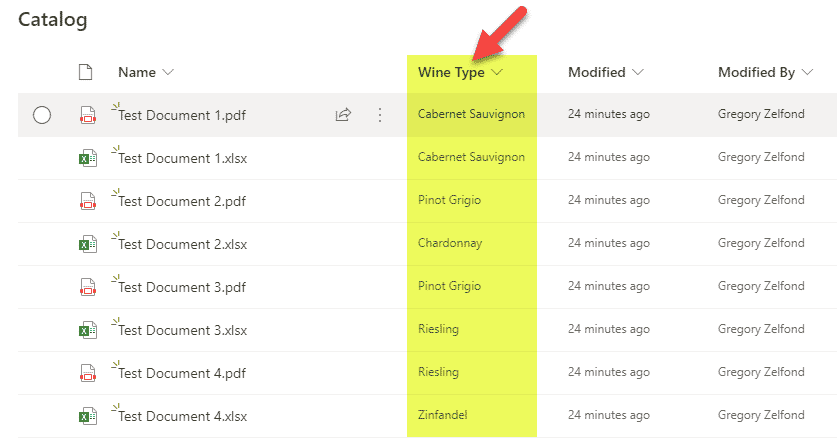
- I created a document library on one SharePoint site and also created a custom Choice column (at the library level) to tag documents against different types of wine. I named my column Wine Type.
- I also created another document library on a completely separate site and added a custom Choice column (at the library level) to tag documents against different types of wine. In this case, I named my column Type of Wine.
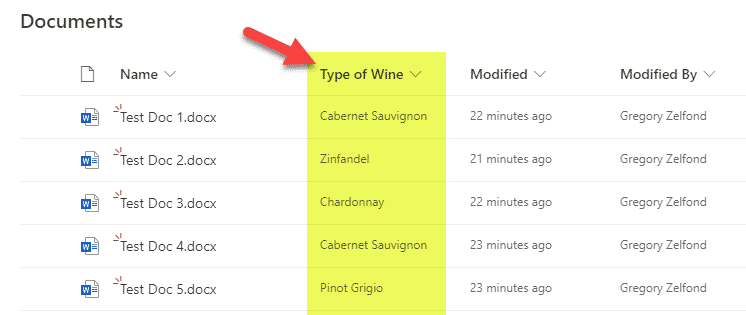
- Other than the difference in the name of the column, both libraries have the same list of wine types (Zinfandel, Riesling, Pinot Grigio, etc.)
- I want to execute a search across both sites/libraries for all documents tagged against a specific type of wine. Let’s proceed!


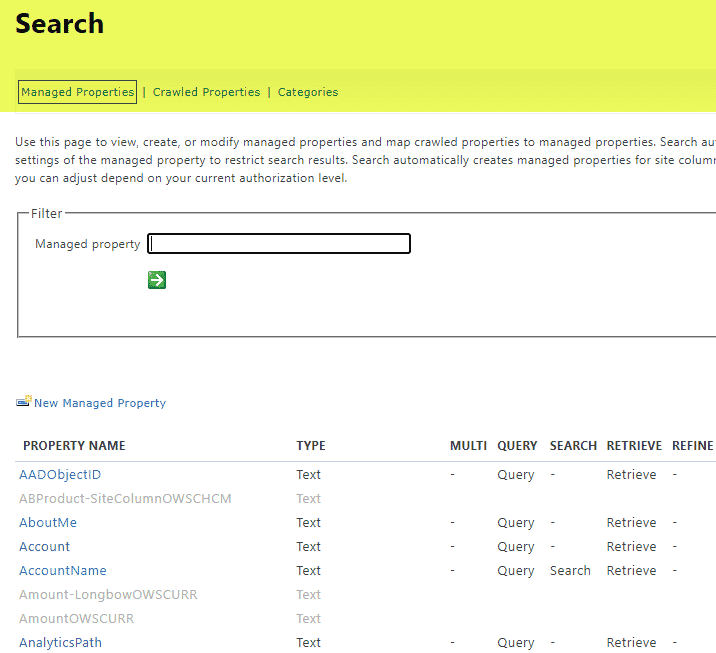
How to access Managed Properties
The first step in our adventure to create a Managed Property in SharePoint Online would be to access the Search Schema – that is where all the managed and crawled properties can be viewed and adjusted. Though I covered it in this post already, below are instructions on how to access it as well. There are two ways to access Search Schema – at a site level and at a tenant level – in our case, we will access Search Schema at a global (tenant) level. I will explain the difference between the two in one of the future articles.
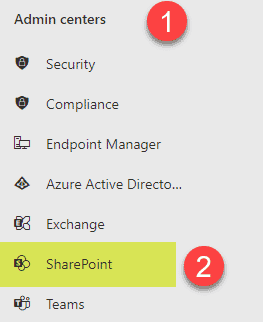
- Microsoft 365 App Launcher > Admin
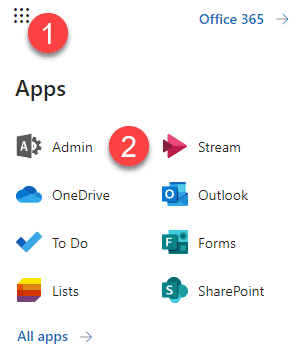
- Under Admin Centers, click on SharePoint
- Click on More features, then Open under Search

- Next, click on Manage Search Schema
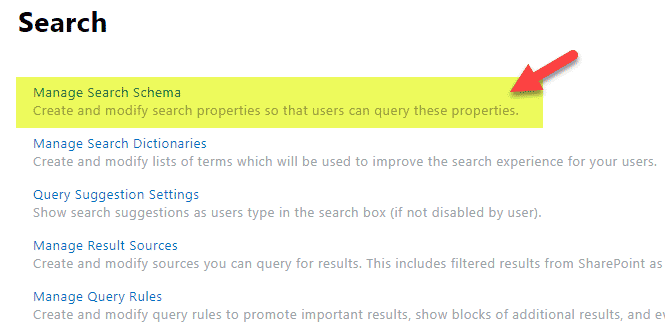
- You will now see the main area where you can access Managed Properties


How to create a Managed Property in SharePoint Online
Before we dive into the step-by-step instructions on how to create managed properties in SharePoint Online, there are several important elements we need to understand first.
Refinable Managed Properties
Though you will probably be tempted to click on the New Managed Property link, we would not be doing so.

The reason for this is that managed properties created that way, are not refinable – the characteristic necessary for us, later on, to be able to refine our choices by specific type of wine.
Instead, SharePoint has several built-in refinable managed properties already created for us. So what we are going to be doing is take one of the built-in refinable managed properties and map it to our crawled properties. Below is a list of different types of Refinable Managed Properties already created for us:
- RefinableString
- RefinableDate
- RefinableInt
- RefinableDecimal
- RefinableDouble
In our case, since we are dealing with text searches, we are going to use a RefinableString Managed Property. More on the actual steps to achieve this below.
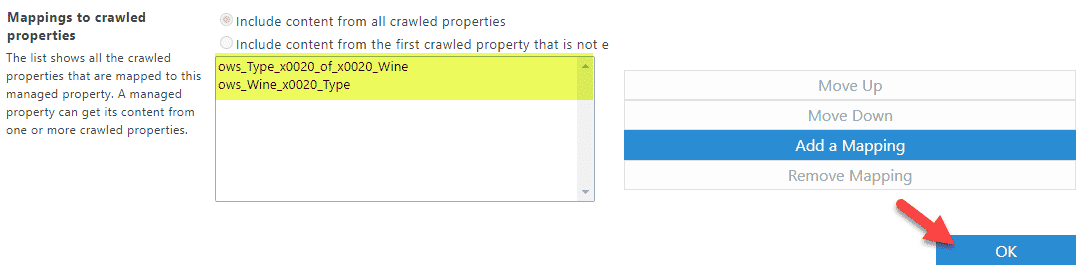
One-to-many mapping
It is important to note that you can map a single Managed Property to multiple crawled properties. Why would you need to do that? In our use case, when I loaded documents into the two libraries, we ended up with 2 separate crawled properties created (since I had different names for the custom columns I created).
- Wine Type Column got indexed and transitioned into ows_Wine_x0020_Type
- Type of Wine Column got indexed and transitioned into ows_Type_x0020_of_x0020_Wine

To query both libraries, I will create a single Managed Property and map both crawled properties above to it. This way, when I later refine by that Managed Property, it will pick up results from both sources (document libraries). Hopefully, this makes sense.

How to create a Refinable Managed Property
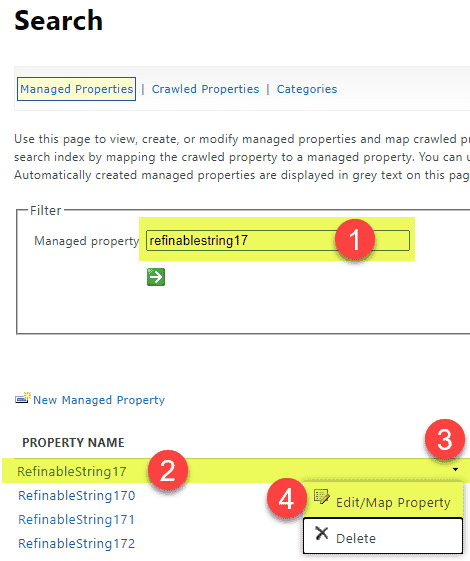
- From the Search Schema Managed Properties Page, find the next available RefinableString (they start with RefinableString00 and go all the way to RefinableString199). In my case, the next available RefinableString is RefinableString17. Click on Edit/Map Property next to it.
- Scroll all the way down and click on Add a Mapping
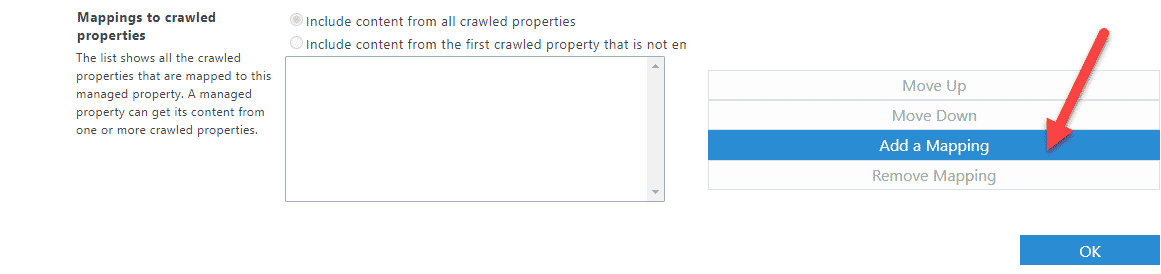
- Choose the crawled properties to map to (one by one) and click OK
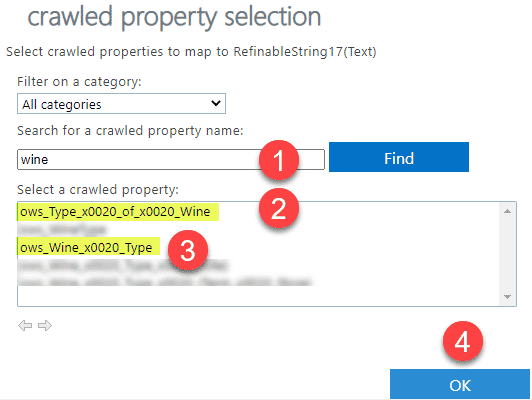
- Click OK on the RefinableString Page as well


Reindex Document Libraries
Every time you alter the mapping of Managed properties, you must request reindexing of the document libraries or sites. You can find out more about the reasons here. To do this:
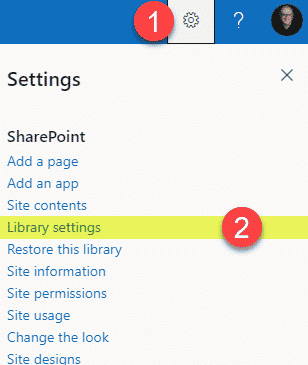
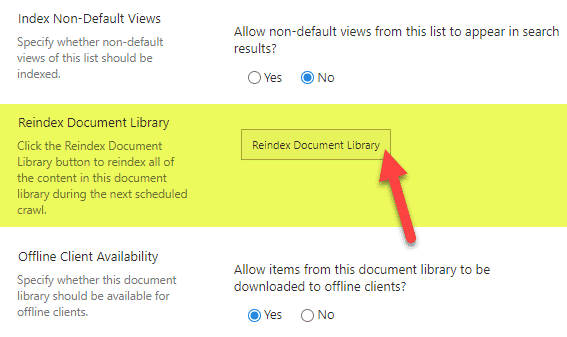
- Navigate to the Document Library, click Gear Icon > Library Settings
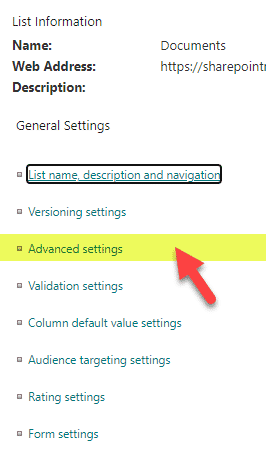
- Click on Advanced Settings
- Under Reindex Document Library section, click on Reindex Document Library
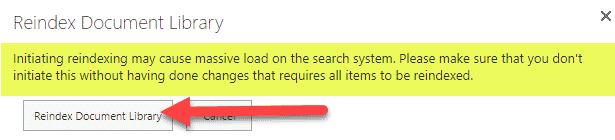
- When you get a warning message, click Reindex Document Library button
- Click OK at the bottom of the page


How to query and refine documents using the Refinable Managed Property
Now that the hard part has been completed let me demonstrate the query in action. It might take several hours and all the way up to 24 hours for reindexing to work, so be patient.
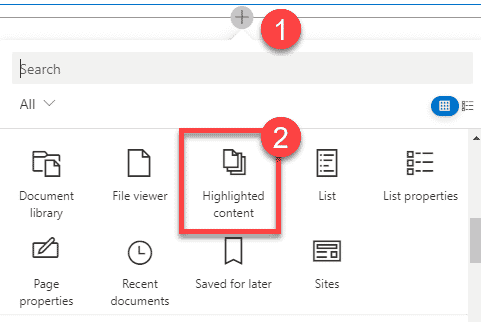
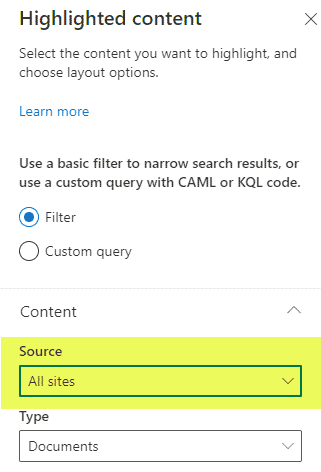
- On any other site or page in SharePoint, add the Highlighted Content Web Part
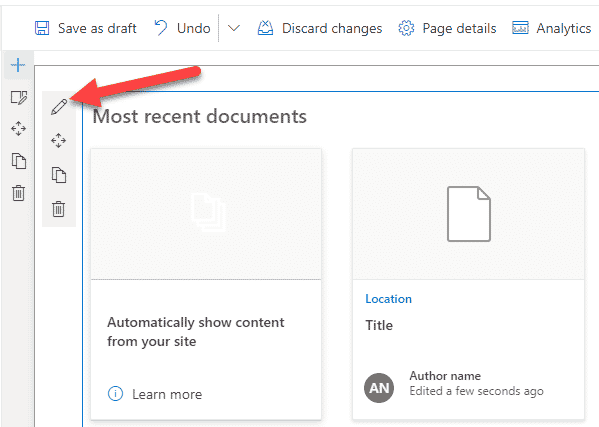
- Click on the Pencil Icon to configure it further
- For the Source, choose All sites (or you may pick specific sites you want to roll up content from)
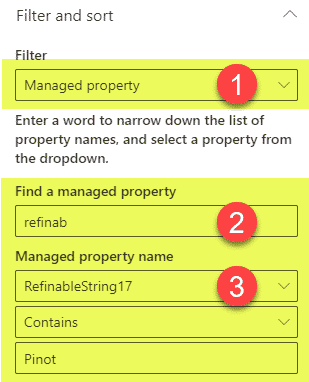
- Under the Filter section, choose Managed Property. Start typing the name of the string (Refinable). Then, in the Managed property name below, choose the Refinable Property you mapped above (RefinableString17 in my case) and set the filter to a specific value.
- Click Republish to Publish the page
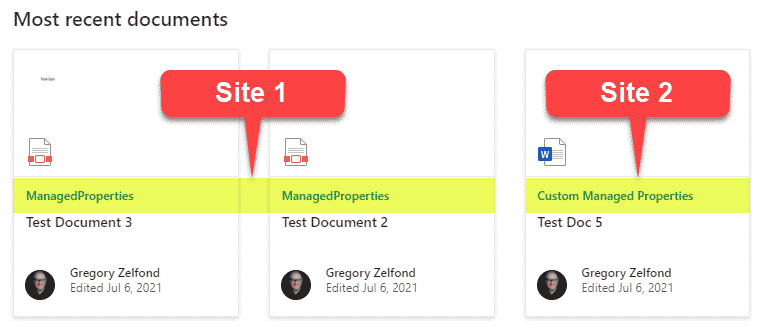
- You will now see the documents rolled up from multiple sources based on a filter you set up


One thing I did not cover in this article and something you would need to understand is the syntax we have on crawled and managed properties. That deserves a separate blog post, and I deserve a glass of hard liquor (not wine), so till next time! Lehaim! 🍾

Share Article