How to add Locations in Microsoft Search & Intelligence Center
I previously wrote a blog on improving the search experience by customizing and configuring various options within the Search & Intelligence Center. There is also another cool option you can configure, something called Locations. This would only make sense for companies that have multiple offices in different locations across the country or the globe. So, in this post, I would like to explain the feature and also explain how you can add locations in the Microsoft Search & Intelligence Center.
What is Search & Intelligence Center?
The Search & Intelligence Center is the Admin Center located in Microsoft 365. It allows Administrators to configure certain search settings in case they want to optimize and improve the search experience within SharePoint and Microsoft 365. I suggest you check out this article to learn more about it.
How to add locations in Microsoft Search & Intelligence Center
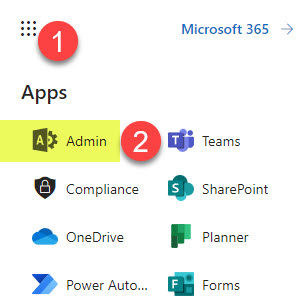
- Click on Microsoft 365 App Launcher > Admin
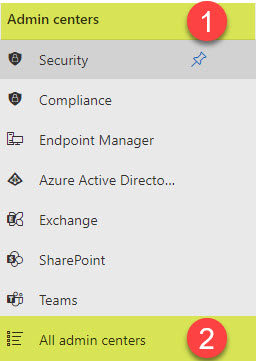
- Under Admin centers, click All admin centers
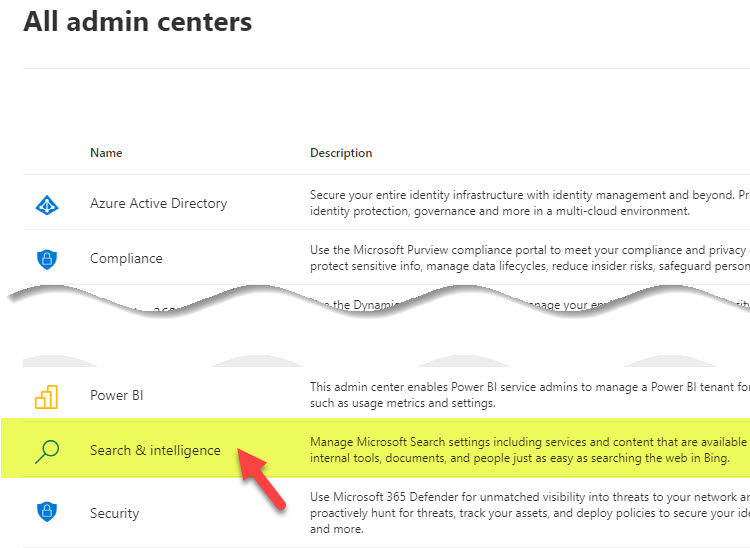
- From the list of various Admin centers, click on Search & intelligence
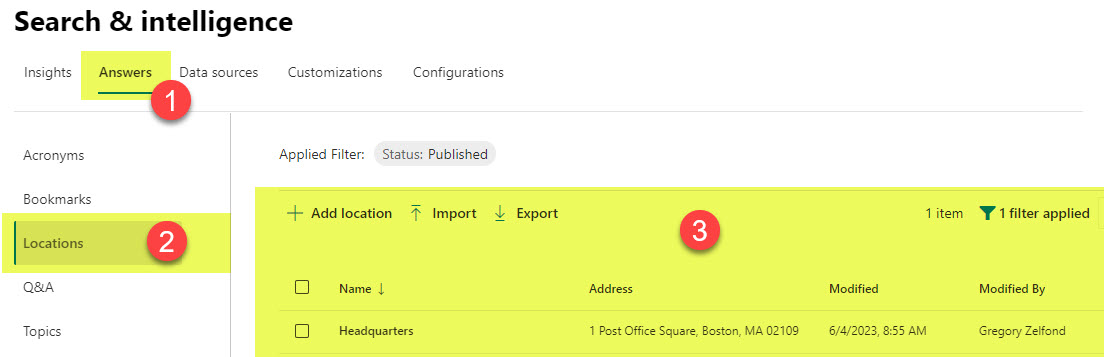
- Once inside the Search & Intelligence Center, click on the Answers tab, then Locations
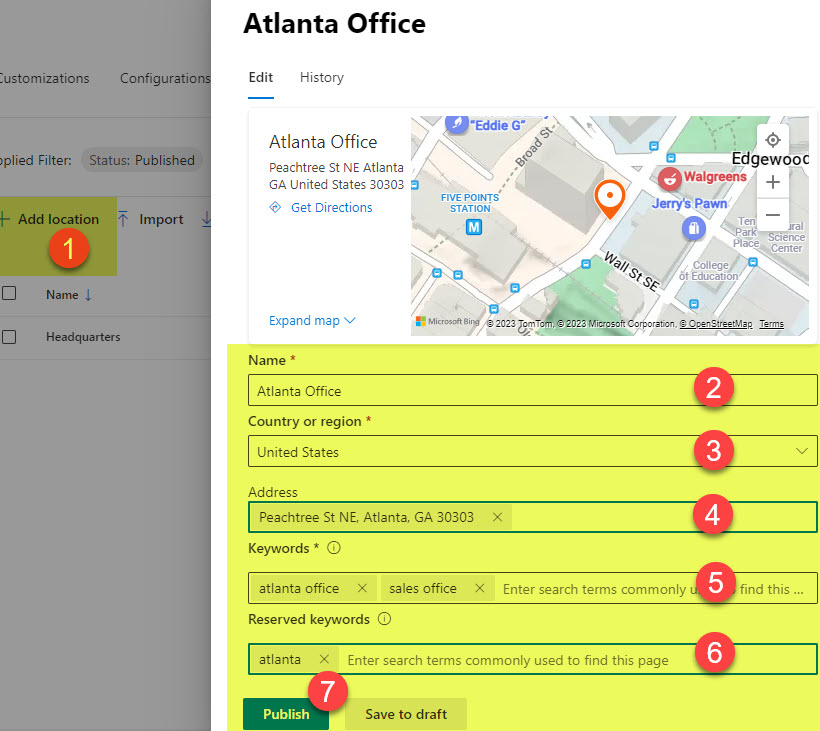
- Next, click Add location and fill in the information for a given location/office. Most of the fields are self-explanatory. The address has to be an actual physical address, and thanks to Bing Maps, it will then be found and displayed to the users. The keywords are various keywords that will trigger the location/map to be displayed when the user types those keywords into the search box. Keywords can be shared with other locations. In contrast, the reserved keyword has to be unique, and it is essentially a keyword/phrase that will trigger just this specific location to be displayed.
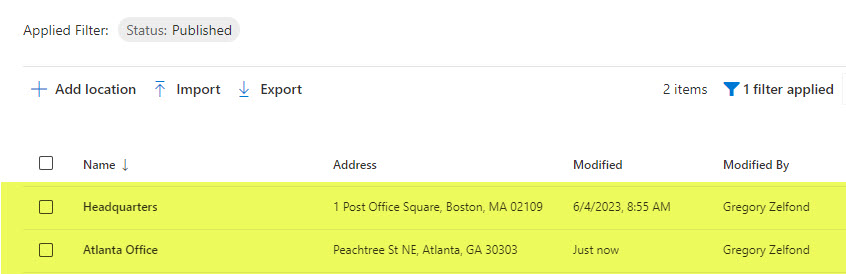
- Once you publish the location, it will appear in a list of locations you published/created.
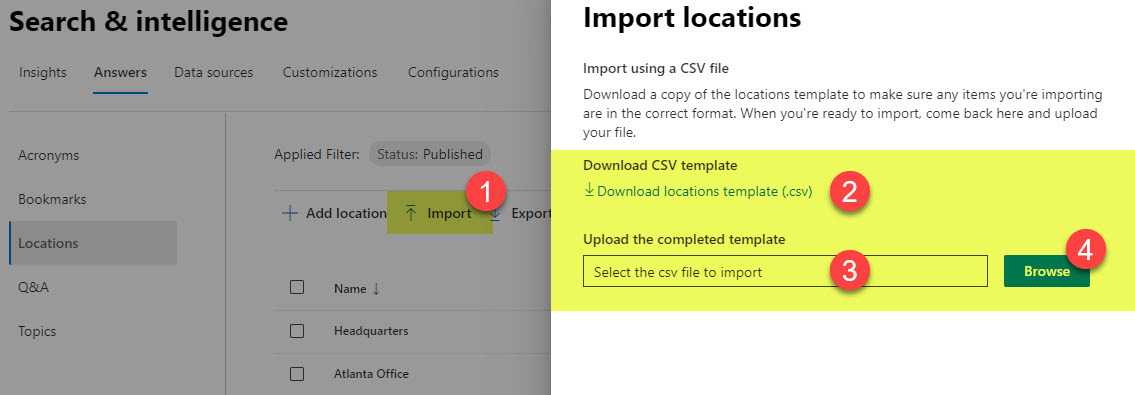
- The next step is optional, but if you have many offices/locations, you can import them using a CSV file. For this, you will need to download the template first.
What is the user experience once Locations have been configured
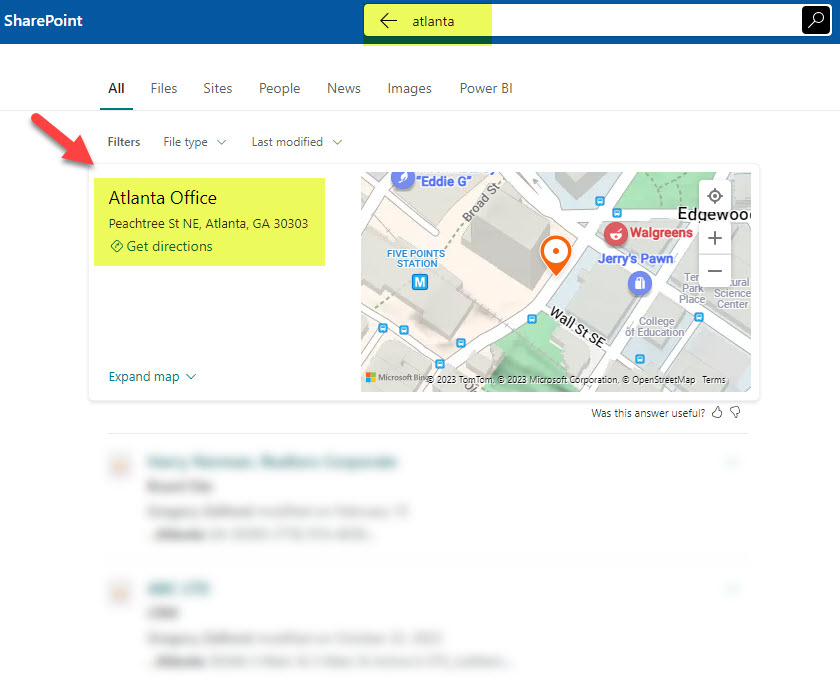
When the user performs the search and types in one of the keywords mentioned in the setup of the location, it will return a snippet containing information about the location + a small map showing it on the map, thanks to Bing Maps.
Important Notes
- Once you add a location, it might take up to 24 hours for the location to appear in search results
- The search on locations can only be performed from the following places in SharePoint and Microsoft 365: the Office.com page, SharePoint Start Page, or OneDrive for Business (when you select Whole organization as Search Scope). The locations will not appear when users search a given hub, site, or library – since those results are only restricted to those “containers.”

Share Article