< All Articles
How to create unique permissions for each row in SharePoint List
Some time ago, I wrote a post explaining how to create unique permissions for a file or folder. This might be necessary when you want to hide certain files from specific users or change their permissions from edit to read-only. However, we can also create the same experience for rows within the SharePoint lists. We usually do not think in those terms, but there might be use cases that require such scenarios. In this article, I aim to explain how to achieve this and outline a few possible use cases.
How to create unique permissions for each row in a SharePoint List
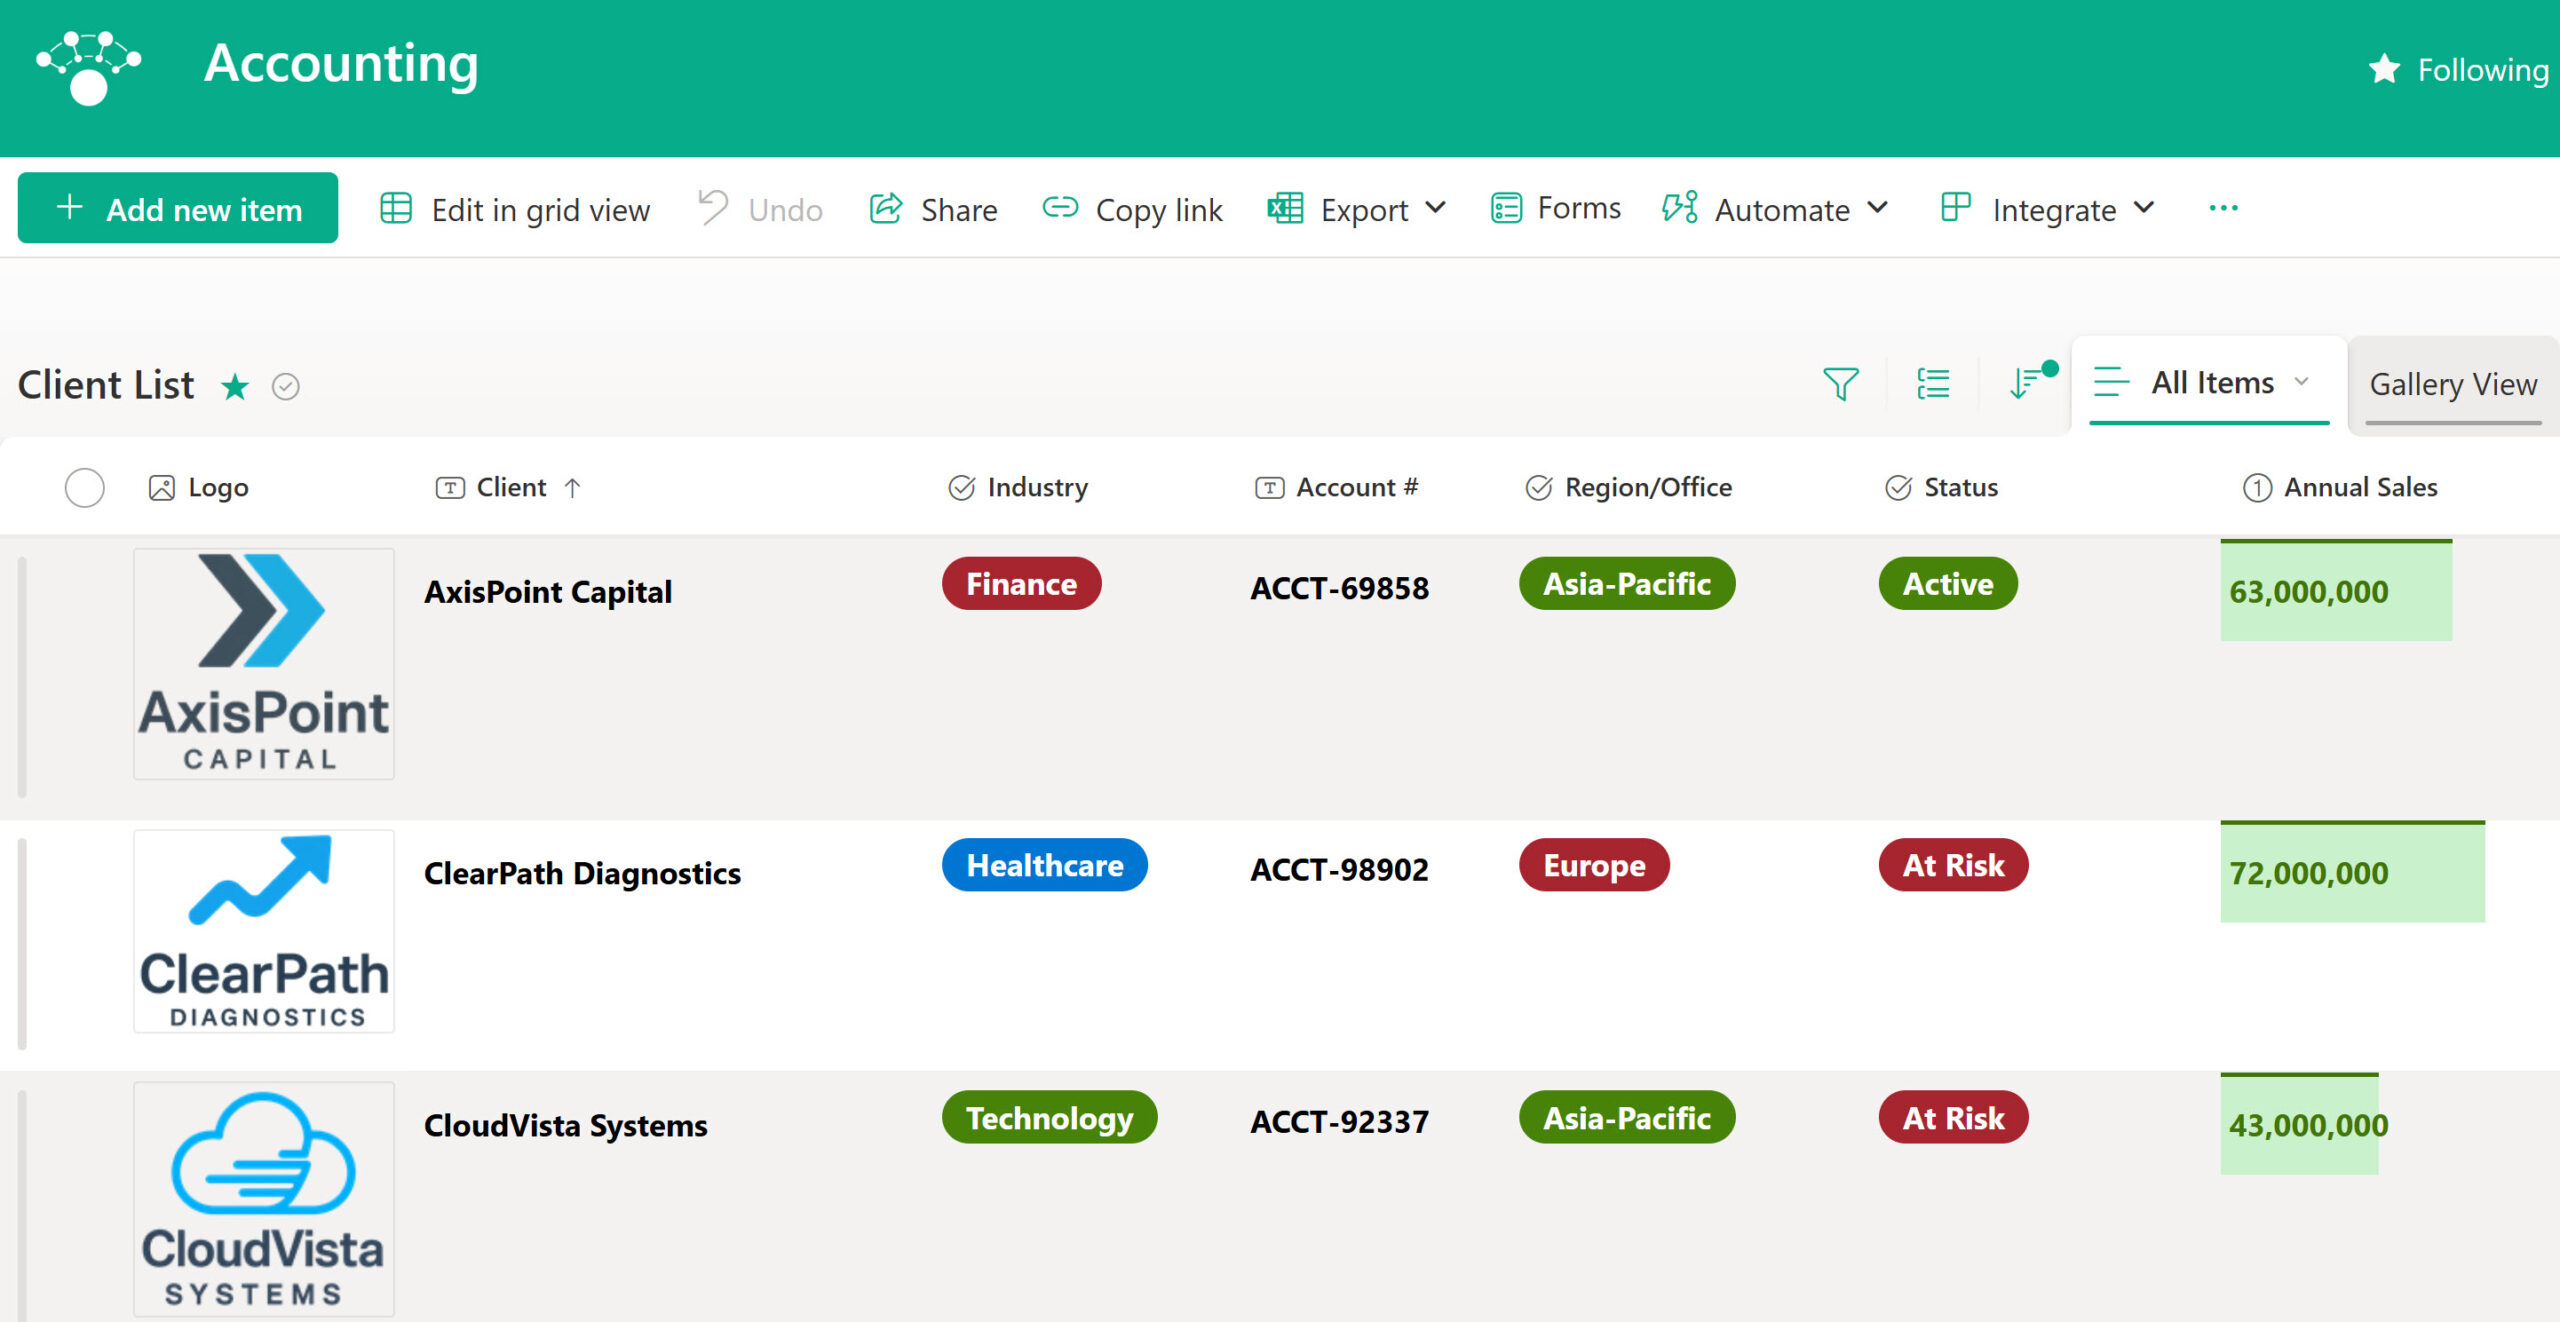
For this example, I will be using a Client List that resides on an Accounting Site.
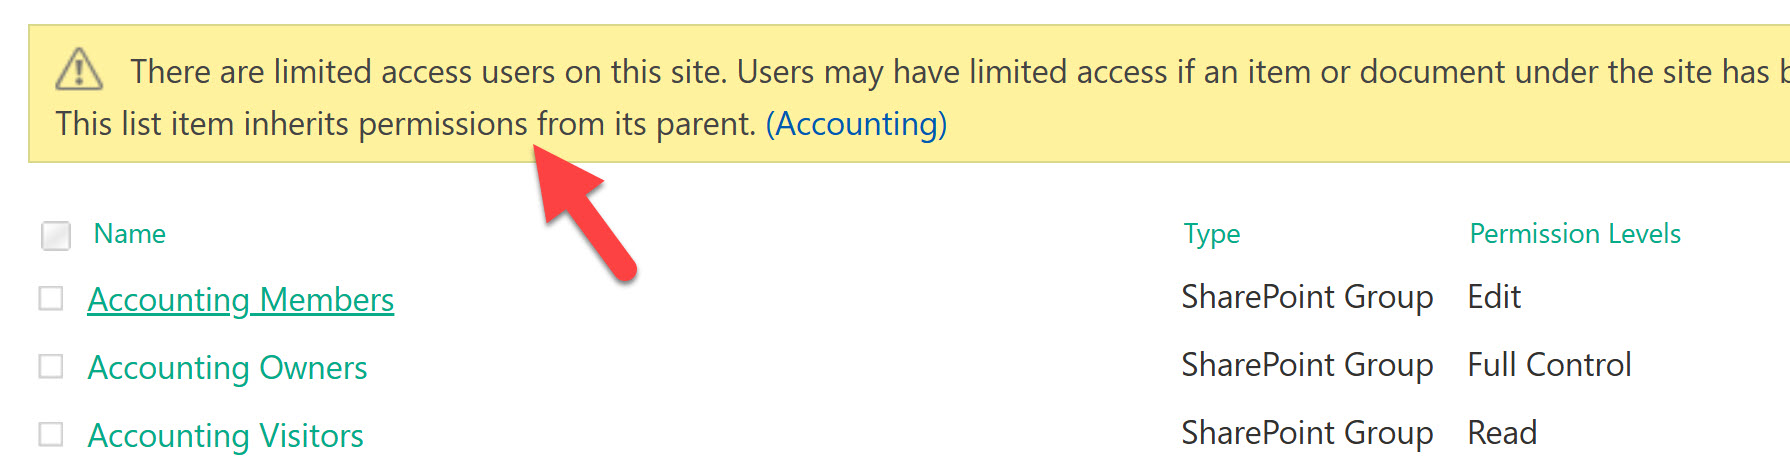
By default, the list inherits the permissions of the SharePoint site on which it resides. The Accounting site has the following permissions:
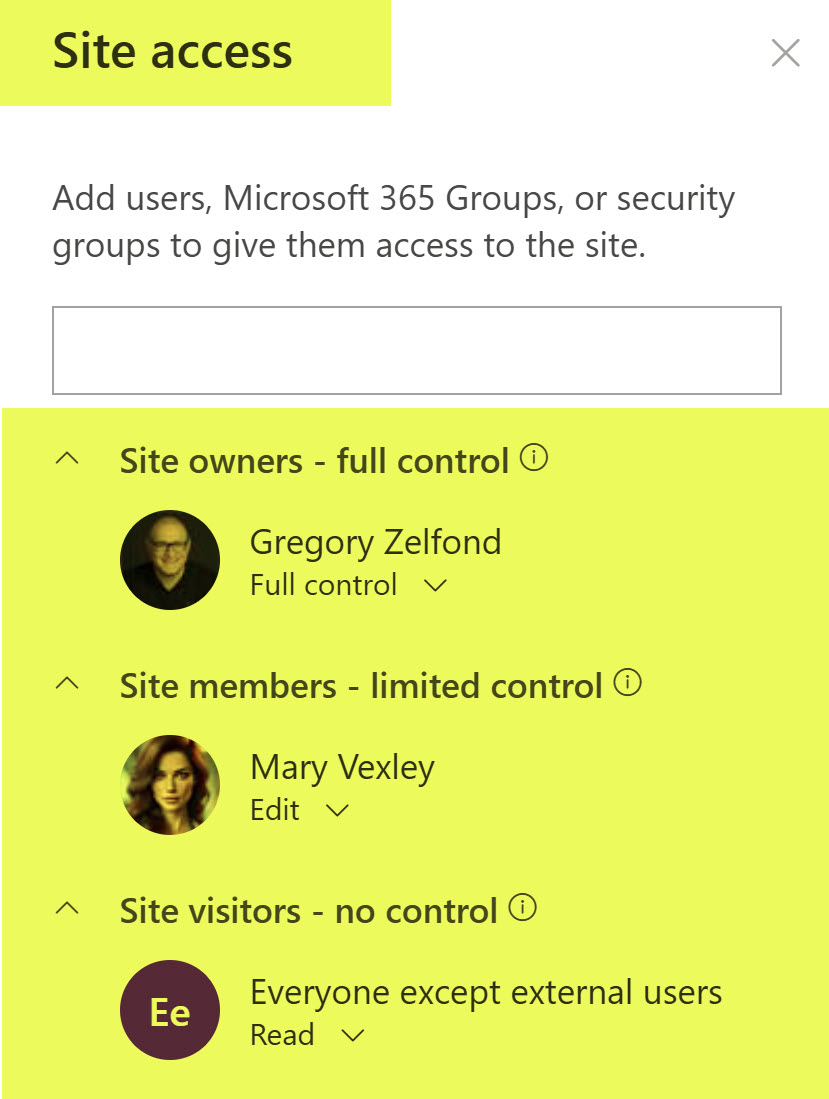
-
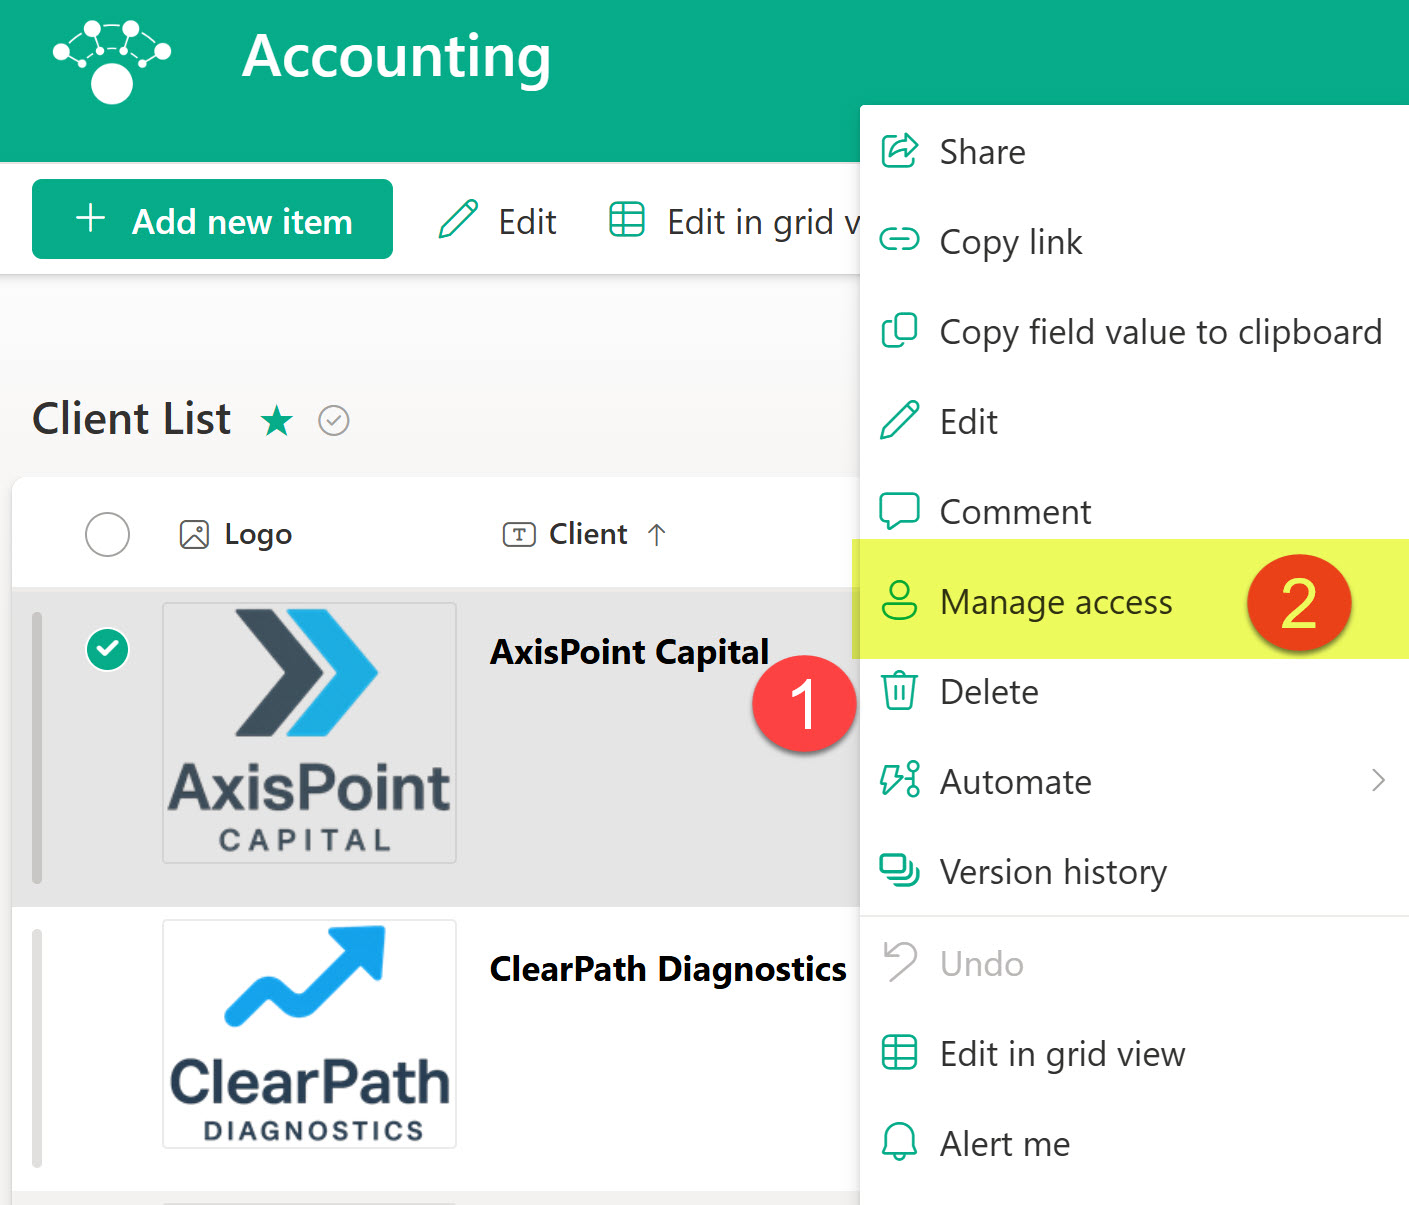
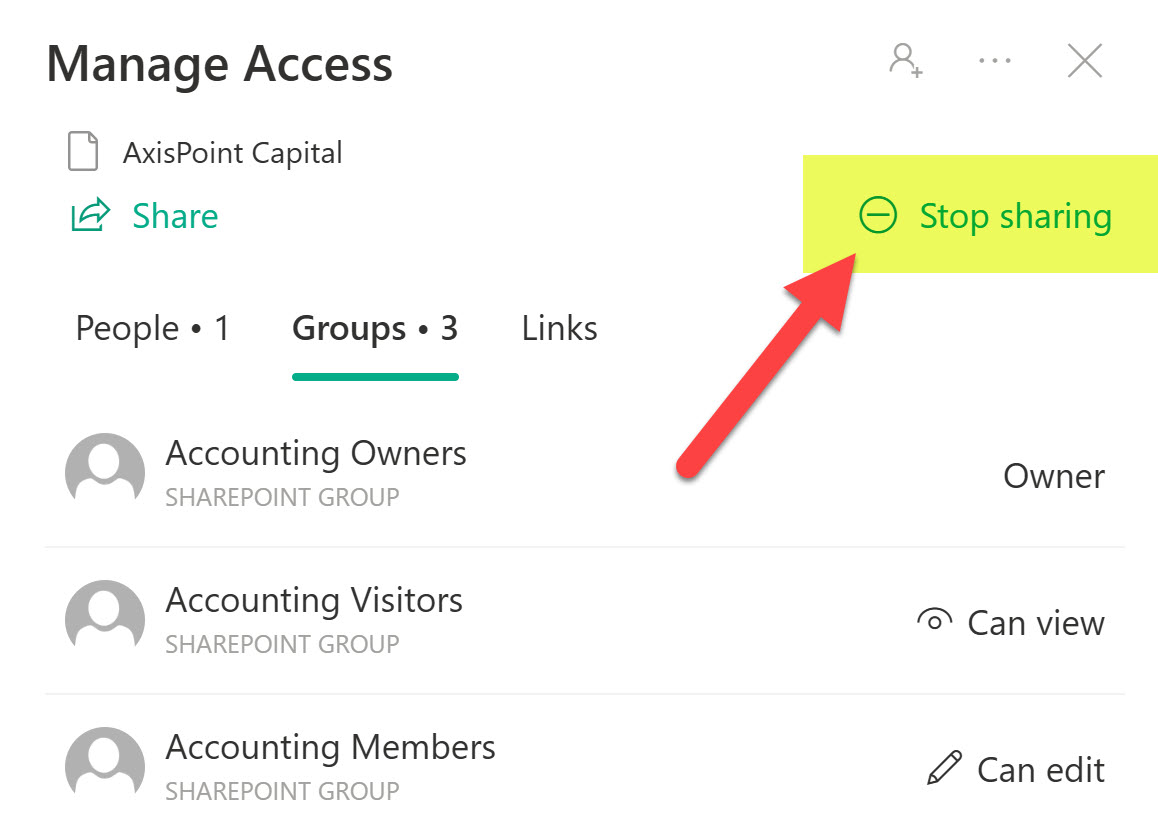
- To adjust the permissions for a row in a list, right-click on the row (or click the three dots next to the Title field), then choose Manage Access
- You will then see the permissions for this specific row, which should match the site’s permissions (due to inheritance).

- If you want to quickly prevent anyone else on the site from seeing the row (except for Site Owners, of course), you can click the “Stop sharing” link.
- You will then get a warning message.

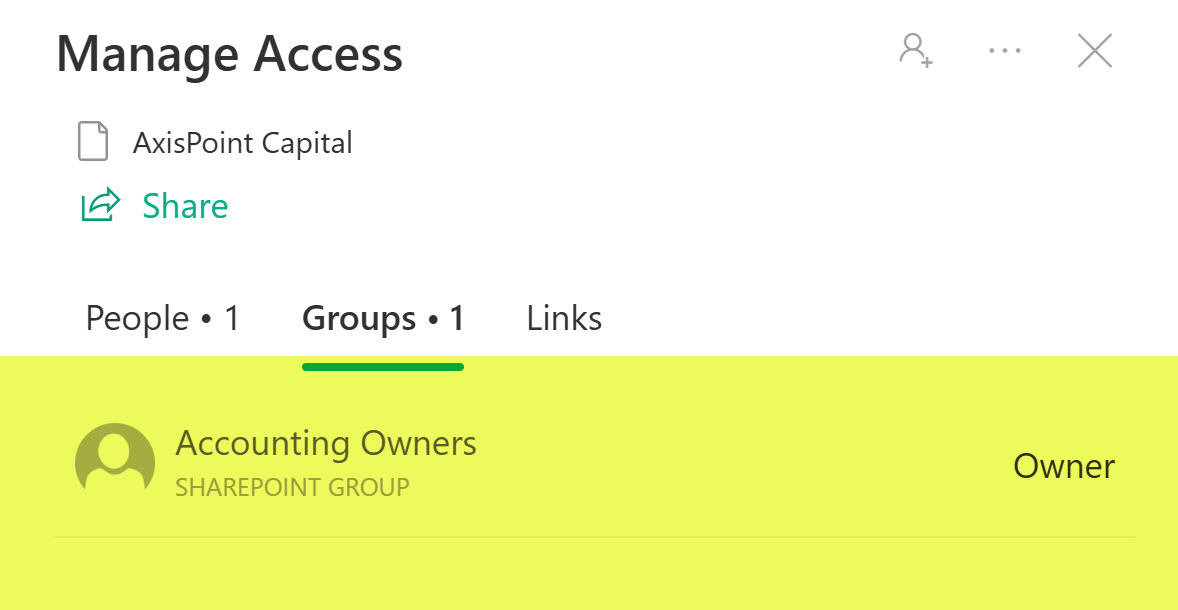
- And you will see the expected result right away.
- However, most often, you will want to adjust the permissions for a specific row instead. For example, I do want to prevent everyone from seeing the row, but Mary (who is a site member) should be able to read it but not edit it.
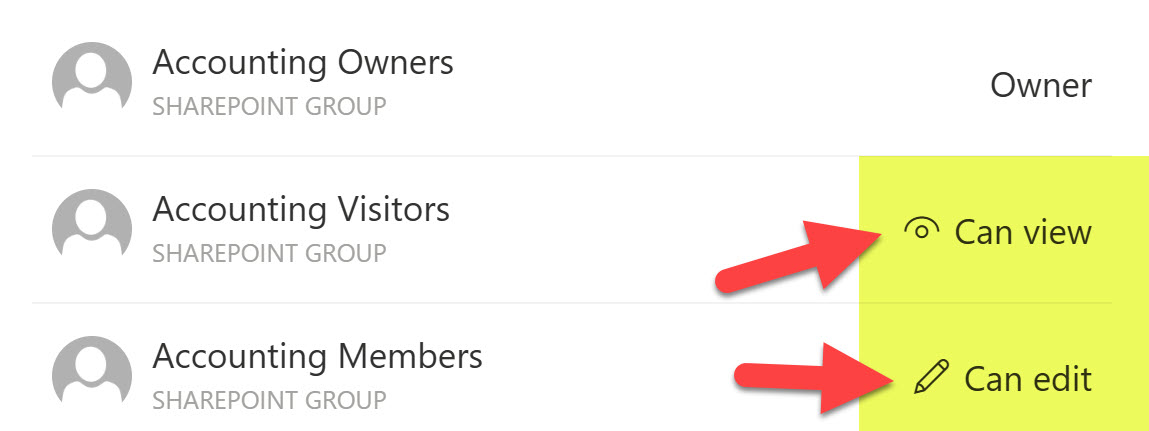
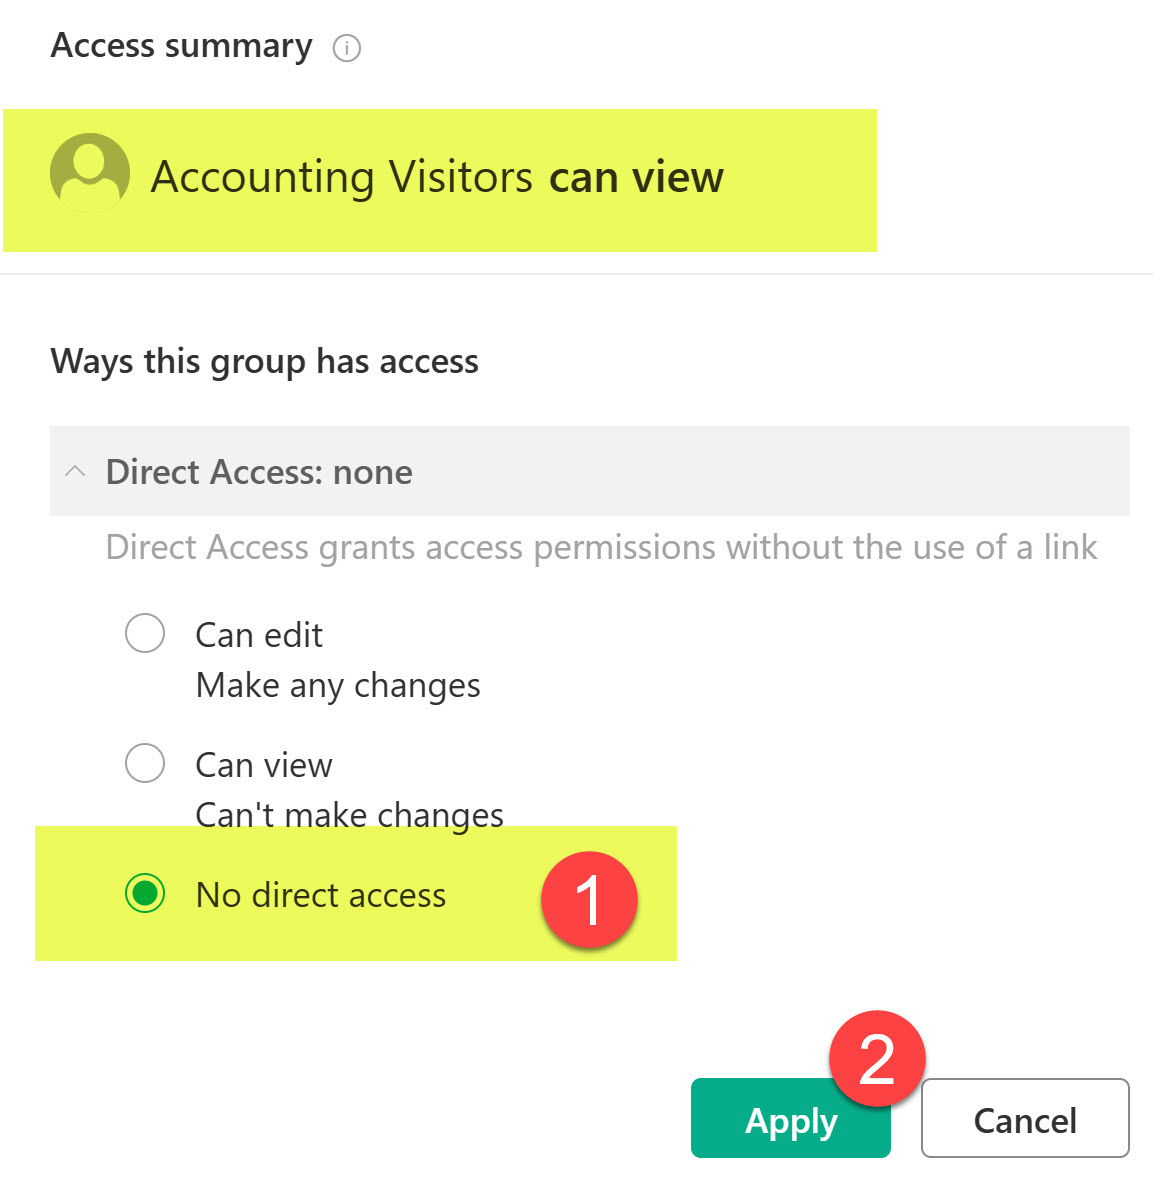
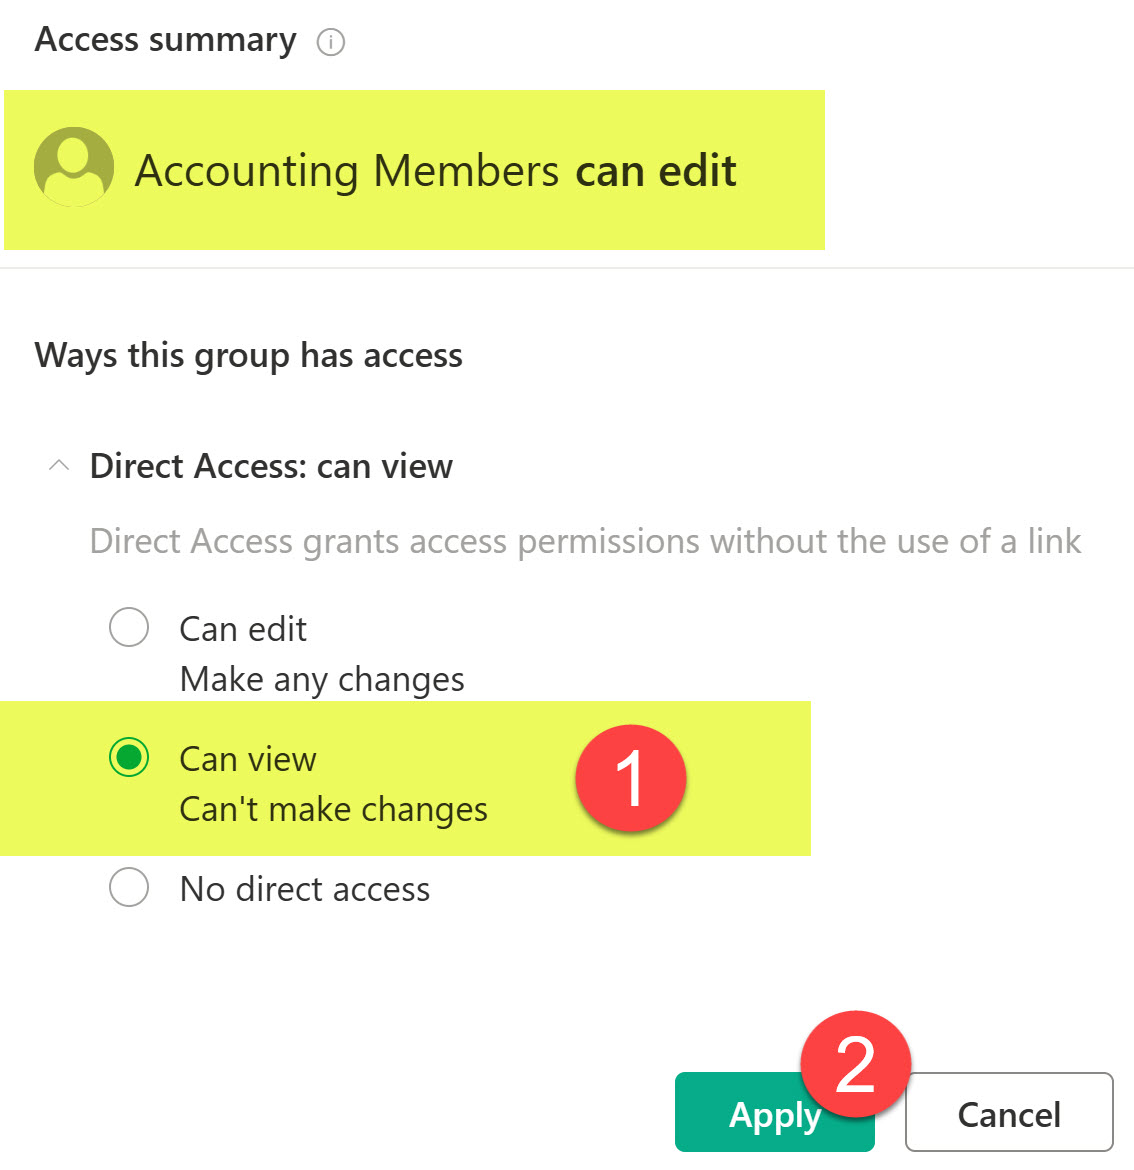
- To remove everyone from the row, we need to remove the Visitors Group. To make that change, click on ‘Can view‘ above and adjust accordingly.
- Similarly, we can adjust Mary’s permissions. Just click Can Edit next to Members and make the change accordingly.
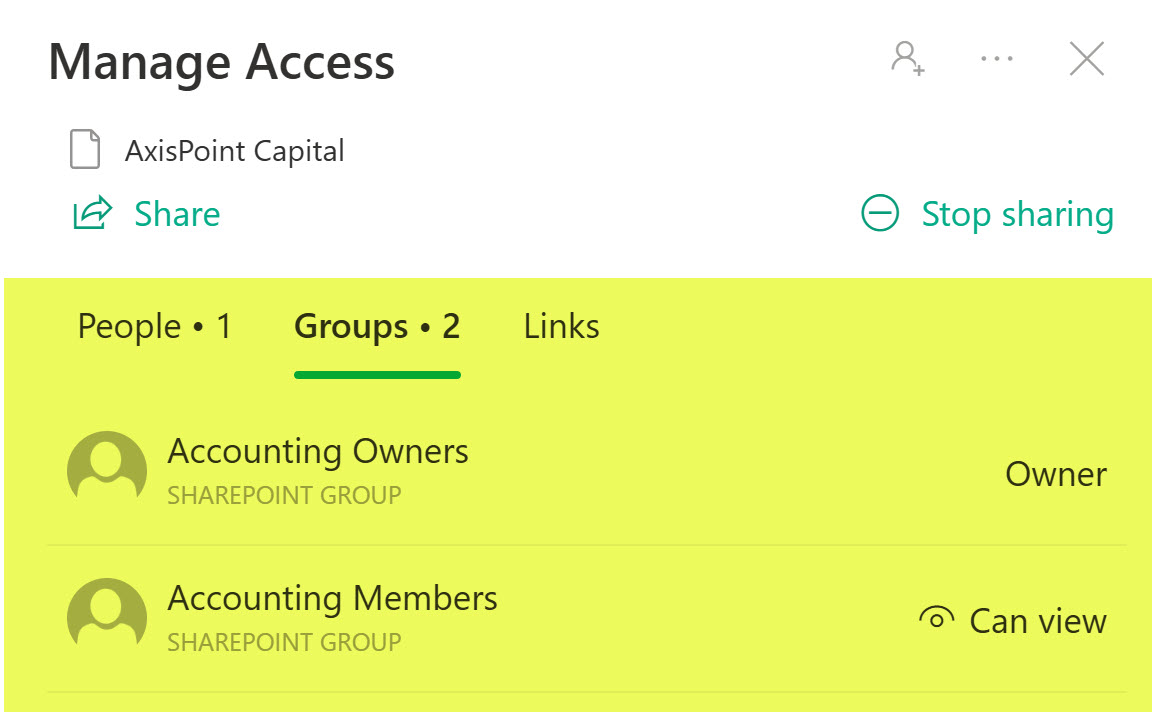
- Below is the result of the above changes.
- To adjust the permissions for a row in a list, right-click on the row (or click the three dots next to the Title field), then choose Manage Access
Nuances about row-level security
- Just like with setting up security on files and folders, you can add/remove users and security groups
- If you later want to reinstate the inheritance from the site, you would need to delete unique permissions for that row


- The security you apply to the row applies to all the fields in that row; you can’t lock down certain fields/columns.
Use Cases for creating unique permissions on rows within a list
- Project List, where you might want to hide certain projects from being visible to all users
- Client List, where certain clients/data should only be visible to certain users/groups
- Contact List, where you want to allow each user to edit their own row (contact information)
- Help Desk System, where certain rows are locked for some users
- Store/Office Locations list, where store info can only be changed by the respective store manager

Share Article