How to access Storage Metrics reports on a SharePoint site
I recently had a client reach out to me with an unusual request. They were constantly running out of space in one of their sites and were always getting warning messages about it. So they wanted to find out what library or file caused the issue. It did not take us long to find the culprit. So let me use this opportunity and explain to you how you can check for Storage Metrics reports on a SharePoint site.
How to access Storage Metrics at a site level
If you just want to know/see how much storage each site is using – this is something you can obtain from the SharePoint Admin Center.
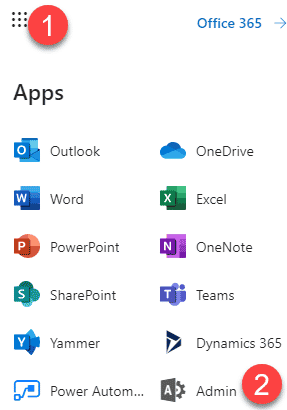
- Office 365 App Launcher > Admin
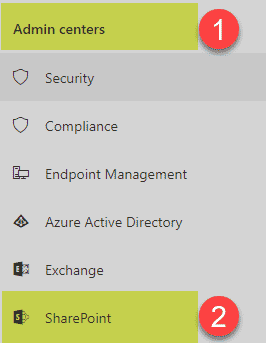
- Choose SharePoint under Admin centers
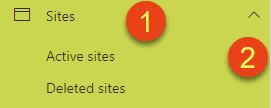
- Under Sites drop-down, choose Active Sites
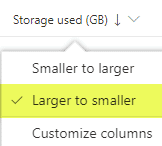
- Under Storage used (GB) Column, you will see the respective storage used by the site

- You can also sort it from largest to smallest, to easily see the largest sites
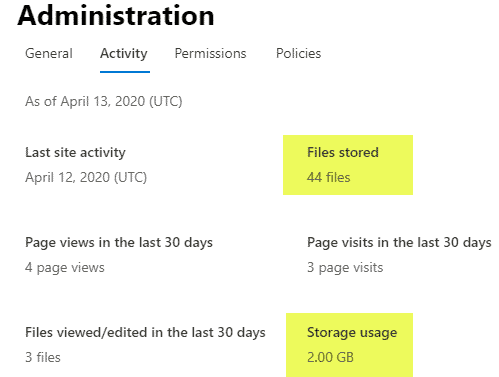
- You can get the additional information by checking the box next to the site and clicking “i” in a circle

- From there, you can see the total number of files
How to access Storage Metrics at a library/folder/file level
Once you find out which site utilizes the most storage, you might want to find out the specifics – which libraries, folders, or files are eating up the storage. In this case, navigate to the site itself first, then:
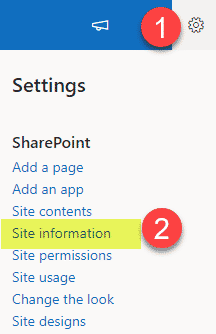
- Gear Icon > Site Information
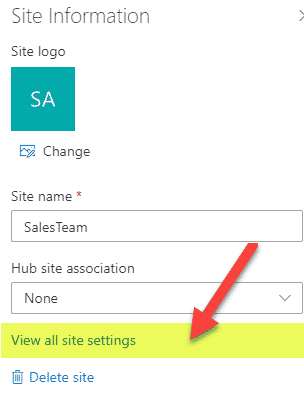
- Click on View all site settings
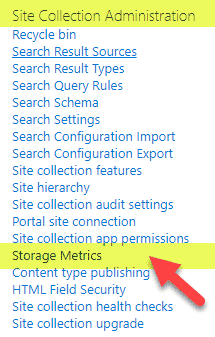
- Under Site Collection Administration, click on Storage Metrics
- You will now get to see each component of a site as well as respective storage taken (all sorted from largest to smallest)
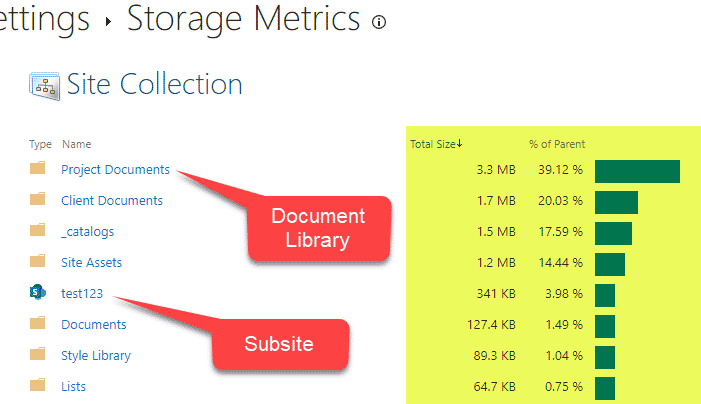
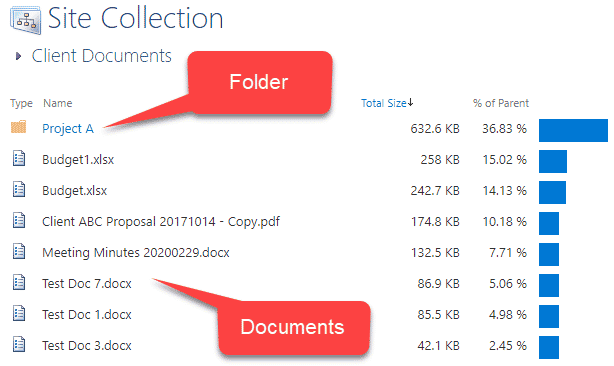
- You can click through to get to the actual subsite (if you have any), library, folder or file to see the storage used
How to set Storage quota for a SharePoint site
By default, you do not have any limits for storage at a site level (well, you do, but it is 25TB per site as of the writing of this post, so you should be OK for a while). However, you can establish storage quotas (which is what my client did and thus ended up with warning messages) in case you want to assure your users do not turn a site into a dumping ground for files. To set the storage quota at a site level, navigate to the SharePoint Admin Center using the steps above, then:
- Click on Settings, then Site storage limits
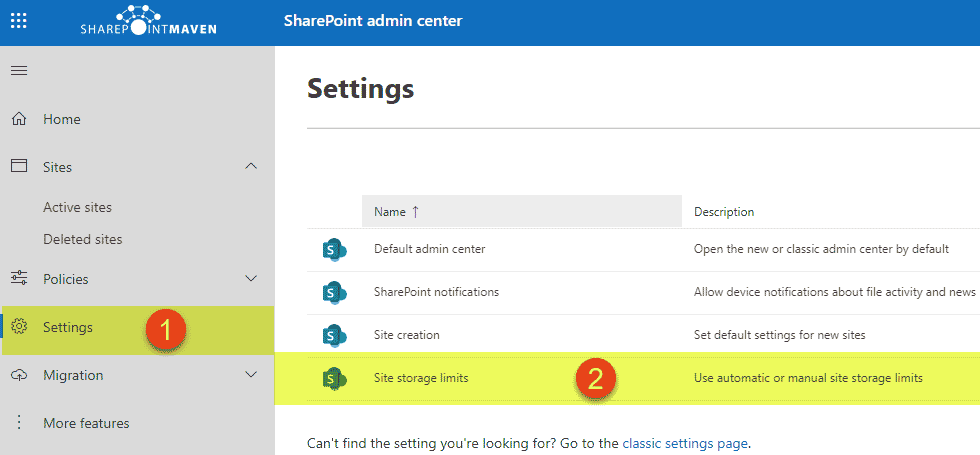
- Again, by default, there is no limit – it is set to Automatic (recommended setting!!!). You can switch it to Manual if you wish
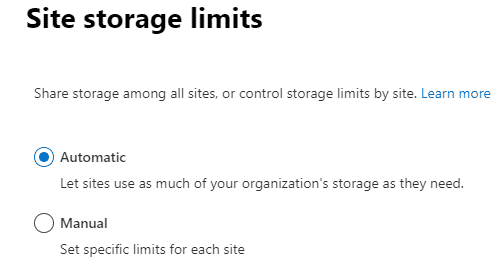
- Once you switch to Manual and click Save, you will now get to see Storage option in the top ribbon

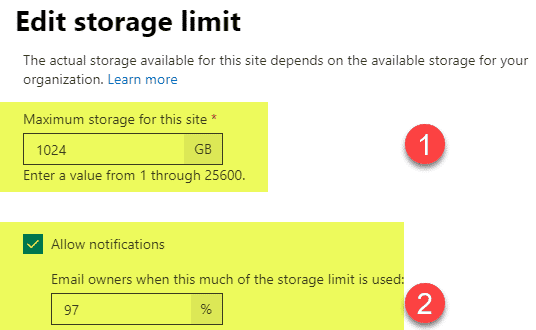
- This option will now allow you to set limits per site, as well as thresholds when you will be notified that storage is approaching the set limit
