How to create Brand Center in SharePoint
One of the major updates and new features released this year was the availability of the Brand Center. I joked throughout the years on my blog that SharePoint is not famous for its branding capabilities. And there was a reason for that. SharePoint, indeed, was very limited in terms of branding capabilities. It contained a small number of out-of-the-box themes (color palettes), and if you wanted to install a custom theme, you had to use PowerShell. Moreover, only one (1) built-in font was available that could not be changed, and there was no ability to customize its typeface for different areas of the SharePoint site. This all changed with the release of the Brand Center, which now allows IT Administrators to set company-wide fonts and themes based on the brand guidelines and have those available on all the SharePoint sites.
- Make sure you have the Global Admin privileges for your tenant (this is required for you to provision the Brand Center)
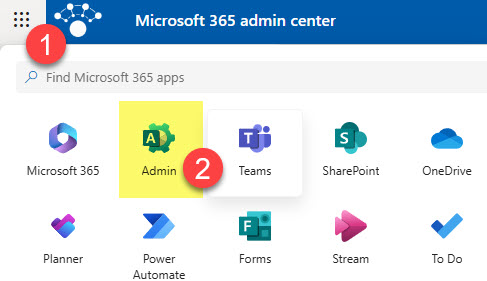
- Click on Microsoft 365 App Launcher, then Admin
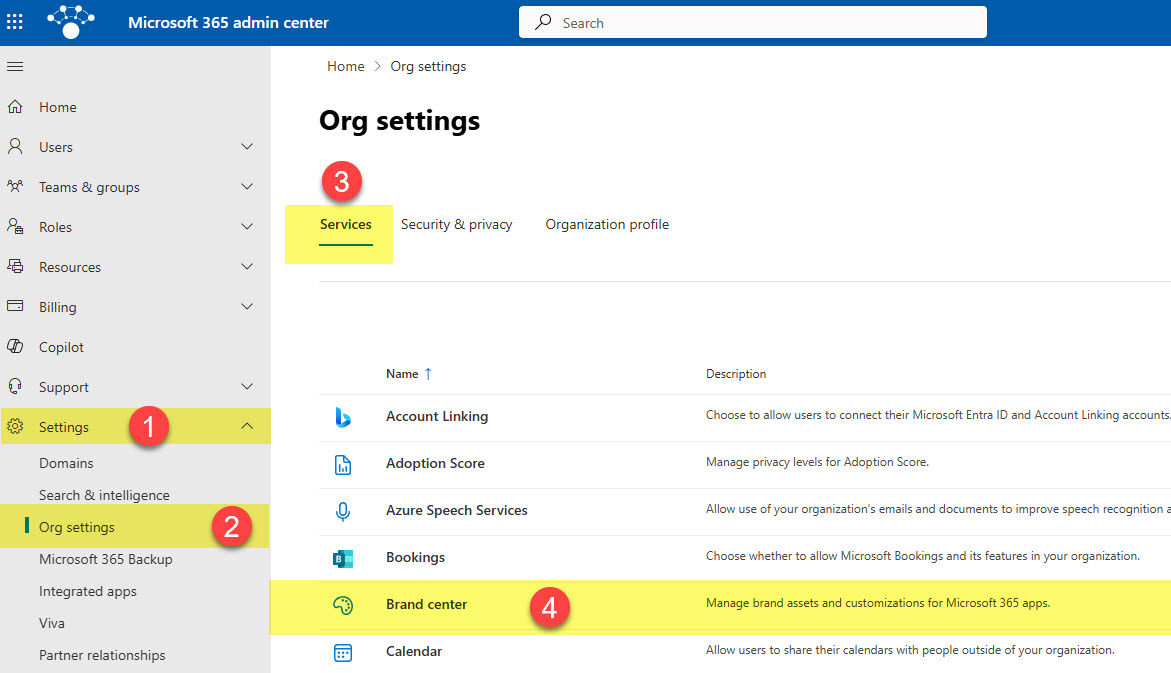
- Under Settings, choose Org settings, then Services tab, then Brand Center
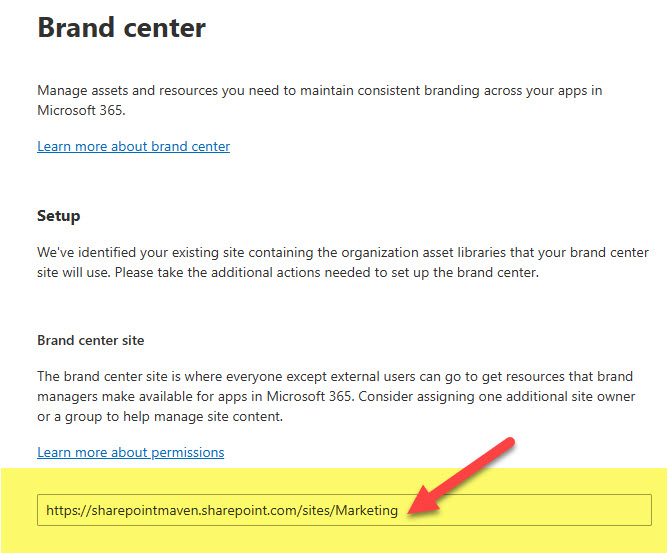
- On the next page, you have to specify the Name/URL for the Brand Center. Suppose you have previously configured Organization Assets Document Libraries to store company-wide images, logos, and templates – something I explained in this earlier post of mine. In that case, the site you used for those libraries will also become the site for the Brand Center. As such, the URL for the Brand Center will be prepopulated with that URL, and you won’t be able to change it. If you have never set up Org Assets libraries – then you would be able to supply the Name/URL for your Brand Center. In my case, I did set up Org Assets Libraries previously, so my URL is prefilled.
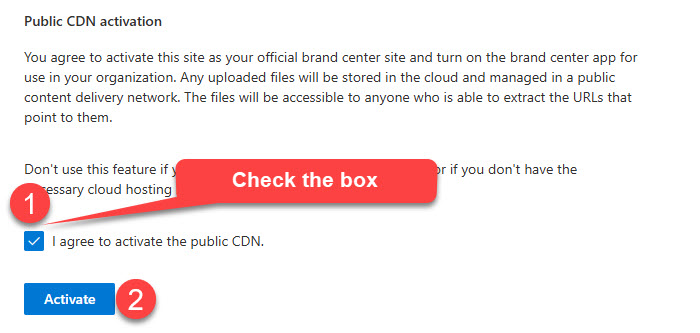
- Next, check the box next to “I agree to activate the public CDN.” Then click the Activate button.
- At this point, the Brand Center is configured, and you will be able to access it via the URL provided
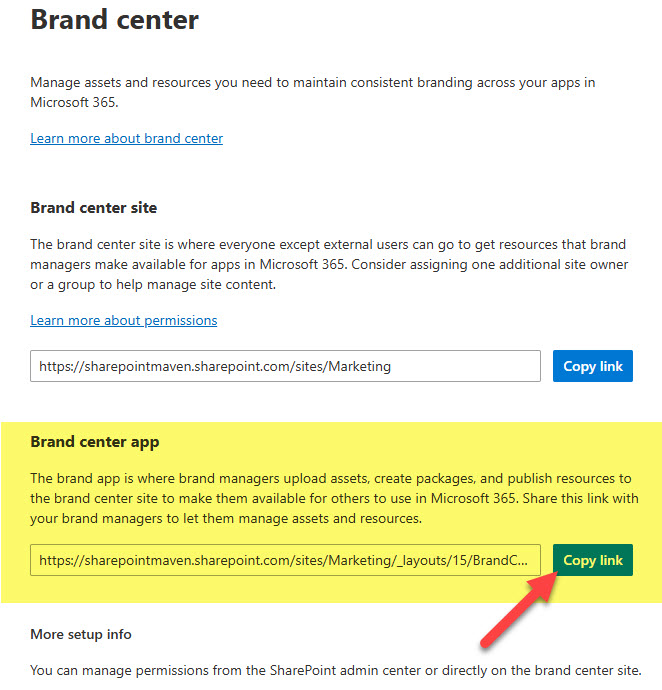
- If you follow the provided URL, you will be able to use the Brand Center to configure and install custom fonts and themes – something that I plan to cover in future articles.
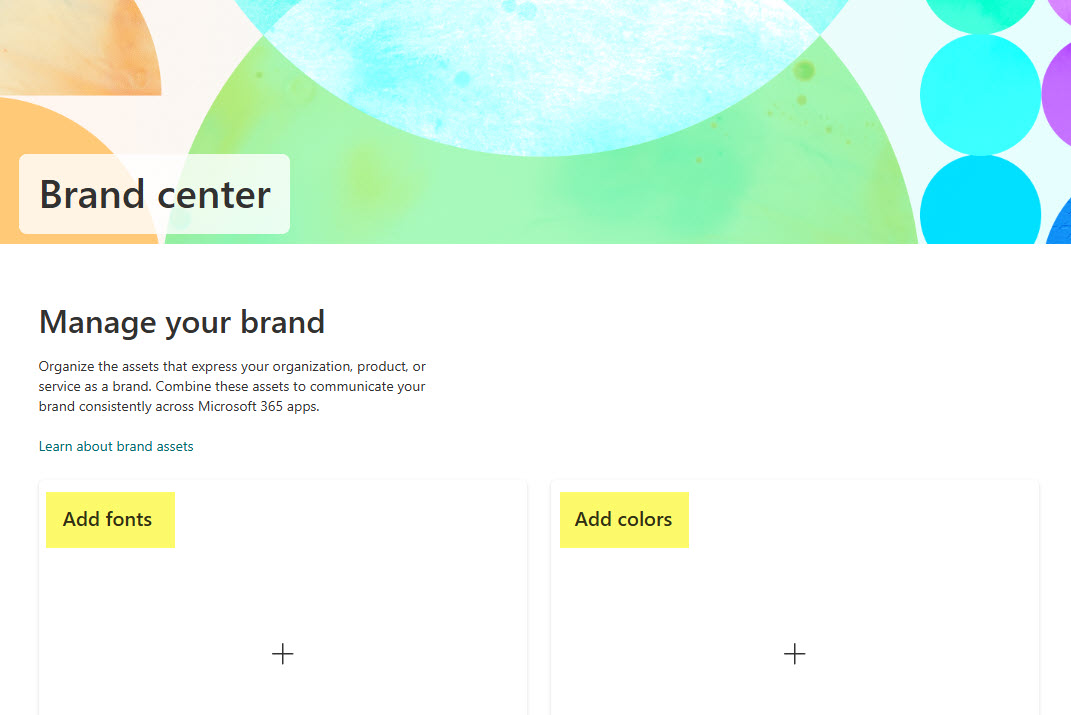
Nuances about the SharePoint Brand Center
- You must be a global administrator to create/enable a Brand Center
- Once a site is registered as Brand Center, it gets a new choice under the Gear Icon, allowing brand managers to quickly access Brand Center capabilities (upload fonts, create themes, etc.)
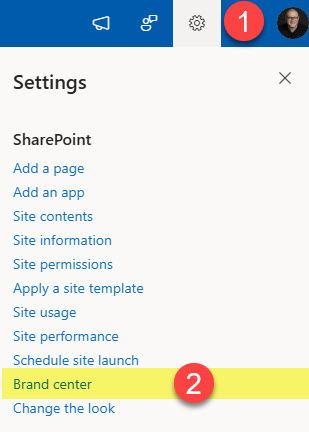
- The Brand Center capabilities can only be accessed and managed by Site Owners, not Site Members or Site Visitors (despite the fact that they will be able to access the assets stored on the Brand Center site)
- As mentioned above, if you already configured org assets libraries using PowerShell, you will be forced to use the same URL for the Brand Center.
- If you never configured the Org Assets, you will be able to create a brand new site (URL) by specifying its name.
- You can only create a maximum of 1 brand center per tenant (as of the writing of this article).


