How to Create and Configure Custom Fonts in SharePoint
One recent and almost revolutionary branding improvement we got in SharePoint was the ability to customize fonts on SharePoint sites. Till recently, everyone’s SharePoint site looked the same – everyone got the same font type/style for the Site Title, headers, and navigation. With the roll-out of the Brand Center, we can install any font and customize the typeface for different areas of the SharePoint site. So, in this article, I would like to explain how to create and configure custom fonts in SharePoint.
Step 1: Create Brand Center
The first step in the process is to create and configure the SharePoint Brand Center. It is a special site where you manage everything related to your company’s brand: fonts, themes, and templates. I have written a separate article on how to configure the Brand Center – check it out here.
Step 2: Download the Font files
Your marketing department might already have certain font files in-house. Alternatively, you can also download them from the web (i.e., Google fonts)
Step 3: Upload Custom Font(s)
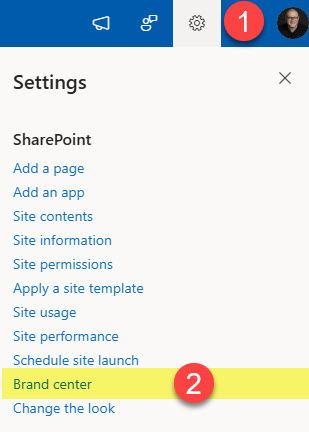
- Once you configure and install the Brand Center site, navigate to it and choose Brand center from the Gear Icon.
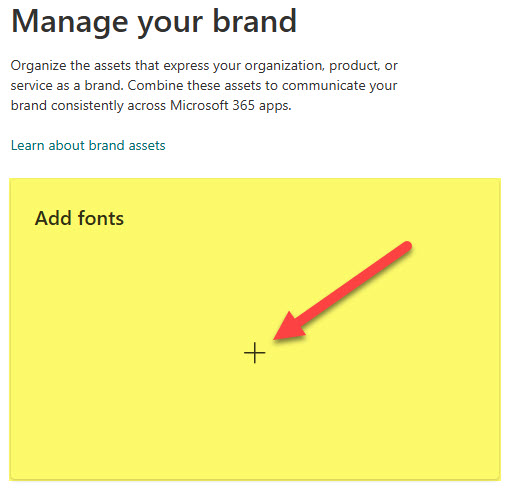
- Next, click on the Add fonts option
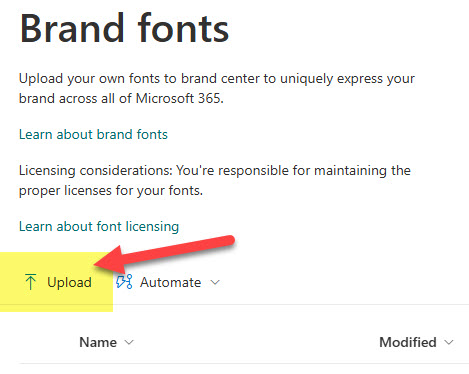
- You will see a special document library to store your font files. Click the Upload button
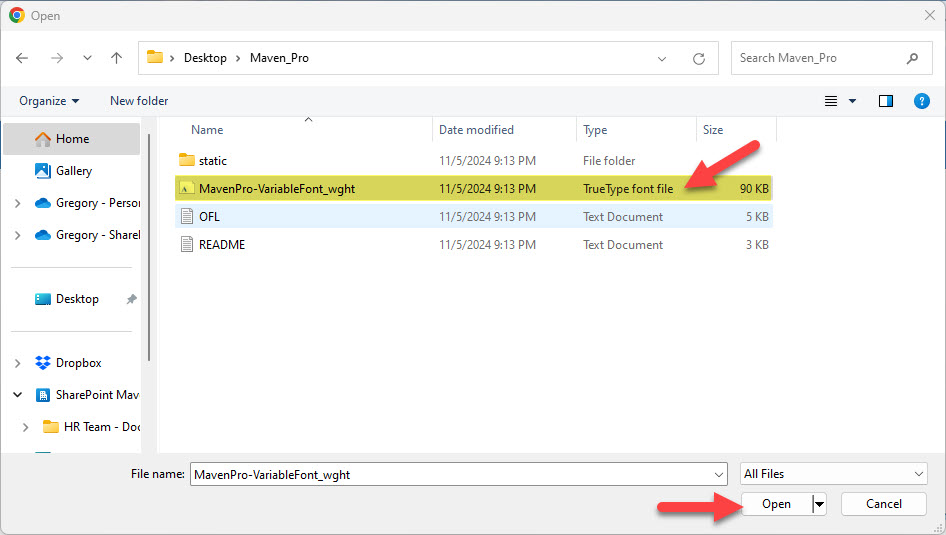
- Grab the font file and upload it
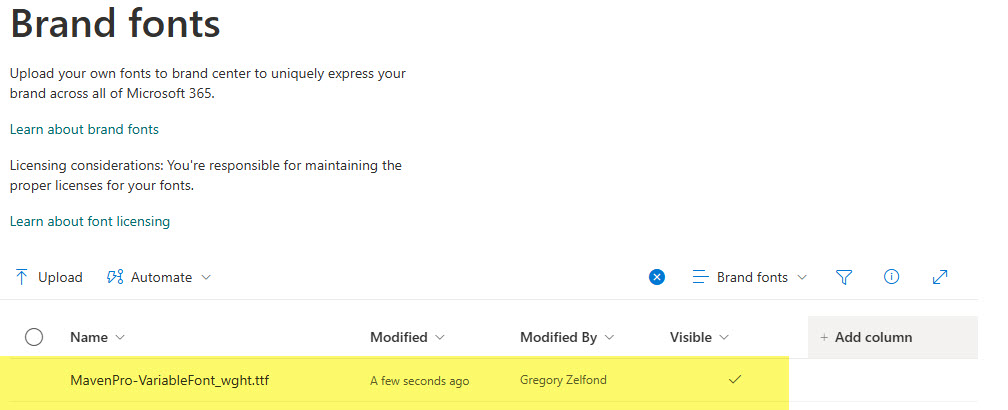
- You will now see the font file uploaded to the library
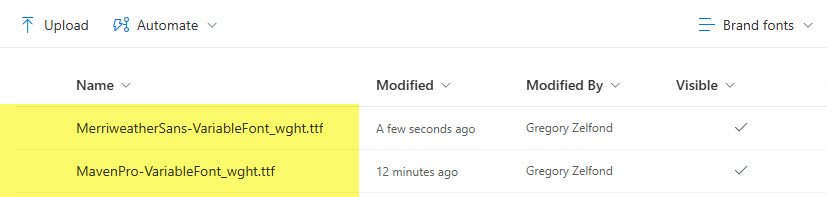
- You can upload multiple font files, too.
Step 4: Create a Custom Font Package
The next step is to create a Custom Font Package. This is where you take the Fonts uploaded in the previous steps and map them to different sections of the SharePoint Site, like Site Title, Site Navigation, body text, etc. You can create font packages at the tenant level (in which case they will be available on any site) or at a site level, where they will only be available on that specific site.
Create a Custom Font Package at the Tenant Level
Font Packages at the Tenant Level can only be created by the Site Owners of the Brand Center. And those packages will be available on all SharePoint sites. To create a custom Font Package at the Tenant Level:
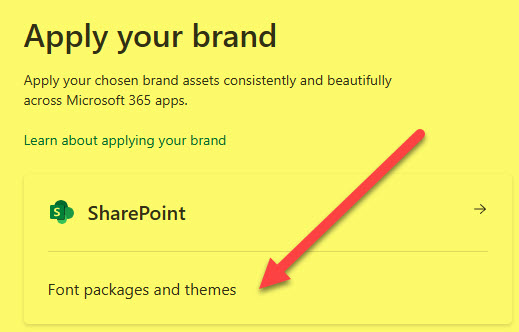
- Under SharePoint, click on Font packages and themes
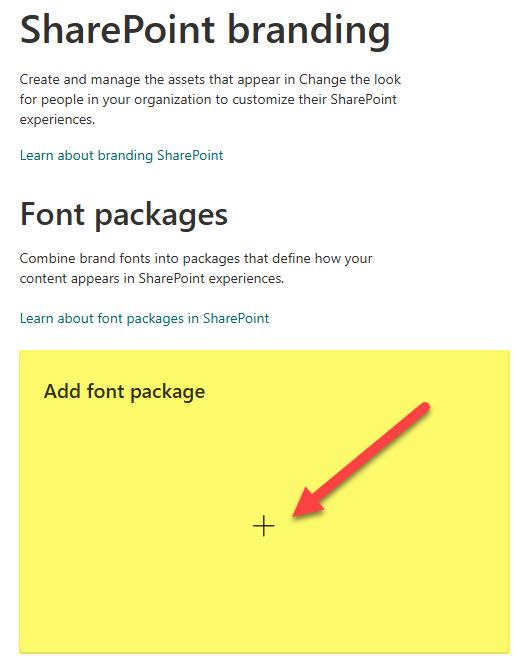
- Click on Add font package
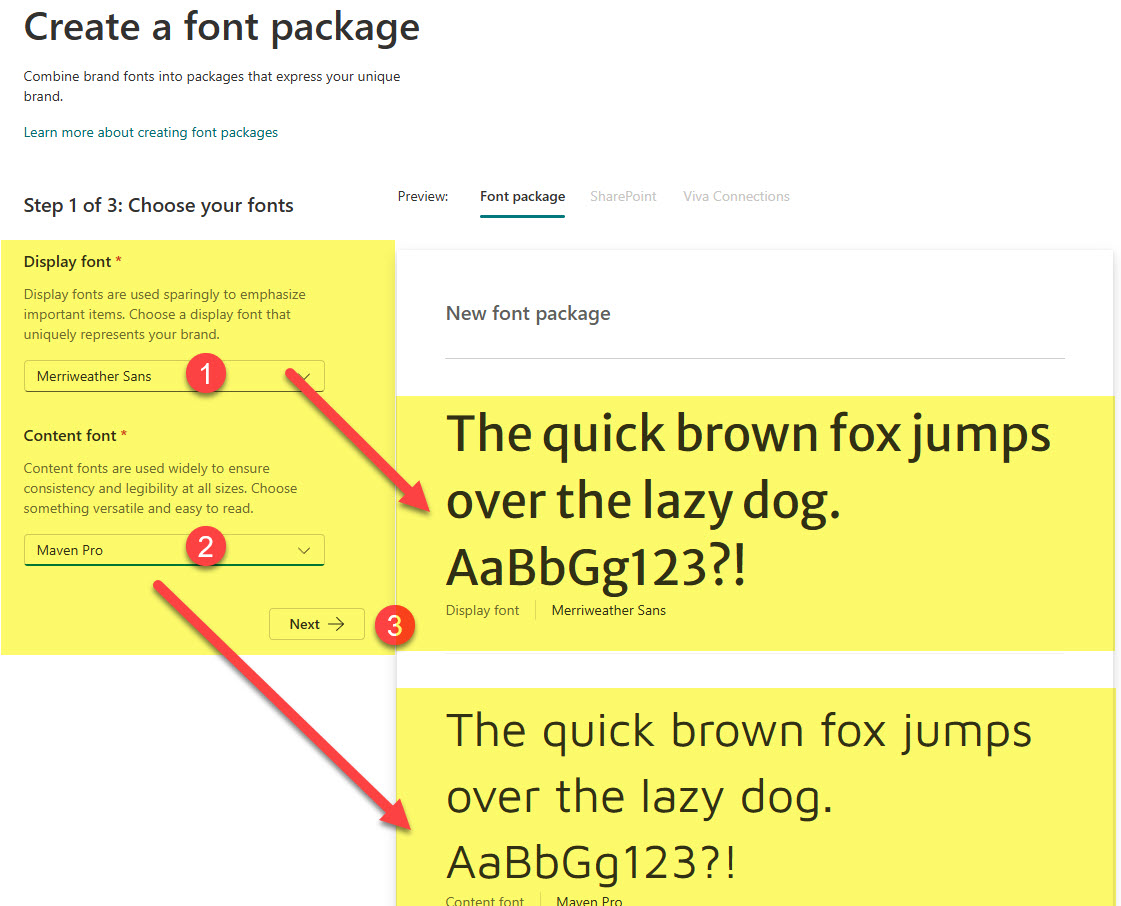
- In the next step, choose a Display Font and a Content Font. They can be different fonts, too!
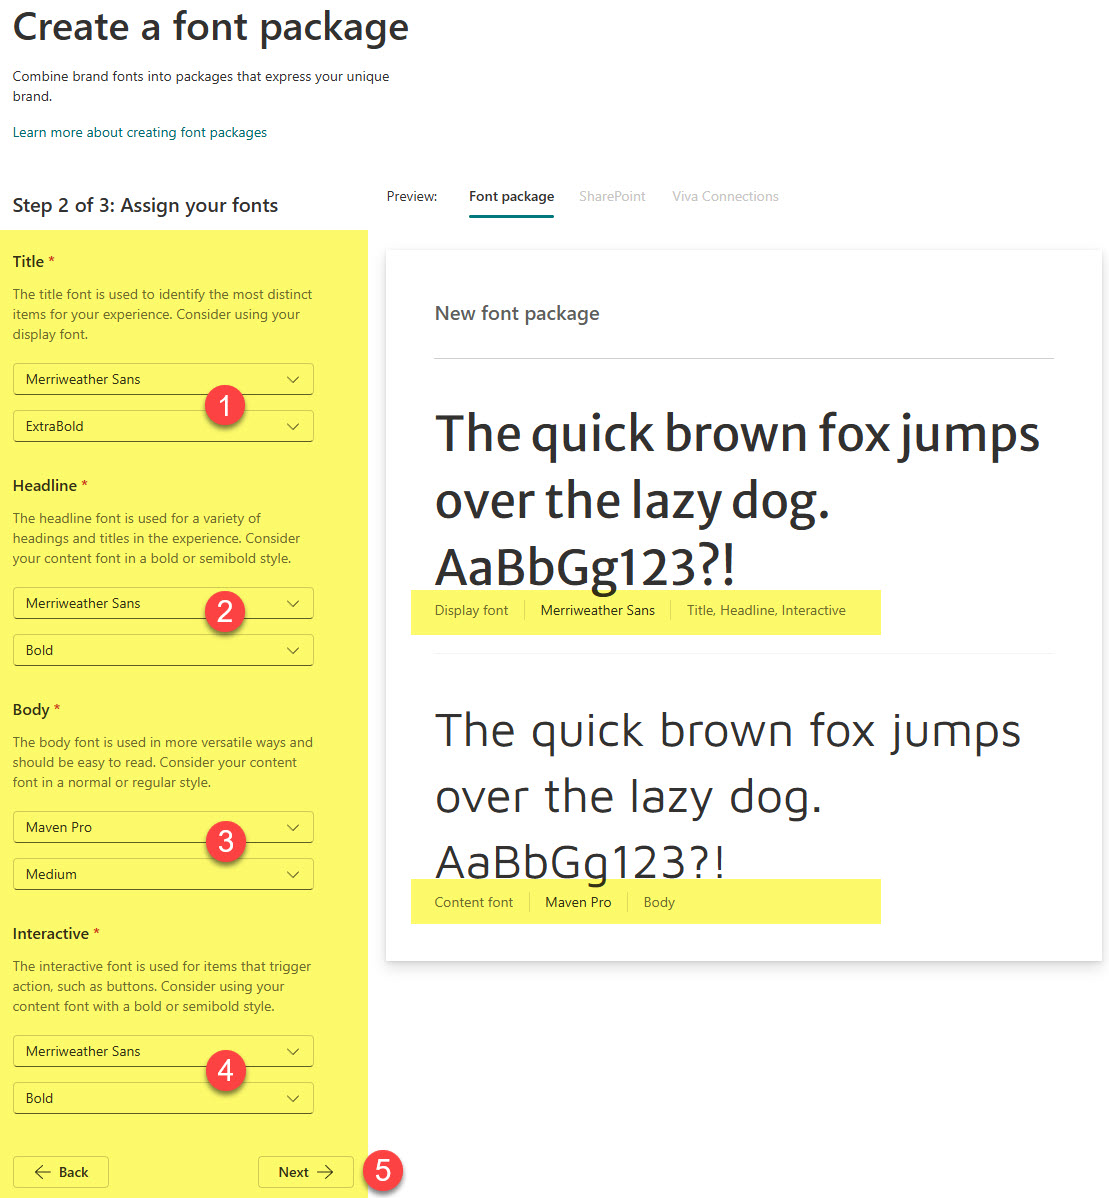
- Next, map different fonts and font styles to different sections of a site (Title, Headings, Body, etc.)
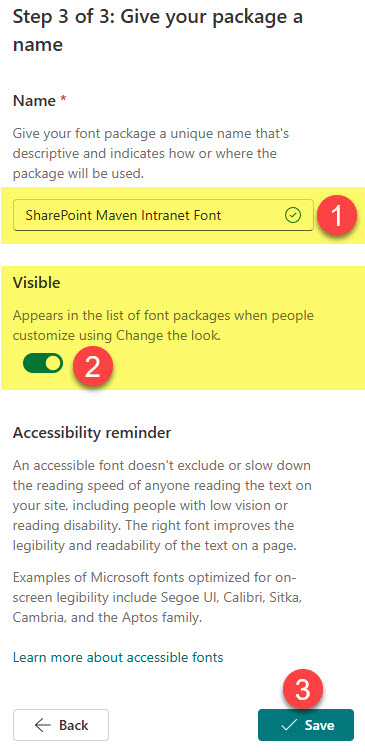
- Next, you have to give your Font Package a name. This is the name of the Font that Site Owners would choose under Change the Look on their sites – so make sure to give it a name that makes sense! Click Save.
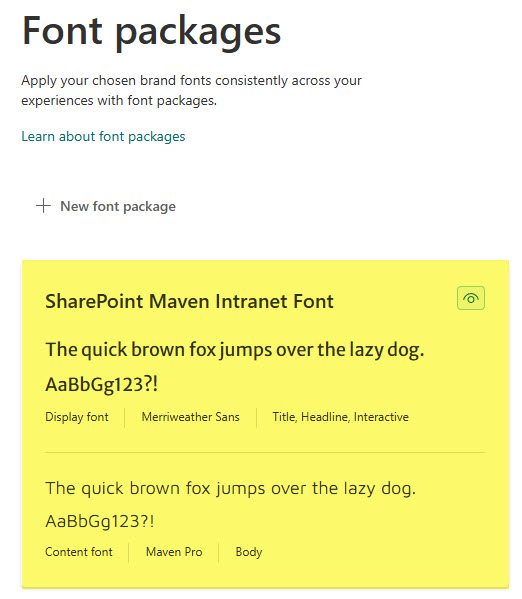
- You will now see the Font Package created. You can create several font packages if needed.
Create a Custom Font Package at the Site Level
Steps for creating Font Packages at the Site Level are very similar to those at the Tenant Level. The only exception is that the Site Owners themselves can create them and do not require access to the Brand Center. One important prerequisite is that the fonts can only be installed by the Brand Center Managers within the Brand Center, and this must be done before font packages are created at the Site Level. To create a custom Font Package at the Site Level:
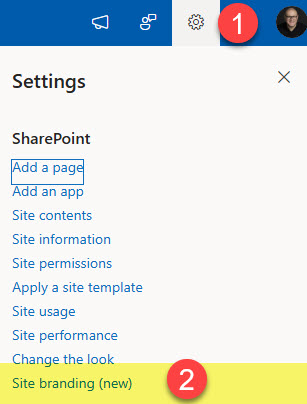
- From a given SharePoint Site, click the Gear Icon > Site branding
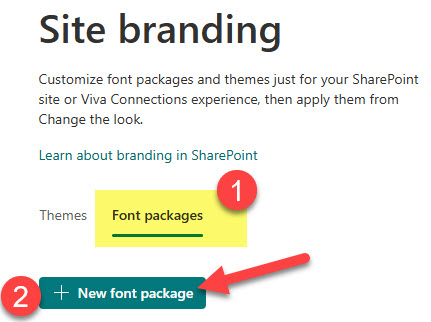
- Click on Font packages tab, then +New font package
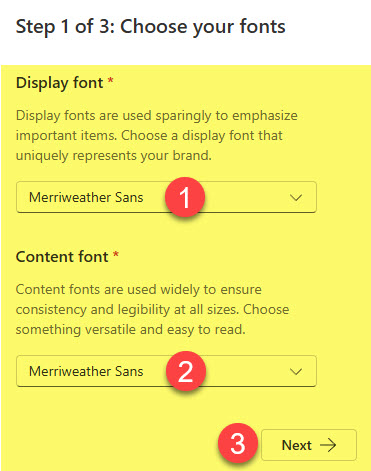
- Choose Display Font and Content Font. Click Next.
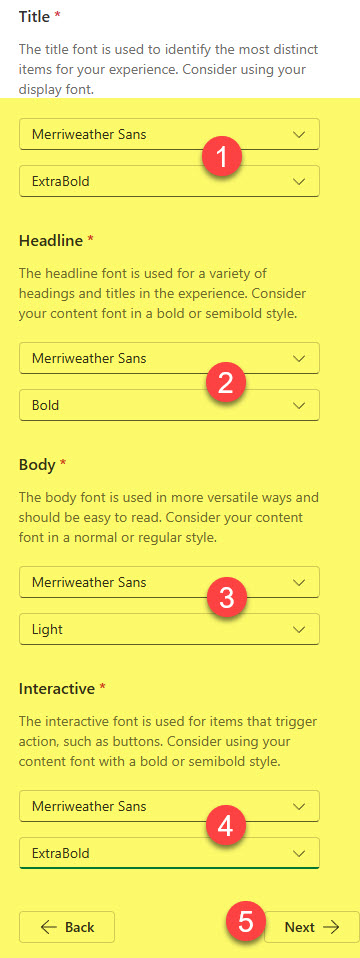
- Next, map the fonts.
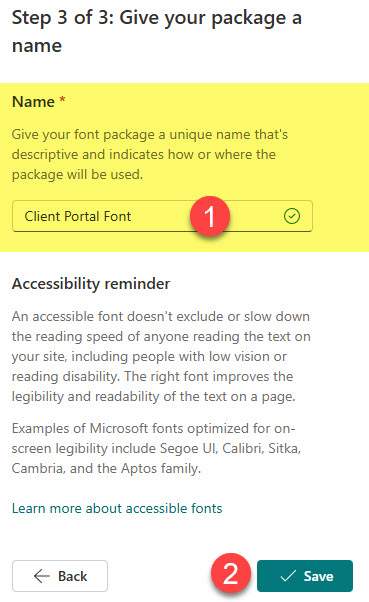
- Give your font package a name.
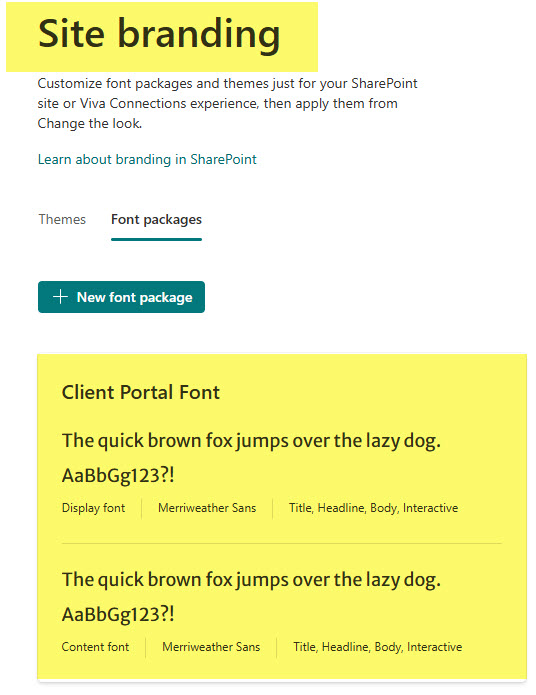
- You will receive a confirmation
Step 5: Apply Font Package to your SharePoint Site
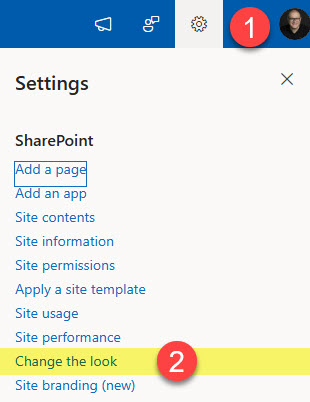
- Click Gear Icon > Change the look
- Click on Font
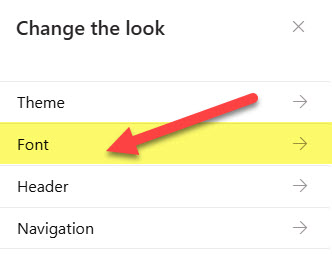
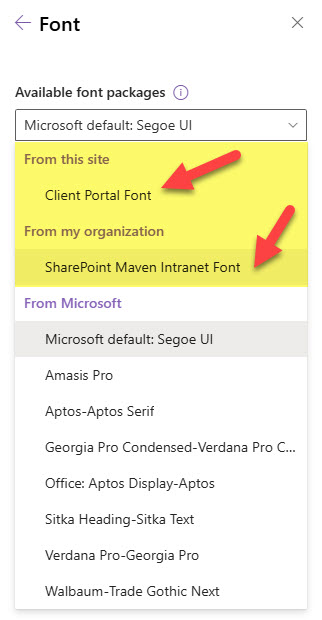
- You can then choose the font from one of the three sections/categories: From Microsoft, From my organization, or From this site.
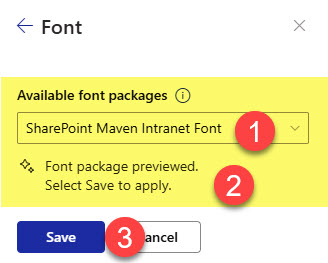
- Once the Font is chosen, click Save.
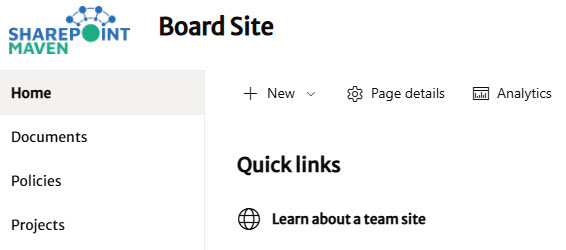
- You will then see the Font changes take effect
Nuances about Custom Fonts in SharePoint
- Site Owners can only create Font packages based on fonts uploaded by Brand Managers within the SharePoint Brand Center.
- If you apply custom fonts to your SharePoint site and then decide to connect the site to the Hub, the font changes you made will be overwritten by those from the Hub.
- Likewise, if your site is connected to the Hub already, you won’t be able to apply custom fonts to your site. In other words, you will not be able to deviate from the Hub’s Font Settings.

Share Article