How to properly update Columns in a Global Content Type Gallery
Some time ago, I published an article on one of the most powerful features in SharePoint Online – the ability to create and publish content types to various SharePoint sites from the Content Type Gallery. Here is this article. If you are serious about Information Architecture and Standardization in SharePoint Online – this is definitely a feature to take note of. However, nothing in this world is constant, and things change. There are situations when you might need to rename columns used for global content types. Or perhaps update some values within an existing column. While I published original instructions on this specific scenario in the article above, the user interface and screenshots have changed over the last few years. So, today, I thought I would provide you with updated steps and instructions.
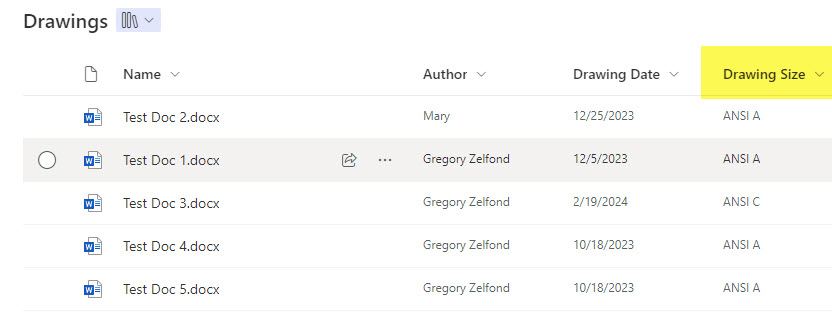
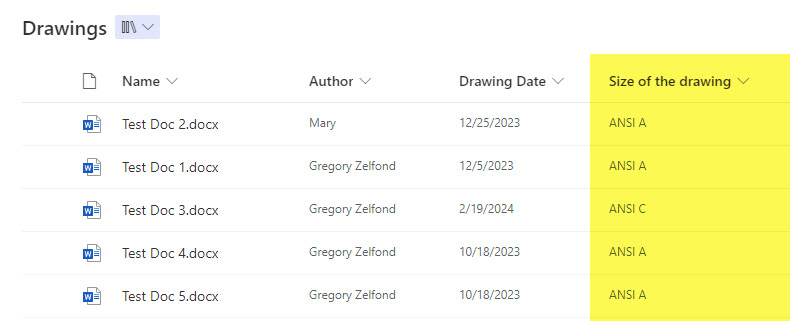
For the example below, I will use this Document Library that uses a Global Content Type (defined and published from Tenant Content Type Gallery). It has a column called Size of the drawing, which will be renamed to Drawing Size within the Tenant Global Content Type gallery.
Step 1: Update the Site Column Name in the Content Type Gallery
- Navigate to the Global Content Type Gallery within the SharePoint Admin Center (you can find the instructions here)
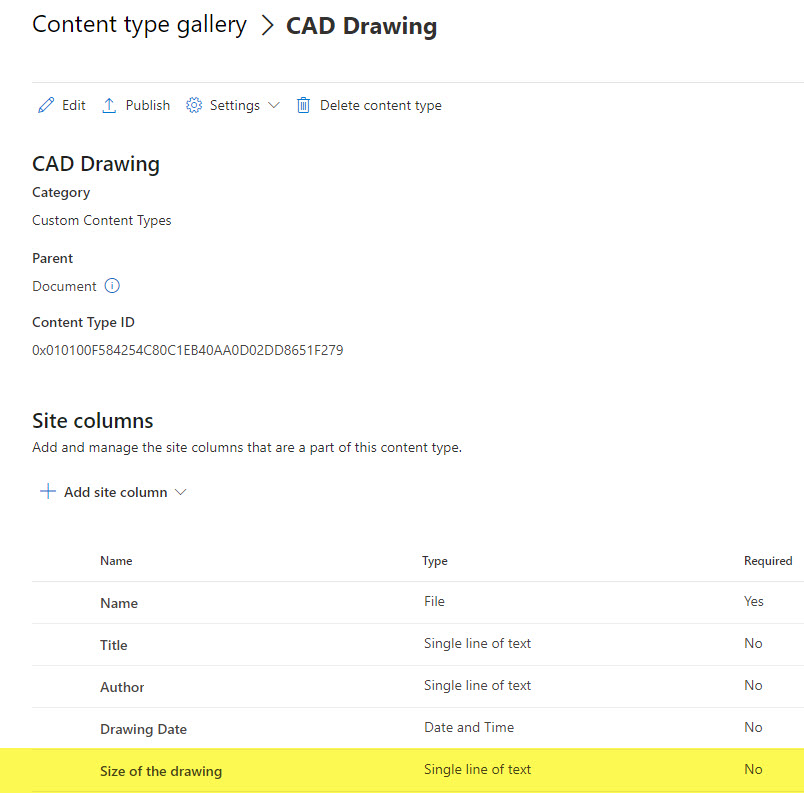
- Click on the Content Type you would like to adjust. In my case, I will update the CAD Drawing Content Type by renaming the Size of the Drawing column.
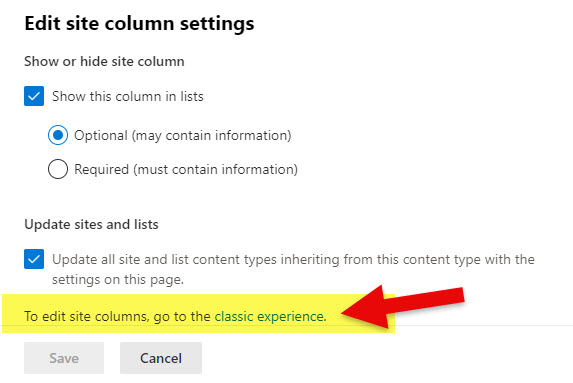
- Click three dots next to the Column you would like to update, then Edit column settings
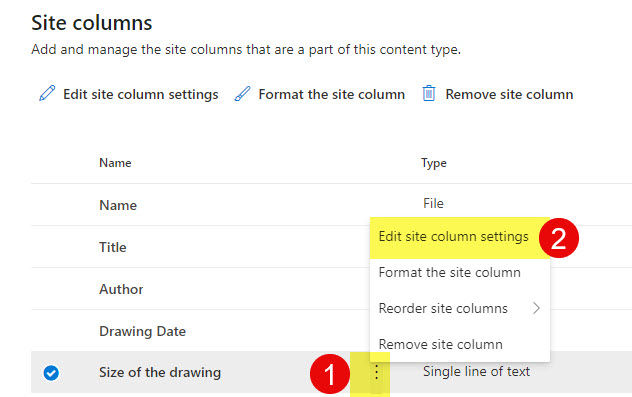
- Click on classic experience to update the column
- Make the changes you would like to make to the column
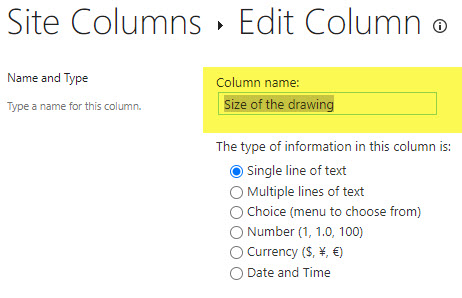
- In my case, I changed the name of the column. You can also make changes to the metadata itself (i.e., add/edit/remove values from the Choice column)
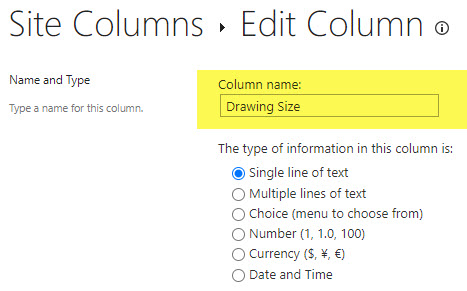
- Make sure to save the changes at the bottom of the page by clicking OK

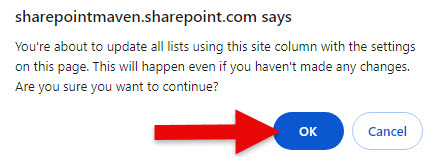
- When the warning message pops up, click OK.
Step 2: Republish the revised Content Type
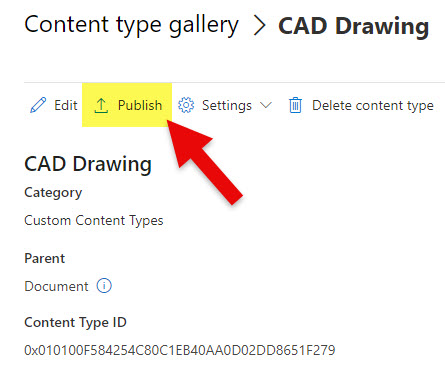
- Once you update the column, we must republish the content type to push the changes to all the SharePoint sites. Click on the Content Type and click the Publish button
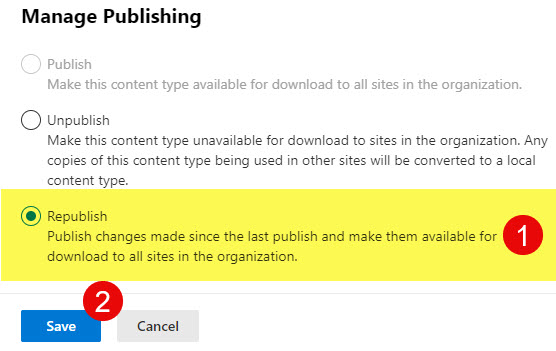
- Click Republish, then Save
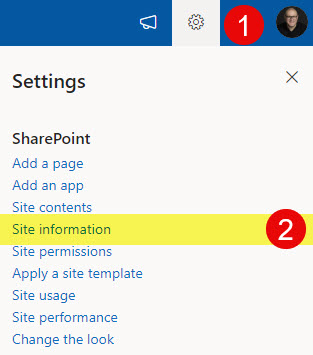
Step 3: Update the Content Type at the Site Level
- Though you republished the Content Type at the tenant Level, each Site Owner must “accept” the changes at the Site level.
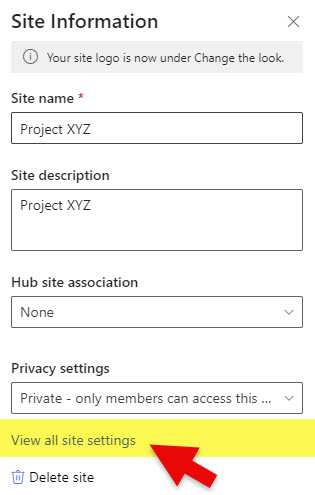
- Click View all site settings
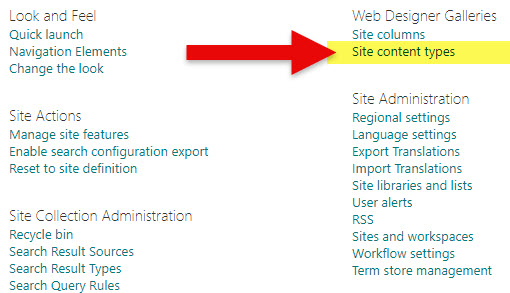
- Under Web Designer Gallery, click Site content types
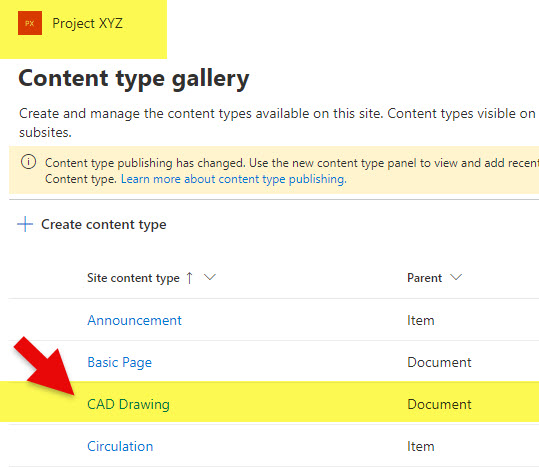
- Click on the Content Type that was updated at the tenant level.
- You will notice a warning message notifying you of changes to the Content Type.
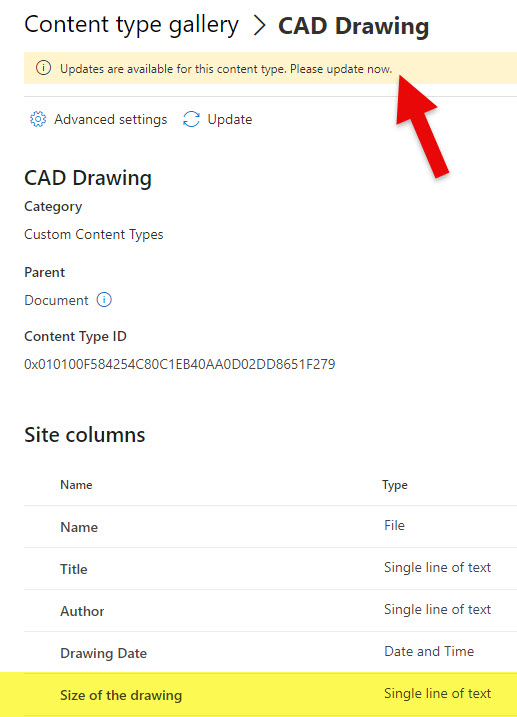
- Click Update

- You will now see the changes reflected in the Site-level Content Type
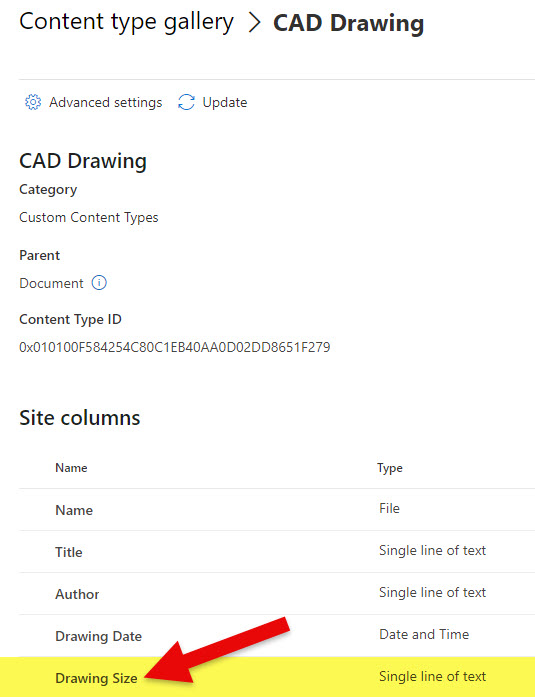
- And the change will also be reflected within the document library itself now as well!
